background image

DRYER USER INSTRUCTIONS

INSTRUCTIONS POUR L’UTILISATION DE LA SÉCHEUSE

Assistance or Service

If you need assistance or service, first see the “Troubleshooting” 
section. Additional help is available by calling 1-800-461-5681 
Monday to Friday 8:00 a.m. - 6:00 p.m. (EST). Saturday 8:30 a.m. 
- 4:30 p.m. (EST) or write:

Customer Interaction Center

Whirlpool Canada Inc.
1901 Minnesota Court

Mississauga, Ontario L5N 3A7

Please include a daytime phone number in your correspondence.

For installation and service, call: 1-800-807-6777 or visit our 
website at www.whirlpool.com/canada.
Keep this book and your sales slip together for future 
reference. You must provide proof of purchase or installation 
date for in-warranty service.

Write down the following information about your appliance to help 
you obtain assistance or service if you ever need it. You will need 
to know your complete model number and serial number. You can 
find this information on the model and serial number label, located 
at the top inside dryer door well.

Dealer name____________________________________________________

Serial number __________________________________________________

Address ________________________________________________________

Phone number __________________________________________________

Model number __________________________________________________

Purchase date __________________________________________________

Table of Contents / Table des matières

ASSISTANCE OR SERVICE ............................ 1

DRYER SAFETY ............................................... 2

DRYER USE...................................................... 4

DRYER CARE ................................................... 5

TROUBLESHOOTING...................................... 6

WARRANTY...................................................... 7

ASSISTANCE OU SERVICE .............................9

SÉCURITÉ DE LA SÉCHEUSE ........................9

UTILISATION DE LA SÉCHEUSE..................11

ENTRETIEN DE LA SÉCHEUSE ....................13

DÉPANNAGE...................................................14

GARANTIE.......................................................15

8578197

Summary of Contents for Inglis IP72001

Page 1: ...nformation about your appliance to help you obtain assistance or service if you ever need it You will need to know your complete model number and serial number You can find this information on the model and serial number label located at the top inside dryer door well Dealer name____________________________________________________ Serial number __________________________________________________ Ad...

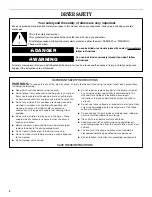
Page 2: ...at have been previously cleaned in washed in soaked in or spotted with gasoline dry cleaning solvents other flammable or explosive substances as they give off vapors that could ignite or explode Do not allow children to play on or in the dryer Close supervision of children is necessary when the dryer is used near children Before the dryer is removed from service or discarded remove the door to the...

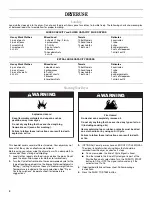
Page 3: ...tend into the interior of the vent to secure vent 5 Clean exhaust vent periodically depending on use but at least every 2 years or when installing your dryer in a new location When cleaning is complete be sure to follow the Installation Instructions supplied with your dryer for final product check WARNING For your safety the information in this manual must be followed to minimize the risk of fire ...

Page 4: ...e selector is set to On 4 If desired add fabric softener sheet Follow package instructions 5 Press the PUSH TO START button SUPER CAPACITY and SUPER CAPACITY PLUS DRYERS Heavy Work Clothes 4 pair of pants 4 pair of jeans 2 sweatshirts 2 sweatpants 4 shirts Mixed Load 3 sheets 1 king 2 twin 4 pillowcases 9 T shirts 9 pair of shorts 3 blouses 10 handkerchiefs 3 shirts Towels 10 bath towels 10 hand t...

Page 5: ...overheating and damage to both the dryer and fabrics If lint falls off the screen into the dryer during removal check the exhaust hood and remove the lint Every Load Cleaning 1 Pull the lint screen toward you 2 Roll lint off the screen with your fingers Do not rinse or wash screen to remove lint Wet lint is hard to remove 3 Push the lint screen firmly back into place As Needed Cleaning 1 Roll lint...

Page 6: ...Expect longer drying times with items rinsed in cold water and with items that hold moisture cottons Is the load too large and heavy to dry quickly Separate the load to tumble freely Lint on load Is the lint screen clogged Clean lint screen Check for air movement Is the load properly sorted Sort lint givers towels chenille from lint takers corduroy synthetics Also sort by color Is the load too big...

Page 7: ... reinstallation of your appliance if it is installed in an inaccessible location or is not installed in accordance with published installation instructions DISCLAIMER OF IMPLIED WARRANTIES LIMITATION OF REMEDIES CUSTOMER S SOLE AND EXCLUSIVE REMEDY UNDER THIS LIMITED WARRANTY SHALL BE PRODUCT REPAIR AS PROVIDED HEREIN IMPLIED WARRANTIES INCLUDING WARRANTIES OF MERCHANTABILITY OR FITNESS FOR A PART...

Page 8: ...8 Notes ...

Page 9: ...eur de la porte à l intérieur de la sécheuse Nom du marchand ______________________________________________ Numéro de série ________________________________________________ Adresse ________________________________________________________ Numéro de téléphone ___________________________________________ Numéro de modèle______________________________________________ Date d achat_______________________...

Page 10: ...euse où elle sera exposée aux intempéries Ne pas jouer avec les commandes Ne pas utiliser un produit assouplissant de tissu ou des produits pour éliminer la statique à moins qu ils ne soient recommandés par le fabricant du produit assouplissant de tissu ou du produit Ne pas utiliser la chaleur pour faire sécher des articles fabriqués avec du caoutchouc mousse ou des matériaux semblables Nettoyer l...

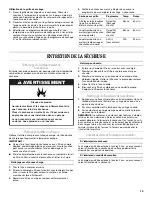
Page 11: ...ion selon l utilisation mais au moins à tous les 2 ans ou lors de l installation de la sécheuse à un nouvel endroit Après le nettoyage veuillez suivre les instructions d installation fournies avec la sécheuse pour une vérification finale de l appareil UTILISATION DE LA SÉCHEUSE Chargement Mettre les vêtements dans la sécheuse sans les tasser Ne pas surcharger la sécheuse Prévoir suffisamment d esp...

Page 12: ...RT Arrêt et remise en marche On peut arrêter la sécheuse à tout moment au cours d un programme Pour arrêter la sécheuse Ouvrir la porte de la sécheuse ou tourner le bouton de commande de programme à OFF REMARQUE Le bouton de commande de programme doit pointer vers une zone d arrêt Off quand la sécheuse n est pas utilisée Pour remettre la sécheuse en marche Fermer la porte Choisir un nouveau progra...

Page 13: ...côtés du filtre à charpie avec de l eau chaude 3 Mouiller une brosse en nylon avec de l eau chaude et du détergent liquide Frotter le filtre avec la brosse pour enlever l accumulation de résidus 4 Rincer le filtre à l eau chaude 5 Bien sécher le filtre à charpie avec une serviette propre Replacer le filtre dans la sécheuse Nettoyagedel intérieurdelasécheuse 1 Appliquer un nettoyant ménager non inf...

Page 14: ...e pièce où la température est inférieure à 45ºF 7ºC Le bon fonctionnement des programmes de la sécheuse nécessite des températures supérieures à 45ºF 7ºC De l eau de rinçage froide a t elle été utilisée La charge était elle très mouillée Prévoir des durées de séchage plus longues pour les articles rincés à l eau froide et les articles qui retiennent l humidité cotons La charge est elle trop grosse...

Page 15: ...ou n est pas installé conformément aux instructions d installation fournies CLAUSE D EXONÉRATION DE RESPONSABILITÉ AU TITRE DES GARANTIES IMPLICITES LIMITATION DES RECOURS LE SEUL ET EXCLUSIF RECOURS DU CLIENT DANS LE CADRE DE LA PRÉSENTE GARANTIE LIMITÉE CONSISTE EN LA RÉPARATION PRÉVUE CI DESSUS LES GARANTIES IMPLICITES Y COMPRIS LES GARANTIES APPLICABLES DE QUALITÉ MARCHANDE ET D APTITUDE À UN ...

Page 16: ...irlpool Corporation All rights reserved Tous droits réservés Registered Trademark TM Trademark of Whirlpool Canada Inc Marque déposée TM Marque de commerce de Whirlpool Canada Inc 9 05 Printed in U S A Imprimé aux É U ...

Reviews: