background image


Operating


Manual


Model:


ITRS

600BRN


USB


Turntable


Suitcase


Summary of Contents for ITRS-600BRN

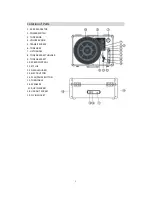
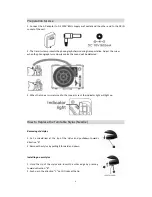
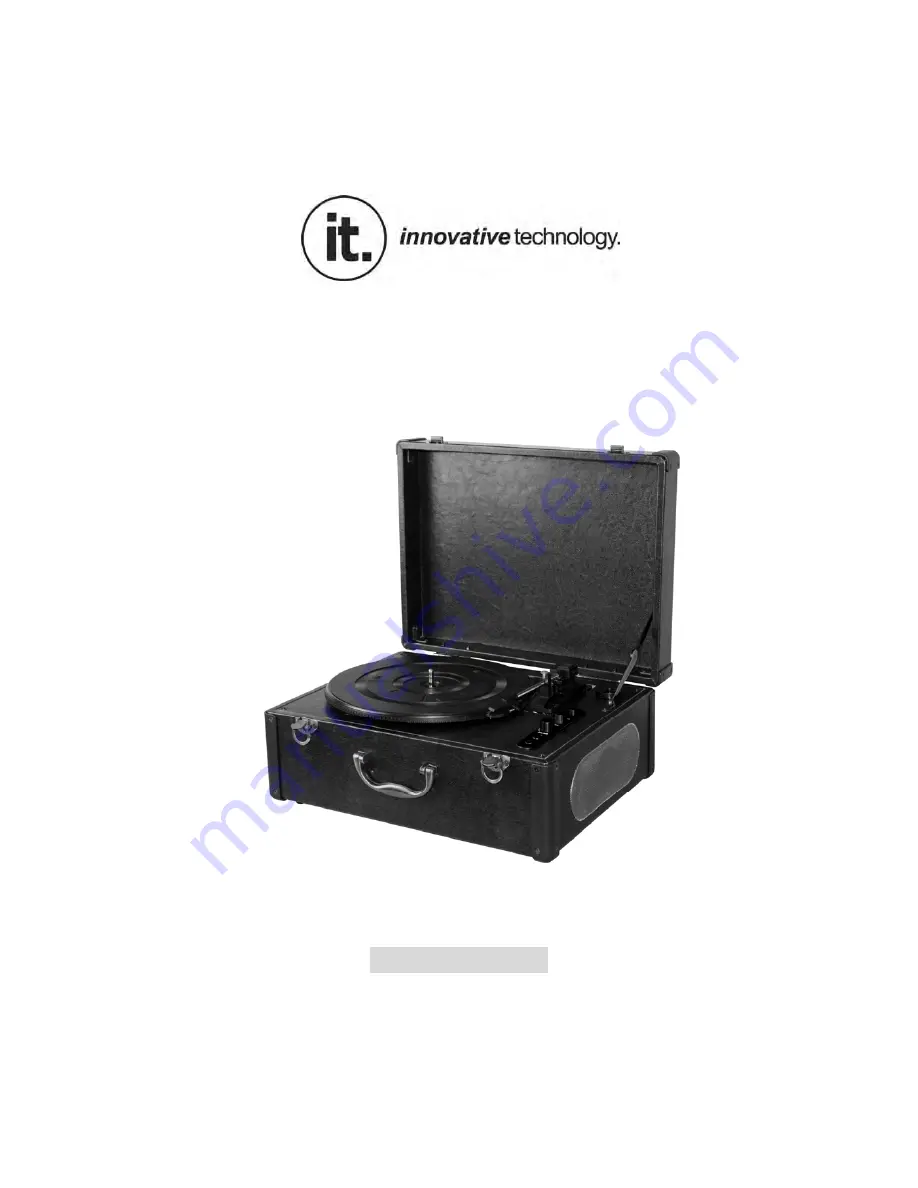
Page 1: ...Operating Manual Model ITRS 600BRN USB Turntable Suitcase ...

Page 2: ...h a stand bracket or table recommended by the manufacturer or sold with the product Any mounting of the product should follow the manufacturer s instructions and should use a mounting accessory recommended by the manufacturer 9 Transporting This product should be moved with care to avoid damage or injury 10 Ventilation Slots and openings in the cabinet are provided for ventilation to ensure reliab...

Page 3: ...nnel 19 Damage Requiring Service Unplug this product from the wall outlet and refer servicing to qualified service personnel under the following conditions a If the power supply cord or plug is damaged b If liquid has spilled or objects have fallen into the product c If the product has been exposed to rain or water d If the product does not operate normally by following the operating instructions ...

Page 4: ...ls or adjustments or performance of procedures other than those specified may result in hazardous radiation exposures CAUTION RISK OF ELECTRIC SHOCK DOES NOT OPEN To reduce the risk of electric shock do not remove cover or back No user serviceable parts inside Refer servicing to qualified service personnel The light flash with arrowhead symbol within an equilateral triangle is intended to alert us...

Page 5: ...into the set contact your dealer 3 When removing the power plug from the wall outlet always pull directly on the plug never pull the cord 4 Do not attempt to clean the unit with chemical solvents as this might damage the finish Use a clean dry cloth 5 Please do remove the vinyl record before you close the cover of the unit 6 In order to shut off the power to this product completely unplug the powe...

Page 6: ...NE KNOB 4 VOLUME KNOB 5 TRANSIT SCREW 6 TONE ARM 7 LIFT HANDLE 8 TONE ARM REST HOLDER 9 TONE ARM REST 10 SPEED CONTROL 11 STYLUS 12 NEEDLE GUARD 13 EJECT BUTTON 14 PLAY PAUSE BUTTON 15 TURNTABLE 16 SPEAKERS 17 AUX IN SOCKET 18 USB OUT SOCKET 19 DC IN SOCKET ...

Page 7: ... sound will be distorted 3 When the tone arm is returned to the tone arm rest the indicator light will light up How to Replace the Turntable Stylus Needle Removing old stylus 1 Set a screwdriver at the tip of the stylus and pushdown towards direction A 2 Remove the stylus by pulling it forward and down Installing a new stylus 1 Hold the tip of the stylus and insert the other edge by pressing towar...

Page 8: ...hes playing and the tone arm reaches the end of the record the tone arm will return to the tone arm rest automatically with the indicator light lighting up Or you can press the EJECT button to move the tone arm to the tone arm rest manually PLEASE NOTE It will be approximately 20 seconds delay before the tone arm returns to the tone arm rest when playing at 78 RPM speed 10 Remember to put on the w...

Page 9: ...AC For Macintosh 3 Audacity_for_WIN For Windows 4 AUTORUN INF 5 The GNU General Public License html The software is compatible with Window 98 2000 ME XP VISTA 7 and Macintosh Audacity Installation and USB Connection Connect the USB cable to the USB OUT socket at the rear of the turntable and the USB socket on your computer Plug in the AC DC adapter and connect the other end of the adapter to the D...

Page 10: ...udacity_for_WIN folder Then double click the audacity win 1 2 6 to install the audacity software 4 The Audacity Setup Wizard will appear Click Next to install the software 5 Click on I accept the agreement and click on Next ...

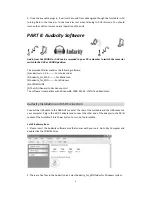
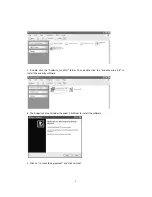
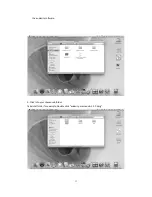
Page 11: ...10 6 Continue to click on the Next buttons ...

Page 12: ...11 7 Click on the Install button to start installation ...

Page 13: ...ty sourceforge net For MAC system 1 Please insert the Audacity software disk that comes with your unit Then click on the AUDACITY icon 2 Double click the Audacity_for_MAC folder There are three subfolders under the folder z If your computer is Mac OS X system Intel CPU please enter the Intel folder to install the audacity software z If your computer is Mac OS 9 system please enter the Mac OS 9 fol...

Page 14: ...13 the audacity software 3 Click into your chosen subfolder Take Intel folder for example Double click audacity macosx ub 1 3 7 dmg ...

Page 15: ...nd a window will be popped up Double click the Audacity icon to enter its interface NOTE Once the software is installed you do not need to re set it with each use For additional information visit the Audacity website at http audacity sourceforge net ...

Page 16: ...ity Interface Audacity Control Buttons z Using the attribute controls button at the top of the screen to go to beginning Play Record Pause Stop and End z Use the File Edit View Project Generate Effect and Analyze menus to Save Export and edit the music ...

Page 17: ...lick the button to record 5 Click the button to pause the recording 6 Click the button to stop the recording 7 Adjust the input volume 8 Click the button to skip to end Audacity Preferences Setting Please set the Preferences before use 1 Click the Edit on the Audacity interface select Preferences ...

Page 18: ...face z Click the Device and select microphone USB Audio CODEC z Click the Channels and select 2 stereo z Click the OK Note If you couldn t find the microphone USB Audio CODEC from the Device list close the Audacity Software and re open then try again 4 Adjust the output and input volume NOTE Because of the variation of different operation systems the input volume control may not work on some indiv...

Page 19: ...tware lame_enc dll needs to be installed 1 Please make sure that the Audacity disc is still inserted in your computer 2 Click the Edit Tab on the Audacity interface select Preferences 3 Select the File Formats Tab and click on the Find Library Button 4 A dialog box will appear Click Yes ...

Page 20: ... the CD ROM Double click on Audacity_for_WIN and you will find the lame_enc dll Click it then click Open 6 Click on the OK Button Now the MP3 software set up is complete and you may proceed with the recording and exporting to MP3 format ...

Page 21: ...ve tone arm to another desired song Press PLAY PAUSE button on turntable or lower the lift handle to start playing the next song Immediately press Pause button on computer and the download will continue 5 Repeat steps 3 and 4 until you have finished downloading NOTE1 Do not click Stop button on computer while continuously downloading songs Remember to click Pause between your desired songs Press S...

Page 22: ... go to the Control Panel 2 Find and click Sound icon 3 Click the Playback tab and change the playback device 4 Click ok Then sound will begin to play Please note that you need to manually change the setting every time you connect the USB cable with the PC 2 If you want to hear the music while downloading to the computer go to the Audacity interface Click Edit and select Preference Then click Audio...

Page 23: ...only If do not have the fluctuant wave on the Audacity interface or the sound is distorted when recording adjust the recording level as follows z Click Start at the lower left corner go to the Control Panel z In Classic View double click the Sound icon ...

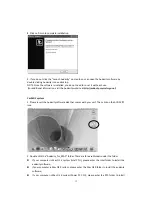
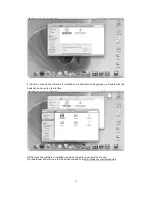
Page 24: ...23 z Or in Control Panel Home view click Hardware and Sound Then click sound ...

Page 25: ...24 z In the Sound interface select Recording tab z Then choose a recording device Herein we recommend you to select Microphone of USB Audio CODEC which is highlighted in the picture and click Properties ...

Page 26: ... Input Level Indicator from the Audacity panel that doesn t excess 0 Then click OK on the Microphone properties interface and sound interface Close the Control Panel Please note that there is no Levels tab in Sound panel in some operating system such as Windows 98 Windows 2000 For Windows 7 users and Vista users the Levels tab in Sound panel is available ...

Page 27: ...Move cursor to the wave graphic area left click mouse and hold then drag from left to right Release the mouse when the highlighted time bar has reached 1 45 end of first song 3 Click file tab then select EXPORT SELECTION AS MP3 4 The window will pop up a dialog box for you to put the song title File name where you want to save it Save in and file format Save as type 5 Click Save and the first song...

Page 28: ...DITIONAL SONGS for MP3 format only During EXPORT SELECTION AS MP3 the software only provides one time to title the song being saved All subsequent songs being divided from the same track are with the same title To change the titles follow steps below 1 Right click on the Music file and select Properties 2 Click on Details You will see Property and Value select a property you want to change and mov...

Page 29: ...forge net For more detailed information and operation etc 1 Click the file tab on the audacity interface 2 Select Export as WAV or Export as Ogg to save the entire song Export As WAV Export As Ogg 3 If you want to save a section of the song highlight the section of the song that you want then click the file tab on the Audacity Interface Choose Export Section As WAV or Export Section As Ogg Vorbis ...

Page 30: ...f the play control buttons you will see the input and output level meters labeled L and R Under the output level meter is an icon that looks like a microphone Next to the microphone is a black arrow that points down Click this arrow and select Start Monitor If you don t see the input and output level meters open your Preferences again as described above ...

Page 31: ...le Edit View Project Generate Effect and Analyze menus to Save Export and edit the music 1 Click the button to skip to start 2 Click the button to play 3 Click the button to record 4 Click the button to pause the recording 5 Click the button to stop the recording 6 Click the button to skip to end 7 Adjust the output volume 8 Adjust the input volume ...

Page 32: ...irectories Smart Recording Theme Keyboard and Mouse 3 Select the recording device Core Audio USB Audio CODEC z Click the Audio I O at the Audacity Preferences interface z In Recording part click the Device and select Core Audio USB Audio CODEC z Click the Channels and select 2 stereo z Click the OK NOTE1 If you want to hear the music while downloading on the computer make sure the third check box ...

Page 33: ...EC from the Device list close the Audacity Software and re open then try again or insure the turntable is connected to the computer 4 Under the Quality tab set the Default Sample Format to 16 bit Select OK to save your setting and close the preferences window ...

Page 34: ...f the input and output level meters labeled L and R you will see the input and output volume On the left of the input and output volume there is a volume icon Adjust the output and input volume to maximum NOTE Because of the variation of different operating systems the input volume control may not work on some individual Windows versions Windows Vista is recommended to ensure the input volume cont...

Page 35: ... move tone arm to another desired song Press PLAY PAUSE button on turntable or lower the lift handle to start playing the next song Immediately press Pause button on computer and the download will continue 5 Repeat steps 3 and 4 until you have finished downloading NOTE Do not click Stop button on computer while continuously downloading songs Remember to click Pause between your desired songs Press...

Page 36: ...the wave graphic area left click mouse and hold then drag from left to right Release the mouse when your desired section in the time bar is highlighted 3 Click file tab then select EXPORT SELECTION 4 The window will pop up a dialog box for you to complete the Metadata Click OK button after you type in 5 Then a window appears Select your music file location and format and type in your file name Cli...

Page 37: ...play back the song through your computer Simply click the to play z NOTE You may visit the Audacity website at http audacity source forge net For more detailed information and operation etc 1 Click the file tab on the audacity interface Select Export to save the entire file 2 Click Export and a window pops up It will default MP3 format but you also can select another format by clicking the arrow l...

Page 38: ...Toolbar and Enable Meter Toolbar options are checked If they are not please check them and then press OK z Check the microphone slider to make sure that it is at full volume all the way to the right as shown in below If you are not seeing the microphone slider please go to the Preferences menu in Audacity click on the Interface tab and make sure that the Enable Mixer Toolbar and Enable Meter Toolb...

Page 39: ...D 420 x 190 x 315 mm Weight 5 75 KGS Unit Standard Accessories Operating Instruction Booklet 45 rpm Adapter CD Disc Audacity Software DRIVER USB Cable AUX IN Cable AC Adaptor DC 10V 900 mA THE WHOLE UNIT Problem Cause Solution Power does not come on when the power switch is pressed Unit is unplugged Connect the unit to the AC power supply No sound comes out of the speakers The volume is turned dow...

Page 40: ...oduct contains a chemicals known to the State of California to cause birth defects or other reproductive harm For more information on these regulations and a list of chemicals log on the following website address http www oehha ca gov prop65 html ...

Page 41: ...40 ...

Page 42: ...41 600100100E ...

Reviews: