background image

Swing-Away Lateral Installation Instructions: 

MaTRx-PB Elite

MaTRx-PB Elite

1

Pull up the bottom of the cover (release velcro fasteners) to expose the mounting slots/channels in the back pan.

2

Determine the desired mounting height/orientation for the lateral pads (upper or lower mounting slot position).

3

Loosely install the lateral supports onto the back pan using the hardware provided. (Note: the backing plate is
installed from the inside of the back pan through the lateral support brackets and secured to the back pan via
the washer plates and locking nuts - refer to 

Figure 1.0

below.

4

Adjust laterals to the desired position via the mounting slots on the backpan and via the slots in the lateral sup-
port bracket. Secure each lateral support into place.

5

Re-attach the back cover via the velcro fasteners.

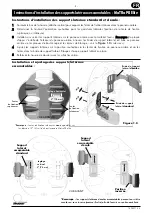
Instructions for Installing Standard and Offset Swing-Away Lateral Supports:

Standard 

Lateral

Support Bracket

Figure 1.0

Figure 1.0

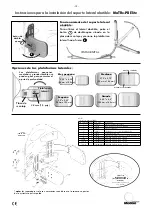
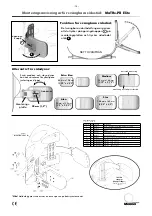
Swing-Away Lateral Installation & Adjustment:

Swing-Away Lateral Installation & Adjustment:

vertical

adjustment

y

3” (76 

mm

)

TRD0277-04 

Offset

Lateral

Support Bracket

Lower
Mounting
Slots

1

Upper

Mounting 

Slots

horizontal adjustment

1

Note: 

lower mounting slots are 

not

available on

12” (31cm) high Matrx-PB Elite backs

3” (76 

mm

)

REAR VIEW

FRONT VIEW

Standard

Swing-Away

Lateral

Offset

Swing-Away

Lateral

Inverted

Position

*Note:

offset swing-away laterals may also be mounted in the

inverted position (as shown) to provide extended support

EN

- 1 -

Summary of Contents for Motion Concepts MaTRx Seating Series

Page 1: ...he mounting slots on the backpan and via the slots in the lateral sup port bracket Secure each lateral support into place 5 Re attach the back cover via the velcro fasteners Instructions for Installin...

Page 2: ...ons Swing Away Lateral Operation Swing Away Lateral Operation TRC1118 Swing Away Latch Offset Right Left Latch TRC1117 not shown Note spacers are only required when utilizing the upper slot on the bac...

Page 3: ...ri re et via les fentes dans la bride de support lat ral Bloquez chaque support lat ral en place 5 Refermez la housse de dossier avec les attaches velcro Instructions d installation des supports lat r...

Page 4: ...supports Manipulation des supports lat raux lat raux escamotables escamotables TRC1118 Verrouillage escamotable d cal droite verrouillage gauche TRC1117 non illustr Remarque les entretoises servent u...

Page 5: ...lichen Elemente in die gew nschte Position Sichern Sie die seitlichen Auflagen in ihrer jeweiligen Position 5 Bringen Sie die hintere Abdeckung mithilfe der Klettverschl sse wieder an Installationsanw...

Page 6: ...dienung schwenkbarer seitlicher Auflagen seitlicher Auflagen TRC1118 Schwenkbare Sperre nach rechts versetzt Linke Sperre TRC1117 nicht abgebildet Hinweis Abstandshalter sind nur dann erforderlich wen...

Page 7: ...averso le fessure nella staffa di supporto laterale Fissare ciascun supporto laterale in posizione 5 Riagganciare il coperchio dello schienale tramite i fissaggi in velcro Istruzioni per l installazio...

Page 8: ...e Operazione di ribaltamento Operazione di ribaltamento del supporto laterale del supporto laterale TRC1118 Chiusura ribaltabile sporgenza a destra Chiusura sinistra TRC1117 non illustrato Nota i dist...

Page 9: ...aje de la estructura del respaldo y las ranuras del soporte de apoyo lateral Fije cada soporte lateral en su sitio 5 Vuelva a colocar la funda del respaldo con los cierres de velcro Instrucciones para...

Page 10: ...cionamiento del soporte lateral Funcionamiento del soporte lateral abatible abatible TRC1118 Pestillo abatible desplazamiento a la derecha Pestillo izquierdo TRC1117 no mostrado nota los separadores s...

Page 11: ...rav s das ranhuras no suporte lateral Fixe todos os apoios laterais 5 Volte a fixar a cobertura posterior utilizando os fechos de velcro Instru es de instala o dos suportes laterais oscilantes estanda...

Page 12: ...o lateral Funcionamento do apoio lateral oscilante oscilante TRC1118 Fecho oscilante deslocado direita Fecho esquerdo TRC1117 n o apresentado Nota os espa adores s s o necess rios quando se utiliza um...

Page 13: ...idest ttebeslaget S rg for at sikre hver sidest tte i positionen 5 Fastg r rygl nets betr k igen med velcrolukningerne Vejledning i montering af standard standard og forskudte forskudte sidest tter de...

Page 14: ...kan Betjening af sidest tte der kan drejes v k drejes v k TRC1118 L s der kan drejes v k forskudt til h jre Venstre l s TRC1117 ikke vist Bem rk Der er kun brug for afstandsstykker hvis du v lger det...

Page 15: ...i f stena till sidost den S tt fast sidost den p plats 5 S tt fast ryggst dskl dseln igen med hj lp av kardborrbanden Monteringsanvisningar f r standard standard och f rskjutna f rskjutna sv ngbara s...

Page 16: ...re sp ren p bakstycket anv nds 84 mm x 108 mm 3 25 x 4 25 90 mm x 133 mm 3 5 x 5 25 95 mm x 146 mm 3 75 x 5 75 108 mm x 165 mm 4 25 x 6 5 Extra liten Liten Medium Stor centrerad montering montering av...

Page 17: ...kainen sivuttaistuki paikalleen 5 Kiinnit selk nojan suojus takaisin teippikiinnityksell Ohjeet liikkuvan vakiomallisen vakiomallisen ja korkeuss dett v n korkeuss dett v n sivutuen asentamiseen Vakio...

Page 18: ...vain kun k ytet n takaosan ylemp aukkoa ylemp aukkoa 3 25 x 4 25 84 mm x 108 mm 3 5 x 5 25 90 mm x 133 mm 3 75 x 5 75 95 mm x 146 mm 4 25 x 6 5 108 mm x 165 mm Erityisen pieni Pieni Keskikokoinen Suu...

Page 19: ...19...

Page 20: ...ugal invacare com Per informazioni Kontaktoplysninger Kontaktinformation Yhteystiedot Norge Invacare AS Grensesvingen 9 Postboks 6230 Etterstad N 0603 Oslo Tel 47 0 22 57 95 00 Fax 47 0 22 57 95 01 no...

Reviews: