


1
Assembly, Installation, and Operating Instructions
ULTI-MATE™ AIR BACK
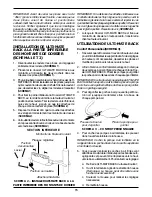
INSTALLATION INSTRUCTIONS
NOTE: When installing the Ulti-Mate Air Back, the cane
rigidizer bar may need to be removed in order to utilized
the full recline of the back.
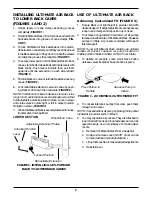
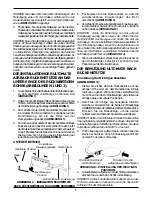
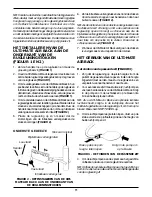
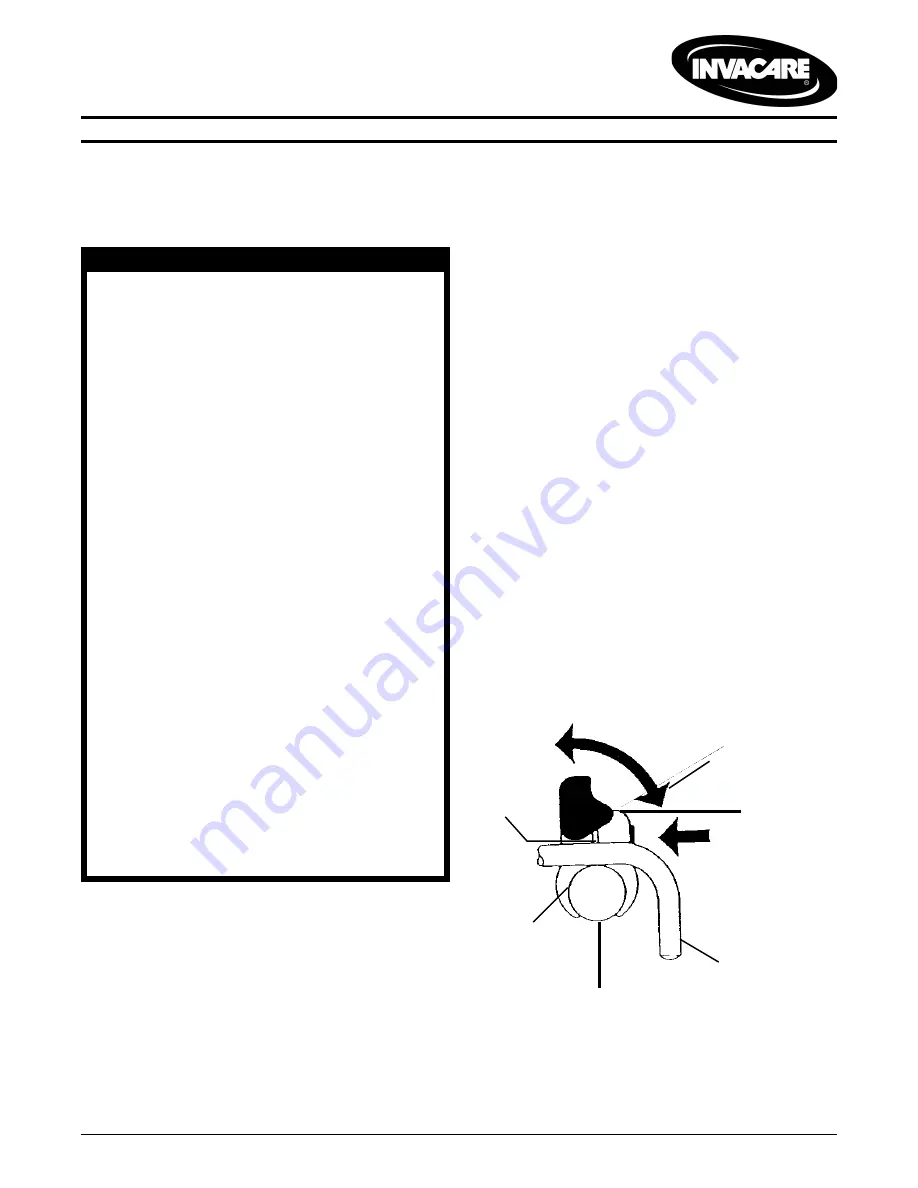
INSTALLING ULTI-MATE AIR BACK
TO UPPER BACK CANES (FIGURE 1)
1. Apply wheelchair brakes.
2. Remove back sling upholstery.
3. Reinsert any bolts required to stabilize back canes.
4. Determine right and left cane clamps and correct clamp
size.
NOTE: There are 7/8 (22mm) and 1-inch (25mm) clamps.
To fit a 3/4-inch (19mm) back cane, remove the plastic washer
from the 7/8-inch (22mm) clamp shown in FIGURE 1.
5. Position right cane clamp around right back cane
ensuring lever on clamp faces up and screw faces
away from chair. Repeat on left side.
NOTE: Before tightening clamps with enclosed Allen Key,
ensure both clamps are level and positioned high enough
on back canes to support Back. Also check that bottom
locks clear any chair obstructions. Back may need to be
positioned higher, lower or the obstruction removed to
operate bottom locks. Clamps can be readjusted once
Back is in place.
Wheelchair Back Cane
Installing Cane Clamps
UPPER SECTION
Cane Clamp
Back Extension
Grooves
Top View - Installed on Right Wheelchair Cane
Screw to Tighten
Clamps to Cane.
Screw should face
away from Chair
(Outwards).
FIGURE 1- INSTALLING ULTI-MATE AIR BACK
TO UPPER AND LOWER BACK CANES
Remove Plastic
Washer for 3/4-inch
(19mm) Canes
Swivel Lever to
Lock and Unlock
NOTE: Check all parts for shipping damage. In case of
shipping damage, DO NOT use. Contact equipment sup-
plier for further instruction.
SAFETY SUMMARY
WARNING
DO NOT use this equipment without first reading
and understanding these instructions. If you are
unable to understand the Warnings, Cautions, and
Instructions, contact equipment supplier before
attempting to use this equipment, otherwise, injury
or damage may result.
The position of the back angle, rear wheels, seat
depth and wheel locks, are directly related to the
wheelchair's stability. Any change to one (1) or
any combination of the four (4) may cause the
wheelchair to decrease in stability. Use EXTREME
caution when using a new seating position.
ALWAYS make sure that the wheelchair is stable
BEFORE reclining the Ulti-Mate Back. Rear wheels
may have to be repositioned rearward depend-
ing on the degree of recline. ALWAYS ensure
stability BEFORE using maximum amount of recline.
TEST wheelchair BEFORE it is occupied BY the end
user to ensure safety.
To maintain the stability of the wheelchair when
moving the rear wheels to ANY forward position,
the amount of recline MUST be limited to prevent
wheelchair from tipping onto anti-tippers.
Changing the seat depth of the wheelchair
changes the stability of the wheelchair. To main-
tain stability, reposition the rear wheels towards the
rear of the wheelchair BEFORE using the wheel-
chair.
The necessary back angle MUST be selected
BEFORE repositioning the rear wheels forward.
Make sure that ALL hardware are tight at ALL times.
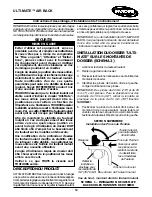
PRODUCT DESCRIPTION
The Ulti-Mate Air Back is designed to provide the user
with posture support and spinal alignment. It includes ad-
justments that allow the user to change the angle of re-
cline of the back from 90°F (32°C) to 115°F (46°C) and the
fit of the back without transferring out of the wheelchair.
The inflatable bladders that adjust the fit of the back can
be repositioned. The cover is made from a water repellant
fabric to protect the foam.
Summary of Contents for Ulti-Mate Air Back
Page 42: ...42 NOTES...
Page 43: ...43 NOTES...


