OneKEY
IR4 Keys, Chargers & OneKEY Manager
Section 1: Charger (4 & 8
Position) Installation
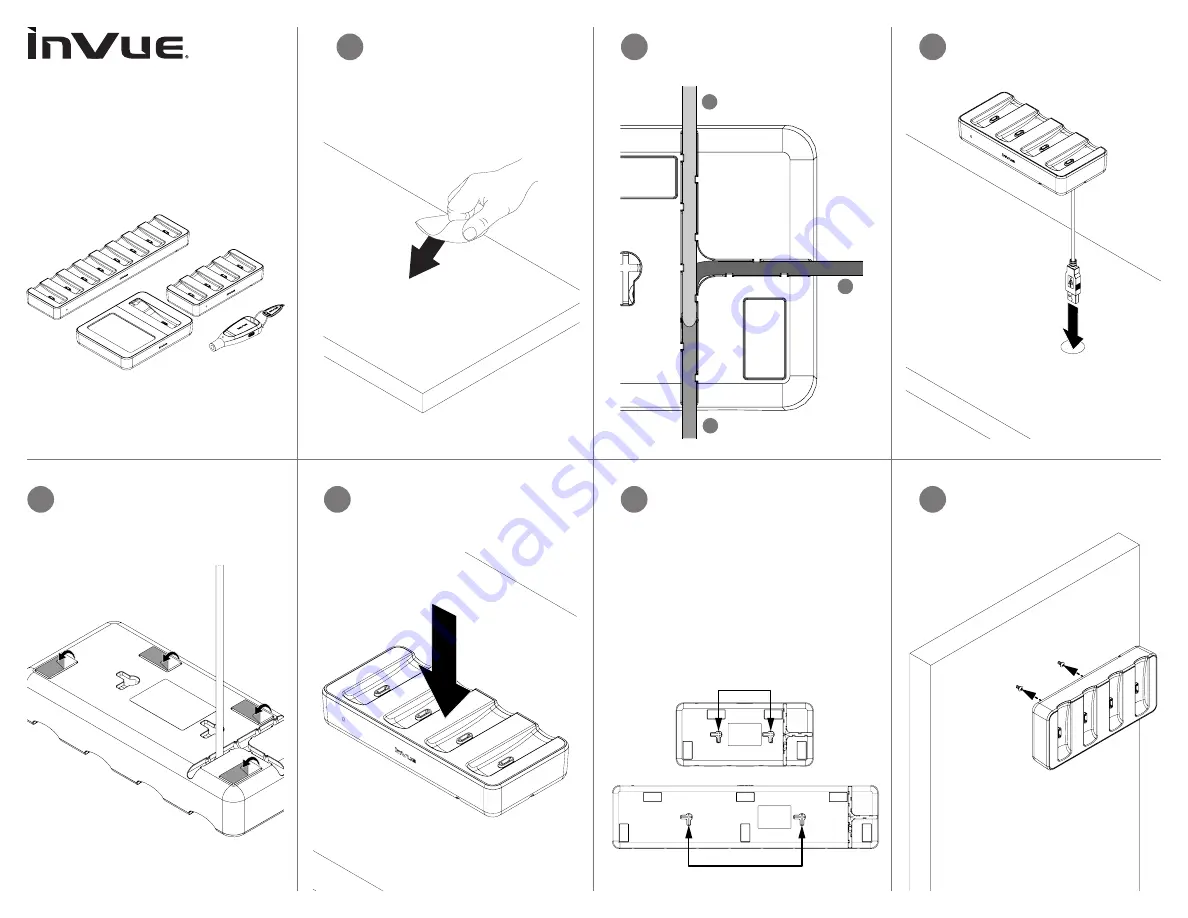
• Adhesive Mount -
Use the
povided alcohol wipe to clean the
area where the charger will be
placed. Allow it to dry completely.
1a
CONTENTS:
One pad saturated in 75%
Isopropyl Alcoho
l
DIRECTIONS:
Apply topically as
needed to cleanse
surface mounting area
.
FOR EXTERNA
L USE ONLY
KEEP OUT OF REACH OF
CHILDREN
KEEP AWAY FROM EY
ES
AND FIRE
Determine how the cable will be
routed. There are 3 exits on the bot-
tom of each charger.
1b
Peel the clear film from the adhesives
on the bottom of the charger (4
adhesives on the 4 position charger
and 6 on the 8 position charger).
1c
Route the cable as determined in
Step 1b, place the charger where
desired and apply pressure for at
least 10 seconds.
1d
1
2
3
The cable can also descend down
through the fixture if a hole or slot is
present.
1c
2b
Place the charger onto the screws.
Screw Mount -
Drill 2 small pilot
holes based on the distances (either
horizontally or vertically) below that
correspond to your charger.
• 4 Position Charger - 60mm (2
3
/
8
in).
• 8 Position Charger - 130mm (5
1
/
8
in).
Insert the screws (not provided,
choose screws appropriate to the
fixture’s material) into the pilot holes.
Allow enough of the screw sticking
out to hang the charger.
2a
60mm (2
3
/
8
in)
130mm (5
1
/
8
in)


