background image

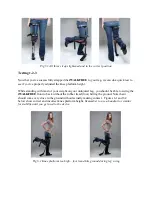
Fitting Instructions


Tailor the fit of your iWALKFREE 

Now we will cover how to tailor the fit of your 

iWALKFREE

Adjustments are quick and easy and require no tools – just be sure that 
you have ordered the correct size!


Wearing for the first time 

YOUR SAFETY IS OUR FIRST CONCERN, SO BEFORE 
USING YOUR IWALKFREE, please do the following:


1.


Read all instructions before starting the fitting process.  

2.


MAKE SURE THAT YOU ARE COMPLETELY FAMILIAR 
WITH THE VARIOUS ADJUSTMENTS.   Before wearing 
the 

iWALKFREE

, practice adjusting the knee platform height 

, adjusting and removing the thigh straps and setting the height 
of the knee tray.Once you are familiar with them, you can try 
on your 

iWALKFREE

 for  the first time.  

3.


UNTIL YOU ARE PROFICIENT AT WEARING AND 
USING YOUR IWALKFREE, SUPPORT YOURSELF 
USING A HANDRAIL, PARALLEL BARS OR 
SIMILAR.  

Good household substitutes include the back of a 

sofa, a sturdy table or chair back,  a guard rail or any other 
stable, waist high or higher device that can support your 
weight.  

4.


IMPORTANT – KEEP AS MUCH WEIGHT AS POSSIBLE 
ON YOUR UNINJURED LEG WHEN PUTTING ON THE 
IWALKFREE. TRY TO PUT AS LITTLE WEIGHT AS 
POSSIBLE ON THE IWALKFREE UNTIL ALL THE 
STRAPS ARE ON AND ADJUSTED.  
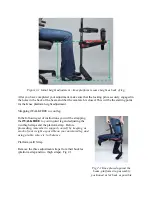
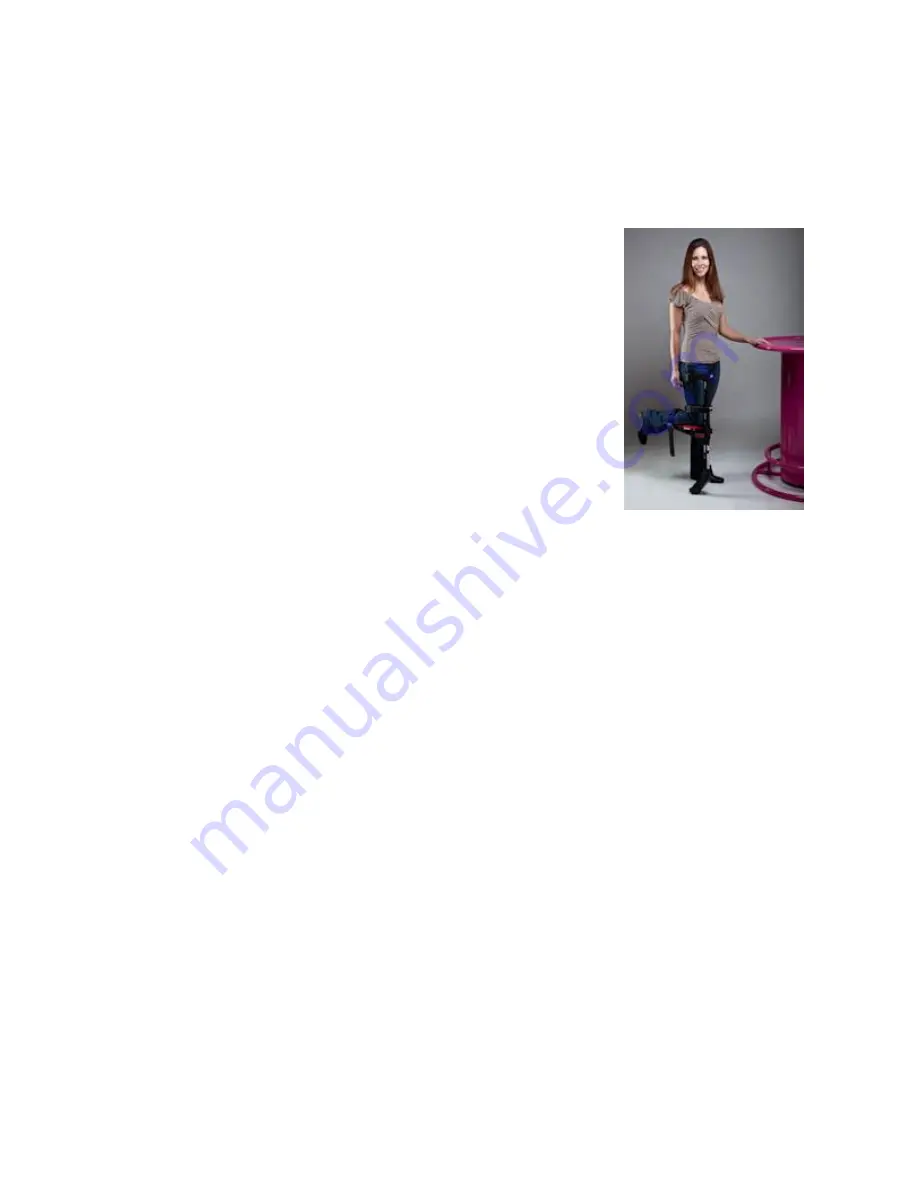


”Supporting and 

balancing yourself 

with an external aid when 

putting on 

our iWALKFREE.


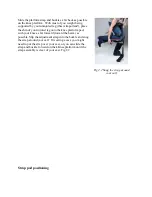
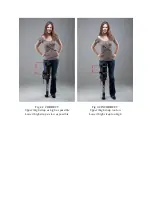
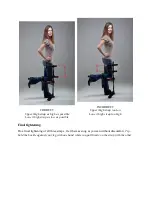
Set the Knee platform height 

Sit in a chair with your knee bent at 90 degrees.  Using your uninjured leg with shoe on, measure 
the distance from the ground (just behind your heel) to the bottom of your thigh (back of your 
knee – where your thigh meets your calf ). This measurement will be the initial height of the 

iWALKFREE

 Knee platform (Figure 1-1). 

 Note – you might fine tune the height after your first 

few times walking on the 

iWALKFREE

.


Summary of Contents for iWALK

Page 1: ...R IWALKFREE SUPPORT YOURSELF USING A HANDRAIL PARALLEL BARS OR SIMILAR Good household substitutes include the back of a sofa a sturdy table or chair back a guard rail or any other stable waist high or...

Page 2: ...E to your leg In the following set of instructions you will be strapping the iWALKFREE to your injured leg and adjusting the two thigh straps and the platform strap Before proceeding remember to suppo...

Page 3: ...knee platform pad with your knee as far forward toward the beam as possible Slip the adjustment strap into the buckle and snug the strap around your calf If wearing a cast you might need to put the s...

Page 4: ...lower thigh firmly against the beam B It holds the front of your calf firmly against the knee platform and prevents your knee from lifting To correctly fit the lower thigh strap 1 Position the lower...

Page 5: ...tighten the adjustment strap around your upper thigh If the strap is uncomfortable in your groin area you can lower it slightly Fig 4 2 5 Check to make sure that the adjustment strap padding is cente...

Page 6: ...Fig 4 2 CORRECT Upper thigh strap as high as possible Lower thigh strap as low as possible Fig 4 2 INCORRECT Upper thigh strap too low Lower thigh strap too high...

Page 7: ...ssible INCORRECT Upper thigh strap too low Lower thigh strap too high Final tightening Do a final tightening of all three straps Get them as snug as you can without discomfort Tip hold the buckle agai...

Page 8: ...your weight on your uninjured leg you should be able to swing the iWALKFREE front to back without the rubber tread foot hitting the ground Note that it should come very close to the ground without ac...

Page 9: ...Fig 6 2 Correct knee platform height leg can freely swing though tread just above ground at mid stride You re done Congratulations You ve completed the initial fitting of your iWALKFree...

Reviews: