background image

IXIUM 

iXium XWSC-9 Wifi 

Clock 

User Manual 


Summary of Contents for XSCBE9

Page 1: ...IXIUM iXium XWSC 9 Wifi Clock User Manual...

Page 2: ...s 3 Set Time 3 Micro SD Card Slot 3 Battery and Charging 3 Connecting to the Camera 4 Direct Connect 4 Change Security Password recommended 7 Internet Connect 9 Camera Settings 10 Timestamp 10 Video Q...

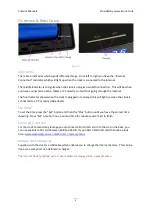
Page 3: ...ock USB Cable USB to Mini USB Before You Start Make sure you removed the battery tab and have charged the device for 8 or more hours prior to use It is recommended that you charge for at least 24 hour...

Page 4: ...n the clock is connected to a PC or mains USB adapter Set Time To set the time press the Set button and then the Plus button until you have the correct time showing Press Set once for hour a second ti...

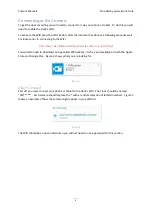
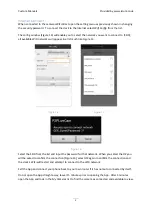
Page 5: ...hing indicator will carry on flashing You will also need to download an App called P2PLiveCam it is free and available on both the Apple Store and Google Play Figure 2 shows what you are looking for F...

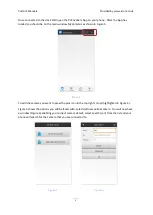
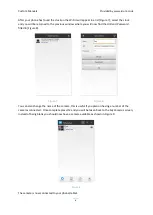
Page 6: ...wn in Figure 4 Figure 4 To add the camera you want to press the plus icon in the top right corner highlighted in Figure 4 Figure 5 shows the options you will be faced with select Add new online camera...

Page 7: ...will now find the UID and Password filled in Figure 8 Figure 7 Figure 8 You can also change the name of the camera this is useful if you plan on having a number of the cameras connected Once complete...

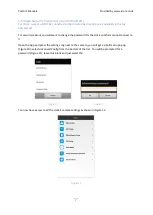
Page 8: ...l want to change the password for the clock so others cannot connect to it Open the App and press the settings cog next to the camera you will get a small menu pop up Figure 10 select Advanced Config...

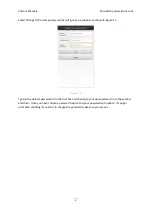
Page 9: ...indow as shown in Figure 13 Figure 13 Type in the default password in to the first box and then type your new password in to the second and third Once you have chosen a password tap OK and your passwo...

Page 10: ...ke Figure 14 Figure 14 Figure 15 Figure 16 Select the SSID from the list and input the password for that network When you select the OK you will be asked to confirm the connection Figure 16 select OK...

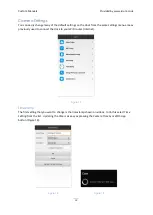
Page 11: ...e settings menu area as previously used to connect the clock to your WiFi router Internet Figure 17 Timestamp The first setting that you want to change is the timestamp shown on videos to do this sele...

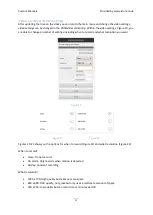
Page 12: ...er of settings including when to record and what resolution you want Figure 20 Figure 21 Figure 22 Figures 21 22 show you the options for when to record Figure 21 and what resolution Figure 22 When to...

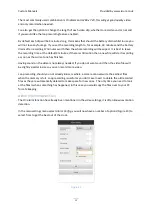
Page 13: ...will start recording as soon as the current one has finished Having sound on the video is not always needed if you do not want sound then the video files will be slightly smaller in size so you can r...

Page 14: ...t is just right for human activation Figure 24 Another option you have is a warning tone this will notify you of any movement if you have the app open or running in the background on your phone or tab...

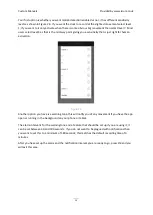
Page 15: ...27 You have 4 options for the video quality HD High Normal and Low Bandwidth By default it will be Low Bandwidth but you can change it to any you want obviously HD is the best streaming quality HD sh...

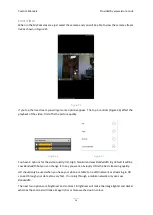
Page 16: ...mage vertically Only 3 of these options are commonly used all of which are marked with Sometimes you want to stream sound from the clock this will use more data Taking a screenshot of something can be...

Page 17: ...ded by www ixium co uk 16 Still Struggling If you are still struggling to understand how this item works you can get in contact via the following methods Recommended Email support ixium co uk Other Te...

Reviews: