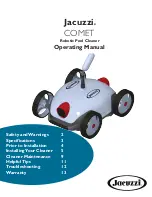
background image

COMET

Robotic Pool Cleaner

Operating Manual

Jacuzzi

®

Safety and Warnings

Specifications

Prior to Installation

Installing Your  Cleaner

Cleaner Maintenance

Helpful Tips

Troubleshooting

Warranty

2

3

4

5

9

11

12

13

Summary of Contents for Comet

Page 1: ...T Robotic Pool Cleaner Operating Manual Jacuzzi Safety and Warnings Specifications Prior to Installation InstallingYour Cleaner Cleaner Maintenance HelpfulTips Troubleshooting Warranty 2 3 4 5 9 11 12...

Page 2: ...ht 10 Power supply unit should be placed in a shaded area To avoid overheating and potential damage of components never cover the power supply unit 11 Only authorized personnel should open the cleaner...

Page 3: ...Length 39 37ft 12m Maximum Cleaning Area 646 sqft 60m2 for 12m cable in rectangle pool Filtering Capacity 5283 gal 20m3 h Filter Density 180 m Water Temperature Of Use For Cleaner 10 C 35 C 50 F 95 F...

Page 4: ...o use of cleaner Pool must be cleaned of algae or debris prior to the cleaner s first use PRIORTO USE Install the brush before use to avoid possible dirt leaks PREPARINGYOUR POOL 1 Make sure the chemi...

Page 5: ...sides of the plug Plug or unplug the cable by holding this position Figure 1 1 1 1 2 OPERATING PANEL 1 2 1 Plug the operating panel into a secure power socket 1 2 2 The operating panel contains three...

Page 6: ...H 1 Hour Cycle Direction of travel reverses every 20 seconds Suited for small pools 1 5H 1 5 Hour Cycle Direction of travel reverses every 25 seconds Suited for medium pools 2H 2 Hour Cycle Direction...

Page 7: ...ner forward Adjust the direction of travel by rotating the nozzle 1 3 2 The nozzle may be adjusted based on the desired route of the cleaner Cleaner will move in a straight line when nozzles are posit...

Page 8: ...INSTALLINGYOUR CLEANER 8 8 1 3 3 Recommended cycle and nozzle settings Nozzle Setting Moving Path 0 45 0 30 0 60 30 30...

Page 9: ...he handle of the cleaner and allow water to fully drain 1 4 1 Align the hooks on the bar with the holes on the underside of the cleaner as shown Press each hook into the holes until they are secured T...

Page 10: ...EANINGTHE FILTERTRAY 2 1 1 To clean the filter tray open the cleaner from both sides by unlatching the top cover Remove the filter tray Clean the filter tray with a steady stream of warm water Reassem...

Page 11: ...CLEANER MAINTENANCE 10 10 2 2 REPLACINGTHE FILTER NET 2 2 1 To replace the filter net press buckle to disassemble Replace filter net and press to reassemble Figure 2 2 1...

Page 12: ...ter use Do not do with wet hand or bare feet 2 While removing cleaner from pool avoid damage to pool walls by ensuring wheels are facing the wall Avoid scratching or dragging cleaner against walls 3 B...

Page 13: ...ned Place power supply in proper position so that cleaner can reach all area Nozzle in improper direction Adjust nozzle into proper direction Customized pool shape Adjust the nozzle to lead to bigger...

Page 14: ...anufacturing defects and does not cover any damage resulting from mishandling of the product by the owner This warranty is void if the product has been altered misused or has been repaired by unauthor...

Reviews: