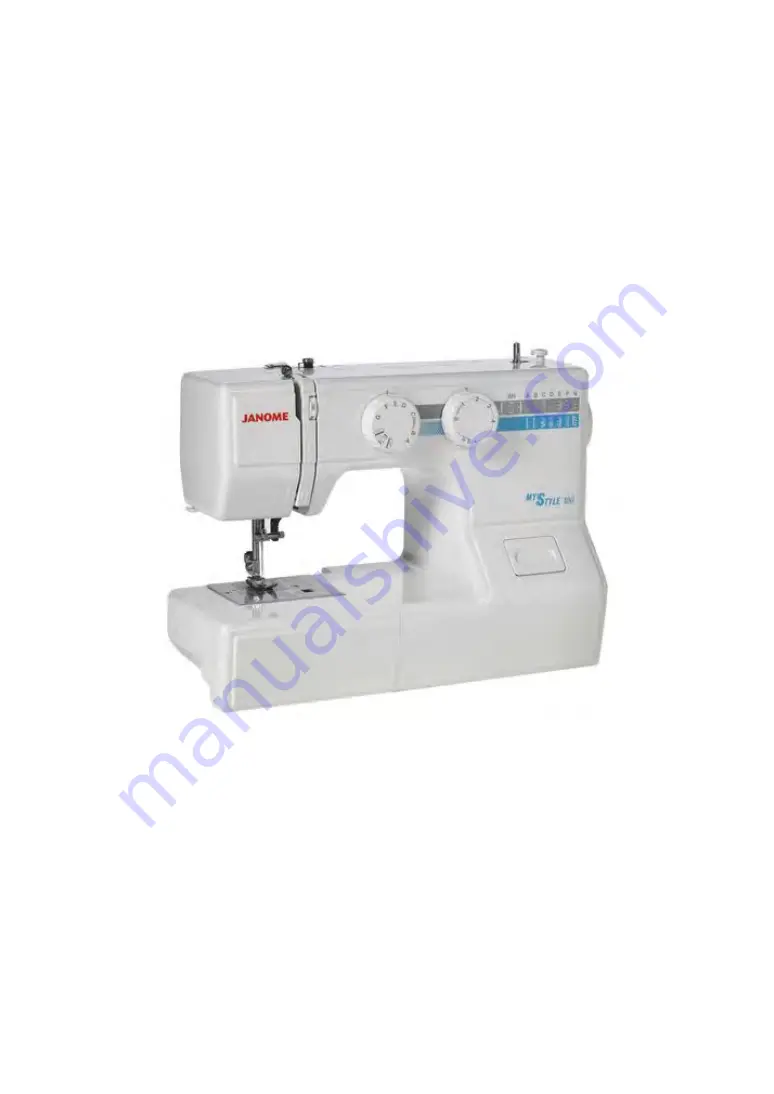
background image

Janome MyStyle 100 

Instruction Manual

Janome MyStyle 100 Sewing Machine Instruciton Manual

www.janomeflyer.com

MyStyle 100 Owners Manual/ User Guide

Summary of Contents for MyStyle 100

Page 1: ...Janome MyStyle 100 Instruction Manual Janome MyStyle 100 Sewing Machine Instruciton Manual www janomeflyer com MyStyle 100 Owners Manual User Guide...

Page 2: ...Dial 26 Adjusting stretch stitch balance 28 Balancing Needle Thread Tension 30 SECTION 3 BASIC SEWING Straight Stitch Sewing 32 Changing the sewing direction 32 Finishing sewing 32 Seam guides on the...

Page 3: ...nsi n del hilo de la aguja 31 SECCI N 3 COSTURA B SICA Puntada recta 33 Cambio de la direcci n de costura 33 Cierre de la costura 33 Gu as de costura en la placa de agujas 35 Esquinas en ngulo 35 SECC...

Page 4: ...Hook cover plate release button 4 Thread tension dial 5 Reverse stitch lever 6 Stitch length dial 7 Pattern selector dial 8 Stitch width dial 9 Presser foot 0 Needle 1 Needle clamp screw 2 Foot holde...

Page 5: ...bobine w Trou SECCI N 1 DESCRIPCI N DE LA M QUINA Nombre de las partes q Tope de la bobinadora w Huso de la bobinadora de bobinas e Orificio para segundo pasador de carrete r Pasador de carrete t Gu a...

Page 6: ...t a c h i n g t h e t a b l e D e t a c h i n g t h e t a b l e D e t a c h i n g t h e t a b l e D e t a c h i n g t h e t a b l e P u l l t h e t a b l e a w a y f r o m t h e m a c h i n e a s i l...

Page 7: ...cylindriques Il est galement id al pour repriser les chaussettes les genoux de pantalons et les coudes de chemises Accesorios est ndar q Pie para cremalleras E w Pie para dobladillo invisible G e Pie...

Page 8: ...nattended when attaching or removing parts when cleaning the machine Do not place anything on the foot control otherwise the machine will run intermittently SECTION 2 GETTING READY TO SEW Operating In...

Page 9: ...ation et d branchez la machine lorsque vous laissez la machine sans surveil lance lorsque vous installez ou d montez des l ments lorsque vous nettoyez la machine Ne placez rien sur la p dale sinon la...

Page 10: ...he Feed Dog The drop feed lever is located underneath the free arm bed on the front side of the machine To drop the feed dog push the lever in the direction of the arrow as illustrated To raise the fe...

Page 11: ...entra nement w Position relev e e Position abaiss e Control de la velocidad de costura Pedal La velocidad de costura se puede variar con el pedal de control de velocidad Cuanto m s pise el pedal a ma...

Page 12: ...rn The wrong foot can cause the needle to break Do not push the lever down to prevent it from being broken To attach Place the desired presser foot so that the pin on the foot lies just under the groo...

Page 13: ...trou Serrez la vis avec un tournevis en tournant dans le sens des aiguilles d une montre q Vis de blocage w Porte pied e Trou r Trou filet Desmontaje y montaje del sujetador del prensatelas ATENCI N P...

Page 14: ...d tighten the needle clamp screw firmly w Stopper pin e Flat side To check needle straightness place the flat side of the needle onto something flat a needle plate glass etc The gap between the needle...

Page 15: ...coton 40 50 Fil de polyester Renforc avec coton synth tique 40 50 Aiguille 70 ou 80 80 ou 90 90 ou 100 Cambio de la agujas PRECAUCI N Aseg rese de que ha apagado y ha desenchufado la m quina de la red...

Page 16: ...pin The additional spool pin is for bobbin winding without unthreading the machine Insert the additional spool pin into the hole Place the felt and a spool on the pin e Additional spool pin r Spool pi...

Page 17: ...r la sortir e Canette Bobinado de la bobina Fijaci n del carrete Coloque el carrete de hilo en el pasador del carrete haciendo que el hilo salga del carrete como se muestra A Presione el sujetador de...

Page 18: ...when the bobbin has been wound a few layers and cut the thread close to the bobbin n Start the machine again When the bobbin is fully wound it will stop automatically Stop the machine and return the...

Page 19: ...bine et dans le trou Placez le feutre et une bobine sur la broche comme illustr q Broche porte bobine suppl mentaire Bobinado de la bobina x Tire del hilo del carrete Gu e el hilo alrededor del gu a h...

Page 20: ...ng it between the tension spring blades w Front notch e Tension spring blade c Continue to draw the thread lightly until the thread slips into the side notch r Side notch v Pull out about 4 10 cm of t...

Page 21: ...et t Fil y Couvercle de crochet Colocaci n de la bobina z Coloque la bobina en el portabobinas con el hilo saliendo por donde muestra la ilustraci n q Hilo x Pase el hilo por la muesca de la parte del...

Page 22: ...e thread guide plate Pull the thread up along the left channel w Right channel e Thread guide plate r Left channel c Firmly draw the thread from right to left over the thread take up lever and down in...

Page 23: ...b Enfilez le fil dans le chas de l aiguille depuis l avant Enhebrado de la m quina Para colocar el hilo de la aguja Levante la palanca tira hilos hasta su posici n m s elevada girando el volante Elev...

Page 24: ...ead x Turn the handwheel slowly toward you one complete turn Bring the bobbin thread up by pulling the needle thread as illustrated q Needle thread w Bobbin thread c Pull 4 10 cm of both threads back...

Page 25: ...fils et faites les passer derri re sous le pied de biche Extracci n del hilo de la bobina z Suba el prensatelas y sujete el hilo de la aguja suavemente con la mano izquierda q Hilo de la aguja x Gire...

Page 26: ...n the fabric otherwise the needle may bend or break To select the stretch stitch patterns set the stitch length dial at S S e Stretch stitch patterns Stitch Length Dial Turn the stitch length dial to...

Page 27: ...eur de longueur de point Tournez le s lecteur de longueur de point pour r gler le num ro de longueur de point d sir e jusqu au rep re de r glage Plus le chiffre est lev plus long est le point Le rep r...

Page 28: ...ic correct them by turning the stitch length dial If the patterns are drawn out correct them by setting the dial to the side If the patterns are compressed correct them by setting the dial to the side...

Page 29: ...les en r glant le s lecteur du c t du Equilibrado de puntadas el sticas Si los patrones de las puntadas el sticas son irregulares cuando trabaja sobre una tela concreta puede corregir el problema gira...

Page 30: ...on the wrong side bottom side of the fabric w Needle thread Top thread e Bobbin thread Bottom thread r Right side Top side of fabric t Wrong side Bottom side of fabric Needle thread tension is too tig...

Page 31: ...nvers du tissu Augmentez la tension du fil d aiguille en r glant le s lecteur sur un num ro sup rieur Equilibrado de la tensi n del hilo de la aguja La tensi n se debe ajustar en funci n de los materi...

Page 32: ...Changing the sewing direction Stop the machine and turn the handwheel toward you to bring the needle down into the fabric Raise the presser foot Pivot the fabric around the needle to change sewing dir...

Page 33: ...s points en arri re puis cousez en marche avant Pour modifier le sens de la couture Arr tez la machine et tournez le volant vers vous de fa on abaisser l aiguille dans le tissu Relevez le pied de bich...

Page 34: ...e facing you lines up with the cornering guide as illustrated stop stitching and lower the needle into the fabric by turning the handwheel toward you Raise the presser foot and pivot the fabric so the...

Page 35: ...de biche et commencez piquer dans le nouveau sens w Guide de couture des coins Gu as de costura en la placa de agujas Las gu as de costuras en la placa de agujas ayudan a medir el margen entre el bor...

Page 36: ...h to suit your sewing needs NOTE Use a stabilizer for stretch fabrics such as tricot and knits to prevent puckering Overcasting Machine setting q Stitch pattern C w Stitch length 1 2 e Thread tension...

Page 37: ...s et tricots pour viter les fronces Surfilage R glage de la machine q Motif de point C w Longueur de point 1 2 e Tension du fil 3 7 r Pied de biche Pied de point zigzag A Guidez le tissu avec pr caut...

Page 38: ...fabrics that tend to pucker Place the fabric to leave a 5 8 1 6 cm allowance Trim the extra allowance after sewing It is also used for mending tears This stitch is ideal for 1 4 0 6 cm seams on knits...

Page 39: ...chirures Puntada en tejidos de punto Configuraci n de la m quina qPatr n de puntadas G wLongitud de la puntada S S eTensi n del hilo 3 7 rPie prensatelas Pie para zigzag A Esta puntada es ideal para...

Page 40: ...use it when constructing items such as backpacks for extra strength Carefully guide the fabric while sewing as the fabric moves back and forth Zigzag Stretch Stitch Machine setting q Stitch pattern C...

Page 41: ...e un point de piq re d coratif Puntada recta el stica Configuraci n de la m quina qPatr n de puntadas A wLongitud de la puntada S S eTensi n del hilo 2 5 rPie prensatelas Pie para zigzag A Este patr n...

Page 42: ...shank Make sure to check if the needle enters into both holes in the button q Pin Re thread the needle and sew about 10 stitches and cut the needle and bobbin threads at the beginning Raise the press...

Page 43: ...e canette REMARQUE Relevez la griffe d entra nement une fois la couture termin e Costura de botones Configuraci n de la m quina q Patr n de puntadas B C w Longitud de la puntada Cualquiera e Tensi n d...

Page 44: ...ighest position Set the pattern selector dial at Sew 5 stitches then stop sewing Set the stitch length dial to 0 and the pattern selector dial at straight sewing Sew a few locking stitches n Raise the...

Page 45: ...miner la densit du point de boutonni re u Boutonni re plus dense i Boutonni re plus grossi re Ojales en 4 pasos Configuraci n de la m quina q Patr n de puntadas w Longitud de la puntada 0 5 1 e Tensi...

Page 46: ...bbin thread to the left Move the slider toward you so that the top mark r on the slider meets the start mark e e Start mark r Top mark t Needle thread y Bobbin thread Lower the needle into the fabric...

Page 47: ...a b o u t o n n ir e s u r l e c o r d o n n e t L a m t h o d e d e c o u t u r e e s t l a mm e q u e p o u r l a b o u t o n n ir e e n 4 p h a s e s c T i r e z s u r le x t r m i t g a u c h e d...

Page 48: ...rall opening size q Right side of the fabric w 3 8 1 cm e Opening size r Zipper size t Slider y Zipper teeth u Zipper tape i Wrong side of the fabric o End of the opening x Place the right top sides o...

Page 49: ...1 Faufilage 2 Point arri re 3 Extr mit de l ouverture 4 Couture inf rieure Costura de cremalleras Configuraci n de la m quina q Patr n de puntadas A w Longitud de la puntada 1 5 4 e Tensi n del hilo...

Page 50: ...the lower fabric layer Align zipper foot with margin edge Return thread tension and stitch length to original settings Sew a seam the entire length of zipper tape c Stop the machine 2 5 cm before reac...

Page 51: ...ban de la fermeture glissi re sur l paisseur de tissu sup rieure 1 Faufilage 2 Ruban de la fermeture glissi re Para coser z Fije el pie para cremalleras con el pasador derecho Doble hacia atr s el mar...

Page 52: ...fore reaching the slider stop the machine with needle in fabric and raise the foot Use seam ripper to open a few inches of basting stitch 3 Unstitch basting 4 3 8 1 cm n Unzip a few inches to clear a...

Page 53: ...r la couture Une fois que les deux c t s de la fermeture sont cousus retirez le faufilage l aide du d coud vite b Levante y suelte el pie y vuelva a fijarlo con el pasador izquierdo Empiece justo deba...

Page 54: ...he folded edge when the needle comes over the extreme left side Lower the presser foot c Turn the screw to align the guide on the foot with the folded edge so that the needle just pierces the fold If...

Page 55: ...roit du tissu Dobladillo invisible Configuraci n de la m quina q Patr n de puntadas E o F w Longitud de la puntada 2 3 e Tensi n del hilo 1 4 r Pie prensatelas Pie para dobladillo invisible G z En tel...

Page 56: ...gzag foot A Decorative stretch patterns are used for adding a creative and personalized touch to items Carefully guide the fabric while sewing as the fabric moves back and forth SECTION 5 DECORATIVE S...

Page 57: ...dance glisser d un c t ou de l autre Puntadas el sticas decorativas Configuraci n de la m quina q Patr n de puntadas A J w Longitud de la puntada S S e Tensi n del hilo 1 4 r Pie prensatelas Pie para...

Page 58: ...nsion to 1 Sew rows of straight stitches 3 8 1 cm apart across the area to be smocked q 3 8 1 cm Step 2 Knot the threads along one end From the other end pull the bobbin threads to distribute gathers...

Page 59: ...on age Une fois termin retirez les points de fron age Fruncido Configuraci n de la m quina q Patr n de puntadas D w Longitud de la puntada S S e Tensi n del hilo 1 4 r Pie prensatelas Pie para zigzag...

Page 60: ...on press the tucks q Screw w Guide e Folded edge Shell Tucking Machine setting q Stitch pattern G w Stitch length 2 3 e Thread tension 6 8 r Presser foot Buttonhole foot B Use a lightweight fabric tri...

Page 61: ...rvures saillantes Prendido con alfileres Configuraci n de la m quina q Patr n de puntadas A w Longitud de la puntada 1 5 3 e Tensi n del hilo 2 6 r Pie prensatelas Pie para dobladillo invisible G Dobl...

Page 62: ...eam along the edges with the straight stitch Open fabrics flat and fold each seam allowances Place the fabric under the foot so that the seam line matches the center of the foot width Lower the foot a...

Page 63: ...sez le motif le long de la ligne de couture q Endroit du tissu Patchwork costura estilo parche Configuraci n de la m quina q Patr n de puntadas D e Longitud de la puntada 1 3 r Tensi n del hilo 1 4 t...

Page 64: ...foot and needle Remove screw on the needle plate with the screwdriver Remove the needle plate and take out the bobbin q Screw x Lift up the bobbin holder and remove it w Bobbin holder c Brush out dust...

Page 65: ...on doux et sec t Logement de crochet REMARQUE Vous pouvez galement utiliser un aspirateur SECCI N 6 CUIDADOS Y MANTENIMIENTO ATENCI N Apague y desenchufe la m quina antes de limpiarla NOTA La m quina...

Page 66: ...en the screw firmly with the screwdriver e Guide holes r Screw Replacing the Light Bulb WARNING When replacing the bulb switch off and unplug the machine Wait for the light bulb to cool down before to...

Page 67: ...a retirer Poussez et tournez l ampoule dans le sens des aiguilles d une montre pour la mettre en place r Ampoule Cambio de la bombilla ATENCI N Cuando ponga la bombilla nueva apague y desenchufe la m...

Page 68: ...aded properly 6 A poor quality needle is used 1 The needle thread tension is too tight 2 The needle thread is not threaded properly 3 The needle is too heavy for the fabric being sewn 4 The stitch len...

Page 69: ...a y o los hilos no son adecuados para la tela que se va a coser 4 No se utiliza la aguja de punta azul para coser telas muy finas el sticas o sint ticas 5 El hilo de la aguja no est correctamente enhe...

Page 70: ...ss e ou tordue 3 L aiguille ou les fils ne sont pas convenables pour le tissu cousu 4 Une aiguille POINTE BLEUE n est pas utilis e pour coudre les tissus extensibles tr s fins et synth tiques 5 Le fil...

Page 71: ...INSTRUCTION BOOK MANUAL DE INSTRUCCIONES LIVRE D INSTRUCTIONS Janome MyStyle 100 Sewing Machine Instruciton Manual www janomeflyer com MyStyle 100 Owners Manual User Guide...

Page 72: ...ical adjustment 4 Never operate the appliance with any air opening blocked Keep ventilation openings of this sewing machine and foot controller free from accumulation of lint dust and loose cloth 5 Ne...

Page 73: ...lguna v a de ventilaci n Mantenga las v as de ventilaci n de esta m quina de coser y el pedal de control libres de pelusa polvo y trozos de tela 5 No deje caer ni introduzca ning n tipo de objeto en n...

Page 74: ...orifices d a ration sont colmat s Tenir les orifices d a ration de cette machine coudre et le curseur d escamotage du pied de biche exempts de toute accumulation de peluches poussi res et de morceaux...

Page 75: ...508 800 XXX E S F Janome MyStyle 100 Sewing Machine Instruciton Manual www janomeflyer com MyStyle 100 Owners Manual User Guide...

Reviews: