Instruction Book
PS1030
Page 1: ...Instruction Book PS1030...
Page 2: ...arest authorized dealer or service center for examination repair electrical or mechanical adjustment 4 Never operate the appliance with any air opening blocked Keep ventilation openings of this sewing...
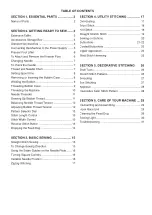
Page 3: ...ontrol 13 Stitch Width Control 13 Reverse Stitch Button 14 Dropping the Feed Dog 14 SECTION 3 BASIC SEWING 15 Straight Stitch Sewing 15 To Change Sewing Direction 15 Using the Seam Guides on the Needl...
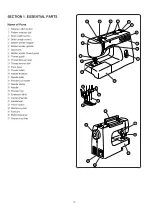
Page 4: ...ead take up lever 1 Thread tension dial 2 Face plate 3 Thread cutter 4 Needle threader 5 Needle plate 6 Presser foot holder 7 Needle clamp 8 Needle 9 Presser foot 0 Extension table 1 Carrying handle 2...
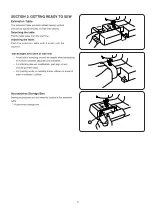
Page 5: ...chine Advantages and uses of free arm Avoid fabric bunching around the needle when bartacking to reinforce pockets plackets and waistlines For stitching sleeves waistbands pant legs or any circular ga...
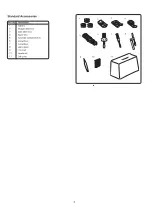
Page 6: ...Straight stitch foot Satin stitch foot Zipper foot Automatic buttonhole foot Screwdriver Screwdriver Seam ripper Lint brush Needle set 1 4 5 6 7 8 9 2 3 Standard Accessories 1 2 3 4 5 6 7 8 9 10 Ref N...
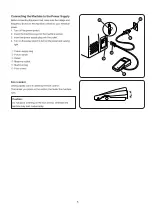
Page 7: ...he machine socket 3 Insert the power supply plug into the outlet 4 Turn on the power switch to turn on the power and sewing light q Power supply plug w Power switch e Outlet r Machine socket t Machine...
Page 8: ...To attach Place the presser foot so the pin on the foot lies just under the groove of the foot holder Lower the foot holder to lock the foot in place Presser Foot Lifter The presser foot lifter raise...
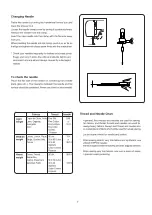
Page 9: ...Thread Crepe de Chine Voile Fine Silk 65 9 Lawn Organdy Fine Cotton or Georgette Fine Synthetic 75 11 Tricot Fine Cotton Covered Polyester Linens Cotton Pique 50 silk 75 11 Serge Double Knits 50 to 80...
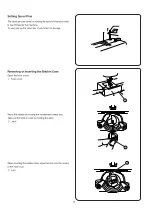
Page 10: ...el toward you Take out the bobbin case by holding the latch w Latch When inserting the bobbin case place the horn into the recess of the hook race e Horn Setting Spool Pins The spool pins are used for...
Page 11: ...and cut the thread close to the hole in the bobbin n Depress the foot control again When the bobbin is fully wound stop the machine Return the bobbin winder spindle to its original position by moving...
Page 12: ...b Draw the thread down and slip it into needle bar thread guide on the left n Thread the needle eye from front to back Refer to page 11 for the built in needle threader Note You may want to cut the en...
Page 13: ...h threads back and under the presser foot Needle Threader z Raise the needle to its highest position Pull down the needle threader knob as far as it will go x Turn the knob in the direction of the arr...
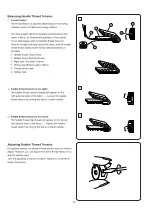
Page 14: ...Wrong side Bottom side of fabric t Thread tension dial y Setting mark x Needle thread tension is too tight The bobbin thread bottom thread will appear on the right side top side of the fabric Loosen t...
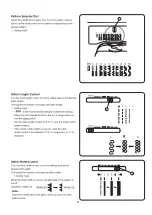
Page 15: ...trol to set the setting mark at the desired stitch length The higher the number the longer the stitch length q Setting mark is the recommended setting for buttonhole stitching Adjust the stitch length...
Page 16: ...ook cover q Hook cover x To drop the feed dog pull down the drop lever and move it to the right as illustrated w Drop lever c To raise the feed dog pull down the drop lever and move it to the left as...
Page 17: ...e needle plate Lower the needle into the fabric Lower the presser foot and smooth the threads toward the back Depress the foot control Gently guide the fabric along the guide line letting the fabric f...
Page 18: ...y turning the handwheel towards you Raise the presser foot and turn the fabric to line the edge with the 1 6 cm 5 8 seam guide Lower the presser foot and begin stitching in the new direction w Corneri...
Page 19: ...ot e Thread tension 1 4 r Stitch length 1 2 t Stitch width 5 The zigzag stitch is used on the seam allowance to prevent fabric from fraying at raw edges Zigzag Stitching q Pattern selector 3 w Presser...
Page 20: ...r fabric to allow a 1 6 cm 5 8 seam Trim the seam allowance after sewing Tricot Stitch q Pattern selector 4 w Presser foot Zigzag foot e Thread tension 1 4 r Stitch length 0 5 4 t Stitch width 5 It is...
Page 21: ...or 2 w Presser foot Zigzag foot e Thread tension 2 6 r Stitch length S S t Stitch width 0 or 5 1 2 3 4 5 The stitch is sewn with two stitches forward and one stitch backward forming a seam that does n...
Page 22: ...on the button Sew about 10 stitches and cut the needle and bobbin threads leaving 20 cm 8 tail v Bring the needle thread between the button and fabric through the holes on the button Pull the needle t...
Page 23: ...et the dial once according to the procedure in 2 c Attach the automatic buttonhole foot v Pull the button holder to the back and place the button in it Push back the button holder toward you as far as...
Page 24: ...pin inside the bartack Then cut the opening with seam ripper Take care not to cut the stitches 2 To repeat buttonhole sewing turn the stitch selector to then back to again as shown Now simply step on...
Page 25: ...front end Hook the filler cord into the forks on the front of the automatic buttonhole foot to hold them tight Lower the needle into the garment where the buttonhole will start and lower the foot q S...
Page 26: ...zipper guide the zipper teeth along the edge of the foot and stitch through the garment and zipper tape Turn the fabric and sew the other side of the zipper in the same way as you did the left side Zi...
Page 27: ...ics B Fine or medium weight fabrics x Position the fabric on the machine so that the needle just pierces the folded part of the fabric when the needle comes over to the extreme left side of wide zigza...
Page 28: ...e compressed slide the control toward L If patterns are drawn slide the control toward S See page 28 SECTION 5 DECORATIVE STITCHING Shell Tuck q Pattern selector 7 w Presser foot Satin stitch foot e T...
Page 29: ...t the gathering stitches Use this stitch to join heavy weight fabrics Overlap two raw edges together and use this stitch to join them Smocking q Pattern selector 4 w Presser foot Zigzag foot e Thread...
Page 30: ...vot fabric to the right or left For a delicate appearance on fabric such as chiffon use a single layer with a tear away backing if necessary Applique q Pattern selector 3 w Presser foot Zigzag foot e...
Page 31: ...ove the hook race ring Remove the hook Clean the hook race with a brush and a soft dry cloth To assemble hook race unit Hold the hook by the center pin and fit it carefully back into the hook race for...
Page 32: ...nplug the machine and remove the cap and setscrew Remove the face plate and replace the bulb Unplug the power supply before changing the bulb Do not dismantle the machine other than explained in this...
Page 33: ...threaded correctly 3 The needle is too heavy for the fabric being sewn 4 The stitches are too coarse for the fabric being new line sewn When sewing extremely light weight materials place a sheet of pa...
Page 34: ......
Page 35: ......
Page 36: ...304 800 250 q EN Printed in Thailand...