background image

U S E R   M A N U A L

Your satisfaction is guaranteed. If you are not completely 

satisfied 

with our Professional Series 48" Freestanding Gas Range and the 
results it brings, we insist that you let us know. We’ll help make the 

Gas Range work for you, or we’ll refund your money. 

Models: GR-670B (SS), GR-670B (G),

GR-670B (WP), GR-670B (BLP), GR-670B (BKP)

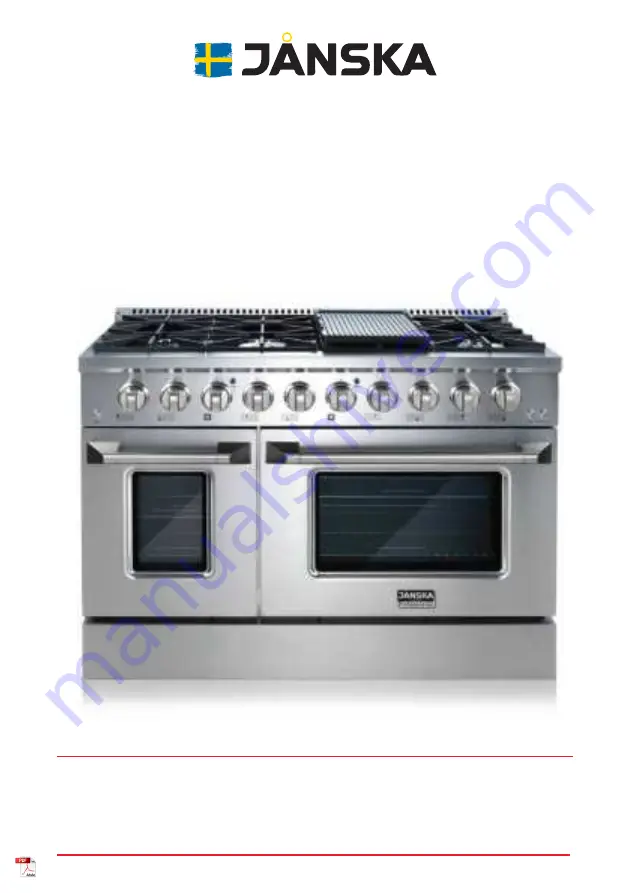
48"  FREESTANDING

GAS RANGE

PROFESSIONAL SERIES

S W E D E N

Summary of Contents for PROFESSIONAL GR-670B

Page 1: ...rofessional Series 48 Freestanding Gas Range and the results it brings we insist that you let us know We ll help make the Gas Range work for you or we ll refund your money Models GR 670B SS GR 670B G GR 670B WP GR 670B BLP GR 670B BKP 48 FREESTANDING GAS RANGE PROFESSIONAL SERIES S W E D E N ...

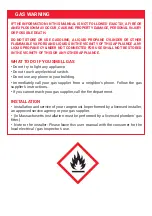
Page 2: ...F YOU SMELL GAS Do not try to light any appliance Do not touch any electrical switch Do not use any phone in your building Immediately call your gas supplier from a neighbor s phone Follow the gas supplier s instructions If you cannot reach your gas supplier call the fire department INSTALLATION Installation and service of your range must be performed by a licensed installer an approved service age...

Page 3: ...ITE OVERLAY INSTALL LEVELING ANTI TIP BRACKET ELECTRIC POWER SUPPLY REQUIREMENTS GROUNDING WIRING DIAGRAM GAS SUPPLY REQUIREMENTS CONNECT RANGE TO GAS SUPPLY COMPONENT PART ASSEMBLY BEFORE FIRST USE COOKTOP OPERATION GRIDDLE OPERATION OVEN OPERATION CARE AND CLEANING TROUBLESHOOTING SPECIFICATIONS 2 2 2 3 3 5 8 10 10 11 12 12 13 14 14 15 16 17 18 20 22 25 25 29 32 34 ...

Page 4: ...ge protect any finished flooring and secure the oven doors closed to prevent damage WARNING DO NOT LIFT OR CARRY THE COOKING RANGE BY THE OVEN DOOR HANDLES OR THE CONTROL PANEL IMPORTANT LET THE RANGE REST FOR A PERIOD OF 24 HOURS ONCE YOU HAVE PLACED IT IN YOUR HOME Do not remove the rating label attached to the range Do not discard the anti tip bracket or LP Gas Conversion Kit supplied with the r...

Page 5: ...nd may void the warranty Before installation make sure that the voltage and frequency listed on the rating label correspond with the household electrical supply This data must correspond to prevent injury and appliance damage Consult a qualified electrician if in doubt Before installation select a suitable area that abides by the clearance measure ments noted in the RANGE INSTALLATION section of th...

Page 6: ... an emergency situation Before servicing turn off the gas valve and disconnect the power supply by either removing the fuse unplugging the unit or manually tripping the circuit breaker Under no circumstance open the outer casing of the appliance This is a safety hazard and may damage the appliance Service or repairs should only be carried out by a qualified service technician Do not attempt to repa...

Page 7: ...ktop or oven Do not leave the range unattended while in use Boil overs cause smoking and greasy spillovers may ignite The range and its parts will be extremely hot during use Always use protective gear such as oven mitts or potholders when using the appliance Do not touch the open flame Use only dry heat resistant potholders Moist or damp potholders used on hot surfaces can result in steam burns D...

Page 8: ...l burners The resulting heat accumulation can damage the appliance Select a heat source size that is as close as possible to the bottom diameter of the cookware Also keep gas flames confined to the base only and not the sidewalls of the cookware Do not heat empty pots or pans This may cause damage to the cookware and the surrounding area Danger of fire Always turn pot handles to the side or back of ...

Page 9: ...idual heat or if the appliance is turned on inadvertently Always switch the control knobs off after use WARNING DO NOT store or use gasoline aerosols combustible liquids or other easily flammable vapors or materials in the vicinity of this appliance Exhaust fan ventilation hoods and grease filters should be kept clean Do not allow grease to accumulate on hood or filter Greasy deposits in the fan cou...

Page 10: ...s Attached 1 Tip Over Bracket Set 2 Brackets 2 Bolts 4 Screws 4 Wall Anchors 1 Liquid Propane Gas Conversion Kit Brass Orifices Nozzles 15 Pieces 10 Blue Burner Knobs 8x Standard 2x Oven Model No GR 670B SS Only Burner Gate Control Panel Oven 1 Light Button Cool Air Intake Oven 1 18 Conventional Front Vent Panel Standard Burner Double Burner Griddle Top Vent Oven 2 Light Button Convection Fan Butto...

Page 11: ...M R FRONT MIDDLE RIGHT F M R BACK RIGHT B R FRONT RIGHT F R Position Left Right Broil Function Right Oven only 8 Burners 2 Ovens SEMI RAPID AUXILIARY SEMI RAPID DOUBLE FLAME SEMI RAPID AUXILIARY SEMI RAPID DOUBLE FLAME NG Orifice 1 36 1 07 1 57 1 36 2 0 73 1 36 1 07 1 57 1 36 2 0 73 1 68 2 13 1 42 LP Orifice 0 9 0 74 1 0 0 89 2 0 53 0 9 0 74 1 0 0 89 2 0 53 1 09 1 4 0 94 Oven 1 18 Conventional Oven ...

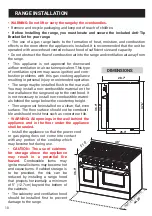
Page 12: ...d operation The range may be installed flush to the rear wall You may install a non combustible material on the rear wall above the range and up to the vent hood It is not necessary to install non combustible materi als behind the range below the countertop height The range must be installed on a clean flat even surface The floor surface should not be combusti ble and should resist heat such as co...

Page 13: ...appliance is 18 inches Front View Side View 36 18 13 48 30 Minimum 13 13 0 1 4 To cabinets below cooktop height and at rear of the range For panels left and right of the range front Maximum depth for cabinets above countertops 0 Minimum to cabinets on either side of the range To cabinets below cooktop height and at rear of the range Make sure the wall coverings countertop and cabinets around the a...

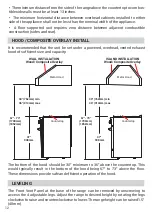
Page 14: ...otating the legs clockwise to raise and counterclockwise to lower The range height can be raised 1 5 40mm 30 762mm min 36 914mm max 67 73 1700mm 1852mm 37 938mm 30 762mm min 36 914mm max Countertop Countertop Metal Hood Metal Hood WALL INSTALLATION Wood Composite Overlay ISLAND INSTALLATION Wood Composite Overlay 37 938mm 67 73 1700mm 1852mm The minimum distance from the side of the range above th...

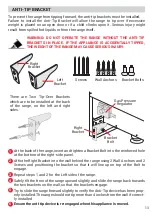
Page 15: ... range insert and tighten a Bracket Bolt into the reinforced hole at the bottom of the right side panel Affix the Right Bracket into the wall behind the range using 2 Wall Anchors and 2 Screws and positioning the bracket so that it will line up on top of the Bolt to engage Repeat steps 1 and 2 for the Left side of the range Safely tilt the front of the range upward slightly and slide the range back...

Page 16: ...nal Electrical Code ANSI NFPA 70 latest edition A copy of this standard may be obtained from the National Fire Protection Association The power supply must be the correct polarity Reverse polarity will result in contin uous sparking of the electrodes even after flame ignition If there is any doubt as to whether the power supply has the correct polarity or grounding have it checked by a qualified el...

Page 17: ... wall receptacle is encountered it is the responsibility and obligation of the customer to have it replaced with a properly grounded three prong wall receptacle by a licensed electrician All cord connected appliances shall include instructions relative to location of the wall receptacle and a warning to the user to disconnect the electrical supply before serving the appliance WARNING Make sure the...

Page 18: ...e gas appliance pressure regulator has been set for the gas which the appliance will use The gas appliance pressure regulator is located at the bottom right rear of the range Installation of this range must conform with local codes or in the absence of local codes the National Fuel Gas Code ANSI Z223 1 NFPA 54 This range has been design certified according to ANSI Z21 1b 2012 latest edition A state...

Page 19: ...pply The supply line must be equipped with an approved external gas shut off valve located near the range in an accessible location Do not block access to the shut off valve All connections to the gas piping must be wrench tightened Do not overtighten or allow pipes to turn when tightening Any pipe connections must be made using a thread sealant approved for gas connections Failure to correctly in...

Page 20: ...e in a flat horizontal position WARNING Always keep the Burner Caps in place when using the burners WARNING It is important to install the Burner parts in the correct order Incorrect assembly could cause flames or gas to escape or burn between parts resulting in poor combustion or damage to your range top 2 1 SB Standard Burner DB Double Burner Cast Iron Burner Cap Aluminum Burner Head Igniter Bur...

Page 21: ...positions The griddle is reversible such that both sides flat and ridged can be heated Ensure the grease trap is positioned toward the front of the range rather than toward the Top Vent OVEN RACKS There are 2 Oven Racks for each oven Slide the Stainless Steel Oven Racks into any of the positions on the fixed Oven Rack Guides The opening on the rack should be positioned closest to the oven door Use ...

Page 22: ... warm water and liquid dish soap and dry Wipe down the interior of the oven and the Oven Rack Guides with a clean damp cloth Dry thoroughly before installing the parts See COMPONENT PART ASSEM BLY A Standard Burner Ignite HI SIM B Small 18 Oven 150 450 C Large 30 Oven 150 500 BROIL A A A A B C A A A A Some Gas Range models include an alternative set of Burner Knobs that can be used to replace the ...

Page 23: ...iance is heated The harmless odor will dissipate after a short time and does not indicate a faulty connection or appliance defect A B C NG LP Yellow at tip of primary flame 1 Service Required When burning natural gas NG the burner flames should be sharp and almost completely blue with possibly a small hint of yellow in the center of the flame as seen in figure A When burning liquid propane LP the f...

Page 24: ...aster but not as evenly as thick cookware Stir the food frequently to prevent burning Always place the cookware on the grate The cookware must not be placed directly on the burner RAPID SEMI RAPID AUXILIARY Boiling steaming toasting paellas stir fry Escalopes steaks omelets frying Steamed potatoes fresh vegetables vegetable stews pasta Cooking casseroles rice pudding caramel Reheating and keeping ...

Page 25: ...due to external causes such as a draft or door slamming The burners will automatically spark to reignite the flame preventing gas leaking inadver tently 1 When a flame is visible keep the Burner Control Knob pressed and continue to turn the knob counterclock wise to adjust the flame size If the knob stays at HI it will continue to click The burner can be continuously regulated between highest and ...

Page 26: ...uld be regulated so that it never protrudes beyond the cookware Since the outer part of the gas flame is much hotter than the center of the flame the flame tips should remain under the base of the cookware Protruding flame tips give off unnecessary heat into the air and can damage pot handles and increase the risk of burning ENERGY SAVING TIPS If possible cook in covered pots or pans This prevents...

Page 27: ...lowly and will stay warm so high heat is typically not required If you do need to use high heat lower the setting once the desired heat has been reached When finished and the Griddle is still hot scrape grease into the grease collection trap after use Clean the Griddle See CLEANING instructions Note The Griddle can be placed in the oven and is safe to use up to 500 F WARNING Use wooden silicone or ...

Page 28: ...l traps heat and may create a fire hazard OVEN FUNCTIONS CONVENTIONAL NATURAL AIR FLOW OVEN 1 OVEN 2 Both ovens small and large operate as conventional ovens Heat is transferred into the oven from the heating element in the bottom of the oven cavity Heat is then circulated by natural airflow This is a traditional bake setting Conventional cooking is best for less tender cuts of meat that should be ...

Page 29: ...king process by pushing the button in again BROIL Broiling is a method of cooking food directly under an infrared broiler in the oven The top heating element of the oven will radiate downwards and provide high direct heat to quickly cook the food s surface searing and sealing in juices Ideal for tender cuts of meat The Broil feature temperature is 500 F Light Convection Fan Operation The Broil fun...

Page 30: ...ng broiling operation Note Rack position affects doneness It is normal and necessary for some smoke to be present for a broiled flavor You should never broil for longer than 10 minutes as this could lead to burnt food or even fire For foods with longer cooking times it s best to use your broiler to create a crispy crust either at the beginning or end of the cooking process For further cook ing plac...

Page 31: ... dish soap Hand washing is recommended to maintain the enamel finish Never place a hot Griddle in cold water to prevent thermal shock For stubborn stains use a paste of baking soda and water and apply with a soft brush Wash with water and mild dish soap Avoid using harsh abrasives oven cleaners or scouring pads to maintain the enamel finish on the Griddle Nylon or soft abrasive pads brushes may be u...

Page 32: ...pecially sugary acidic and toma to based sauces as soon as the range has cooled to avoid staining of the surface If spills are allowed to cook on the surface they may permanently stain Never wipe up a hot porcelain surface with a damp sponge It may cause chipping or hair line cracks Do not use harsh or abrasive cleaning agents rust removers waxes polishes steel wool metal scrapers or sharp objects...

Page 33: ...t lint free cloth OVEN RACKS AND RACK GUIDES Remove the Oven Racks from the oven by sliding out The Oven Rack Guides can be unscrewed for thorough cleaning Clean with a solution of detergent and hot water To clean heavy soil use a scouring pad such as steel wool with plenty of water and a mild abrasive such as a paste of baking soda and water or oven dedicated cleaning products Dishwasher Safe CON...

Page 34: ...steel REPLACING THE OVEN LIGHT Turn off the power at the main power supply To prevent electrical shock or personal injury make sure the oven and light bulb are cool and power to the oven has been turned off before replacing the light bulb Remove the lens cover from the housing by pulling straight out then replace with a 25W appliance bulb Make sure the lens cover is in place prior to using the ove...

Page 35: ...les around burners are obstructed No Power Supply Oven light and Igniters do not come on either Incorrect cooking time or temperature The light bulb is loose The light bulb has blown This is the sound of metal heating and cooling Make sure the unit is properly connected to the power supply Remove the burner heads and clean them Check the igniter area for burned on food or grease Clean burner head ...

Page 36: ...mp Oven Fan 120V 60Hz 0 53 Amp Oven Lights 120V 60Hz 0 2 Amp 25 W JANSKA USA 5175 Commerce Dr Baldwin Park CA support janskaus com If you are not happy with the product for any reason please contact us at support janskaus com with your feedback or questions and we will do our best to make things right for you Your purchase comes with a 100 satisfaction guarantee from Janska ...

Reviews: