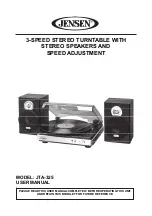
background image


3-SPEED STEREO TURNTABLE WITH 

STEREO SPEAKERS AND   

SPEED ADJUSTMENT


MODEL: JTA-325 
USER MANUAL 


PLEASE READ THIS USER MANUAL COMPLETELY BEFORE OPERATING THIS UNIT 

AND RETAIN THIS BOOKLET FOR FUTURE REFERENCE. 

Summary of Contents for JTA-325

Page 1: ...SPEED STEREO TURNTABLE WITH STEREO SPEAKERS AND SPEED ADJUSTMENT MODEL JTA 325 USER MANUAL PLEASE READ THIS USER MANUAL COMPLETELY BEFORE OPERATING THIS UNIT AND RETAIN THIS BOOKLET FOR FUTURE REFEREN...

Page 2: ...liance should be situated so that its location or position does not interfere with its proper ventilation For example the appliance should not be situated on a bed sofa rug or similar surface that may...

Page 3: ...ed when the apparatus has been damaged in any way such as power supply cord or plug is damaged liquid has been spilled or objects have fallen into the apparatus the apparatus has been exposed to rain...

Page 4: ...evision reception which can be determined by turning the equipment off and on the user is encouraged to try to correct the interference by one or more of the following measures Reorient or relocate th...

Page 5: ...safe level Start your volume control at a low setting Slowly increase the sound until you can hear it comfortably and clearly and without distortion Once you have established a comfortable sound leve...

Page 6: ...he speakers are connected to the correct sockets CONNECTING THE AC POWER CORD 1 Unwind the AC power cord fully and connect it to any convenient household 120V 60Hz AC outlet 2 Turn on the system by ro...

Page 7: ...tory Rotate the ANTI SHOCK LOCK DOWN SCREW in a clockwise direction to release the turntable and activate the anti shock feature before using the turntable STEREO PHONOGRAPH OPERATION Please Note Befo...

Page 8: ...PITCH ADJUST The PITCH ADJUST locates on the back of the unit allows you to fine tune the playing speed of the record once the correct speed 33 45 78 RPM is chosen Turn the Pitch Adjust Control to sl...

Page 9: ...E 1 Insert the Audacity disc included into the CD drive of your computer 2 Click on My computer on the desktop 3 Double click CD drive to view the contents of the CD and select Windows under Audacity...

Page 10: ...then click Audio Properties towards the bottom of the menu to select Audio properties interface 4 In the Sound Recording field click the pull down menu to select USB PnP Audio Device as Default devic...

Page 11: ...restrictions found on the software disc Use of the Audacity software is subject to those conditions and restriction For additional help with recording and editing music by using the Audacity software...

Page 12: ...k Preferences at the bottom of the Edit menu you can set the Devices Quality and various settings here 4 Adjust the input and output volume by sliding the Input and Output Volume bars Output Volume In...

Page 13: ...ck File menu and move down to Export to convert the file to WAV format or MP3 format 2 Click on WAV or MP3 format you want to save the music as in pull down menu of Save as type field and you will be...

Page 14: ...rating your unit under direct sunlight or in hot humid or dusty places 2 Keep your unit away from heating appliances and sources of electrical noise such as fluorescent lamps or motors 3 Unplug the un...

Page 15: ...us Brush from the base to the tip as shown below For records with only light amounts of dust we recommend brushing them off with a carbon fiber brush or velvet pad before playing them Use a good quali...

Page 16: ...on the unit Unit is ON but there is low or no volume The volume Control has been turned all the way down Rotate the Volume control knob to a higher output Sound is distorted Volume level is set too h...

Page 17: ...re to provide reasonable care and necessary maintenance as outlined in the user manual 3 Warranty of all SPECTRA products applies to residential use only and is void when products are used in a nonres...

Page 18: ...CIDADES CON ALTAVOCES Y AJUSTE DE VELOCIDAD MODEL JTA 325 MANUAL DEL PROPIETARIO Por favor lea y observe cuidadosamente este manual de Instrucciones cuidadosamente antes de utilizar la unidad y ret ng...

Page 19: ...as instrucciones Todas las instrucciones de la operaci n y del uso deben ser seguidas 5 No use este aparato cerca del agua La aplicaci n no se debe utilizar cerca del agua por ejemplo cerca de una ba...

Page 20: ...st n derramados en el recinto con aberturas 18 El aparato no debe exponerse a goteos ni salpicaduras y ning n objeto con l quido como un jarr n debe colocarse sobre el aparato 19 Referir todos que man...

Page 21: ...da ina a las radiocomunicaciones Sin embargo no hay ninguna garant a de que no vaya a ocurrir interferencia en ninguna instalaci n Determinada Si este equipo causa interferencia no deseada contra la...

Page 22: ...ente fuerte y da ino para su o do Prev ngalo sintonizando su equipo dentro de un rango de seguridad ANTES de que su o do se adapte Para establecer un nivel seguro Inicie el control del volumen con un...

Page 23: ...correcta CONEXI N DEL CABLE DE ELECTRICIDAD 1 Desenrolle el cable de alimentaci n de corriente CA por completo y con ctelo a un tomacorriente CA de 120V 60Hz 2 Encienda el sistema por poder girar ence...

Page 24: ...un sistema integrado antigolpes y la tornamesa tiene un bloqueo de seguridad al ser enviada de la f brica Gire el tornillo de seguridad y bloqueo contra golpes No 6 hacia la derecha como giran las man...

Page 25: ...e desconectar el cable Aux in antes de utilizar el tocadiscos CONTROL DE GRADO PITCH El control de Grado Pitch le permite afinar la velocidad de reproducci n del disco una vez se haya seleccionado la...

Page 26: ...p audacity sourceforge net INSTALACI N DEL SOFTWARE AUDACITY 1 Inserte el disco de Audacity incluido en la unidad de CD de su computadora 2 Haga clic en Mi PC en su escritorio 3 Haga doble clic en la...

Page 27: ...de audio hacia la parte inferior del men para seleccionar la interfaz Propiedades de audio 4 En el campo Grabaci n de sonidos haga clic en el men desplegable para seleccionar Controlador de Audio USB...

Page 28: ...n que se encuentran en el disco de software El uso del software Audacity est sujeto a esas condiciones y restricciones Para obtener ayuda adicional con la grabaci n y edici n de m sica utilizando el s...

Page 29: ...cias en la parte inferior del men Editar aqu puede hacer varios ajustes como Dispositivos Calidad y varios 4 Ajuste el volumen de entrada y salida deslizando las barras de volumen de entrada y salida...

Page 30: ...a vez que haya terminado de grabar aseg rese de guardar su m sica grabada en la computadora 1 Haga clic en el men Archivo y baje a Exportar para convertir el archivo a formato WAV o MP3 2 Haga clic en...

Page 31: ...el clic en Buscar bot n en la pantalla del ordenador para buscar el archivo lame_enc dll archivo en el directorio que ha instalado Ver Fig 1 y 2 a continuaci n y haga clic en OK para finalizar la inst...

Page 32: ...d PRECAUCI N Nunca permita que caiga agua u otros l quidos adentro de la unidad CUIDADO Y MANTENIMIENTO DEL DISCO Para garantizar el mejor sonido y el menor desgaste de sus discos es esencial mantener...

Page 33: ...le de suministro de corriente no est enchufado adecuadamente a un tomacorriente de la pared Conecte el cable de alimentaci n de CA a una toma de corriente El tomacorriente de la pared no funciona Ench...

Page 34: ...mplazado de acuerdo a garant a los gastos de retorno ser n por cuenta de SPECTRA No existen otras garant as expresas diferentes de aquellas declaradas en el presente documento Esta garant a es v lida...

Page 35: ...por 40 00 para cubrir el costo de reparaci n manejo y correo de retorno Todas las devoluciones cubiertas por la garant a deben ser enviadas por correo prepago Se recomienda que primero entre en contac...

Reviews: