
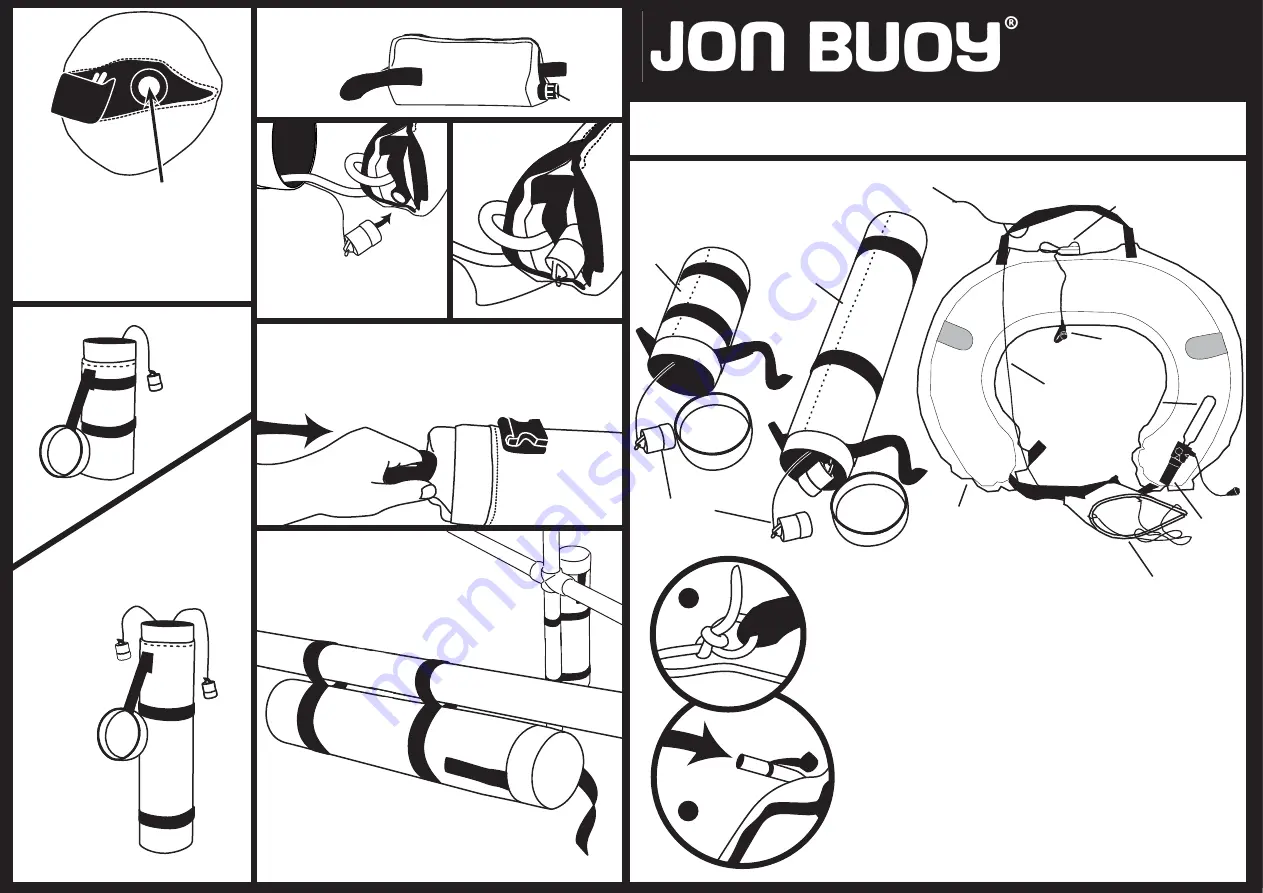
j) Ensure the green cap in the end
of the capsule is clear of any
obstructions.
The pouch is now ready to
be stowed in the tube.
Close the pouch using the velcro.
INFLATABLE HORSESHOE
4. Installation
Install vertically or horizontally
(at least 25mm off the ground).
Servicing: It is recommended that the
Horseshoe is serviced annually at a
Jon Buoy approved service station.
k) Locate the sealing cap(s)
One on single tube
Two on double tube
RE-ARM & RE-PACK
INSTRUCTIONS
b
a
1. Preparation
a) Separate the inflated Horseshoe, the Drogue and
the pouch by undoing the bowline knots (at the
handle).
b) Dry the drogue, pouch and the inflated Horseshoe
naturally in the air.
c) If the Horseshoe has been deflated, re-inflate
carefully using the oral valve.
WARNING: Do not use a high pressure air source to
re-inflate as this will damage the valve.
d) Check all of the component parts for damage.
WWW.JONBUOY.COM
T: +44 (0)2380 720800
F: +44 (0)2380 720801
MAIL@ JONBUOY.COM
Light (if fitted)
Light switch
(if fitted)
Capsule
Gas cylinder
Drogue
Oral valve
(underneath)
Drogue line
Single
container
Sealing cap
l) Ensure that
capsule protudes
20mm.
Capsule
m) Attach the sealing cap
over the operating
mechanism capsule.
Pouch retaining line
n) Push the pouch into the tube so that it is just below
the lip and ensure that the pouch handle is stowed on
top. Fit the cap in place.
Double
container