background image

EN SP

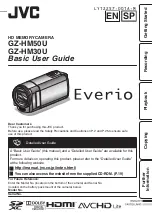
HD MEMORY CAMERA

GZ-HM50U

GZ-HM30U

Basic User Guide

Dear Customers

Thank you for purchasing this JVC product.
Before use, please read the Safety Precautions and Cautions on 

P.2

 and 

P.25

 to ensure safe

use of this product.

.

Detailed User Guide

A “Basic User Guide” (this manual) and a “Detailed User Guide” are available for this

product.

For more details on operating this product, please refer to the “Detailed User Guide”

at the following website.

o

http://manual.jvc.co.jp/index.html/

o

You can also access the website from the supplied CD-ROM. (

P.19

)

For Future Reference:

Enter the Model No. (located on the bottom of the camera) and Serial No.

(located on the battery pack mount of the camera) below.

Model No.
Serial No.

L Y T 2 2 5 7 - 0 0 1 A - M

Getting Started

Recording

Playback

Copying

Further

Information

Summary of Contents for Everio GZ-HM30U

Page 1: ...d User Guide are available for this product For more details on operating this product please refer to the Detailed User Guide at the following website o http manual jvc co jp index html o You can also access the website from the supplied CD ROM P 19 For Future Reference Enter the Model No located on the bottom of the camera and Serial No located on the battery pack mount of the camera below Model...

Page 2: ... sufficient space on all sides to allow for ventilation 10 cm 3 15 16 or more on both sides on top and at the rear Do not block the ventilation holes If the ventilation holes are blocked by a newspaper or cloth etc the heat may not be able to get out No naked flame sources such as lighted candles should be placed on the apparatus When discarding batteries environmental problems must be considered ...

Page 3: ...member that this unit is intended for private consumer use only Any commercial use without proper permission is prohibited Even if you record an event such as a show performance or exhibition for personal enjoyment it is strongly recommended that you obtain permission beforehand Trademarks Make a backup of important recorded data AVCHD AVCHD logo AVCHD Lite and AVCHD Lite logo are trademarks of Pa...

Page 4: ... User Guide this manual and a Detailed User Guide are available for this product For more details on operating this product please refer to the Detailed User Guide at the following website o http manual jvc co jp index html o You can also access the website from the supplied CD ROM P 19 Verifying the Accessories AC Adapter AC V11U Battery Pack BN VG108U USB Cable Type A Mini Type B QAM1313 001 AV ...

Page 5: ...ch J OK INFO Button Confirms the selection Displays information as follows Recording Displays the remaining time and battery power Playback Displays file information such as recording date K AV Connector P 15 17 L MENU Button P 21 M HDMI Connector P 14 N USB Connector P 20 O COMPONENT Component Connector P 14 P Zoom Volume Lever Index u P 12 13 Q i AUTO Intelligent Auto Button P 12 R DC Connector ...

Page 6: ...k CAUTION Be sure to use JVC battery packs 0 If you use any other battery packs besides JVC battery packs safety and performance cannot be guaranteed 0 Charging time Approx 2 h 10 m using supplied battery pack The charging time is when the unit is used at 25 C 77 F If the battery pack is charged outside the room temperature range of 10 C to 35 C 50 F to 95 F charging may take a longer time or it m...

Page 7: ...To change the setting A Press MENU B Press UP or DOWN to select VIDEO QUALITY and press OK INFO C Press UP or DOWN to select the video quality D Press OK INFO Setting complete High Definition LS 16 9 Higher video quality LE 16 9 Standard Definition SSW 16 9 SS 4 3 SEW 16 9 SE 4 3 More recording time For the approximate video recording time refer to P 22 For more information refer to the Detailed U...

Page 8: ...is closed the unit turns off o To remove the card Push the card inward once then pull it out straight Base NOTE Operations are confirmed on the following SD cards Manufacturer Panasonic TOSHIBA SanDisk ATP Eye Fi Video A Class 4 or higher compatible SDHC card 4 GB to 32 GB Class 4 or higher compatible SDXC card Max 64 GB Eye Fi Eye Fi Connect X2 Eye Fi Explore X2 Eye Fi Pro X2 Only the specified m...

Page 9: ...ther devices Format initialize the card using FORMAT SD CARD from media settings All data on the card will be deleted when it is formatted Copy all files on the card to a computer before formatting A Press MENU B Select MEDIA SETTINGS and press OK C Select FORMAT SD CARD and press OK FORMAT SD CARD D Select FILE and press OK FORMAT SD CARD FILE E Select YES and press OK F After formatting press OK...

Page 10: ...e 2011 JAN 1 10 00 CLOCK SETTING DATE TIME 0 Press UP or DOWN to adjust the setting value and press OK to confirm it The cursor moves to the next item 0 Repeat this step to input the year month day hour and minute 4 Press UP or DOWN to select the region where you live and press OK 0 The city name and time difference are displayed GMT CLOCK AREA SETTING o To return to the previous screen Press MENU...

Page 11: ...age on the display can be changed A Press MENU B Select DISPLAY SETTINGS and press OK DISPLAY SETTINGS C Select LANGUAGE and press OK LANGUAGE D Select the desired language and press OK NOTE 0 SET DATE TIME is displayed when you turn on this unit after it has not been used for a prolonged period Charge this unit for more than 24 hours before setting the clock For more information refer to the Deta...

Page 12: ...ual with every press If the mode is H Manual press the S button to switch Check if the recording mode is P Intelligent Auto Open the lens cover Zoom ratio setting depends on the setting of VIDEO QUALITY P 27 o Indications during video recording 0 00 00 000 22 Battery Indicator Recording Media Recording in Progress Record Standby Remaining Recording Time Video Quality Scene Counter Image Stabilizer...

Page 13: ...n or to SSW SS SEW or SE to view the videos recorded in standard definition before selecting the playback mode P 7 o To delete selected files from the index screen A Press MENU select DELETE and press OK B Select FILE SELECT and press OK C Press UP or DOWN to select files and press OK D Press MENU select DELETE and press OK to confirm deletion E After deleting is complete press OK o Usable operati...

Page 14: ... cable TV Audio Input R Audio Input L Component Video Input Yellow Red White Red Blue Green AV Cable Provided To AV Connector Component Cable Optional To COMPONENT Connector NOTE 0 For questions about the TV or method of connection contact your TV s manufacturer 0 Use a High Speed HDMI Cable category 2 cable as the HDMI mini cable 0 When playing back in HD quality set COMPONENT OUTPUT in the CONNE...

Page 15: ... menu to ON Set ON SCREEN DISPLAY in the playback menu to ON o When images look unnatural on the TV Images do not appear on the TV properly 0 Disconnect the cable and connect again 0 Turn off and on this unit again Images are projected vertically on the TV 0 Set VIDEO OUTPUT in the CONNECTION SETTINGS menu to 4 3 Images are projected horizontally on the TV 0 Adjust the TV s screen accordingly The ...

Page 16: ...ternal HDD Device Blu ray Recorder X F 1 X X See manual of recorder DVD Recorder X F 1 X P 17 VCR X P 17 Computer 2 2 2 X P 18 1 Only on AVCHD Lite compatible devices 2 For details on how to create a disc using a computer refer to the Detailed User Guide NOTE 0 It is not possible to connect and record to a DVD writer external Blu ray drive or external hard disk Copying 16 For more information refe...

Page 17: ...to select the playback mode 3 Prepare to record Preparation on TV and VCR DVD recorder 0 Switch to a compatible external input 0 Insert a DVD R or video tape Preparation on this unit 0 Set VIDEO OUTPUT in the CONNECTION SETTINGS menu to the aspect ratio 4 3 or 16 9 of the connecting TV 0 To include the date during dubbing set DISPLAY ON TV in the CONNECTION SETTINGS menu to ON Set ON SCREEN DISPLA...

Page 18: ...talled versions only Windows 7 o Windows XP Memory At least 1 GB Processor High definition Intel Core Duo CPU 1 66 GHz or higher Intel Core 2 Duo CPU 2 13 GHz or higher recommended Standard definition Intel Pentium 4 CPU 3 0 GHz or higher Intel Pentium D CPU 3 0 GHz or higher recommended Service Pack 3 Home Edition or Professional Pre installed versions only Windows XP o Other requirements Display...

Page 19: ...d perform simple editing using the provided software 1 Load the provided CD ROM into your PC Windows Vista Windows 7 only A Click Run INSTALL EXE in the auto play dialog box B Click Continue on the user account control screen 0 Software Setup appears after a while 0 If it doesn t appear double click the CD ROM icon in My Computer Windows XP only 0 Go to Step 2 2 Click Everio MediaBrowser 3 0 Follo...

Page 20: ...CT TO PC and press OK 4 Select BACK UP and press OK BACK UP CONNECT TO PC 0 The provided software Everio MediaBrowser starts up on the PC The subsequent operations are to be performed on the PC 5 Select the volume 2 1 Click Click 6 Start backup Click Saving destination PC 7 After backup is complete click OK If you encounter any problems with the provided software Everio MediaBrowser please consult...

Page 21: ...O POWER OFF OPERATION SOUND DEMO MODE BASIC SETTINGS MONITOR BRIGHTNESS DATE DISPLAY STYLE LANGUAGE DISPLAY SETTINGS Common Menu ON SCREEN DISPLAY REC MEDIA SETTING GZ HM50 Only CLOCK ADJUST SEAMLESS REC CTRL GZ HM50 Only PLAYBACK OTHER FILE SEARCH DATE MOVE GZ HM50 Only COPY GZ HM50 Only PROTECT CANCEL DELETE Playback Menu REC MEDIA SETTING GZ HM50 Only CLOCK ADJUST x v Color SEAMLESS RECORDING G...

Page 22: ...er applications or drivers Recordable Time You can check the video recording time by pressing the OK INFO button Approximate Video Recording Time Quality Built in Memory GZ HM50 SDHC SDXC Card 4 GB 8 GB 16 GB 32 GB 48 GB 64 GB LS 1 h 20 m 40 m 1 h 30 m 3 h 10 m 6 h 30 m 9 h 30 m 13 h LE 3 h 20 m 1 h 50 m 3 h 40 m 7 h 20 m 15 h 10 m 22 h 20 m 30 h 20 m SSW SS 2 h 30 m 1 h 20 m 2 h 50 m 5 h 40 m 11 ...

Page 23: ...m and this unit powers on automatically 5 If the above do not solve the problem consult your nearest JVC dealer or JVC service center Trouble Trouble Action Page Power POWER CHARGE lamp starts blinking when the monitor is closed 0 The battery pack is being charged P 6 Recording Recording cannot be performed 0 Set to the recording mode with the L Play Record button P 13 Recording stops automaticall...

Page 24: ...tions RECORDING FAILURE 0 Turn off and on this unit again 0 If the above does not solve the problem back up your files and execute FORMAT BUILT IN MEM GZ HM50 only or FORMAT SD CARD inthe MEDIASETTINGS menu Alldatawillbe deleted DATA RECORDED FILE IS TOO SMALL TO BE SAVED 0 When recording is stopped with the recorded time less than 0 00 00 17 the video will not be saved MEMORY CARD ERROR 0 Turn of...

Page 25: ... pack over a long period of time remove from charger or powered unit when not in use as some machines use current even when switched off do not drop or subject to strong impact ATTENTION The product you have purchased is powered by a rechargeable battery that is recyclable Please call 1 800 8 BATTERY for information on how to recycle this battery USA and Canada only Recording Medium Be sure to fol...

Page 26: ...e the power is on leave the battery pack attached when the camcorder is not in use place naked flame sources such as lighted candles on the apparatus expose the apparatus to dripping or splashing leave dust or metal objects adhered to the power plug or an AC wall outlet insert any objects in the camcorder Avoid using the unit in places subject to excessive humidity or dust in places subject to soo...

Page 27: ... 1 050 000 pixels dynamic zoom OFF SS SE 340 000 to 790 000 pixels dynamic zoom ON SS SE 470 000 to 790 000 pixels dynamic zoom OFF Lens F1 8 6 3 f 2 9 mm to 116 0 mm LS LE 35 mm conversion 45 6 mm to 1 824 mm AIS ON LS LE 35 mm conversion 42 0 mm to 1 680 mm AIS OFF SSW SEW 35 mm conversion 45 6 mm to 3 182 mm dynamic zoom ON SSW SEW 35 mm conversion 45 6 mm to 1 824 mm dynamic zoom OFF SS SE 35 ...

Page 28: ...roduct are subject to changes for further improvement without prior notice Index A AC adapter 6 25 Apple 19 AV Connection 15 17 B Battery Pack 6 25 C CD ROM 19 Clock Adjust 10 Component Connection 14 Copy Back Up 16 D Date Time Setting 10 Deleting Files 13 Dubbing Duplicate 17 F Format SD Card 9 H HDMI Connection 14 I Installation 19 L Language Setting 11 LCD Monitor 25 M Mac 19 Menu Settings 21 R...

Page 29: ...ntran disponibles para este producto Para más detalles sobre el funcionamiento de este producto consulte el Guía detallada del usuario en el siguiente sitio web o http manual jvc co jp index html o También puede acceder al sitio web desde el CD ROM provisto P 19 Para futuras consultas Introduzca el número de modelo ubicado en la parte inferior de la cámara y el número de serie ubicado en el compar...

Page 30: ...puede requerirse una manipulación especial Visite www dtsc ca gov hazardouswaste perchlorate Cuando el equipo se encuentra instalado en un gabinete o en un estante asegúrese que tenga suficiente espacio en todos los lados para permitir la ventilación 10 cm 3 15 16 o más en cada lado en la parte superior y en la parte trasera No bloquee los orificios de ventilación Si los orificios de ventilación e...

Page 31: ...datos importantes que haya grabado JVC no se responsabilizará de cualquier pérdida de datos Le sugerimos que guarde los datos importantes que haya grabado copiándolos en un DVD o cualquier otro soporte de grabación Recuerde que esta cámara debe usarse únicamente para fines privados Marcas comerciales Está prohibido cualquier uso comercial sin la autorización correspondiente Aunque grabe acontecimi...

Page 32: ... este manual y un Guía detallada del usuario se encuentran disponibles para este producto Para más detalles sobre el funcionamiento de este producto consulte el Guía detallada del usuario en el siguiente sitio web o http manual jvc co jp index html o También puede acceder al sitio web desde el CD ROM provisto P 19 Comprobación de los accesorios Adaptador de CA AC V11U Batería BN VG108U Cable USB t...

Page 33: ... la selección Muestra información de la siguiente manera Grabación Muestra el tiempo y carga de batería restantes Reproducción Muestra la información de los archivos como por ejemplo la fecha de grabación K Conector AV P 15 17 L Botón MENU P 21 M Conector HDMI P 14 N Conector USB P 20 O Conector COMPONENT componente P 14 P Palanca de zoom volumen Índice u P 12 13 Q Botón i AUTO auto inteligente P ...

Page 34: ... utiliza alguna otra batería que no sea JVC no se pueden garantizar la seguridad ni el rendimiento del producto 0 Tiempo de carga Aprox 2 h 10 m utilizando la batería suministrada El tiempo de carga aplica cuando la unidad se utiliza a 25 ºC 77 ºF Si se carga la batería en un rango de temperatura ambiente que no se encuentre entre 10 ºC y 35 ºC 50 F y 95 F la carga puede tardar más tiempo en reali...

Page 35: ...ación A Presione MENU B Presione UP o DOWN para seleccionar CALIDAD DE VÍDEO y presione OK INFO C Presione UP o DOWN para seleccionar la calidad de video D Presione OK INFO Configuración completa Alta definición LS 16 9 Calidad superior de video LE 16 9 Definición estándar SSW 16 9 SS 4 3 SEW 16 9 SE 4 3 Más tiempo de grabación Para el tiempo aproximado de grabación de video consulte P 22 Para obt...

Page 36: ...e apaga la unidad o Para extraer la tarjeta Presione la tarjeta hacia dentro y luego retírela hacia arriba base NOTA Se ha confirmado el funcionamiento con las siguientes tarjetas SD Fabricante Panasonic TOSHIBA SanDisk ATP Eye Fi Vídeo A Tarjeta SDHC compatible Clase 4 o superior de 4 GB a 32 GB Tarjeta SDXC compatible Clase 4 o superior máximo 64 GB Eye Fi Eye Fi Connect X2 Eye Fi Explore X2 Eye...

Page 37: ...icialice la tarjeta utilizando FORMATEAR TARJETA SD de los ajustes de soportes Si se formatea la tarjeta todos los datos incluidos en ella se eliminarán Realice una copia de todos los archivos a una computadora antes de realizar el formateado A Presione MENU B Seleccione CONFIG MEDIOS y presione OK C Seleccione FORMATEAR TARJETA SD y presione OK FORMATEAR TARJETA SD D Seleccione ARCHIVO y presione...

Page 38: ...11 JAN 1 10 00 CONF RELOJ FECHA HORA 0 Presione UP o DOWN para establecer el valor de ajuste y presione OK para confirmarlo El cursor se mueve al siguiente ítem 0 Repita este paso para ingresar el año mes día hora y minuto 4 Presione UP o DOWN para seleccionar la región donde usted vive y presione OK 0 Se mostrará el nombre de la ciudad y la diferencia horaria GMT CONFIG RELOJ ÁREA o Para volver a...

Page 39: ...nformación de la pantalla puede cambiarse A Presione MENU B Seleccione CONFIG PANTALLA y presione OK CONFIG PANTALLA C Seleccione LANGUAGE y presione OK LANGUAGE D Seleccione el idioma que desee y presione OK NOTA 0 AJUSTE FECHA HORA aparece si se enciende esta unidad después de no haberla utilizado durante un periodo prolongado de tiempo Cargue esta unidad durante más de 24 horas antes de ajustar...

Page 40: ...siona Si el modo es Manual H presione el botón S para cambiar de modo Compruebe que el modo de grabación sea P Auto Inteligente Abra la cubierta de la lente La proporción del zoom depende del ajuste de CALIDAD DE VÍDEO P 27 o Indicaciones durante la grabación de vídeo 0 00 00 000 22 Indicador de batería Grabación de soportes Grabación en curso Espera de grabación Tiempo restante de grabación Calid...

Page 41: ...antes de seleccionar el modo de reproducción P 7 o Para eliminar los archivos seleccionadodelapantalladeíndice A Presione MENU seleccione ELIMINAR y presione OK B Seleccione SELECCIÓN ARCHIVOS y presione OK C Presione UP o DOWN para seleccionar los archivos y presione OK D Presione MENU seleccione ELIMINAR y presione OK para confirmar la eliminación E Después de que la eliminación se haya completa...

Page 42: ... audio L izquierda Entrada de vídeo componente Amarillo Rojo Blanco Rojo Azul Verde Cable AV proporcionado A conector AV Cable componente opcional A conector COMPONENT NOTA 0 En caso de preguntas sobre el televisor o el método de conexión póngase en contacto con el fabricante del televisor 0 Utilice un cable HDMI de alta velocidad cable de categoría 2 como el mini cable HDMI 0 Cuando reproduzca en...

Page 43: ...el menú de reproducción en ON o Si las imágenes no se ven naturales en el televisor Las imágenes no aparecen en el televisor adecuadamente 0 Desconecte el cable y vuelva a conectarlo 0 Apague esta unidad y vuelva a encenderla Las imágenes se proyectan verticalmente en el televisor 0 Ajuste SALIDA DE VÍDEO del menú CONFIG CONEXIÓN en 4 3 Las imágenes se proyectan horizontalmente en el televisor 0 A...

Page 44: ...positivo Dispositivo Grabadora de Blu ray X F 1 X X Consultar manual del grabador Grabadora de DVD X F 1 X P 17 VCR X P 17 Computadora 2 2 2 X P 18 1 Sólo para dispositivos compatibles con AVCHD Lite 2 Paraobtenerinformaciónsobrecómocrearundiscoutilizandounordenador consulte la Guía detallada del usuario NOTA 0 No es posible conectar y grabar en una grabadora de DVD unidad externa de Blu ray o dis...

Page 45: ...A 2 Presione L reproducir grabar para seleccionar el modo de reproducción 3 Prepárese para la grabación Preparación del televisor y de la grabadora de vídeo o DVD 0 Cambie a una entrada externa compatible 0 Introduzca un DVD R o cinta de vídeo Preparación en esta unidad 0 Ajuste SALIDA DE VÍDEO del menú CONFIG CONEXIÓN en la proporción de aspecto 4 3 o 16 9 del TV conectado 0 Para incluir la fecha...

Page 46: ...adas Windows 7 o Windows XP Memoria 1 GB como mínimo Procesador Alta definición Intel Core Duo CPU 1 66 GHz o superior se recomienda Intel Core 2 Duo CPU 2 13 GHz o superior Definición estándar Intel Pentium 4 CPU 3 0 GHz o superior se recomienda Intel Pentium D CPU 3 0 GHz o superior Service Pack 3 Home Edition o Professional solo versiones preinstaladas Windows XP o Otros requisitos Visualizació...

Page 47: ... proporcionado 1 Coloque el CD ROM proporcionado en su PC sólo Windows Vista Windows 7 A Haga clic en Ejecutar INSTALL EXE del cuadro de diálogo de reproducción automática B Haga clic en Continuar de la pantalla de control de cuenta de usuario 0 Software Setup aparece después de unos momentos 0 Si no apareciera haga doble clic en el icono del CD ROM en Mi PC Windows XP solo 0 Continúe con el paso ...

Page 48: ...OK 4 Seleccione HACER COPIA DE SEGURIDAD y presione OK HACER COPIA DE SEGURIDAD CONECTAR A PC 0 El software proporcionado Everio MediaBrowser se inicia en el PC Las demás operaciones se deben realizar en el PC 5 Seleccione el volumen 2 1 Haga clic Haga clic 6 Inicie la copia de seguridad Haga clic Destino de almacenamiento PC 7 Después de que se haya completado la copia de seguridad haga clic en A...

Page 49: ...AR REINICIO RÁPIDO DESCONEXIÓN AUTOM SONIDO FUNCIONAM MODO DEMO CONFIG BÁSICA BRILLO PANTALLA TIPO INDIC FECHA LANGUAGE CONFIG PANTALLA Menú común DATOS EN PANTALLA CONF FORMATO GRAB solo GZ HM50 AJUS RELOJ CTRL GRAB CONTINUA solo GZ HM50 REPR OTRO ARCHIVO BUSCAR FECHA MOVER solo GZ HM50 COPIAR solo GZ HM50 PROTEGER CANCELAR ELIMINAR Menú de reproducción CONF FORMATO GRAB solo GZ HM50 AJUS RELOJ x...

Page 50: ...ciones o el rendimiento del sistema operativo otras aplicaciones o controladores Tiempo de grabación Es posible comprobar el tiempo de grabación de vídeo presionando el botón OK INFO Tiempo estimado de grabación de vídeo Calidad Memoria integrada GZ HM50 Tarjeta SDHC SDXC 4 GB 8 GB 16 GB 32 GB 48 GB 64 GB LS 1 h 20 m 40 m 1 h 30 m 3 h 10 m 6 h 30 m 9 h 30 m 13 h LE 3 h 20 m 1 h 50 m 3 h 40 m 7 h 2...

Page 51: ...cerá automáticamente 5 Si lo mencionado anteriomente no resuelve el problema póngase en contacto con su distribuidor JVC o centro de servicios JVC más cercanos Problema Problema Acción Página Alimentación La luz POWER CHARGE empieza a parpadear cuando el monitor está cerrado 0 La batería se está cargando P 6 Grabación La grabación no puede realizarse 0 Ajuste el modo grabación con el botón L repro...

Page 52: ...ACIÓN 0 Apague esta unidad y vuelva a encenderla 0 Si lo mencionado más arriba no soluciona el problema realice una copia de seguridad de los archivos y ejecute FORMATEAR MEM INT sólo GZ HM50 o FORMATEAR TARJETA SD en el menú CONFIG MEDIOS se eliminarán todos los datos LOS DATOS GRABADOS SON INSUFICIENTES NO SE PUEDEN GUARDAR 0 Cuando se detiene la grabación con un tiempo de grabación menor a 0 00...

Page 53: ...atural y reducirá el periodo de vida útil se debe cargar totalmente y luego descargar totalmente la batería cada seis meses cuando se guarde durante un periodo de tiempo prolongado cuando no se utilice se debe retirar del cargador o dispositivo eléctrico ya que algunas máquinas utilizan corriente incluso estando apagadas ATENCIÓN La batería que ha adquirido es reciclable Por favor comunicarse al 1...

Page 54: ...ro almacene la videocámara en un lugar con polvo o arena Para evitar que la unidad se caiga Ajuste bien la correa de mano Si utiliza la cámara con un trípode fije bien la cámara en el trípode Si se le cae la cámara puede herirse usted y dañarse la cámara Si un niño utiliza la unidad un adulto deberá guiarle Los cambios o modificaciones no aprobados por JVC podrian anular la autoridad del usuario p...

Page 55: ... 1 050 000 pixeles zoom dinámico OFF SS SE 340 000 a 790 000 pixeles zoom dinámico ON SS SE 470 000 a 790 000 pixeles zoom dinámico OFF Lente F1 8 a 6 3 f 2 9 mm a 116 0 mm LS LE conversión de 35 mm 45 6 mm a 1 824 mm AIS ON LS LE conversión de 35 mm 42 0 mm a 1 680 mm AIS OFF SSW SEW conversión de 35 mm 45 6 mm a 3 182 mm zoom dinámico ON SSW SEW conversión de 35 mm 45 6 mm a 1 824 mm zoom dinámi...

Page 56: ...l aspecto de este producto están sujetos a cambios sin previo aviso Índice A Adaptador de CA 6 25 Ajuste de la fecha hora 10 Ajuste del idioma 11 Ajustes de menú 21 Apple 19 B Batería 6 25 C Cable USB 20 CD ROM 19 Conexión AV 15 17 Conexión componente 14 Conexión HDMI 14 Configuración del reloj 10 Copia copia de seguridad 16 Copia duplicado 17 E Eliminación de archivos 13 F Formato tarjeta SD 9 I ...

Reviews: