background image

XL-MC334BK

LVT0022-001B [J]

For Customer Use:

Enter below the Model No. and Serial 
No. which are located either on the rear, 
bottom or side of the cabinet. Retain this 
information for future reference.

Model No.

Serial No.

LVT0022-001B

[ J  ]

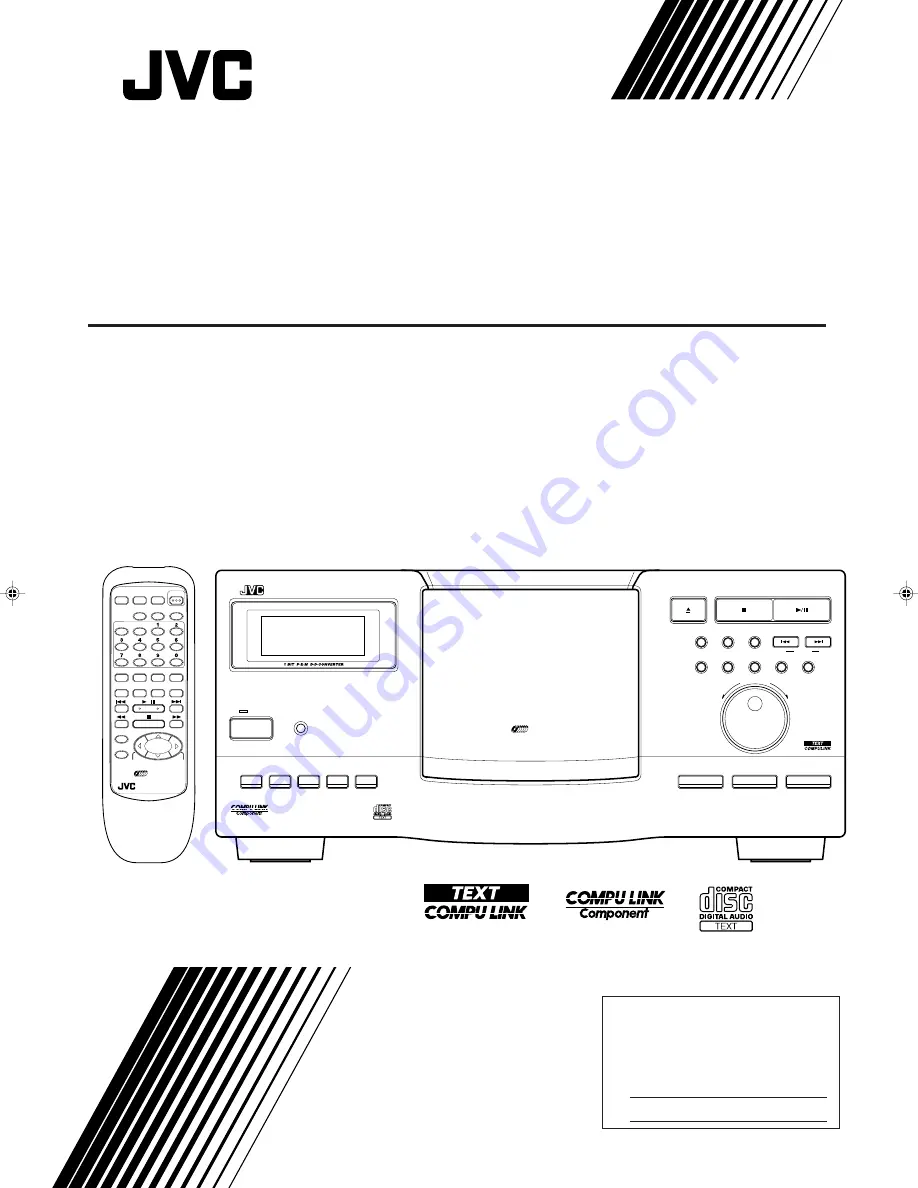
COMPACT COMPONENT SYSTEM

XL-MC334BK

COMPACT DISC AUTOMATIC CHANGER

'

Enter below the Model No. and Serial No.
which are located on the rear, bottom or
side of the cabinet. Retain this information
for future reference.

INSTRUCTIONS

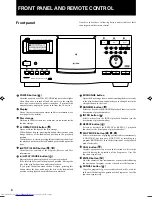
POWER

STANDBY

XL-MC334 COMPACT DISC AUTOMATIC CHANGER

PLAY/PAUSE

STOP/CLEAR

REPEAT

PLAY MODE

CALL

DISC/TRACK

EXCHANGE

RANDOM

INTRO

ENTER

CANCEL

CURSOR

<

>

TRACK

OPEN/CLOSE

DISC

DOWN

UP

DISC EJECT

200

ENHANCED COMPULINK CONTROL SYSTEM

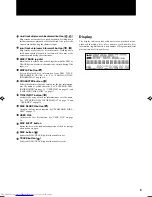
DISPLAY

CHARACTER

TITLE INPUT

DISC SEARCH

USER FILE

11

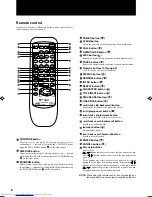
CONTINUE ONE DISC PROGRAM POWER

TITLE
INPUT

DISC

SEARCH

OPEN/

CLOSE

USER

FILE

REMOTE CONTROL
RM–SX334U

'

200

CANCEL

ENTER

/

CHARACTER

DISPLAY

RANDOM

INTRO

REPEAT

CLEAR

TRACK

DISC

CALL

+

10DISC

–10DISC

–1DISC

+

1DISC

Summary of Contents for XL-MC334BK

Page 1: ...he cabinet Retain this information for future reference INSTRUCTIONS POWER STANDBY XL MC334 COMPACT DISC AUTOMATIC CHANGER PLAY PAUSE STOP CLEAR REPEAT PLAY MODE CALL DISC TRACK EXCHANGE RANDOM INTRO ENTER CANCEL CURSOR TRACK OPEN CLOSE DISC DOWN UP DISC EJECT 200 ENHANCED COMPULINK CONTROL SYSTEM DISPLAY CHARACTER TITLE INPUT DISC SEARCH USER FILE 11 CONTINUE ONE DISC PROGRAM POWER TITLE INPUT DI...

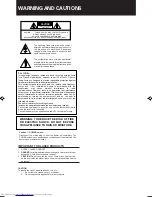
Page 2: ...ltage within the product s enclosure that may be of sufficient magnitude to constitute a risk of electric shock to persons The exclamation point within an equilateral triangle is intended to alert the user to the presence of important operating and maintenance servicing instructions in the literature accompanying the appliance CAUTION 1 CLASS 1 LASER PRODUCT 2 DANGER Invisible laser radiation when...

Page 3: ...stallation 2 Compact discs 2 Operation 2 SETTING UP 2 Connecting the unit 2 Installing batteries in the remote control 3 FRONT PANEL AND REMOTE CONTROL 4 Front panel 4 Display 5 Remote control 6 BASIC OPERATION 7 Turning the power on 7 Loading compact discs 7 Unloading changing discs 7 Playing back discs 8 Changing discs during playback 9 CONTINUE MODE PLAYBACK 10 Basic mode 10 Playing back discs ...

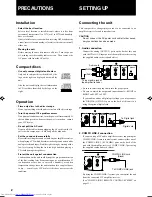
Page 4: ...n on the unit could disrupt the proper transmission of the disc reading laser beam causing noise or malfunction If condensation occurs due to excessive humidity or sudden temperature change leave the unit turned on for a couple of hours to dry consult your JVC dealer if this does not correct the condition Connecting the unit This compact disc changer player needs to be connected to an amplifier re...

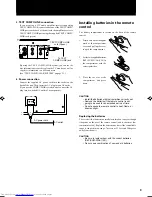
Page 5: ...max range 7 meters or 23 feet and 30 degrees away from the unit CAUTION Be sure to replace them with the correct batteries R6P SUM 3 AA 15F Do not use a combination of new and old batteries 3 TEXT COMPU LINK connection If you are using a JVC audio amplifier receiver supporting TEXT COMPU LINK connect either one of the TEXT COMPU LINK ports on the back of the unit with the amplifier receiver s TEXT...

Page 6: ...s playback 7 EXCHANGE button Opens the disc storage door without retracting the disc currently in the playback position and permits you to change discs in the slots positioned in the front 8 RANDOM button 12 Selects or deselects the RANDOM playback function see the description of playback modes 9 INTRO button 13 Selects or deselects the INTRO playback function see the description of playback modes...

Page 7: ...be entered for the disc information user file name or search character See ENTERING DISC INFORMATION on page 15 USER FILE on page 18 and SEARCHING FOR A DISC on page 17 20 TITLE INPUT button 16 Activates the entry of the disc information or user file name See ENTERING DISC INFORMATION on page 15 and USER FILE on page 18 21 DISC SEARCH button 17 Activates the Disc search function See SEARCHING FOR ...

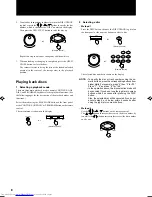
Page 8: ... select a character or genre to be entered during the Title input or Search operation Pressing the buttons selects the next character or genre while pressing the buttons jumps to the 5th character or genre forward backward from the one currently displayed NOTE When using the remote control do not press the but tons too quickly to ensure proper reception by the unit Remote control Numbers in bracke...

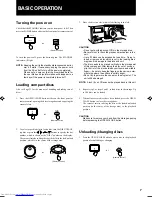
Page 9: ...s the OPEN CLOSE button to close the storage door The carousel rotates to bring the disc at the loaded unloaded position in the center of the storage area to the playback position CAUTION Make sure to remove your hand from the storage opening before pressing the OPEN CLOSE button Unloading changing discs 1 Press the OPEN CLOSE button to eject a disc in the playback position for unloading or changi...

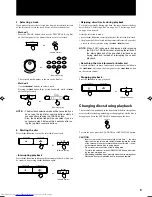
Page 10: ... the nu meric buttons press the corresponding buttons from higher digits For example press 5 then 2 for 52 Press 1 4 and then 8 for 148 In the operation above the disc selection mode will be canceled if you do not use the jog dial or numeric buttons within 4 seconds after pressing the DISC button Also the selected disc will be canceled if you do not execute step 3 or 4 below within 4 seconds after...

Page 11: ... DOWN UP TRACK DISC or Remote control 3 Selecting a track If you want to listen to the selected disc from a desired track instead of the first track select the track by one of the methods below Method 1 Press the TRACK button then use the DISC TRACK jog dial on the front panel or the numeric buttons to select a track NOTE The disc track selection mode will be canceled if you do not use the jog dia...

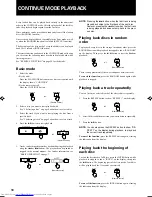
Page 12: ...on page 8 about how to select a disc 3 Select the track if you want to start playing the disc from a specific track See 3 Selecting a track on page 9 about how to select a track 4 Press the 3 8 button to start playback PLAY MODE or CONTINUE Remote control 5 Tracks can be skipped forward or backward during the playback using the 4 or buttons The playback can be paused or stopped in the normal manne...

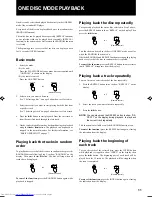
Page 13: ...an be played back for 15 seconds INTRO function Basic mode 1 Select the mode By the unit Press the PLAY MODE button as many times as required until ONE DISC is shown on the display By the remote control Press the ONE DISC button To cancel the function press the RANDOM button again while playback is stopped RANDOM RANDOM or Remote control This function can be used in the basic ONE DISC mode as well...

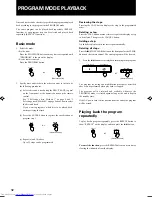
Page 14: ... listen to by the following procedures a Select a disc and a track using the DISC TRACK jog dial on the front panel or the numeric buttons on the remote control See 2 Selecting a disc Method 1 on page 8 and 3 Selecting a track Method 1 on page 9 about how to select the disc and track If you want to program a whole disc to be played back omit specifying the track b Press the ENTER button to registe...

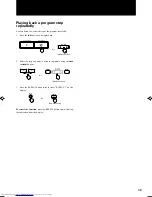
Page 15: ...Remote control CURSOR or Remote control Playing back a program step repeatedly You can listen to a selected step of the program repeatedly 1 Press the 3 8 button to start playback 3 Press the REPEAT button twice to show REPEAT 1 on the display To cancel the function press the REPEAT button again clearing the indication from the display ...

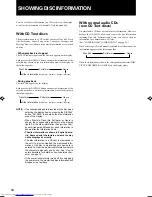
Page 16: ...he display When Disc title Track title Performer or Genre is shown the corresponding indicator on the display lights For the other information Song writer Com poser Arranger and Message each information is shown after the information name The disc information is shown in English prima rily Some special characters and accents may not be displayed correctly The disc information in a CD text is memor...

Page 17: ...C 1DISC or Remote control How to enter characters a Select the character type from upper case lower case numeral and symbol by pressing the CHARACTER button as many times as required until the desired character type appears in the entry area of the display ENTER ENTER or Remote control b Select a character by the jog dial or buttons on the remote control Pressing the buttons selects the next chara...

Page 18: ... the 7 STOP CLEAR button on the front panel or the CLEAR button on the remote control in step 7 cancels the genre selection and the display shows NO DATA 8 Press the TITLE INPUT button TITLE INPUT or DISC TRACK DOWN UP 10DISC 10DISC 1DISC 1DISC or Remote control TITLE INPUT TITLE INPUT or Remote control The performer name is stored and GENRE lights instead of PERFORMER on the display and the displ...

Page 19: ...rol 4 Specify the search criterion When searching by Disc title or Performer Enter the first character of the string to be searched for See How to enter characters on page 15 for the procedures When searching by Genre Select the genre by using the jog dial or buttons on the remote control 5 Press the ENTER button The disc search function is executed Then the information of the disc found is shown ...

Page 20: ...cel the enrollment press the CANCEL button A disc can be enrolled to more than one user file 5 Repeat 3 and 4 above if you want to enroll more than one disc To exit the USER FILE function de either of the following Press the USER FILE button until the USER FILE display disappears on the display Press the PLAY MODE button on the front panel or the CONTINUE ONE DISC or PROGRAM button on the remote c...

Page 21: ...cs en rolled in the user file one by one Turning the power completely off by unplugging the power cord clears the user file contents in a few days Playing back all discs in a user file 1 Press the USER FILE button as many times as required until the desired user file is selected CANCEL CANCEL or Remote control USER FILE USER FILE or Remote control PLAY PAUSE STOP CLEAR or Remote control 2 Press th...

Page 22: ...going to listen to in advance You can add tunes at any time Up to 32 tracks can be reserved Just pressing the ENTER button during playback re serves the current track Selective playback functions Repeat Random or Intro are canceled when a track is reserved After finishing the playback of the reserved tunes the unit returns to the normal CONTINUE mode and continues playback while the RESERVE indica...

Page 23: ... basically compatible some functions may not be avail able with the older versions refer to the instructions manual of the component for the information The COMPU LINK 3 Remote Control System provides the following functions Automatic power on off Turning a linked component on or off will automatically turn the amplifier receiver on or off Selecting a source on the amplifier receiver will turn on ...

Page 24: ...isc can easily be damaged and the damaged disc disrupts sound reproduction and operation of the player Keep every disc in its case Be sure to keep every disc in its case whenever it is taken out of the player Placing one disc upon another without putting them in their cases could cause damage Keep the label side clean Do not attempt to put adhesive tape or paper nor write anything even on the labe...

Page 25: ...tched or warped Replace the disc with a new one A piece of paper or adhesive tape is stuck Remove it cleanly to the CD surface The audio cord is placed close to the AC Separate them power cord The remote control does not work properly The batteries are run down Replace the batteries The remote control is not properly used Its maximum range is 7 meters 23 feet and 30 degrees away from the component...

Page 26: ...ttle Falls Road Fairfield NJ 07004 2105 201 808 9279 5665 Corporate Avenue Cypress CA 90630 0024 714 229 8011 230 Eliot Street Ashland MA 0172 2377 508 881 5923 705 Enterprise Street Aurora IL 60504 8149 708 851 7855 10700 Hammerly Suite 110 Houston TX 77043 713 935 9331 890 Dubuque Avenue South San Francisco CA 94080 1804 415 871 2666 1500 Lakes Parkway Lawrenceville GA 30243 5357 404 339 2522 29...

Page 27: ...y attachment not provided with the products or if the model or serial number has been altered tampered with defaced or removed 2 Initial installation and installation and removal for repair 3 Operational adjustments covered in the Owner s Manual normal maintenance video and audio head cleaning 4 Damage that occurs in shipment due to act of God and cosmetic damage 5 Signal reception problems and fa...

Page 28: ...J VC VICTOR COMPANY OF JAPAN LIMITED Printed in Japan 0398MSMUBNOZK EN ...

Reviews: