background image

Summary of Contents for 385.12318

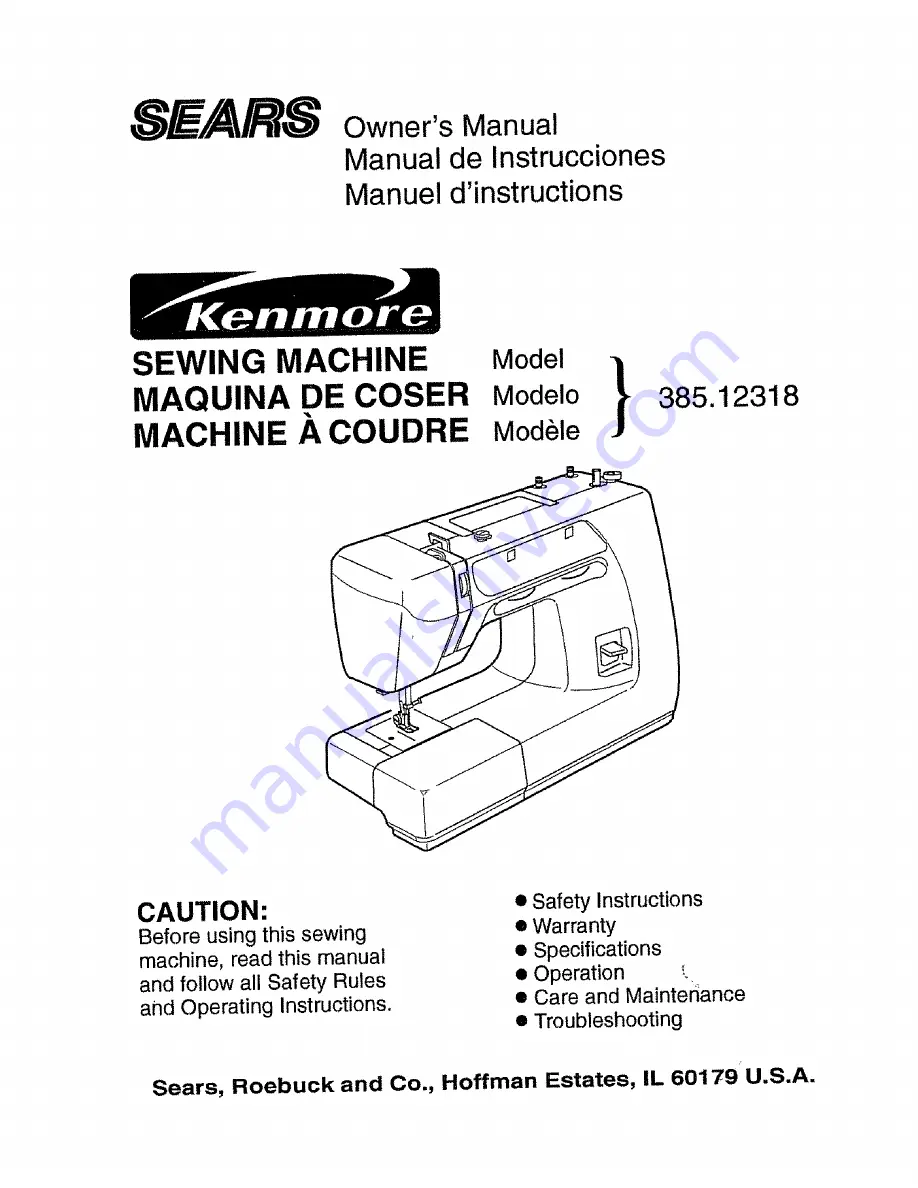
Page 1: ...ACHINE A COUDRE Model Modelo Mod61e 385 12318 CAUTION Before using this sewing machine read this manual and follow all Safety Rules and Operating Instructions Safety Instructions Warranty Specifications Operation Care and Maintedance Troubleshooting Sears Roebuck and Co Hoffman Estates IL 60179 U S A ...

Page 2: ...ears store or service center for examination repair electrical or mechanical adjustment 4 Never operate this sewing machine with any air opening blocked Keep ventilation openings of this sewing machine and foot controller free from accumulation of lint dust and loose cloth 5_ Never drop or insert any object into any opening 6 Do not use outdoors 7 Do not operate where aerosol spray products are be...

Page 3: ...e mec nico o el_ctrico 4r Nunca opere la m quina con cualquier salida de aire bloqueada Mantenga las aberturas de ventilaciSn de la m quina de coser y el pedal de control libra de acumulaciSn de pelusa polvo y residuos de telao 5 Nunca deje caer o introduzca objetos en ninguna abertura de la m quina 6 No la utilice en extedores_ 7 _ No opera donde se utilizan aerosoles o sitios de administraciSn d...

Page 4: ... Rapportez la machine au magasin Sears le plus proche pour une v_rification une r_paration un r_glage _lectrique ou m_canique 4 N utilisez jamais une machine dont les ouvertures de venlilation sent obstru_es Maintenez les condiuts d a_ration libres de toute accumulation de charpie de poussi_re et de fibres de tissu 5o Ne laissez tomber et n introduisez aucun objet darts les ouvertures de la machin...

Page 5: ...SOBRE TODAS LAS PARTES Y AJUSTES MECANICOS Durante 90 dias desde la fecha de Ia compra Sears efface libra de costo reemp azar cualquiera parte y proveer el servic o mecanico necesado para fa apropiada operaci6n de fa m quina de coser excepto para mantenimiento normal El servicio de garantia se puede obtener enviando a m quina de coser af centro departamento de Servicios Sears rues cercano en los E...

Page 6: ...nto de puntadas Integradas Ojales Dimensiones de la m quina Peso Especificaci6n Mds de 730 top m 4 mm M_xima 5 mm Mdxima 36 18 Funci6n de ojal incorporado de 4 pasos 390 mm 15o4 de ancho x 155 mm 6 1 de profundidad x 290 mm 11 4 de altura 6 2kg t3 5 ibs Caractdristiques de la machine Description Vitesse de couture Maximum Longueur du point Largeurdu point Ensemblede points pointsde couture points ...

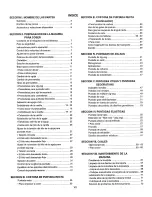
Page 7: ...Length Control 30 Adjusting Stretch Stitch Balance 30 Reverse Stitch Control 30 SECTION 11 STRAIGHT STITCH SEWING Straight Stitch 32 Starting to sew 32 Finishing sewing 32 Use the Seam Guides 32 Turn a Square Corner 32 SECTION III STRAIGHT STITCH SEWING continued Topstitching 34 Zipper Sewing 34 36 Fabric preparation 34 To sew 36 To Drop or Raise the Feed Dogs 38 Darning 38 SECTION IV ZIGZAG STITC...

Page 8: ...s patrones distorsionados 31 Control de puntada reversa 31 SECCION IlL COSTURA DE PUNTADA RECTA Puntada recta 33 Para ernpezar a coser 33 VII SECCION IIi COSTURA DE PUNTADA RECTA continuaci6n Para terminar Ia costura 33 Uso de las gu_as de costura 33 Para girar en esquinas de ngulo recto 33 Costura a la vista 35 Costura de cremalleras 35 37 Preparaci6n de la tela 35 Para coser 37 C6mo bajar subir ...

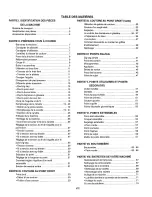
Page 9: ... de point 31 R6glage de la longueur du point 31 Comment r_gler f 6quilibre d un motif extensible 31 Bouton de marche arri_re 31 PARTtE III COUTURE AU POINT DROIT Point droit 33 D_but d une couture 33 Finition d tJne couture 33 PARTIE II1oCOUTURE AU POINT DROIT suite Utilisation de guides de couture 33 Couture d un angle droit 33 Surpiq 3re 35 La couture des fermetures glissi6re 35 37 Pr6paracien d...

Page 10: ...lay _ Stitch length control _ Stitch length setting display _ Bobbin winder spindle 0 Spool pins _ Bobbin winding tension disc _ Upper needle thread guide _ Thread take up lever _ Thread tension dial _ Face cover Thread cutter _ Needle plate _ Extension table Accessory box _ Carrying handle 0 Handwheel _ Power switch _ Machine socket Nomenclature plate _ Free arm Presser foot lifter _ Thumb screw ...

Page 11: ...Cubierta frontal Q Cortahilos Q Placa de aguja _ Estuche de accesorios AmpliaciSn m6vil de la supefficie de costura _ Asa de transporte Q Volante _ interruptor de corriente _ Enchufe de la m quina Q Placa de identificaciSn _ Brazo libre _ Palanca de elevaci6n del prensatelas _ Tornillo del soporte de prensatelas _ Prensatelas Tornillo de sujeci6n de la aguja Pedal de control _ S_lecteur de point _...

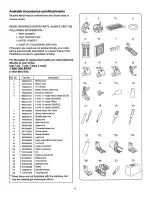
Page 12: ...93401008 13 941800000 14 647112009 15 764805004 16 000009803 17 647808009 18 802424004 19 820832005 20 647803004 21 741814003 22 200012104 23 214872011 24 200104104 25 200103103 26 941620000 27 200262101 28 475701105 Description Shuttle hook Bobbin case 10 x Bobbin Bobbin winder nJbber ring Assoded needle set 5 x No 11 stretch fabric needle BLUE 5 x No 11 needle ORANGE 5 x No 14 needle RED 5 X No ...

Page 13: ...nsatelas de doblearmsta Prensatetas pare alforzas Prensataias recogedor Prensatelas para truneidos Enhebrador de aguja Matetfn transportador Estos artfculos no as proveen can la m quina pero pueden set erdenados con tas instrucciones arriba descritas Accessoires disponibles Toutes cos pi_ces peuvent _tre commandoes dans un magasin ou un centre de r_paration Sears JOIGNEZ TOUJOURS VOTRE COMMANDE LE...

Page 14: ...urn off the power switch and unplug from the power supply When leaving the machine unattended When attaching or removing any parts When cleaning the machine Do not place anything on the foot control when not sewing Operating instructions For appliances with a polarized plug one blade wider than the other To reduce the risk of electric shock this plug is intended to fit in a polarized outlet only o...

Page 15: ...e en cours et ne touchez aucune des parties mobiles telles qua le levier releveur du ill le votant _ ou l aiguille Eteignez et d_branchez syst_matiquement la machine de la prise de couranto Iorsque vous laissez Ia machine sans surveiJJance_ Iorsque vous fixez ou retirez des parties d_tachables lorsque vous nettoyez ta machine Ne placez rien sur la p_dale de contrSle sauf pendant l utilisation Inst...

Page 16: ...e presser foot lifter raises and lowers your presser foot You can raise it about 1 4 O 6cm higher than the normal up position for easy removal of the presser foot or to help you place heavy fabric under the foot Thread Cutter C Thread cutter You do not need a pair of scissors to cut threads after sewing Just use the built in thread cutter f F Accessory Box Open the cover of the accessory box towar...

Page 17: ...mal para qua le resufte m s f_cil colocar telas gruesas o come ayuda para quitar el prensateias Retev_ pied presseur C Relov_ pied presseur _ Position relevei normale _ Position relevei maximum Le relive pied presseur remonte et abaisse le pied presseur Vous pouvez le remonter d environ O 6cm 1 4 plus haut que la position normale pour retlror plus facilement lo pied presseur ou pour vous aider _ p...

Page 18: ...rt a new needle into the needle cfamp _ with the flat side to the rear When inserting the needle into the clamp _ push it up as far as it goes Tighten the clamp screwO firmly by turning it clockwise To check for a good needle place the flat side of the needle onto something flat needle plate glass etc The gap between the needle and the flat surface should be consistent Never use a bent or blunt ne...

Page 19: ...eten causar enganches y carreras irreparables en tejidos de punts sedas fines y de imitaci6n seda Changer l aiguille _ Vie du pin el aiguille _ pince del aiguille I_teignez la machine Faites monter I aiguille le plus haut possible en tournant le volant en sens antihoraire et abaissez le pied presseur Desserrez la vie du pince aiguille _ en la tournant en sens antihoraire Retirez I aiguitle _ Ins_r...

Page 20: ...ns page 60 o Straight stitch foot Use this foot exclus vely for straight stitching with center needle position For Straight stitch page 32 Topstitching page 34 Straight stretch page 54 Sliding buttonhole foot Use this foot for manual buttonhole making It is marked to help you measure a buttonhole accurately For Buttonhole sewing page 62 64 Zipper foot This foot can be set to sew on each side of th...

Page 21: ...multiple page 49 Point de cr6neay page 51 Coutre ajour6e page 51 Point droit extensible page 55 Croquet ext_nsible page 55 Surfilage extensible page 57 Point smocks page 57 Point d _pines page 59 Point de surjet page 59 Motifs de points d_coratifs page 6t Pied _ point droit Ce pied est uniquement recommand_ pour ta couture _ points drcits avec t aiguiIle en position centrale Pour Point droit page ...

Page 22: ...aused by damaged needles Always purchase a good quality thread It should be strong smooth and consistent in thickness r j WEIGHT FABRIC TYPE OF NEEDLE NEEDLE SIZE Universa 9 65 Very Light Ball Point 9 65 Light Chiffon Georgette Fine Lace Organdy Organdy Net Tulle Batiste Voile Lawn Pure Silk Crepe de Chine Sheer Crepe Chambray Handkerchief Linen Gingham Challis Percale Wool Crepe Peau de Sole Taff...

Page 23: ...cuencia pare comprobar que no est_n embotadas o despuntadas Las agujas daSadas suelen causer enganches y carreras irreparables en tejidos de punto sedes finas y de imitaci6n sed Adquiera siempre bile de buena cafidad Deber_ ser uerte suave y de grosor uniforme PESO TIPO DE TELA TIPO DE AGUJA TAMANO DE AGUJA Gasa Gase detgada Encaje fine Organdi Malta Organdf Universal 9 65 Muy ligera Tul Punta de ...

Page 24: ...s tricots les soies fines et les 8toffes semblables _ la sole sent dafinitifs et sent souvent provoqu_s par des aiguilles ab_mdes Achetez toujours du fil de bonne qualitY 11 dolt 8tre solide tisse et d _paisseur raguliere Poids Tissu Type d aiguille Diambbre d aiauille Mousseline Cr_pe Georgette Dentelle fine Organdi Tufie Universelle 9 65 Tr6s Idger Pointe bout rend 9 65 Batiste zdphyr linen pure...

Page 25: ... blank page p gina blanca page blanche 17 ...

Page 26: ..._ Shuttle cover 1_ Bobbin case To remove the bobbin case _ from the shuttle pull open the latch of the bobbin case_ Pull the bobbin case straight out of the shuttle Bobbin winding IT Release the clutch by pulling out the handwhee This will stop the needle from moving while you wind the bobbin Draw thread from spool Guide the thread around the thread guide Thread through the hole in the bobbin from...

Page 27: ...el ret_n detportacanillas pare abrir Oeje recto hacia afuera el portacan llas de la lenzadera_ Retirez le porte_canette _ de la navette en tirant le loquet de la canelte vers vous Sorlez e porte canette en le tirant tout droit de la navette Embobinado de la canilla Libere el embrague jalando el volante y asi evitar que la aguja se mueva mientras devane la bobina Bobinage d une canette de fii Tirez...

Page 28: ...ically Return the bobbin winder to its original position by moving the spindle to the left and cut the thread J Push the handwheel to the left to engage clutch The machine does not function until the clutch is engaged_ NOTE Position of the bobbin winder stopper is adjustable for the required amount of thread on bobbin example 1 2 full or full etc Use a screwdriver and loosen the screw one tum or l...

Page 29: ...te la position d origine en poussant t axe vers ta gauche et coupez le fil Empuje el volante a la izquierda para la engranar el embragueo La m quina no coser_ hasta qua el embrague ast8 engranado con la m quina Poussez le volant vers I int_rieur La machine ne fonctionnera pas rant qua I embrayage n est pas engage NOTA El tope det devanador de canitlas puede ser ajustado a la cantidad de hilo qua r...

Page 30: ...m the bobbin Draw the thread through the slot of case Continue to draw the thread under the tension spring and through the opening Pull out about 4 10cm of thread_ Holding latch open position the bobbin case into the shuttle and release latch Case should lock into place when latch is released J 22 ...

Page 31: ...l par la fente du porte canette Continue tirando deJ hilo debaje de resorte tensor y a trav_s de ta abertura Deje sobresalJr aproximadamente lOcm 4 de hilo T_rez le fil sous le ressort de tension et fa _es le passer par le trouo T_rez environ 10cm 4 de _o Con el ret_n abierto meta el portacanillas en la lanzadera y libere el ret6n Ouvrez leloquet pour engager te porte canette fond dane la navette ...

Page 32: ...rom right to left over the take up lever and down into the take up lever eye Slide the thread behind the needle bar thread guide on the left Thread the needle from front to back or use a needle threader We recommend using the convenient needle threader 200262101 included with your machine J o Drawing up bobbin thread Raise the presser foot Hold the needle thread lightly with your left hand and rot...

Page 33: ... comma illustr_ lenez le fil de I aiguille st passez te sous te guide ilL En retenant le fil prSs de la bobine tirez fii vers le bas st de la droite vers la gauche autour du dispositif ressorto Tirez fermsment le fil vers la haut puis de la dmite vers ta gauche dans I oeilletdu levier releveur de ill Par tagauche glissez le fil derriere le guide situ_ sur le barrs d aiguilte Enfilaz i aiguille de ...

Page 34: ...ckness of the fabric number of fabric layers type of stitch o Tension is too tight 0 Needle thread Top thread _ Bobbin thread Bottom thread _ To loosen _ Right side Top side of fabric 0 Wrong side Bottom side of fabric The bobbin thread shows through on the right side of the fab ric and it feels bumpy Turn the dial to a lower tension setting number to loosen the needle thread tension Tension is to...

Page 35: ...s ills crois_s entre les deux _paisseurs de tissu comma illustr6 gauche agrandi pour montrer les d_tails En regardant te dessus et le dessous de ta couture vous remarquerez qu il n y a pas d interruption r Les points sent align6s et _gaux Lots du r_glage de la tension du fil de I aiguille plus le num_ro ast grand plus le fit sara tendu Le r_sultat d_pend de la raideur et de P6paisseu du tissu du n...

Page 36: ...abric Minimize amount of needle thread visible on the wrong side bottom side of fabric without causing excessive puckering or causing bobbin thread to show on the right side top side of fabric Results vary with fabric thread and sewing condition Tension is too tight 0 Right side Top side of fabric _ Wrong side Bottom side of fabric Corner of each zigzag pulls together on the right side of fabric T...

Page 37: ...siva o haciendo que el hilo de la canilla se vea en la parte de arriba de la tela Los resuttados pueden variar segun la tela hilo y condiciones de costurao Tension correcte C Endroit du tissu _ Envers du tissu R6duisez la quantit6 de fil de aiguille visible sur le l envers du tissu sans pour autant plisser excessivement le tissu et sans que le fil de ta canette n apparaisse sur t endroit du tiSSUo...

Page 38: ...itch setting To select a stretch stitch set the control at _ STRETCH NOTE When you select a stitch Red or Green or buttonhole Blue make sure that the stitch length control is NOT set at V STRETCH Study the red green gold and blue zones on the stitch length control These are recommended zones of stitch length and are color coded to the stitches Adjusting Stretch Stitch Balance In stretch stitch sew...

Page 39: ...ada recomendable y corresponden a los colores de Ias puntadas Equilibrio de los patrones distorsionados En la costura de puntadas el sticas el controi de Ia Iongitud de puntada deber_ estar en posici6n entre S y L posicSn _ para la mayor_a de las telas Dependiendo del tipo de tela utilizado usted puede ajustar este control para hacer coincidir las puntadas hacia adelante de la costura el stica con...

Page 40: ...rol and sew several reverse stitches Raise the presser foot Remove the fabric draw the threads to the back and cut them with the thread cutter The threads are cut in a proper length for the next seam i I I I 0 PATTERN _ _ LENGTH _ or o OU Use the Seam Guides _ Cornering guide _ Guide lines in inches _ Guide lines in millimeters The seam guides on the needle plate are there to help you measure seam...

Page 41: ... presseurst tirez lee ills vers I arribre_ Appuyez doucernent St Jr ap6dalede contr61e Guidezle tissu lelong de ta tigne de rep_re en laissantle tiesu avencer naturellement Finition d une couture Pour arr6ter l extr6rnit6 des coutures appuyez sur le bouton de marche arri_re et piquez p usieurs points en arri_re Relevez Ie pied presseuroRetirez le tissu tirez los ills vers l arri_re et coupez les _...

Page 42: ...of cuffs lapels or collars Lower the presser foot and keep the edge of the fabric next to the right edge of the presser foot Evenly guide the fabric along the edge to produce an even row of topstitching 3 8 0 gcm from the edge I I I 1 or o OLI J Zipper Sewing _ Stitch selector 1 or 2 _ Stitch length 2 _ Needle thread tension 2 to 6 _ Presser foot Zipper foot Fabric preparation _ Right side of fabr...

Page 43: ...e faire des coutures d_coratives et des garder tes bords plats et rigides Vous pouvez orner les en sembtes et les blouses avec une ou deux surpiq0res autour des poignets revers el cols Abaissez le pied presseur et gardez le bord du tissu pros du bord droit du pied Cousez ainsi pour faire une surpiq_Jre r_guli_re _ 09cm 318 du bord Costura de cremaUeras 6 cierres _ Selector de patr6n 1 o 2 _ Contro...

Page 44: ... of the zipper Lower the needle slightly into the fabric raise the foot and remove the basting stitches along the zipper Qpening_ Open the zipper to move the sliderO behind the zipper foot Lower the foot and stitch the remainder of the seam making sure the fold is even_ _ Slider Close the zipper and spread the fabric flat with the right side top side of fabric facing up Right side Top side of fabr...

Page 45: ...ArrStezwous justs avant qua le pied attetgne Is curseur sur le ruben de la fermeture environ 5cm 2 du haut de la fermeture Piquez 18g_rement l aiguille dens te tissu remontez le pied et ratirez Jes points de b ti qui ferment l ouverture Abra la cremallera baje el prensatetas _y cosa hasta e final _ Deslizador Ouvrez la fermeture pour dTptacer Ie curseur _ derri6re le pied presseur Abaissez Is pied...

Page 46: ...Any _ Needle thread tension 1 to 4 _ Presser foot Removed _ Feed dog Dropped Drop the feed dogs see above and remove presser foot Place fabric with the hole in the center on an embroidery hoop Lower the presser bar and sew at slow speed Move the fabric back and forth slowly until the darning area is covered Turn the fabric a 1 4 turn 90 and sew another layer of stitching over the first layer NOTE ...

Page 47: ...oint 1 ou 2 Longueur du point Toute _ Tension du fil sup6rieur 1 _4 _ Pied presseur Pas de pied de biche _ Griffes d entrainement Descendues Baje los dientes de transporte yea arriba y retire el pie prensatefas Baje la barra prensatelas y cosa a una velocidad muy baja despacio Mueva la teta para atras y para adelante hasta qua haya cubierto la rea a zurcir Voltee la tefa 1 4 vuelta 90 y cosa otra ...

Page 48: ...o decorate with trims appliques and cut work or as a decorative stitch O PATTERN LENGTH J Satin Stitch _ Stitch selector 3 Stitch length 0 5 to 1 _ Needle thread tension 1 to 4 _ Presser foot Satin stitch foot The satin stitch is often used to decorate and to overcast the raw edge of blankets linens tablecloths napkins etc It is also attractive in applique Once your machine is set up to stitch tes...

Page 49: ... point d_coratif Puntada en satin _ Selector de patr6n 3 _ Control de la Iongitud 0 5 a 1 Tensi6n del bile de la aguja 1 a 4 _ Prensatelas Prensatelas para puntada decorativa Point de bourdon _ S_lecteur de point 3 _ Longueur du point 0 5 _ 1 _ Tension du fil sup_rieur 1 _ 4 _ Pied presseur Pied point de bourdon La puntada en satin es muy vers til y frecuentemente utitizada come puntada decorativa...

Page 50: ...ric with tailor s chalk Form each pattern with satin stitch adjusting stitch width PATTERN _ LENGTH J Applique _ Stitch selector 3 _ Stitch length 045to 1 _ Needle thread tension 1 to4 Presser foot Satin stitch foot Baste applique pieces on the fabric or fuse the applique pieces with iron on fabric joiner rStitch around the applique making sure the needle falls along the raw edge of the applique P...

Page 51: ...e craie de tailteur Suivez chaque motif au point de bourdon en rSglant la largeur du point Aplicaciones _ Selector de patr6n 3 _ Control de la longitud 0 5 a t _ Tensi6n def hilo de la aguja 1 a 4 _ Prensatelas Prensatelas para puntada decorativa Appliques C SSlecteur de point _ Longueurdu point _ Tensiondu fil sup_rieur _ Piedpresseur 3 0 5 1 1 4 Pied point de bourdon Bastee las plazas de aplicac...

Page 52: ...les on a bt_on with the horizontal slot of the zigzag foot and place the left hole of the button just below the needle point 3 Lower the foot and turn the stitch selector to zigzag until the needle point comes just above the right hole of the button 4 Sew about five stitches then raise the needle 5 Set the stitch at 2 again and sew a few stitches to lock thread To strengthen the shank cut the thre...

Page 53: ...atelas y co oque et agujero izquierdo del bot6n exactamente debajo de la punta de la agujao 3 Baje el prensatelas y sire el selector de puntada a fa puntada zigzag hasta qua la punta de la aguja penetre en el agujere derecho det bot6n 4 Cose 5 puntadas aprox y levante la aguja_ 5 Ajuste nuevamente el selector de puntada en 2 y cose un par de puntas para asegurar el hilo Utilisez Ia platine de repr...

Page 54: ...ngth 1 to 3 _ Needle thread tension 1 to4 _ Presser foot Zigzag foot _ Lightweight fabric _ Heavyweight fabric _ Wrong side Bottom side of fabric On heavyweight fabrics that ravel the raw edge should be overcast first Then fold the hem as illustrated leaving 1 4 0_6cm of the hem edge showing Position the fabric on the machine so that the needle just pierces the folded part of the fabric when the n...

Page 55: ...e zig zag Ourlet invisible _ S_ ecteur du point 5 ou 6 _ Largeur du point 1 3 I_ Tension du fil sup_rieur 1 _ 4 _ Pied presseur Pied zig_zag L _ Telas ligeras _ Telas gruesas _ Parle de abajo la tela En telas gruesas pfimero deber rematar el borde Despu_s pliegue el dobladillo de la forma indicada en la ilustraci6n dejando de Oo6cm t 4 del horde cosido ala vista Coloque la tela en la m quina de te...

Page 56: ..._ Stitch selector 4 _ Stitch length 0 5 to I _ Needle thread tension 1 to 4 _ Presser foot Zigzag foot This is used to finish seam allowance on synthetics and other fabrics that tend to pucker The stitch is also excellent for darning and mending tears Seam finishing Place fabric under the presser foot in such a manner that the edge is slightly inside the right hand side of the presser foot Guide t...

Page 57: ...azig zag Esta puntada ds costura es usada para terminar el borde del exceso de tela del dobladillo en tslas sint_ticas y telas que tienden a fruncir esta puntada tambi_n es excelente para hacer remiendos arregfar desgarros y zurcir rotes Point zig zag multiple _ S_lecteur de point 4 _ Longueur du point 0 5 1 _ Tension du fil supSrieur 1 _ 4 _ Pied presseur Pied zig zag On utilise ce point pour rin...

Page 58: ...selector 9 _ Stitch length 1to 2 _ Top thread tension 3 to 8 _ Presser foot Zigzag foot 0 PATTERN LENGTH _ Paper or tear away backing 1 8 O 3cm Use this stitch to join two pieces of fabric to create an open work appearance and add design interest Fold under each fabric edge 1 3cm 1 2 and press Pin the two edges to paper or tearaway backing O 3cm 1 8 apart Sew slowly guiding the fabric so the needl...

Page 59: ...uture ajourde C S_tecteur de point 9 _ Largeurdupoint 1 2 _ Tensiondu fil sup_rieur 3 _ 8 _ Pied presseur Pied zig zag _ Papel o cinta desprendible 0 o 3crn 1 8 Use seta puntada de costura para unir dos teias y crear una apariencia de trabajo abierto deshilachado y aSadir interns al diseSo Haga un doblez de uno 1to3Cm t 2 en cada uno alf leres los dos hordes a un pape o cinta desprendible separ nd...

Page 60: ...lded edge of the fabric at zigzag stitches If you sew rows of shell stitches space the rows at least 5 8 1 5cm apart You can also sew shell stitches on knits or soft silky woven fabrics in any direction D PATTERN _ Decorative Stitch of Geometric Pattern _ Stitch selector _ Stitch length 1_ Needle thread tension _ Presser foot 10 Green zone 1 to 4 Satin stitch foot For a delicate appearance on fabr...

Page 61: ...y Pliez le tissuet piquez sur le blaiseVousaurez peut _tre besoin d augmenterI_g_rementla tensiondu fil supSrieuro Laissezraiguille tomberjusteen dehors du bordpli_ du tissu lotsdu zig zag Si vous cousez des rang_es de points coquille espacez les rang6es d au moins 1 Scm 5 8 _ Vous pouvez _galement coudre des points coquilles sur les tricots et les _toffes soyeuses dans toutes les di rections Punt...

Page 62: ...nded where both elasticity and strength are necessary to ensure comfort and durability f I11 W 1 1 PATTERN LENGTH I11 or o ou t Use it to reinforce areas such as crotch and armhole seams as well as to eliminate puckering on knits and stretch fabrics Also use when constructing items requiring extra strength such as backpacks Rick rack Stretch _ Stitch selector _ Stitch length _ Needle thread tensio...

Page 63: ...pour les coutures ou la solidit_ et l _Iasticit6 sent n_eessaires au confort et ta durabitit6 Usela para referzar reas come braguetas puSos de camisa y tambi_n pare evitar deshilachamientos en telas de punto y telas el sticas Use tambi6n esta puntada para construir etementos que requieran refuerzos especialmente fuerte come bolsos y mochilas Utilisez le pour renforcer tes coutures d entre jambes e...

Page 64: ...m seam then trim seam allowance Raw or worn edges of older garments can be overcasted to prevent further raveling NOTE Use a 11 blue stretch needle which effectively prevents skipped stitching 0 PATTERN LENGTH _ Smocking D Stitch selector _ Stitch length 0 Top thread tension _ Presser foot 4 Gold stretch stitch position I to4 Zigzag foot With this stitch length at 4 sew straight stitching lines 0 ...

Page 65: ...ille comme iltustr_ Cousez de man _re ceque I aigui e perce le tissu tout pros du bord extSrieur Ou encore placez le tissu en pr_voyant une ressource de t 5cm 5 8 puis recoupez la ressource Les bords bruts ou effiloeh_s des vieux v_tements peuvent _tre surgrt_s de cette mani_re pour _viter I effiiochange REMARQUE Utitisez une aiguille n_11 bout bleu ce qui _vite efficacement ies points manqu_s Fru...

Page 66: ... quilting 1 Sew this pattern on a seam that is already joined and pressed flat 2 Butt two folded edges together and use this stitch to join them t el 1 Serging _ Stitch selector _ Stitch length _ Needle thread tension _ Presser foot 7 Gold stretch stitch position 1 to 4 Zigzag foot This stitch is ideal for 114 0 6cm seams on knits or on medium to heavy weight woven fabrics where you want a narrow ...

Page 67: ...issu _lastique_ Vous pouvez _gatament utiliser ce point pour te piquage en patch work 1 Appliquer ce motif sur la couture qui a 8t6 d_j jointe et press_e plat 2 Rabouter tes deux bouts plies et y appliquer ca point pout les joindre Puntada de dobladillo Point de surjet _ Selector de patron 7 _ Control de la longitud PositiOn oro de puntada el_stica _ Tensi6n del hilo de la aguja I a 4 _ Prensatela...

Page 68: ...edle thread tension _ Presser foot 10 Gold stretch stitch position 2to 6 Zigzag foot Decorative stretch patterns are used for adding a creative and personalized touch to items You can decorate children s clothes women s blouses curtains etc 0 PATTERN _ LENGTH _ 6O ...

Page 69: ... du point Position point extensible or _ Tension du ffi supdrieur 2 6 _ Pied presseur Pied zig zag Disefios decorativos el sticos son usados para afiadir un toque creativo personalizado a las prendas Usted podrd decorar ropa de nifios blusas camisas cortinas etc Les motifs d_coratifsvous permettent d ajouter une note de fantaisie et de personna iser vos ouvrages Vous pouvez d_corer les vatements d...

Page 70: ...ht fabrics NOTE Always check a buttonhole on a scrap of fabric to make sure the adjustment satisfies you To sew Carefully mark buttonhole length on fabric Place the fabric under the foot with the buttonhole marking running toward you r O PATTERN _ LENGTH _ LENGT_H_ Move the slider A toward you so that the top mark C on the slider meets the start mark B Line up the markings on the foot with the top...

Page 71: ...e toumez le bouton de Iongueur point vers 0 Points serr6s pour les tissus fins Point un point moins dense tournez le bouton de longueur du point vers 1 _ _ Points I ches pour les tissus 6pals REMARQUE Faftes toujours une boutonni6re d essai sur une chute du tissu que vous utilisez pour vous assurer que les r_glages sont satisfaisants Pour coudre Marquez avec soin la Iongueur de la boutonniere sur ...

Page 72: ...reach the back marking of the buttonhole Stop sewing at a right stitch m Set the stitch selector at L_ Sew four 4 to six 6 stitches Stop sewing at a left stitch_ Remove the fabric and open a hole with a seam ripper buttonhole opener NOTE When sewing at the edge of the fabric set the sliding buttonhole foot as illustrated and sew in reverse _ M _M r J J J 64 ...

Page 73: ...ArrStez ta couture avec l aiguilte droite r_ Ajuste el selector de puntadas a W Cosa de cuatro 4 a seis 6 puntadas Termine cosiendo con una puntada izquierda R_glez le s_lecteur sur Cousez quatre 4 _ six 6 points ArrStez la couture avec Paiguitie gauche Saque la telay abra el agujero del ojal con un cortador o tin abreoja_es Retirez le tissu et eoupez la fente avec le d_coud vite ouvre boutenniSre...

Page 74: ...ht Bulb CAUTION As the light bulb could be HOT protect your fingers when you handle it Unplug the machine and open the face cover While pushing the bulb up turn it counterclockwise to remove_ Put in a new bulb by pushing it up and turning it clockwise I 0 I I t 0 Cleaning the Feed Dogs Unplug the machine and remove the presser foot and needle with a screwdriver Remove the needle plate with a screw...

Page 75: ...loque la bombilla nueva empuj_ ndola y gir ndola en la misma direcci6n de las agujas del reloj Remplacement de I ampoule ATi ENTION _ ampoule peut _tre CHAUDE donc prot_gsz yes doigts avant d y toucher D_branchez la machine et ouvrez le couvercte frontal Poussez i ampoule vers le haut et tournez la en sons antihoraire pour la retirero Instatiez une nouvelle ampoule en la poussant vers le haut et e...

Page 76: ..._out 34 Clean the shuttle race _ with a lint brush 4 Put a drop of oil on the center pin of the shuttle _ and shuttle race _ Do not over oil o Replacing shuttle assembly _ Levers _ Shuttle race cover _ Shuttle _ Shuttle race _ Center pin on the shuttle 0 Shuttle driver _ Pointed hook _ Oil here 1 Turn hand wheel so that shuttle driver Z is forming half moon on the left side of the machine 2 Hold s...

Page 77: ...ue cot_ lea pattes de retenue du _ couvercle de la coursi_re enlevez ce dernier _ et retirez la navette _ 3 Nettoyez la coursi_re l aide d un pinceau _ charpie 4 Mettez une geutte d huile sur I axe commun de ta navette _ et de la coursi6re _ _ Ne huilez jamais excessivemenL oColoque nuevamente el conjunto de la lanzadera _ Palanca _ Cubierta de corredera _ Corredera _ Corredera de lanzadera _ Pern...

Page 78: ...may stain fabric in case machine is not used for an extended time oit it before sewing NOTE Unplug the machine before oiling Oil behind the face cover Open the face cover and oil points as indicated in illustration Oil the shuttle area Open the shuttle cover by pulling down the embossed part on the left side of the cover Oil the point as indicated in the illustration 7O ...

Page 79: ...dant une Iongue p_riode de temps ators huilez la d abord avant de vous en servir Employez une huile de bonne qualit_ pour machine a coudre Une ou deux gouttes d huile suffisent a chaque endroit Essuyez i exc_s d huile sinon il y a dan ger de tacher les tissus REMARQUE D6branchez la machine _ coudreavant de la huller Lubrifiez derribre le couvercle de facade Ouvrez la couvercte de fa_ adeet lubrifi...

Page 80: ...s too fine for the fabric being sewn 1 The needle is incorrectly inserted 2_ The needle is bent or blunt 3oThe needle and or threads are not suitable for the work being sewn 4_A blue needle is not being used for sewing stretch very fine fabrics and synthetics 5 The needle thread is not threaded properly 6 The wrong needle is used_ 1oThe needle thread tension is too tight 2_ The needle thread is no...

Page 81: ... est_ utilizando una aguja azul para coser tejidos el sticos tojidos finos y telas sintSticas 5 El hito de la aguja no est enhebrado correctamente 6 La aguja utilizada no es la adecuada 1 2_ 3 La tensi6n del bile de la aguja es excesiva El hito de la aguja no se ha enhebrado correctamente El m _mero de la aguja es demasiado grande para la tela que so est cosiendo r La Iongitud de puntada es demasi...

Page 82: ...issu employ6 1 L aiguille n est pas instali_e correctement 2 L aigui le est tordue ou _mouss_e 3 L aiguiHe et Is fie ne conviennent pas pour le tissue 4 Vous n utilisez pas une aiguilte _ bout bleu pour une couture extensibie un tissu tr_s fin otJ synth_tique 5 Le fil de I aiguille n est pas enfile correctemenL 6 Vous utifisez une mauvaise aiguille 1 La tension du fil de I aiguille est trop _lev_e...

Page 83: ...epair or replacement parts you need Call 6 am 11 pm CST 7 days a week PartsDirect 1 800 366 PART 1 8oo 366 7278 Para ordenar piezas con entrega a domicilio 1 800 659 7084 For the location of a Sears Service Center in your area Call 24 hours a day 7 days a week 1 800 488 1222 To purchase or inquire about a Sears Maintainance Agreement Call 7 am 5 p m CST Monday Saturday 1 800 827 6655 F HomeCentral...

Reviews: