background image

Summary of Contents for 790.7877 Series

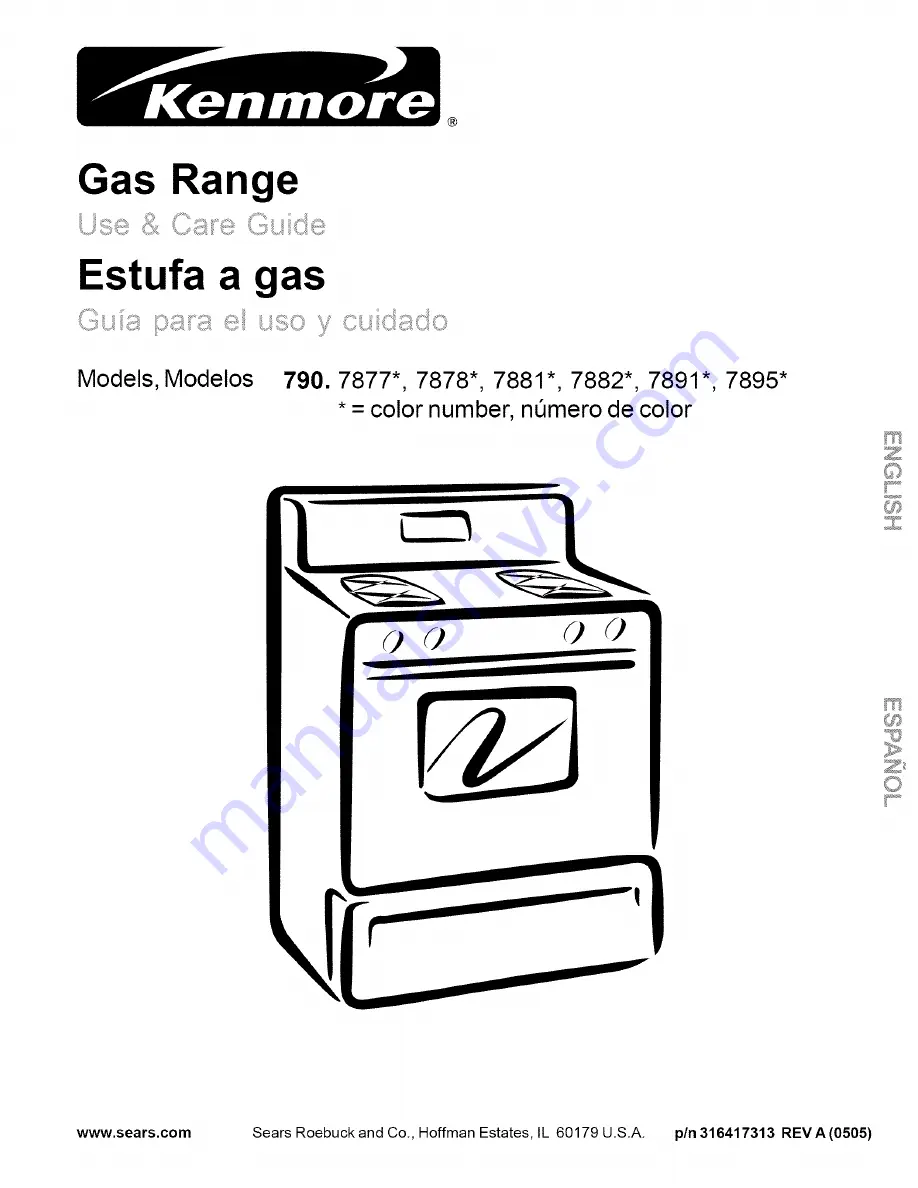
Page 1: ...as Range Estufa a gas Models Modelos 790 7877 7878 7881 7882 7891 7895 color number nt mero de color III _D _J r www sears com Sears Roebuck and Co Hoffman Estates IL 60179 U S A pin 316417313 REV A 0505 ...

Page 2: ...lation Cooktop glass if it fails due to thermal shock Cooking elements if they are defective Rubber seal if it cracks between the cooktop glass and the porcelain edge What Sears will not cover Failure of the product if it is abused misused or used for other than the intended purpose Damage to the cooktop glass caused by the use of cleaners or utensils other than the recommended cleaning cream and ...

Page 3: ...e weight of a child on an open door may cause the range to tip resulting in serious burns or other injury Do not use the oven or warmer drawer if equipped for storage Do not store items of interest to children in the cabinets above a range or on the backguard of a range Children climbing on the range to reach items could be seriously injured All ranges can tip Injury to persons could result Instal...

Page 4: ...eating elements in the oven Remove all utensils from the rack before moving Do not use the broiler pan without its insert The broiler pan and its insert allow dripping fat to drain and be kept away from the high heat of the broiler Do not cover the broiler insert with aluminum foil Exposed fat and grease could ignite Cold temperatures can damage the electronic control When using the appliance for ...

Page 5: ...ntment online Sears has over 12 000 professional repair specialists who have access to over 4 5 million quality parts and accessories That s the kind of professionalism you can count on to help prolong the life of your new purchase for years to come Purchase your Master Protection Agreement today Some limitations and exclusions apply For prices and additional information call 1 800 827 6655 In Can...

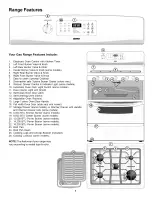
Page 6: ... with Shield 12 Self Clean Oven Door Latch 13 Self Cleaning Oven interior 14 Adjustable Oven Racks s 15 Large 1 piece Oven Door Handle 16 Full width Oven Door style vary with model 17 Storage Drawer some models or Warmer Drawer with Handle and Warmer Drawer rack some models 18 5 000 BTU Simmer Burner some models 19 9 500 BTU Center Burner some models 20 12 000 BTU Power Burner some models 21 14 20...

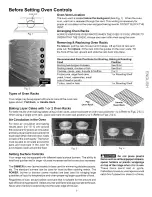
Page 7: ...en rack positions 1 4 Refer to Figs 2 3 When using a single oven rack place cookware on oven rack position 2 or 3 Refer to Figs 2 4 Air Circulation in the Oven For best air circulation and baking results allow 2 4 5 10 cm around the cookware for proper air circulation and be sure pans and cookware do not touch each other the oven door sides or back of the oven cavity The hot air must be able to ci...

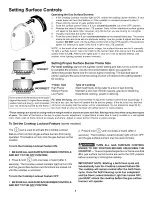
Page 8: ...ken sauces gravies or steaming Keep foods cooking poach or stewing For deep fat frying use a thermometer adjust the surface control knob accordingly If the fat is too cool the food will absorb the fat and be greasy If the fat is too hot the food will brown so quickly that the center will be undercooked Do not attempt to deep fat fry too much food at once as the food will neither brown or cook prop...

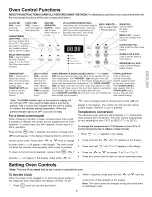
Page 9: ...antly after the door STOP CLEAR pad is Iocks COOKTOP LOCKED light will glow when the cooktop has used to activate oven been locked some models door lockout setting Notei The OVEN indicator light on the electronic display will V once to change back to normal sound mode SP will turn QN and OFF when using the Bake feature and during preheat This is normal and indicates that the oven is cycling appear...

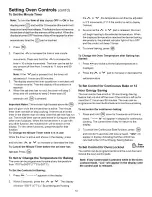
Page 10: ...out Press _ To Set or Change the Temperature for Baking The oven can be programmed to bake at any temperature from 170 F to 550 F 77 C to 287 C the A or V the temperature can then be adjusted in 5 F increments 1 C if the control is set to display Celsius 3 As soon as the A or V pad is released the oven will begin heating to the selected temperature When the displayed temperature reaches the desire...

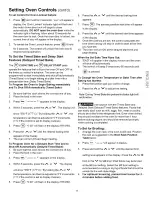
Page 11: ...s the A or V The display will show 350 F 177 C By holding the A or V the temperature can then be adjusted in 5 F increments 1 C if the control is set to display Celsius Press 0 00 will flash in the display HR MIN 6 Press the A or V until the desired baking time appears Press The earliest possible start time will appear in the display 8 Press the A or V until the desired start time appears in the d...

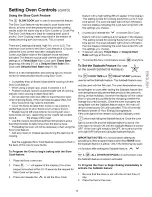
Page 12: ...e Timer feature see To Set the Minute Timer instructions in the Setting Oven Controls section To Set the Recipe Recall Feature f_ The 00 RECIPE RECALL pad is used to set the Recipe Recall feature This feature will ONLY recall a previous Bake Timed Bake or a Timed Bake with a Warm Hold added setting This feature will not work with any other function including a Delayed Timed Bake setting To Program...

Page 13: ...15 seconds the request for Slow Cook will be clear 3 Press and release the A to set the Slow Cook feature with a high setting HI will appear in the display This setting is best for cooking foods from a 4 to 5 hour time period The oven indicator light will turn ON below the time display indicating the oven has turned ON with the settings you choose 4 or press and release the V to set the Slow Cook ...

Page 14: ...ically The oven will remember that it is set for the Sabbath and the food may be safely removed from the oven while still in the Sabbath feature however the oven cannot be turned back on until after the Sabbath After the Sabbath observance turn OFF the Sabbath feature Press and hold both the and pads for at least 3 seconds SAb will disappear from the display and the oven may be used with all norma...

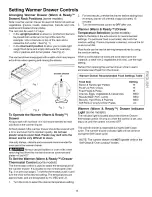
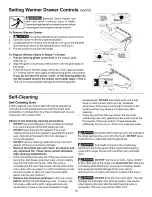
Page 15: ... tt is located on the control panel See Fig 3 on previous page To set the thermostat push in and turn the knob to the desired setting The temperatures are approximate and are designated by HI MED and LO 1 Turn the knob to select the desired temperature setting For best results preheat the drawer before adding food An empty drawer will preheat in approximately 15 minutes Turn the thermostat control...

Page 16: ...mage Remove the broiler pan and insert all utensils and any aluminum foil These items cannot withstand high cleaning temperatures Oven racks should be removed If they are not removed during the Self Clean cycle their color will turn slightly blue and the finish will be dull After the cycle is complete and the oven has cooled rub the sides of the oven racks with wax paper or a cloth containing a sm...

Page 17: ...Cycle is Completed 1 The time of day or End will appear in the display window and the Clean and LOCK light will continue to glow 2 Once the oven has cooled down for about 1 HOUR and the LOCK light has gone out the oven door can be opened If End is in the display and the Select Clean indicator light remains ON press _ The time of day will appear in the display To avoid possible burns use care when ...

Page 18: ...des of the racks with wax paper or a cloth containing a small amount of baby oil or salad oil this will make the racks glide easier into the oven rack positions Use soap water to thoroughly clean the top sides front of the oven door Rinse well You may use a glass cleaner on the outside glass of the oven door DO NOT immerse the door in water DO NOT spray or allow water or the glass cleaner to enter...

Page 19: ...l with floor See Fig 1 4 Push the door hinge locks up towards and into the oven frame on both left and right oven door hinges See Fig 2 to the locked position 5 Close the oven door Special Door Care Instructions Most oven doors contain glass that can break Read the following recommendations 1 Do not close the oven door until all the oven racks are fully in place 2 Do not hit the glass with pots pa...

Page 20: ...urner head must be routinely cleaned If residue still remains in these ports use a small gauge wire or needle to clean the slots or holes For proper flow of gas and ignition of the burner DO NOT ALLOW SPILLS FOOD CLEANING AGENTS OR ANY OTHER MATERIAL TO ENTER THE GAS ORIFICE HOLDER OPENING ALWAYS keep the surface burner cap and surface burner head in place whenever a surface burner is in use Adjus...

Page 21: ...essively during broiling 1 Control s not set properly Follow Broil instructions under Setting Oven Controls 2 Oven door is open Make sure oven door is closed 3 Meat too close to the broil element Reposition the broil rack to provide proper clearance between the meat the element Preheat the broil element for searing 4 Meat not properly prepared Remove excess fat from meat Cut fatty edges to prevent...

Page 22: ... 1 teaspoon salt seasoning 1 tablespoon parsley 6 medium potatoes sliced 1 medium onion sliced In a large mixing bowl combine first 5 ingredients blend well In a roasting pan spread potatoes and onions over the bottom of the pan Pour soup mixture over potatoes and onions topping with the pork chops Sprinkle pepper seasoning and parsley on top of pork chops Cover pan with lid or aluminum foil and p...

Page 23: ...equipment and electronics call or go on line for the location of your nearest Sears Parts Repair Center 1 800 488 1222 Call anytime day or night U S A only www sears com To purchase a protection agreement U S A or maintenance agreement Canada on a product serviced by Sears 1 800 827 6655 U S A 1 800 361 6665 Canada Para pedir servicio de reparaci6n a domicilio y para ordenar plezas 1 888 SU HOGAR ...

Reviews: