background image

Summary of Contents for 911.95381

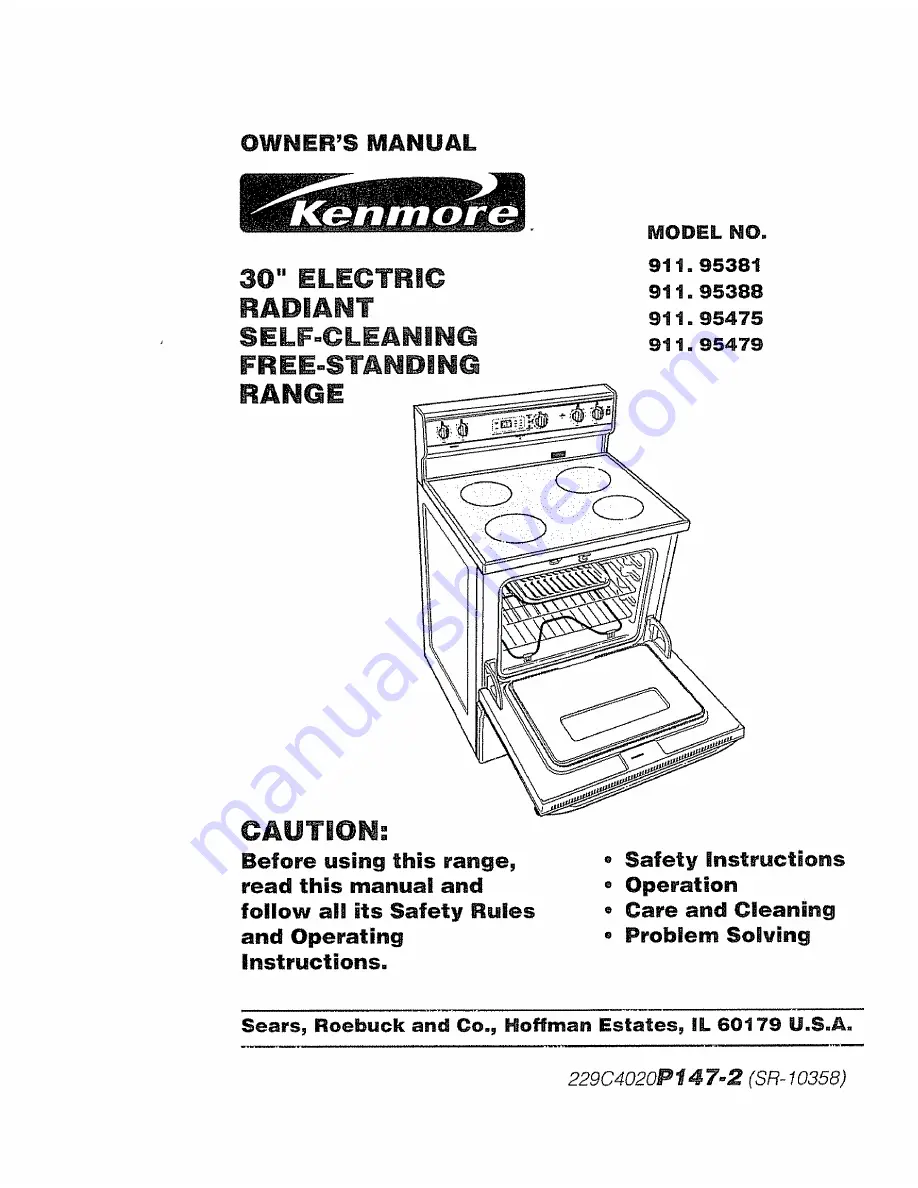
Page 1: ...ing this range read this manual and follow all its Safety Rules and Operating Instructions Safety instructBons Operation Care and Cleaning o Problem Solving Sears Roebuck and Co Hoffman Estates IL 60t 79 U S_A 229C4020Pt 47 _ SR 10358 ...

Page 2: ...utomatic Oven Shut Off 11 To Set The Clock t2 To Set The Timer 12 To Reset The Timer t2 To Cancel The Timer 12 Oven Cooking Tips 13 15 Baking With Margarine 14 Oven Control 15 Baking 16 Broiling 7 Self Cleaning Cycle t8 19 Glass Cooktop Cleaning 20 21 Control Panel 21 Broiler Pan and Grid 21 Control Knobs 22 Oven Light Bulb 22 Oven Racks 23 Oven Door 23 Storage Drawer 24 Before Calling for Service...

Page 3: ... of the range side painted outside panel will be Place the bracket with its outside edge at this location and against back wall See Figure 2 4 Determine whether you will anchor the bracket to the floor or wall Make sure this location is clear of electrical wiring or plumbing Fig 1 w Fasten the bracket securely with the screws provided Screws are self drilling in wood plywood particle and chip boar...

Page 4: ...ppliance Children climbing on the appliance could be seriously injured KEEP THIS book for later use NEVER USE your appliance for warming or heating the room NEVER TRY to repair or replace any part of the appliance unless instruc tions are given in this manual All other work should be done by a qualified technician ALWAYS KEEP combustible walt coverings curtains dish cloths towels potholders and ot...

Page 5: ... area being used Undersized utensils expose the heating element and may result in direct contact or ignition of clothing o NEVER LEAVE surface units unattended at high settings Boi overs result in smoking or greasy spills which could catch fire NEVER cook on a broken cooktop cleaning solutions and spillage could penetrate it and create the risk of electrical shock or fire o ALWAYS TURN utensil han...

Page 6: ... potential exposure to such substances The fiberglass insulation in a self cleaning oven will give off a very small amount of carbon monoxide during the cleaning cycle Exposure can be minimized by venting with an open door or window or using a ventilation fan or hood IMPORTANT 1 he health of some birds is extremely sensitive to the fumes given off during the self cleaning cycle of any range Move b...

Page 7: ...o scrape remaining spill from the hot cooking zone OPERATION r CAUTUON When the surface controls are turned off the Hot Surface mndicator light will remain lit until the cooktop surface has cooled to approximately 150 F The glass ceramic surface will retain heat after the indicator light goes out Use caution until the cooktop surface has had time to cool w J To remove the adhesive left from packag...

Page 8: ...ght Glass Ceramic Cookto Door Latch And Unlatch Handle Oven Hot Surface Control indicator Light Broil Element Model and Serial Number Lo Storage Drawer Broiler Pan and Grid Oven Light Vent Cooking Oven Door Removable Racks Bake Element Removable Door Oven Door Gasket 8 ...

Page 9: ...ler flat against the surface of the pan Rotate the ruler a full circle checking as you turn for any space between the two surfaces The bottom of the pan and the edge of the ruler should fit flush against each other all the way across Stainless Steel Highly recom mended for use with your new cooktop Especially good with a sandwich clad bottom Aguminum Heavyweight aluminum cookware recommended Cast ...

Page 10: ...lass ceramic This procedure helps maintain an even cooking temperature without allowing the cooking zones to overheat Water bath or pressure canners and large diameter pots extending more than 1 beyond the edge of the cooktop element may be used for canning However do not use large diameter canners pots or pans for anything other than boiling water Most syrup or sauce mixtures and all types of fry...

Page 11: ...you have a function error code Note the number after the F Turn the oven control knob to the OFF position Allow the oven to cool for about t hour and retry the oven operation If the problem repeats call for service Advise the technician what code was flashing When the power to your range is turned on for the first time the display will flash the time when the power was turned off You can set the c...

Page 12: ...clock wilt automatically start keeping time within one minute or you may press the CLOCK pad for immediate start If you have selected an amount of time but decide to change it tf the countdown is showing in the display press the HOUR MIN UP and or DOWN arrow pads Select the desired time If the time of day clock or temperature is showing in the display press the TIMER ONIOFF pad Then press either t...

Page 13: ...maintains the temperature of the oven Never move or bend this tube Oven ___ Temperature Sensor Opening the door often to check foods will cause heat loss and poor baking results The low temperature zone of your oven between 170 and 200 F is available to keep hot cooked foods warm However foods kept at these temperatures longer than 2 hours may spoil To prolong the life of your oven light bulb foll...

Page 14: ...he more noticeable these differences become To ensure best results use margarine butter or stick spreads containing at least 70 vegetable oil If baking with more than one pan place the pans so each has at least 1 to 1 t 2 of air space around it Place pans so one is not directly above the other SHINY PANS reflect heat and are perfect for cakes and quick breads that need a light brown crust GLASS DA...

Page 15: ...REHEATED Indicator Light turns on and stays on when oven has reached selected bake tem perature o OVEN OH Indicator Light turns on and stays on when a Bake Broil or Clean function has been chosen o CLEAN indicator Light turns on and stays on for self clean If the CLEAH Indicator Light flashes you should check for one of the following 1 The door handle is latched during a baking function 2 The door...

Page 16: ... pad 2 The OVEN ON indicator light will glow 3 When the oven has reached the selected temperature a series of short tones will sound and the PREHEATED and OVEH ON indicator lights will glow 4 The PREHEATED and OVEN ON indicator lights will remain on until baking is complete and the control knob is turned to the OFF position 1 With the control knob in the off position press and hold the i_inN UP an...

Page 17: ...ltry to at least an INTERNAL temperature of I80 F Cooking to these temperatures usually protects against food borne illness The closer you place foods to the broil element the faster foods brown on the outside yet remain red to pink in the center Moving meats away from the element will allow the meat to cook to the center while browning on the outside Cook side 1 at least 2 minutes longer than sid...

Page 18: ... frayed or displaced on the door it should be replaced The door gasket is designed to have a 5 6 gap at the bottom of the door This allows for proper air circulation Door Panel Gasket Door Liner tt is normal for your oven door to give the appearance of not having a good seal against the range This is due to the gasket The location of the gasket on the oven door maintains a good seal and prevents a...

Page 19: ...off position 7 When the temperature has cooled the door latch handle will easily slide to the left Turn the oven control knob to the off position You will need to wait for the oven temperature to drop below the lock temperature approx 1 hour before attempting to open the door The indicator light will not blink if the cycle is interrupted After the cycle you may notice some white ash in the oven Ju...

Page 20: ...o not use a dull or nicked razor b_ade on your cooktop Store the razor scraper out of reach of children Sugar spills such as jellies fudge candy syrups or melted plastic can cause pitting of the cooktop surface unless the spill is removed while it is still hot Special care should be taken when removing hot substances Follow these instructions carefully and remove soil while spill is hot 11 Turn of...

Page 21: ...nt film on the cooktop Cleaning Creme will remove this film Water stains mineral deposits are removable using the creme or full strength white vinegar Do not use a dull or nicked razor blade on your cooktop Do not use abrasive cleaners or abrasive scouring pads on your cooktop o Plastic mesh pads such as Dobie may be used To order additional Cooktop Cleaning Creme call your nearest Sears Service C...

Page 22: ... the oven at the main circuit breaker or fuse box before attempting to replace the oven light bulb Do not touch a hot light bulb with wet hands or a wet cloth Wait until the bulb has cooled and use a dry cloth Glass Live Collar Bulb Glass Cover TO REMOVE THE COVER 1 Disconnect electrical power to the oven at the main circuit breaker or fuse box 2 Grasp the glass cover and turn 1 4 turn countercloc...

Page 23: ...he way back Broil Stop Position TO REMOVE 1 Open the door to the broil stop position 2 Grasp the door at each side and lift up and off the hinges DO NOT LiFT DOOR BY THE HANDLE _z_r _ J fll r I _ 4 1 I ll __ AUTION When the door is removed and the hinge arms are at the broil stop position as a precaution cover the hinge arms with toweling or an empty paper towel roll Do not bump or try to move the...

Page 24: ...drawer stop TO CLEAN Wipe the inside and outside with warm soapy water and a damp cloth or sponge Do not use harsh abra sives or scouring pads on the drawer Guide 2 Lower the front of the drawer and push back the drawer until it stops 8 Lift up on the front of the drawer until the stop guide of the drawer clears the stop guide of the base rail Slide the drawer into place CAUTION The drawer gives y...

Page 25: ...are with rough c bottoms surface and bottom of cookware are clean be fore using Use only flat bottomed cookware Metal markings on the cooktop surface may appear as scratches Sliding or scraping metal utensils and cook ware across cooktop surface Areas of discolora Mineral deposits from tion on the cooktop water or food surface Use recommended clean ing procedure to clean the cooktop surface Use re...

Page 26: ...bulb Oven did not a clean or results were poor b Oven smokes Controls were not set a properly Clean cycle was b interrupted Check the self cleaning section of this manual The normal clean cycle should last 4 hours and 20 minutes c Oven was soiled heavily ell a Dirty oven a b Improper use of b aluminum foil Heavy spillovers should be removed before the cycle is set You can also repeat the cycle Che...

Page 27: ...ture 25 degrees for glass or dultldarkened pans f Recipe not followed f Is recipe tested reliable g improper thermostat g Check oven tempera calibration ture adjustment section h Range and oven h Check the installation rack not level for leveling a improper rack a Check broi pan position placement see broiling section b Oven preheated b c improper use of foil c Do not preheat when broiling Do not ...

Page 28: ... the temperature set the oven temperature 25 degrees higher if foods are undercooked or 25 degrees lower if foods are burning than the temperature in your recipe then bake The results of this test should give you an idea of how much the temperature should be changed 1 While the control knob is in the off position press and hoed at the same time the HOUR UP and DOWN arrow pads until the display sho...

Page 29: ... only 90 days WARRANTY SERVICE ISAVAILABLE BY CONTACTING THENEAREST SEARSSERVICE CENTER DEPARTMENT tN THEUNITED STATES This warrantygivesyouspecific legalrights andyou mayalso haveotherrightswhichvaryfrom stateto state SearsRoebuck andCo Dept 817WAHeffmanEstates IL 60179 To further add to the value of your Range Buy a Sears Maintenance Agreement _ 1st Year 2nd Year 3rd Year Years of Ownership Cove...

Page 30: ...5 4455 For the repair orreplacementparts you need Call 7 am 7 pm 7 days a week 1 800 366 PART 1 800 366 7278 Para ordenarpiezasconentregaa domicilio 1 800 659 7084 For the location of a SearsPartsand Repair Center in yourarea Call24 hours a day I daysa week t 800 488 t 222 For informationonpurchasinga Sears MaintenanceAgreementor to inquire aboutan existingAgreement Call9 arn 5 prn Monday Saturday...

Page 31: ..._ql el 1 ss4_s_ i sl I 9s47 _ J PRSCAUCION Lea y siga todas las reglas y las instrucciones para el funcionamiento antes de usar este producto pot primera vez o nstrucciones de Seguridad o FuncionamJento o Cuidado y Limpieza C6mo Reso ver Probiemas Sears Roebuck and Co Hoffman Estates iL 60179 U S A 229C4020Pt 47 2 SR 10358 ...

Page 32: ..._tico del homo 11 Cemo poner el reloj 12 C0mo programar el cron6metro 12 C6mo reprogramar el cron6metro 12 Para cancefar el cronOmetro 12 Cosejos para cocinar en el homo 13 15 Horneado con margarina 14 Control del homo 15 COmo hornear 16 C6mo asar a la parrilla 17 Ciclo de Autolimpieza I8 I9 Limpieza de la superficie de vidrio 20 21 Panel de control 2t Cacerola y parrilla para asar 2t Perilfas de ...

Page 33: ... y contra ta pared de atr_s Vea ta Fig 2 4 Determine si va a ancfar la abrazadera al piso o a la pared Asegurese que esta ubicaci6n este libre de alambres etectricos o plomeria m u w Oritla exterior de la abrazadera debe estar en llnea con el lado zquferdo o estufa Fig I Pegue la abrazadera firmemente con los tornitlos que se proveen Los torniilos son para madera madera terciada tablas de part cul...

Page 34: ...o o en los gabinetes sobre la estufa Los ni_os que se suban sobre la estufa podrfan resuftar gravemente heridos GUARDE ESTE libro para un uso futuro NUNCA USE su estufa para entibiar o calentar una habitaci6n NUNCA TRATE de reparar o reemplazar una parte de la estufa a menos que las instrucciones se den en este manual Todo otro trabajo deber a ser hecho por un tecnico especializado SIEMPRE MANTENG...

Page 35: ...temento catentador y podria resultar en un contacto directo o el incendio de ta ropa NUNCA deje las unidades de superficie sin vigitancia a temperaturas altas Los derrames podrian resuttar en humo o en derrames de grasa que se podrian incendiar NUNCA COCIIHE sobre una cubierta quebrada Las soluciones para fa limpieza y los derrames podrian penetrarla y crear el riesgo de un gotpe de corriente o un...

Page 36: ...viertan a sus clientes de contacto potencial a tales substancias E aislante de fibra de vidrio en el homo con autolimpieza emitir_ una muy peque_a cantidad de mon6xido de carbono durante el ciclo de autolimpieza El contacto se puede minimizar ventilando con una puerta o ventana abierta o usando un ventilador o una campana de ventilaci6n IMPORTANTE La salud de algunos p_jaros es extremadamente sens...

Page 37: ... para cocinar caIiente OPERAC ON PRECAUCJON Cuando los controles de la superficie se apaguen la luz indicadora de Caior de la Superficie permanecerd encendida basra que ta superficie se haya enfriado hasta aproximadarnente 150 grados F La superficie de vidrio cerdmica retendr_ calor despu6s que la luz indicadora se haya apagado Tenga cuidado hasta que la superficie de la cubierta haya tenido tiemp...

Page 38: ...ente Luz indicadora de supe Cubierta de vidrio cer_mi Cerrojo para abrir y cerrar la puerta Elemento para asar a la Ve tilaci6n homo Zona para cocinar Cerrojo de ia puerta del homo Ubicaci6n de placa con hombre y nQmero Parrillas removibles Elemento ara hornear Caj6n de Cacerola y parrilla para asar Selio de la puerta Puerta removibBe del homo 8 ...

Page 39: ... coloque una regla sobre la superficie de la olta Haga girar la regla en un circulo complete revisando mientras ta da vuelta cualquier espacio que podria existir entre las dos superficies El fondo de la olla y et filo de la regla debertan coincidir uno sobre et otro a traves de todo et largo Acero inoxidable Altamente recomendado para uso con su nueva cubierta para cocinar Especialmente bueno con ...

Page 40: ...constante sin permitir que las zonas para cocinar se sobrecalienlen HI MED LO Se usa para comienzos rapidos tal come para hervir agua Se usa para hervir y freir Se usa para comidas al vapor o para mantener los alimentos a temperaturas para ser servidos La luz indicadora de unidad de superficie se encenderA cuando cuaiquier zona para cocinar sea activada Las olfas para hacer conservas a presiOn o a...

Page 41: ......

Page 42: ......

Page 43: ...lletas sobre la parrilfa debajo de la comida que se podria derramar La ventilaci6n del homo est_ ubicada debajo del etemento posterior derecho Esta area se podria caientar mucho durante el uso del homo Nunca obstruya la ventilaci6n Ventilaci6n _ _ _ _ delhorno La zona de temperatura baja de su homo entre 170 y 200 F est_ disponible para mantener tibios los alimentos que hart sido cocinados calient...

Page 44: ...m_s se notar_n estas diferencias Para asegurar los mejores resuttados use margarina mantequilla u otras barras de estos productos que contengan por fo menos 70 de aceite vegetal LOS UTEHSILiOS BRILLAHTES refiejan el calor y son perfectos para queques y panecillos r_ pidos que deben quedar levemente dorados LOS UTENSILIOS DE VIDRIO CONTRAPEGADURAS O OSCURECIDOS POR LA EDAD absorben calory pueden se...

Page 45: ... enciende y permanece encendida cuando et homo Ilega a la temperatura seleccionada para hornear HORNO ENCENDIDO Se enciende y permanece encendida cuando la funci6n para hornear asar o limpiar haya sido seleccionada LIIMPIIEZA Se enciende y permanece encendida para ia autolimpieza Si la luz indicadora para la LIMPIEZA pestahea usted debeda revisar Io siguiente t La manifla de la puerta est _ enganc...

Page 46: ...indicadora HORHO ENCENDUDO OVEN ON se encender_ 3 Cuando et homo ttegue a fa temperatura seleccionada sonar_ una serie de tonos y las luces indicadoras PREHEATED y OVEN ON se encender_n 4 Las luces indicadoras de PRE HEATED y OVEH ON permanecer_n encendidas hasta que el horneado haya terminado y la perilla de control se haya puesto en la posici6n de apagado OFF tB 2_ Con la perilla de control en p...

Page 47: ...calor INTERNO de pot lo menos 180 F El cocinar a estas temperaturas 17 generalmente protege contra enfermedades causadas por los alimentos Mientras mas cerca cotoque los alimentos del etemento para asar m_s r_pido se dorar_n per afuera pero quedando rojo o rosado en el centro Colocando ias carnes lejos det elemento permitira que las carnes se cocinen en el centro mientras se doran por afuera Usand...

Page 48: ...atiendo de la puerta debeda ser reemptazado El selto de la puerta estA diseNado para que tenga un espacio de 5 6 en el rondo del homo Panel de la puerta Sello f _ 6 _4 Revestimento de la puerta Esto permite la circufaciOn adecuada del aire Es normal que su homo de la apariencia de no tenet un buen sello sobre el homo Esto se debe al sello La ubicaciOn del sello sobre la puerta det horno mantiene t...

Page 49: ... de apagado OFF 7 Cuando ta temperatura se haya enfriado ta manitla del cerrojo de ta puerta se deslizar_ f cilmente hacia la izquierda D6 vuelta la perilla de control del homo a la posiciOn de apagado OFF Tendr_ que esperar a que ia temperatura del homo baie a menos de la temperatura de cierre approx I hora antes de tratar de abrir la puerta Las luces indicadoras no pestaC_aran si el ciclo de tim...

Page 50: ...eitarse que estA gastada o mellada sobre la cubierta Guarde el raspador a hoja fuera de alcance de los ni_os Los derrames de aztJcares tales como jateas chocolate y jarabes o el plAstico derretido puede causar hoyos en la cubierta a menos que et derrame se saque mientras todavia este caliente Se debe usar un cuidado especial cuando se limpian sustancias calientes Siga estas instrucciones cuidadosa...

Page 51: ...ca este residuo inmediatamente podria producir marcas permanentes o Si las ollas con un enchapado de aluminio delgado de cobre o de esmalte hierven cuando estan secas se podrian fundir con ia superficie de la cubierta Esta descoloraciOn negra deberia ser sacada inmediatamente o podda ser permanente o El uso de limpiadores de vidrio podrian dejar una capa irridescente sobre la cubierta La crema par...

Page 52: ...e los fusibles antes de tratar de reemplazar el foco de la luz del homo No toque un foco de la luz caliente con ias manos mojadas o con un paso htimedo Espere a que el foco se enfrie y use un paso seco Sujetador del vidrio Collar con electricidad Foco Cubierta de vidrio COMO SACAR LA CUBUERTA 1 Desconecte el paso de ta electricidad al homo en el interruptor del circuito principal o en la caia de l...

Page 53: ...asar a la parrilla PARA SACAR 1 Abra la puerta hasta la posici6n para asar a la parrilla 2 Tome la puerta de cada lado ievantela y sAquela de las bisagras NO LEVANTE LA PUERTA DE LA MAHILLA puerta se saca y los brazos de las bisagras est_n en la posici6n de tope para asar a la parriUa como precauci6n cubra los brazos de las bisagras con toailas o con un rol o de toallas vacio No pase a Ilevar o tr...

Page 54: ...hacia atrAs hasta que se detenga 3 Levante el frente del caj6n hasta que el tope de la gufa del caj6n pase por encima de la guia en e riel de la base Destice el caj6n hacia su lugar _ RECAUCION El caj6n le ofrece espacio para guardar utensUios para cocinar y hornear Los materiales inflamables y de pl_stico no se deberian guardar en este caj6n No sobrecargue el caj6n Si el caj6n est_ demasiado pesa...

Page 55: ... cubierta y el fondo de las ollas esten limpias antes de usarIas c Use solamente ollas de fondo piano Marcas de metal en Ita Arrastrar o raspar los superficie de la utensilios sobre la cubierta pueden verse superficie de la cubierta como rayaduras Areas de descoloraciOn Dep0sitos de minerafes sobre la superficie de agua o alimentos de la cubierta Bandas y manchas oscuras sobre la superficie de la ...

Page 56: ...usieron bien b E1ciclo de limpieza rue interrumpido a Revise ia posiciOn del interruptor b Revise el foco de ta luz del homo a Lea la secciOn de autofimpieza de este manual b El ciclo de limpieza normal deberia ser de 4 horas y 20 minutos c Los derrames grandes se deberian limpiar antes de programar un ciclo Usted tambien podria repetir el ciclo c El homo estaba demasiado sucio El horno humea El h...

Page 57: ...scuros u opacos f Es la receta probada y de confianza go Revise la seccidn de ajustes a la temperatura La estufa o la parrilla h Vea ias instrucciones de del homo no estan instaIaci0n para la niveladas nivelaciOn Los alimentos no se a PosiciOn incorrecta a Revise fa posicidn de las asan adecuadamente a la parrilla de la parrilla b El homose precatent0 c Mal usode papel de aluminio d_ em f_ La puer...

Page 58: ...ba ta temperatura del homo en 25 grados si los alimentos no quedan bien cocidos o baje ta temperatura en 25 grados si la comida se quema de la temperatura de la receta luego hornee Los resultados de esta prueba le deberlan dar una idea de cu_nto se deberfa cambiar la temperatura 1 Mientras la peritla de control est_ en la posisiOn de APAGADO OFF empuje y sujete a la misma vez por 4 segundos los bo...

Page 59: ...ICIO DEGARANTIA ESTA DISPONIBLE PON1ENDOSE ENCONTACTO CONEL CENTRO 0 DEPARTAMENTO DESERVfCIO SEARS MASCERCANO ENLOSESTADOS UNIDOS Estagarantiale brindaderechoslegalesespecificos y tJsted podriatenetotrosderechosquevarian deestadoaestado SearsRoebuck andCo Dept 8t7 WAHoffmanEstates IL 60179 Para ampiiar eg valor die su estufa compre un contrato de mantenimiento Sears A_os die cobertura de propiedad...

Page 60: ...0 665 4455 For therepair orreplacementparts you need Call7 am 7 pm 7 daysa week t 800 366 PART 1 800 366 7278 Paraordenar piezas conentregaa domicilio 1 800 659 7084 For the location of a SearsPartsand Repair Center in yourarea Call 24 hours a day 7 days a week t 800 488 t 222 Forinformationonpurchasinga Sears Maintenance Agreementor to inquire aboutan existingAgreement Ca l9am 5 pm Monday Saturda...

Reviews: