background image

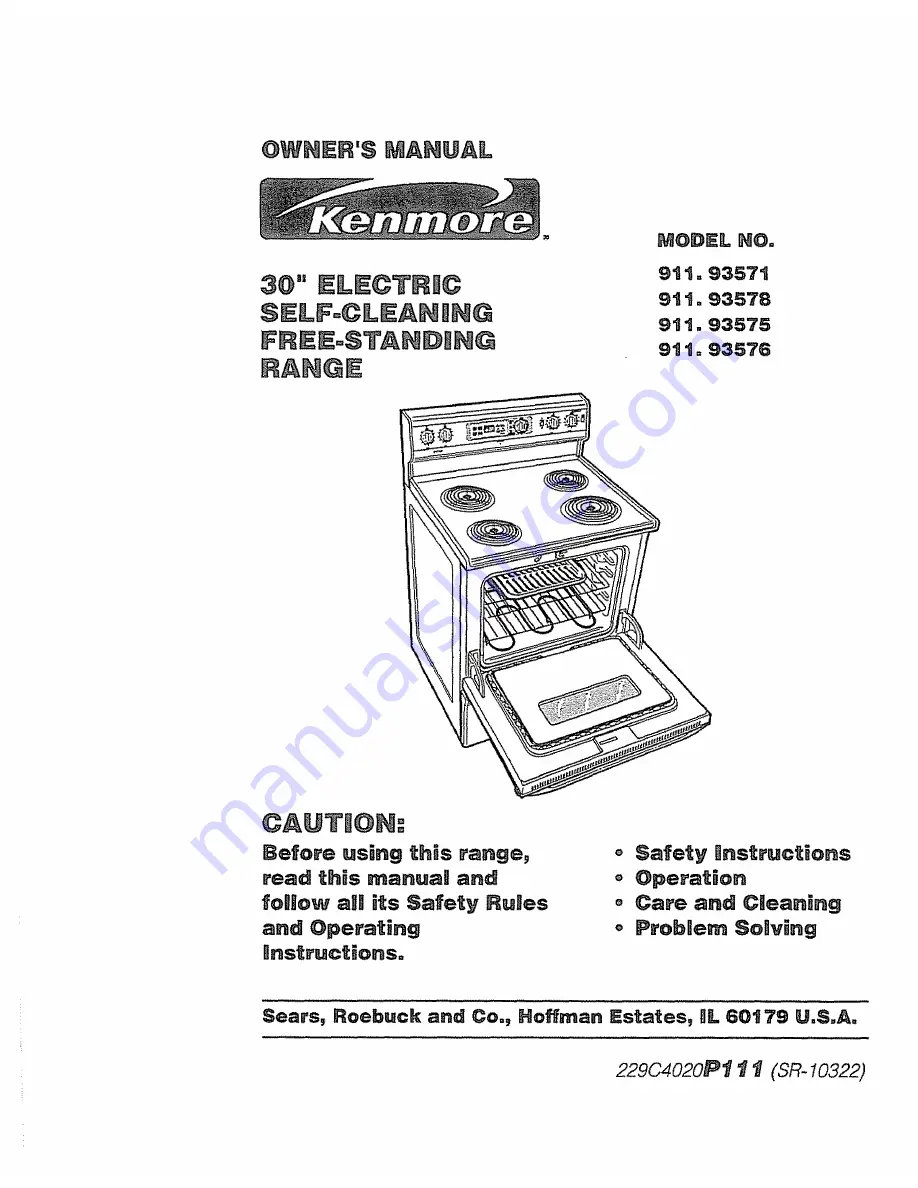
Summary of Contents for Kenmore 911.93571

Page 1: ... 91to93575 Before using this range read th_s manua_ a d foHo_ allHits Safety RuJes and Operati g Rnstruct ons o Safety I nstruc_L_ons o Operation o Care and C_eanBng ProbRem Solving Sears Roebuck and Co Hoffman Estates EIL60179 U S Ao 229C4020PI I l SR 10322 ...

Page 2: ...5 Broiling 16 Self Clean Cycle 17 18 Control Panel 19 Broiler Pan and Grid 9 Walls of The Oven 19 Cooktop and Burner Box Bottom 19 Painted Surfaces 19 Glass 19 Control Knobs 20 Replacing Oven Light Bulb 20 Storage Drawer 21 Lift Up Cooktop 22 Cooktop Units 22 Oven Racks 23 Oven Door 23 Before Calling for Service 24 25 Temperature Adjustment 26 Warranty 27 Consumer Service Numbers 28 For your conve...

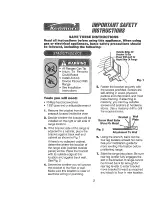
Page 3: ...with its outside edge at this location and against back wall See Fig 2 Determine whether you will anchor the bracket to the floor or wall Make sure this location is clear of electrical wiring or plumbing Fasten the bracket securely with the screws provided Screws are self drilling in wood plywood particle and chip board and most metal framing If attaching to masonry you can buy suitable screws and...

Page 4: ...ng on the appliance could be seriously injured KEEP THIS book for later use NEVER USE your appliance for warming or heating the room NEVER TRY to repair or replace any part of the appliance unless instruc tions are given in this manual All other work should be done by a qualified technician o ALWAYS KEEP combustible walt coverings curtains dish cloths towels potholders and other linens a safe dist...

Page 5: ...ersized utensils expose the heating element and may result in direct contact or ignition of clothing ALWAYS USE drip bowls to prevent wiring and component damage Do not use aluminum liners or foil in drip bowls Improper use may result in risk of electrical shock or fire NEVER LEAVE surface units unattended at high settings Boilovers result in smoking or greasy spills which could catch fire ALWAYS ...

Page 6: ...cleaning oven wii give off a very sma01i amount of carbon monoxide during the cleaning cycl e Exposure can be minimized by venting with an open door or window or using a venUIlation fan or hood the drip tbowRs _ith al uml num fol i Foi can baock the normal heat fUo_ and damage the range AMways use cookwaFe and woks that are ftlat on the bottom and the same size as the cooking ellement being used C...

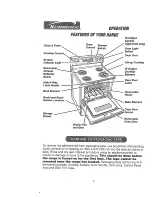
Page 7: ...awer Broiler Pan and Grid Oven Door Removable Oven Door To remove the adhesive left from packaging tape use household dishwashing liquid mineral oil or cooking oil With a soft cloth rub into the area and allow to soak Rinse and dry well Repeat procedure using an appliance polish to insure no damage is done to the appliance 3 his shougd be done before the range is turned on for the first time The t...

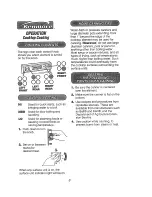
Page 8: ...s surrounding the surface units O0 O0 LEFT RIGHT REAR REAR HB LO Used for quick starts such as bringing water to a boil Used for slow boiling and sauteing Used for steaming foods or keeping cooked foods at serving temperature t o Push down to turn _1_ the knob 2 Set on or between marks for 0_ desired heat tm m 3o m Be sure the canner is centered over the element Make sure the canner is flat on the...

Page 9: ...n and turn the centroll knob to off 00 The indicator light wilt go OO off SIMMER This 6 coil element compared to the 5 coil element on the left rear provides additiona heating capacity It can be used for all your cooking needs but is particularly beneficial for large amounts of food NOTE Bf you remove this egement to cLIean the drip bow9 _t is essentiaU that the 6 coil eBement be returned to the r...

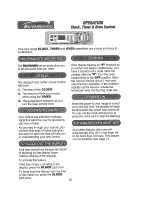
Page 10: ...u have a function error code Note the number after the F Turn the oven control knob to the OFF position Allow the oven to coot for about I hour and retry the oven operation If the problem repeats call for service Advise the technician what the flashing code was When the power to your range is turned on for the first time the display will flash the time when the power was turned off You can set the...

Page 11: ...lock will automatically start keeping time within one minute or you may press the O OCK pad for immediate start If you have selected an amount of time but decide to change it If the countdown is showing in the display press the _IIH_TE HO_ _P or O_ arrow pad Select the desired time if the time of day clock or temperature i _ showing in the display press the TH_ER ON OFF pad Then press either the _...

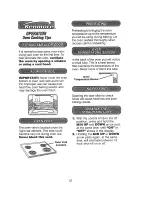
Page 12: ...ay damage the oven finish In the back of the oven you will notice a small tube This is a heat sensor that maintains the temperature of the oven Never move or bend this tube Ove Temperature Sensor Opening the door often to check foods will cause heat loss and poor baking results The oven vent is located under the right rear element This area could become very hot during oven use Never block tth_s v...

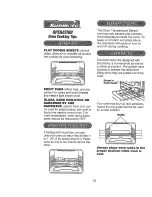
Page 13: ...an place the pans so each has at least to 1 1 2 of air space around it Place pans so one is not directly above the other The Oven Temperature Sensor continuously senses and controls the temperature inside the oven To keep a constant set temperature the elements will cycle or turn on and off during cooking The oven racks are designed with stop locks a convenience as wel as a safety precaution The g...

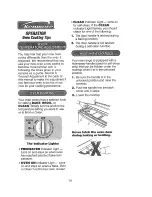
Page 14: ... oven is too hot or too cool for your cooking preference Your oven control has a selector knob for setting BAKE BRORL or CLEAN Simply turn the knob to the temperature setting you want to use or to Broil or Clean Your new range is equipped with a hide away handle used for self clean only that can be hidden under the maintop when it is in the unlocked position t Be sure the handle is in the unlocked...

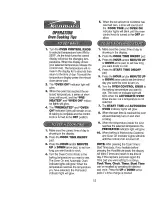
Page 15: ...indicator lights will glow When the temperature reaches the temperature you have selected the Preheated indicator light will glow t Make sure the correct time of day is showing in the display 2 Pressthe COOK TIIME ON OFF pad 3 Pressthe HOUR and or MIINUTE UP or DOWN arrow pad to set how long you want foods to cook 4 Pressthe START TIIME ON OFF pad 5 Pressthe HOUR and or MRNUTE UP or DOWN arrow pad...

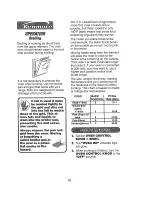
Page 16: ...nly I40 F rare means that some food poisoning organisms may survive The closer you place foods to the broil element the faster foods brown on the outside yet remain red to pink in the center Moving meats away from the element will allow the meat to cook to the center while browning on the outside Cook side 1 at least 2 minutes longer than side 2 If your oven is connected to 208 volts you may want ...

Page 17: ...r displaced on the door it should be replaced The door gasket is designed to have a 5 6 gap at the bottom of the door This allows for proper air circulation Door Panel Gasket It is normal for your oven door to give the appearance of not having a good seal against the range This is due to the gasket The location of the gasket on the oven door maintains a good seal and prevents any heat loss _ ten s...

Page 18: ...turned to the off po sition 8 When the temperature has cooled the door handle will easily slide to the left 18 tm For best results follow the steps in tPREPARn_IG YOUR OV _H 2 If your handle is hidden lift the cooktop and pull the handle out as far as it wilt go 3 Slide the handle to the right Do not force the handle If it does not slide easily you have not pulled it out from the latch cover as fa...

Page 19: ... OF THE OVI_Ho When cleaning be sure not to bend or displace the temperature sensor located on the back wall of the oven CL_ANliHG MATERBALS o Dishwashing detergent Warm water o Paper towel Ammonia oAbrasive cleaner o Scouring pad TO CLEAN Clean after each use If acidic foods hot fruit filling milk tomatoes sauerkraut or sauces with vinegar or lemon juice spill use a dry paper towel to wipe up as ...

Page 20: ...he knob pulling straight out TO CLEAN Wash the knob thoroughly with soapy water Dry completely with a soft cloth DO NOT let the knob soak TO REPLACE 1 Check the back of the knob 2 The molded rib of the knob is designed to fit perfectly onto the knob stem 3 Align the molded rib to the clear groove in the knob stem Push the knob back as far as it will go Retainer t Unscrew glass cover and remove 2 U...

Page 21: ...sh abra sives or scouring pads on the drawer TO REPLACE tR Lift the front of the drawer stop and lower the stop of the drawer through the opening of the base raE 2 Lower the front of the drawer and push back the drawer until it stops 3 Lift up on the front of the drawer until the stop guide of the drawer clears the stop guide of the base rail Slide the drawer into place _ AUTIOH The drawer gives y...

Page 22: ...s_a ns _ use dishwashing detergent warm water plastic scouring pads mild abrasive cleaners soap filled scouring pads or ammonia Clean drip bowls after each use Rinse and dry welt Foods that are not removed can cause perma nent stains that cannot be removed For heavily soiled bowls place an am monia soaked paper towel over the bowl to loosen the soil then gently scrub the bowl with a plastic scouri...

Page 23: ... rack guides 3 Slide the rack all the way back TO u BroW Stop Position 11 i efi RSMOVE Open the door to the broil stop position Grasp the door at each side and lift up and off the hinges DO NOT ILIIFT DOOR BY THE HANDLE door is removed and H the h_nge arms are at H the brownstop position as a ip_ ca_ _ion cover the hinge iaeons w th towellSng or an iempty paper toweli roRL Do not bump or try to mo...

Page 24: ...ot bake proper0y a_ Improper rack or pan placement b Oven vent blocked or covered c Improper use of foil d Improper temperature setting for utensil used e Recipe not followed f Improper oven control calibration g Range and oven rack not level a Maintain uniform air space around pans and utensils See oven cooking section b Keep vent clear c Racks should not be covered during baking do Reduce temper...

Page 25: ...operly a Check the elements make sure they are properly plugged into the receptacle b Push knob in while turning to tem perature setting Oven will8 a Control set improp not work erly Ceoktop b Door latched Ok Cm Door not latched for clean a Check the control and check oven cooking section b Be sure to unlatch after the self clean has finished and the oven has cooled Be sure to retrieve the hidden ...

Page 26: ...perature set the oven temperature 25 degrees higher if foods are undercooked or 25 degrees lower if foods are burning than the temperature in your recipe then bake The results of this test should give you an idea of how much the temperature should be changed ta m While the control knob is in the off position press and hold at the same t_me the HOUR UP and DOWN arrow pads for 4 seconds until the di...

Page 27: ...EARS SERVICE CENTER DEPARTMENT INTHEUNITED STATES This warranty apptiesonly whilethisproductis in usein theUnitedStates Thiswarrantygivesyou specificlegalrights andyou mayalso haveotherrightswhichvaryfrom stateto state Sears Roebuck andCo Dept 817WAHoffman Estates IL60179 To fu_hez add to the vaRue of your Range Buy a Seazs Maintenance Agreement Years of Ownership Coverage Ist Year 2nd Year 3rd Ye...

Page 28: ...r service Call24 hours a day 7 days a week t 800 4 REPAIR t 800 473 7247 For the location of a Searsparts and RepairCenterin your area Call24 hours a day 7 days a week 1_ 800 488 _1222 For information on purchasinga Sears MaintenanceAgreementor to inquire aboutan existing Agreement Call 9 am 5 pro Monday Saturday t 800 827 6655 America s Repair Specialists 28 ...

Page 29: ...93575 91to93576 Lea y siga todas las regBas y aas instrucciones para el funcBenamiento antes de usar este producto pot primera vez Hnstrucc ones cue Seguridad o FuncionamJento o Cuidado y Limpieza e C6mo Resonver Probmemas Sears Roebuck and Co Hoffman IEstates ill 60t 79 U S A 229C4020Pt 1 t SR 10322 ...

Page 30: ...16 El ciclo de autolimpieza 17 18 Panel de control 19 Cacerola y parrilla para asar a la parrilla 19 Paredes del horno 19 Cubierta y fondo de la caja del quemador 19 Superficies pintadas 19 Vidrio 19 Perillas de control 20 C6mo reemptazar el foco de la luz del homo 20 Cajon de almacenamiento 21 Cubierta Levantable 22 Unidades de la superficie 22 Parrillas del homo 23 Puerta del homo 23 Antes de Il...

Page 31: ...ugar y contra la pared de atr s Vea la Fig 2 4 Determine si va a anclar la abrazadera al piso o a la pared Asegt3rese que esta ubicacbn este libre de alambres el_ctricos o plomeria Fig I 511 Pegue la abrazadera firmemente con los tomillos que se proveen Los tornillos son para madera madera terciada tablas de particulas y fragmentos y la mayoria de marcos de metal Siva a anclar a cemento usted pued...

Page 32: ... especializado S_EMPRE _AHTEHGA los revestimientos combustibles de tas paredes cortinas y otros paros a una distancia prudente de la estufa o NUHCA CA_ SENII E contenedores de alimentos cerrados El aumento de la presi0n podria causar que el contened explore y cause heridas NUNCA deje frascos o latas de grasa goteaduras sobre o cerca de la estufa o SIIE_PRE _A_3 E_GA el _rea de la estufa despejada ...

Page 33: ...ontacto directo o el incendio de la ropa o SIIEMPRE USE los recipientes para derrames para evitar daSos a los alambrados y a los componentes No use forros de aluminio o de papel de aluminio sobre los recipientes El uso inadecuado de estos podria resultar en un riesgo de golpe de corriente o incendio o NUNCA DE lIE las unidades de superficie sin vigilancia a temperaturas altas Los derrames podrian ...

Page 34: ...bra de vidrio en e homo con autolimpieza emiUr_ una muy peque_a cantidad de mon6xido de carbono durante el ciclo de autolimpieza El contacto se puede minimizar ventilando con una puerta o ventana abierta o usando un ventilador o una campana de venUlaci6n PRECAUCION Hunca forte _os rec_p_entes para derrames con paper de aUuntinio El papei de a_unt_nio puede obstruis e paso normaU del canor y da_ar ...

Page 35: ...la y parrilla Sello de la homo para asar puerta removible Para sacar ei adhesivo que queda de la cinta de empaque use un detergente I quido normal para platos aceite mineral o para cocinar Con un paso suave frote el Area y permita que se remoje Enjuague y seque bien Repita el procedimiento usando un pulidor para estufas para asegurarse que la estufa no se dane Esto dteber a hacea se antes que la e...

Page 36: ...ubierta que rodean los elemento para cocinar DELANTERA IZQUIERDA DERECHA TRASERA _ TRASERA HIi Se usa para comienzos r pidos ta como para hervir agua MED Se usa para hervir y frel r LO Se usa para comidas al vapor o para mantener los alimentos a temperaturas para ser servidos t Empuje para hacer girar la perilla 1 Asegt_rese que la olla est_ centrada sobre el quemador 2 AsegOrese que la olla sea d...

Page 37: ...ra un calor alto En e lado derecho det panel de control usted notar_ una luz indicadora que dice UNIIDADES DE SUPERFICIE SURFACE UNITS Este indicador se encender_ cada vez que una pe rilla de la unidad de superficie este encendida Siempre revise esta luz indicadora antes de dejar su estufa sin supervisi6n 9 _ _ _ 7 J _ _ _ Luz indicadora de unidades de superficie NOTA La fuego lento se puede utili...

Page 38: ...e no mostrar nsds en el dial Para activar esta funci6n Si la hora det d_ase muestra en el dial empuje el bot6n del RELOJ dos veces Para activar nuevarnente el dia del RELOJ empuje el bot6n del reloj dos veces Si el control hace pestafiear una _ seguida de un n0mero y un tono continuo existe un error en el c6digo de la funci6n Tome nota del nt3rnero despues de la Ponga la peritla del control del ho...

Page 39: ...mpezar a dar la hora dentro de un minuto ousted puede empujar el bot6n del RF LOJ para un comienzo inmediato El CronSmetro es sSIo un cron6metro en minutos y no controlar_ las operaciones del homo La cantidad de tiempo m xima que puede programar es 11 horas y 59 minutos Empuje el bot6n TIIMER OH OFF CROHOMETRO Mostrar_ 0 00 y la luz indicadora del cron6metro empezar_ a pestanear Empuje los botones...

Page 40: ...lla del homo con papel de aluminio El uso inadecuado puede causar una mala circulaci6n del calor pobres resultados al homear y podria daSar el acabado del homo La ventilaci6n del homo est ubicada debajo del elemento posterior derecho Si abre la puerta para mirar los alimentos causar_ una perdida de calory malos resultados cuando hornee Esta Area se podri calentar mucho durante el uso del horno Hun...

Page 41: ...a pasteles o alimentos que necesitan tener una corteza de color car La temperatura del homo cuando use estos utensilios deberia ser reducida en 25 F Las parrillas del homo est n dise5adas con topes una conveniencia y tambi_n una precauci6n de seguridad Las guias tienen topes para prevenir que las parrillas se den vuelta Tope en las guias para las pard as Su homo tiene cuatro 4 posiciones para la p...

Page 42: ...utolimpieza o Luz ind_cadora de Precalentamiento _ Se enciende y permanece encendida cuando el homo Ilega a la temperatura seleccionada para hornear o Luz ind cadora de HORNO EHCEHDnDO se enciende y permanece encendida cuando la funci6n para hornear asar o limpiar haya sido seleccionada Su nueva estufa viene equipada con una manilla que puede ocultarse debajo de la cubierta cuando no se encuentra ...

Page 43: ... en la posici6n de APAGADO OFF 1 Asegt3rese que el reloj est_ mostrando la hora correcta del dia 2 Empuje el bot6n COOK TIIME OHIOFF 3 Empuje los botones con las flechas para SUISIR o IBAaAR las HORAS y o los MIIHUTOS para programar la cantidad de tiempo para cocinar 4 Empuje el bot6n START TIME OH OFF 5 Empuje los botones con ias flechas para SUBIIR o BA JAR tas HORAS y o los MBHUTOS para program...

Page 44: ... se cocina hasta s6to 140 F cruda significa que algunos organismos venenosos poddan sobrevivir Mientras mAs cerca coloque los alimento del elemento para asar m_ s r__pido se dorar_n por afuera pero quedando rojo o rosado en el centro Colocando las carnes lejos del elemento permitirA que las carnes se cocinen en el centro mientras se doran pot afuera Usando estas posiciones cocine el lado 1 por Io ...

Page 45: ...ia y seque 3 Limpie cualquier derrame pesado del rondo del horno 4_ No limpie el selio de la puerta del horno El material de fibra de vidrio de la puerta del homo no soporta la abrasi6n Es esencial que el sel o permanezca intacto Si nota que se est gastando trizando o saliendo de la puerta deberia ser reemplazado El seflo de la puerta est dise5ado para que tenga un espacio de 5 6 en el rondo del h...

Page 46: ... apagado 8 Cuando la temperautra se haya enfriado la manilla se deslizar_ f_ cilmente hacia ta izquierda 18 t Para mejor resultado siga los pasos para PREPARAR SU HORHO 2 Si su manija no se ve levante la cubiert_ superior y tire la manilia Io m_s afuera posible 3 Corra la mani la hacia la derecha No fuerce la manitla Si no corre f cilmente usted no la ha tirado Io m_s afuera posible desde la cubie...

Page 47: ...so o una toalia h0meda por un taro Ffiegue a medida que sea necesafio Lave enjuague y seque bien Usted tambi_n podfia poner la cacerota y ta parrilla en la avadora de platos MATERIALES DE UMPREZA o Detergente para piatos o Agua tibia o Toalla de papel COMO LOMPOAR No use lirnpiadores para hornos polvos para limpiar o abrasivos fuertes Si salsas para sasonar salsa de tomates materiales para batidos...

Page 48: ...6n Seque completamente con un paso suave No permita que _a periHa se remoje PARA COLOCARLA NUEVAMEHTE t Mire la parte trasera de la perilla 2 E cana moldeado de la peri la estA diseSado para quedar perfectamente ajustado en el talto de la perilla 3 Coloque et canal moldeado en l nea con la ranura plana en el ta lo de la perilla Empuje ia perilla hasta Io m_s atrAs posible Sujetador del vidrio Coll...

Page 49: ... hacia atr s hasta que se detenga Levante el frente det caj6n hasta que et tope de la guia del caj6n pase por encima de la guia en el riel de la base Deslice el cajOn hacia su lugar PRECAUCUON Eg caj6n le ofrece espacio para guardar uCensi_ios para cocinar y hornear Los materiales _nfDamabies y de pD_stico no so deber_an guardar en este caj6n No sobrecargue el caj6n S_ eg caj6n est_ demasiado pesa...

Page 50: ... muy sucios coloque una toalla empapada con amonia sobre el recipiente para soltar la suciedad luego friegue el recipiente suavemente con una lana de pl_ stico IPara manchas azules doradas Use un putidor para metal En un periodo de tiempo estas manchas son causadas por el cator excesivo y generalmente son permanentes Para ayudar a minimizar este efecto evite usar las posiciones de calor altas y us...

Page 51: ...parrtlla PARA SACAR lm 2 Abra la puerta hasta la posiciSn para asar a la parrifla Tome la puerta de cada lado lev ntela y s_ quela de las bisagras NO LEVAHTE LA PUERTA DE LJl MAHIILL_ _ PRECAUCOOH Cuando la puerla se saca y aos brazos de las bisagras est_n en a posici6n de tope para asar a 0a parrii a come precauci6n cubra gos brazos de gas bisagras con toallas o con un roUo de toagas vac o No pas...

Page 52: ...ilaci6n del homo est obstruida o cubierta a AsegOrese de precalentar hasta que suene el tono bo Mantenga un espacio de aire uniforme alrededor de las ollas y utensilios Yea la secci6n para Cocinar en el Horno c Mantenga fa ventilaci6n despejada d Uso incorrecto del papel de aluminio d No cubra ias parrillas cuando hornee ell f_ g Temperatura incorrecta para el utensilio usado No se sigui6 la recet...

Page 53: ... asegerese que est n est6n enchufados correctamente en desenchufados los recept_culos Control en posiciOn b Empuje la perilla mientras la hace incorrecta girar para seleccionar ta temperatura Controi Pu esto a Revise el _c0ntiol y a Secci6n de c6 m incorrectamente cocinar en el homo Cubierta OK bm Cm Pue_a enganchada La puerta no est enganchada para la limpieza b Asegerese de desenganchar a puert_...

Page 54: ...uba la temperatura del homo en 25 grados si los alirnentos no quedan bien cocidos o baje la temperatura en 25 grados si Ia comida se quema de la temperatura de la receta luego hornee Los resultados de esta prueba le deberian dar una idea de cuAnto se deberfa cambiar la temperatura 1 Mientras la perilla de control est en la posisi6n de APAGADO OFF empuje y sujete a la misma vez por 4 segundos los b...

Page 55: ...OLO PONERSE EN CONTACTO CON EL CENTRO O DEPARTAMENTO DE SERVtCtO SEARS MAS CERCANO EN LOS ESTADOS UNIDOS Esta garantia se aplica s61o cuando este producto se use en los Estados Unidos Esta garant a le brinda derechos legales especfficos y tambi_n puede tenet otros derechos que vartan de un estado a otto Sears Roebuck and Co Dept 8t7 WA Hoffman Estates IL 60179 Para Ampg_ar iE0VaBor De Su Estufa Co...

Page 56: ...6nicos de todas las B_t_rCaS En Sears usted puede co tar con operadores en espa_ol a Yes que puede Hamar s_n cargo aRgunoo Para servic o de reparac 6n a domiciqjo Llame 24 horas al d a 7 d as a la semana t 80 676o581 t Para om denm piezas con entrega a domic_lio Llame de 7 am a 7 pro 7 d as a la semana t 28 ...

Reviews: