background image

Summary of Contents for SEARS 385. 17622

Page 1: ...OWNER S MANUAL SEWING MACHINE MODEL 385 17622 ...

Page 2: ...ense for conditions beyond our control Advice on the operation and care of your machine is always available at your nearest Sears Retail Store Please remember if you have questions about your machine or need parts and service always mention the model number and serial number when you inquire Kenmore Sewing Machine Record in space provided below the model number and serial number of this appliance ...

Page 3: ...opped into water Return the appliance to the nearest authorized dealer or service center for examination repair electrical or mechanical adjustment 4 5 6 7 8 9 10 11 12 13 14 15 Never operate the appliance with any air opening blocked Keep ventilation openings of the sewing machine and foot controller free from accumulation of lint dust and loose cloth Never drop or insert any object into any open...

Page 4: ...16 Adjusting Stretch Stitch Balance 16 Starting To Sew 17 LEARN THE STITCHES Straight Stitches 18_22 Straight Stitch 18 Usethe Seam Guides 18 Turna Square Corner 1B Topstitching 19 Left Needle Position l g Sew in a Zipper 20_21 Use the Darning Plate 22 Darning 22 Zigzag Stitches 23_31 Basic Zigzag 23 Satin Stitch 23 Applique 24 Bar Tacking 24 Sew a Button 25 Overcasting Stitch 26 Three Step Zigzag...

Page 5: ...arrying Case then your Kenmore goes anywhere can be stored any where Locate and Identify the Parts Take up Lever Bobbin Winding Tension Disc Top Thread Tension Control Face Cover Plate Thread Cutter Needle Plate Upper Thread Guide Selector Release Shuttle Cover Extension Table Accessory storage box Thread Spool Pins Bobbin Winding Spindle Stitch Length Control Reverse Stitch Control Stitch Selecto...

Page 6: ...o Clutch Knob Light and Power Switch Plug Connector Presser Foot Presser Foot Lever Free Arm _Nomenclature Plate Foot Control Needle Clamp Screw Bobbin Darning plate Lint brush all screw driver nhole opener _ Large screw driver Sliding buttonhole foot Zipperfoot Straight stitch foot Satin stitch foot ...

Page 7: ...the other To reduce the risk of electric shock this plug is intended to fit in a Foot control The foot control regulates the speed at which you saw To increase speed gently press down with the ball of your foot To decrease speed release your foot pres sure slightly The foot control is sensitive and wilt increase or decrease your sewing speed immediately Practice on a scrap of fabric to regulate yo...

Page 8: ...ositior High position ip position Presser foo _ lever J The Presser Foot Lever raises and lowers your presser foot You can raise it about 1 4 higher than the normal up position for easy removal of the presser foot or to help you place heavy fabrics under the presser foot Thread Cutter You don t need a pair of scissors to cut the thread after you finish sewing Just use the handy thread cutter Pull ...

Page 9: ...and index finger gently snap in Use the correct presser foot for the stitch you wish to sew To change the various presser feet raise the presser bar to its highest position by lifting the presser foot lever Loosen the presser foot thumb screw choose the proper foot insert from the bottom Tighten the screw using the large screw driver to make certain the foot is secure Flat side away fror 1 you NOT...

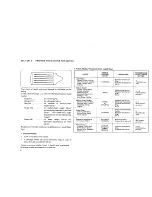
Page 10: ...ZE AND THREAD SIZE STITCH LENGTH COLOR SETTING Lightweight Batiste Dimity Chiffon Polyester Core Cotton 2 Silks Fine Lace Organza 11 ORANGE Wrap 12 stitches per Fine Mercerized Co on inch Crepe Taffeta Voile Organdy Silk A Medium Weight CQtton Cotton Blend Percale Gingham 50 Mercerized Cotton 2 2 5 Shantung Pique 14 RED Polyester Core Cotton 10 12 stitches Seersucker Satin Knit Wrap per inch Suiti...

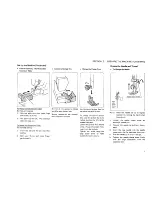
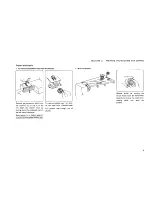
Page 11: ... left side of the cover Raise needle to its highest position by rotating hand wheel toward you J To remove bobbin case from shut tle pull open latch of bobbin case Pull bobbin case straight out of shuttle Wind the Bobbin SECTION 2 PREPARE THE MACHINE FOR SEWING Release clutch by turning the clutch knob inside the hand wheel toward you to stop the needle from moving while you wind the bobbin i ...

Page 12: ...off end of thread Wind thread until winder stops Push bobbin winding spindle to the left and clip thread Remove bobbin Turn clutch knob away from you while holding hand wheel for normal sewing operation Insert the Bobbin into the Bobbin Case Place bobbin in bobbin case making sure thread feeds clock wise and is coming from bobbin as shown Pull thread through slot of case as shown Pull thread J und...

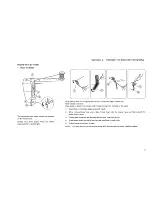
Page 13: ...t lever Place spool on spool pin as shown with thread coming from the back of the spool 1 Draw thread into thread guide using both hands 2 While holding thread near spool draw thread down into the tension area and then around the check spring holder 3 Firmly draw thread up and through take up lever from right to left 4 Draw thread down and slip it into left side needle bar thread guide 5 Thread ne...

Page 14: ...th threads under and to the back of the presser foot leaving 4 to 6 inches of thread clear If you cannot pick up bobbin thread by following steps given above then check 1 Is needle threaded from front to back 2 Is thread tangled around needle 3 Are 3 to 4 inches of thread coming from the shuttle 4 Is thread from shuttle tanglecl 5 Is bobbin properly installed in the bobbin case 6 Is the machine th...

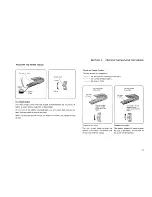
Page 15: ...number the tighter the top thread Choose the Correct Tension The best tension will depend on the stiffness and thickness of the fabric the number of fabric layers the type of stitch The top thread is too loose Top side of fabric The top thread appears on the underside of the fabric Tension is too loose The top thread shows through the bottom of the fabric The bottom side of the stitch will feel bu...

Page 16: ...e of Fabric Reverse Stitch Control To reverse stitch hold down this control during sewing Release to sew forward again Bottom side of Fabric Too Tight Corner of each zigzag will pull together on the top side of fabrics Bottom side of Fabric Too Loose The top thread will loop through bottom side of fabric and will be pulled almost together Bottom side of Fabric Just Right Minimize the amount of top...

Page 17: ...e meets the setting mark on the machine b Then select the desired pattern at the setting mark I by turning the pattern selector dial c Slide back the selector release to the left so that the SEW mark on the selector release meets the setting mark _ on the machine Note Do not turn the pattern selector dial while the needle is in the lower position It may cause the needle to break SECTION 2 PREPARE ...

Page 18: ...tch length control at position Study the red green brown and blue section around this control These are recommended zones of stitch length and are colorcoded to the stitches pictured on the stitch indicator panel Setting mark titch Length t o i _ I Yn i 1 Stitch _ Control _ _ To select Stretch Stitches set this control at position be in the detent position between S and L Vposition for most materi...

Page 19: ... ne_ Ho don to threads during the sewing of the first 3 or 4 stitches of the seam 3 Test the machine stitch on a scrap of the fabric you plan to use The fabric should be double thickness Adjust the machine for the length of stitch and tension suitable to the fabric 4 Fabric should be placed under the presser foot with the bulk of the material to the left of the needle and the right edge of the mat...

Page 20: ...move t T_o uare Corner the fabric 3 Place the edge of the fabric next _ to a stitching guide line on the 9 Cut the threads needle plate 5 8 is most common g 4 Draw the threads towards the back and lower the presser foot 5 Press the foot control 6 Hold the fabric loosely and gently guide it along the guide line so To turn a square corner 5 8 from the that it feeds naturally fabric edge Do not force...

Page 21: ...r edges of cuffs lapels or collars Here s How 1 2 3 Lower the presser foot Keep the edge of the fabric next to the right edge of the presser foot Evenly guide the fabric along this edge to produce an even row of topstitching 3 8 from the edge NOTE You can easily adjust your needle from center to left for topstitching without moving your fabric from under the zigzag presser foot Left Needle Positio...

Page 22: ...ew 1 Zipper teeth Zipper tape Fold back the left seam allowance asshown 2 Turn under the right seam allow ance to form a 1 8 fold 3 Place the zipper teeth next to the 1 8 fold and pin in place 4 5 6 7 To sew the left side of the zipper set the zipper foot on the left side of the needle Lower the zipper foot on the right side at the bottom of the zipper so that the needle pierces the fold and the z...

Page 23: ... used to make cording for slip covers etc Cover e cord with a strip of bias fabric end sew as shown NOTE Use Low Bar Sewing Machine ZIPPER FOOT 6757 for invisible zipper end cording which can be obtained at any Sears retail store 11 To sew the right side of the zip per set the zipper foot on the right side of the needle 12 Stitch across and below the bot tom of the zipper 13 Turn the corner and co...

Page 24: ...ing Set the Machine Stitch I I I Stitch selector Stitch length control any number not necessary to adjust Top thread tension control 1 to 4 No presser foot Darning plate Here s How 1 Put the darning plate on the needle plate 2 Remove presser foot and stretch fabric between embroidery hoops with hole centered 3 Draw the bobbin thread up through the fabric by holding the top thread and taking one st...

Page 25: ...ch and Its Uses The Satin stitch is a versatile and often used decorative stitch but it can also be used to overcast a raw edge for ex ample blankets linens tablecloths and napkins The Satin stitch is especially attractive in applique SECTION 3 LEARN THE STITCHES Zigzag width Close to 0 Stitch length 1 2 Here s How Once your machine is set up to stitch you may want to experiment on a scrap of the ...

Page 26: ...ng sure the needle falls along the outer edge of the applique When sewing corners lower the needle down into the fabric Raise the presser foot and pivot the fabric to the right or left Bar Tacking Set the Machine Stitch Stitch selector Stitch length control 0 5 to 1 Top thread tension control 1 to 4 Zigzag foot This stitch is similar to a very short satin stitch and is used to reinforce points of ...

Page 27: ...lot of the foot and place the left hole of the button just below the needle point 3 Lower the foot and turn the stitch selector to zigzag until the needle point comes just above the right hole of the button 4 Sew about five stitches and raise needle I again and sew a few stitches to lock thread 5 Set the stitch selector at c1_ To strengthen the shank cut the threads leaving a 20 cm 8 tail Bring th...

Page 28: ...p thread tension Zigzag foot control 1 to 4 The Stitch and Its Uses This zigzag variation is very useful in garment construction and in finishing raw edgesof any sewing project Helpful Hints Start overcasting about 1 8 inside the raw corner of your seam If you start right at the edge the fabric will bunch up and the stitches will become tangled 26 ...

Page 29: ...er than a regular zigzag mending sewing patches smoothly and securely repairing straight tears finishing seams Top thread tension Zigzag foot control 1 to 4 NOTE Be sure to slide back the selector release to the SEW position SECTION 3 LEARN THE STITCHES Seam Finishing Place the fabric under the presser foot so that the edge will be slightly inside the right hand side of the presserfoot Guide the w...

Page 30: ... p _66 2 Measure tUrn up your hem and pin NOTE For light weight fabrics you may need a double fold 3 Fold the material wrong side out on the edge to be stitched as shown leaving 1 4 of the finished hem edge showing 4 Place garment under presser foot in such a manner that straight stitches will be sewn on extended edge The zigzag stitd should just catch the fold of the garment 5 After hemming press...

Page 31: ...n sew soft silky wovens in any direction Top thread tension Zigzag foot Top thread tension Zigzag foot control 1 to 4 control 3 to 9 The Stitch and Its Uses _ _ __ _ The Shell Stitch is formed by sewing a Lace adds a fanciful feminine touch blind hem over folded fabric Several _ to blouses and lingerie Table linenSand pillows become more elegant _ _ tucks r ws of shell stitching are called shetl w...

Page 32: ... Stitch Selector release I Stitch selector Stitch length control 1 Top thread tension ZhTzagfoot control 1 to 4 NOTE Be sure to slide back the selector release to the SEW position Use this stitch to join heavy weight interlining use this stitch to join them 3O ...

Page 33: ...Decorate with Geometric Patterns Set the Machine Stitch Selector release Stitch selector F G H or I Stitch length control green zone Top thread tension Satin stitch foot control 1 to 4 NOTE Be sure to slide back the selector release to the SEW position The Stitches and Their Uses These stitches are purely decorative You can sew one row or several or vary the stitch width and length for special eff...

Page 34: ...ch is the stretch variation of the straight stitch especially develop ed for knits and stretch fabrics Stretch stitch can be used on other nstead of break ng_ Th s st tch fabrics as well It works well on can also be used for topstitching curved seams and on any garments on all fabrics that will receive a great deal of strain ie children s clothes Rick Rack Stretch Stitch Set the Machine Stitch len...

Page 35: ... 8 seam then trim seam allowance after Raw or worn edges of older garments 3osition straight stitching lines 3 8 apart across the area to be smocked Knot the threads along one edge Pull the bobbin threads and distribute the gathers evenly Secure the threads at the other end Sew the decorative stitch between the gathering stitches Pu II out the gathering stitches NOTE Loosen the top thread tension ...

Page 36: ...ight woven fabrics where you want a narrow seam It is also great for making elastic swim wear 34 Place the fabric under the presser foot so that the stitches are made ever theedge Or place your fabric to aglow a 5 8 seam then trim seam allowance after NOTE When using stretch knit fabric use a blue stretch fabric needle which effectively prevents skipped stitches Top thread tension Zigzag foot cont...

Page 37: ... the edge Trim close to stitching The stitch will prevent raveling Decorative Stretch Patterns Set the Machine Stitch o t _ l Stitch selector F G H or Stitch length coFIt rol Drown stretch stitch oosition I____J Top thread tension control 1 to 4 Zigzag foot NOTE Be sure to slide back the selector release to the SEW position The Stitch and Its Uses Decorative stretch patterns can be used for adding...

Page 38: ...e but tonhole on a scrap of fabric you plan to use to find the more suitable stitch length 36 2 a Move the slider A toward you 3 a Set the stitch selector at _ length on yourgarment so that the top _nark C on _he I_ Sew forward until yo_rreach the slider meet_ th_ start mark B front marking of your bu on b _ _ Hy tO the _IIIU ll_ UU I I UI I IU l_ f0ot c Insert the garment under the foot with the ...

Page 39: ...til you reach the back marking of the buttonhole e Stop sewing at the right stitch 6 a Set the stitch selector at _J m b Sew 4 to 6 stitches c Stop sewing at tne left stitch 7 Remove the fabric and cut the hole open with the buttonhole opener NOTE When sewing at the edge of fabric set sliding buttonhole foot as illustrated and sewin reverse ___ r__ lr_ _r_ LI _ U _ 37 ...

Page 40: ...ne Loosen upper thread tension Choose correct size needle for thread and fabric Insert new needle Replace shuttle or polish off burrs completely Nicks o_bun_ at hole of_eedle plate_ Rep ane needlep_ po isl_of_burr_ on_y Breaking Bobbin Thread Improl_er bobbin case threading Check bobbin case threading Lint in bobbin case or shuttle Clean bobbin case and shuttle Fabric not Moving Machine Jamming Kn...

Page 41: ...o different sizes or kinds of thread CORRECTION Choose correct size needle for thread and fabric Rethread machine Tighten upper thread tension Do not pull fabric guide it gently RA_Rt pr_Ar fnnt Rewind bobbin needle plate or polish off burrs completely Do not pull fabric guide it gently Choose correct size needle for thread and fabric Reset needle Reset presser foot When starting a seam be sure to...

Page 42: ...reas about every three months under normal use If you sew frequently clean more often Clean the Feed Dogs 1 Unplug the machine and open the face cover CAUTION The light bulb could be HOT Protect your fingers when you handle it 2 Push the bulb up and turn the bulb counter clockwise to remove it 3 Put the new bulb in by pushing it up and turning it clockwise Follow these directions Unplug the machin...

Page 43: ...ition shuttle race as illustrated so that shuttle point and remove the bobbin case driver is forming half moon on the left side of the 2 Push shuttle race levers aside Lift shuttle race cover and take shuttle out 3 Clean the shuttle race with a lint brush 4 Put a drop of oil on the center pin of the shuttle and shuttle race Do not over oil machine 2 Hold shuttle by center pin and position shuttle ...

Page 44: ...otherwise it may stain fabric Kenmore sewing machine oil is available at your nearest Sears retail store NOTE Unplug the machine before oiling Remove needle and put needle bar in full down position Oil behind the Face Cover Plate and under the Arm Cover Plate Oil the Underside Face cover plate Arm cover plate I I Open face cover plate and or remove arm cover plate by loosening top screw to oil poi...

Page 45: ...01108 8 650802014 9 735503018 10 6870 11 593401008 Shuttle Bobbin case Bobbin box with 10 bobbins Bobbin winder rubber ring No 11 Stretch fabric needles BLU No 11 Single needles ORG No 14 Single needles RED No 16 Single needles PUR No 18 Single needles GRN Needle clamp with screw Sliding buttonhole foot Straight stitch foot Standard zigzag foot Satin stitch foot Zipper foot 17 19 20 _ _ 12 13 14 1...

Page 46: ...ng 33 P Parts list 43 Performance problems chart 38_39 Pine leaf stretch stitching 34 S Satin stitch foot 4 23_24 31 43 Satin stitch 23 Seam guides 18 Serging 34 Sewing light 5 Shell stitching 29 Shuttle 41 43 Shuttle cover 3 9 Shuttle race 41 Sliding buttonhole foot 4 36_37 43 Small screw driver 4 43 Smocking 33 Spool pin 3 6 Stitch length control 3 16 Stitch selector 3 15 Straight stitch 1B_l 9 ...

Page 47: ...ee of charge repair defects in material or workmanship which _ appear in the electrical equipment of the sewing machine including electronic components motor wiring switch and speed control FULL 90 DAY WARRANTY ON ALL PARTS AND MECHANICAL ADJUSTMENTS P For 90 days from the date of purchase Sears wil free of charge replac_ any parts and p_o_ide mechanical se_ice _1 necessary for proper operation of...

Page 48: ...ing Machine will be shown on your nomenclature plate on the back of your Sewing Machine See page 4 for location WHEN ORDERING REPAIR PARTS ALWAYS G VE THE FOLLOWING INFORMATION _PARTNUMBER PANi DESCRiPTiON MODEL NUMBER NAMEOF iTEM If the parts you need are not stocked locally your order will be electronically transmitted to a Sears Repair Parts Distribution Center for handling SEARS ROEBUCK AND CO...

Page 49: ...ht 2 Selact _attem A Slide RELEASE left I SIIde RELEASE _ right 2 le I_attern S r _T03 l 1TO4 I A 3 Slide RELEASE left _ I 1 S ide RELEASE right _ I 2 Select pstlern C 1 UZ 3_U_ I A 3 SIde RELEASE left 1 Sli_e _RE LEASE right 2 Sabot em O _ 1 _kI_ FIEL_ ASE right 2 Sele_ t_e_ E _ 3 Stide _aE LEASE _ft _r Selector Release STITCH SELECTOR m__ There are certain types Of stitches that are used Setting...

Page 50: ...truc tion book Thread should come off the back of the spoo as shown Bo rroM THREADING 1 Insert bobbin with thread wound as shown and guide bobbin onto center pin of bobbin case 2 Pull thread through slot 3 Pull thread uader tension spring 4 Holding latch open position case into shuttle and release latch COMPLETING THREADING Hold top thread loosely in left hand and rotate handwheel toward you one c...

Page 51: ... Foot Walking Foot Even Foot Pin Tuck Foot Gathering Foot Ruffler Piping Foot Gathering Foot Pin Tucking Foot Hemmer Foot Binder Foot 1 4 Seam Foot Walking Foot Embroidery Foot Ruffler Piping Foot Gathering Foot Pin Tucking Foot Hemmer Foot Binder Foot Roller Foot Teflon Foot 1 4 Seam Foot Applique Foot Cording Foot Walking Foot Embroidery Foot Ruffler Elastic Foot Piping Foot Blind Hem Foot Tapin...

Page 52: ...still does not fit 4ol the proper outlet t_ Do not modify tl_e pl g Replace foot controlle_ Foot Controller MODE l ORTANT shock it in a polarized outlet only one way _lly in the outlet reverse the plug tact a qualified electrician to install tny way ith the same type L YC 482P or YC 30 ...

Reviews: