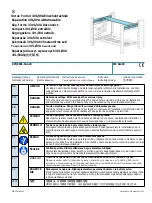
HA32 - Ribbon Arm Wall Mount with Bottom Scroll
Installation Instructions
P.O. Box 60080 • 16555 East Gale Ave.
City of Industry, California 91716-0080
626/968-5666 • FAX 626/330-3861
Revision
716
/10 EC 100715008 Status 3 Part No. 95713
Tools Required
:
Flat Head Screwdriver
Torque Wrench
F
" Hex Wrench
Sealant
NS, SRS, RA17,
N
" 6- or 12- Point Deep (2" min.) Socket
12" (min.) Long Socket Extension
AE17, BE17, LE19
RA25, AE21, BE21, LE26:
L
" 6- or 12- Point Deep (2" min.) Socket
20" (min.) Long Socket Extension
WARNING: Fixtures must be grounded in accordance with local codes or the National Electrical Code.
Failure to do so may result in serious personal injury.
MAINTENANCE: A regularly scheduled maintenance program must be established to insure paint coating is
intact, corrosion or structural damage has not occurred, and all mounting arms, rods, nuts and bolts are tight.
CAUTION: Structural integrity of mounting plate attachment to wall is by others.
NOTE: All electrical work must be done by a qualified electrician. KEEP THIS SHEET FOR FUTURE REFERENCE.
!
HA32S
HA32L
NS / SRS
RA25
AE17 / BE17 AE21 / BE21
LE19
LE26
Make certain electrical supply is
OFF
before starting installation.
1. Remove wiring inspec-
tion cover from wall plate
and wall mount cover.
Adhere rope caulk in a
continuous strip into the
wall plate groove.
2. Securely mount wall
plate over junction box
(by others).
5. Attach base & base top to arm fitter using (4) socket head cap screws. Tighten securely.
IMPORTANT! Keep wires
tight when attaching fixture to avoid pinching wires.
4. Install ribbon arm onto
wall plate cover.
!
3. Insert arm bolts into wall
mount cover.
Junction
Box
(By
Others)
Wall Mount
Cover
Base
Arm Fitter
Base Top
Wall
Plate
Groove
CAUTION: Structural integrity of mountingplate attachment to wall is by others.
Arm Bolts


