background image

Summary of Contents for KUCC151LSS2

Page 1: ...tures operation performance parts accessories or service call 1 800 422 1230 or visit our website at www kitchenaid com In Canada for assistance installation or service call 1 800 807 6777 or visit our website at www KitchenAid ca Table of Contents 2 9872215 ...

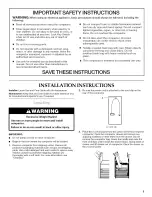
Page 2: ...PACTOR SAFETY Your safety and the safety of others are very important We have provided many important safety messages in this manual and on your appliance Always read and obey all safety messages This is the safety alert symbol This symbol alerts you to potential hazards that can kill or hurt you and others All safety messages will follow the safety alert symbol and either the word DANGER or WARNI...

Page 3: ...sh bag with heavy material such as glass This compactor is intended for household use only SAVE THESE INSTRUCTIONS INSTALLATION INSTRUCTIONS Installer Leave Use and Care Guide with the homeowner 2 Be sure the power cord is attached to the cord clip on the Homeowner Keep Use and Care Guide for future reference and rear of the compactor for local electrical inspector s use if required A Excessive We...

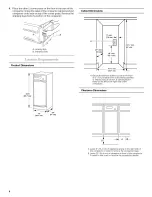
Page 4: ...61 crn 3 rnin 7 6 cm _1_I I 24 min l 61 crn 18 iin 45 7 cm 151 4 rain 38 7 cm 341 4 rnin a7 cm A Grounded eletrical outlet must be a minimum of 3 7 6 cm away from surrounding cabinets or nearby walls as shown It can be placed either to the left or the right side of the compactor Clearance Dimensions r q o B J A Leave 6 15 2 cm of clearance space to the right side of the compactor in order to remov...

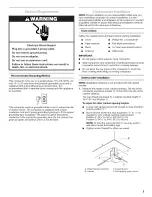
Page 5: ...nal and Local codes and ordinances Tools needed Gather the required tools and parts before starting installation Level Phillips No 2 screwdriver Tape measure Flat blade screwdriver Pliers 5 16 Hex head socket wrench Scissors Utility knife IMPORTANT Do not grasp control panel to move compactor Slide compactor onto cardboard or hardboard before moving compactor across floor to avoid floor covering d...

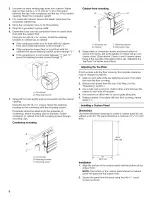
Page 6: ...ith mounting screws through mounting clips Countertop mounting A Countertop B Retaining bracket C Mounting screw Cabinet front mounting A C A Mounting clip B Cabinet C Retaining bracket D Mounting screw 8 Grasp sides of compactor drawer and place bottom of drawer into tracks Lift at the handle so drawer will go over drawer stops Close drawer Check to see if drawer opens freely If the toe plate rub...

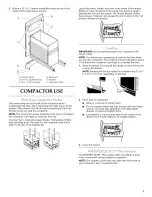
Page 7: ...epending on the load y _ 2 The compacting ram is the part of the compactor which compresses the trash The compacting ram does not go to the bottom of the drawer You will not see compacting of trash the first few times you load the compactor NOTE The compactor drawer should be more than 1 2 full before the compactor can begin to compress the load You may hear a noise when glass breaks Strong glass ...

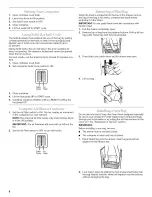
Page 8: ... willwork withorwithout the fan 2 SettheAirFilter switch toOFF toturnoffthefan Solid Air Cycle Filter When the trash is compacted to the top of the drawer remove the bag If the bag is too heavy compact less trash before emptying it in the future IMPORTANT Do not push items down into compactor with hands or feet 1 Pull the drawer completely open 2 Remove top of bag from bag retainer buttons Pull up...

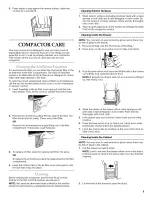
Page 9: ...n sponge or soft cloth and a mild detergent in warm water Do not use abrasive or harsh cleaners Rinse and dry thoroughly with a soft cloth 2 Wipe up spills right away Some foods can damage the finish if left on the compactor surface Cleaning Inside the Drawer NOTE You may want to wear protective gloves since there may be bits of glass in the drawer 1 2 3 Remove the bag See the Removing a Filled Ba...

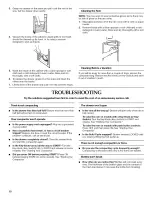
Page 10: ...than half full before trash is compacted Your compactor won t operate Is the power supply cord unplugged Plug into a grounded 3 prong outlet Has a household fuse blown or has a circuit breaker tripped Replace the fuse or reset the circuit breaker If the problem continues call an electrician Is the drawer completely closed Close the drawer firmly and start the compactor again Is the Key Knob turned...

Page 11: ...Road Benton Harbor MI 49022 2692 Please include a daytime phone number in your correspondence Call the KitchenAid Canada Customer Interaction Centre toll free 1 800 807 6777 Our consultants provide assistance with Features and specifications on our full line of appliances Warranty information Use and maintenance procedures Accessory and repair parts sales Referrals to local dealers repair parts di...

Page 12: ...ed in an inaccessible location or is not installed in accordance with published installation instructions DISCLAIMER OF IMPLIED WARRANTIES LIMITATION OF REMEDIES CUSTOMER S SOLE AND EXCLUSIVE REMEDY UNDER THIS LIMITED WARRANTY SHALL BE PRODUCT REPAIR AS PROVIDED HEREIN IMPLIED WARRANTIES INCLUDING WARRANTIES OF MERCHANTABILITY OR FITNESS FOR A PARTICULAR PURPOSE ARE LIMITED TO ONE YEAR OR THE SHOR...

Reviews: