1 X SKXSLED-UHF 1.0W
1 X 6000mAh Lithium-Polymer Battery
1 x Companion Cushion (SKXPro or SKX5)
*SKX sold separately. Tweezers and PH0 screw driver
(not included) will be necessary to complete assembly.
What’s in the Box?
1.0W UHF Reader Companion Assembly
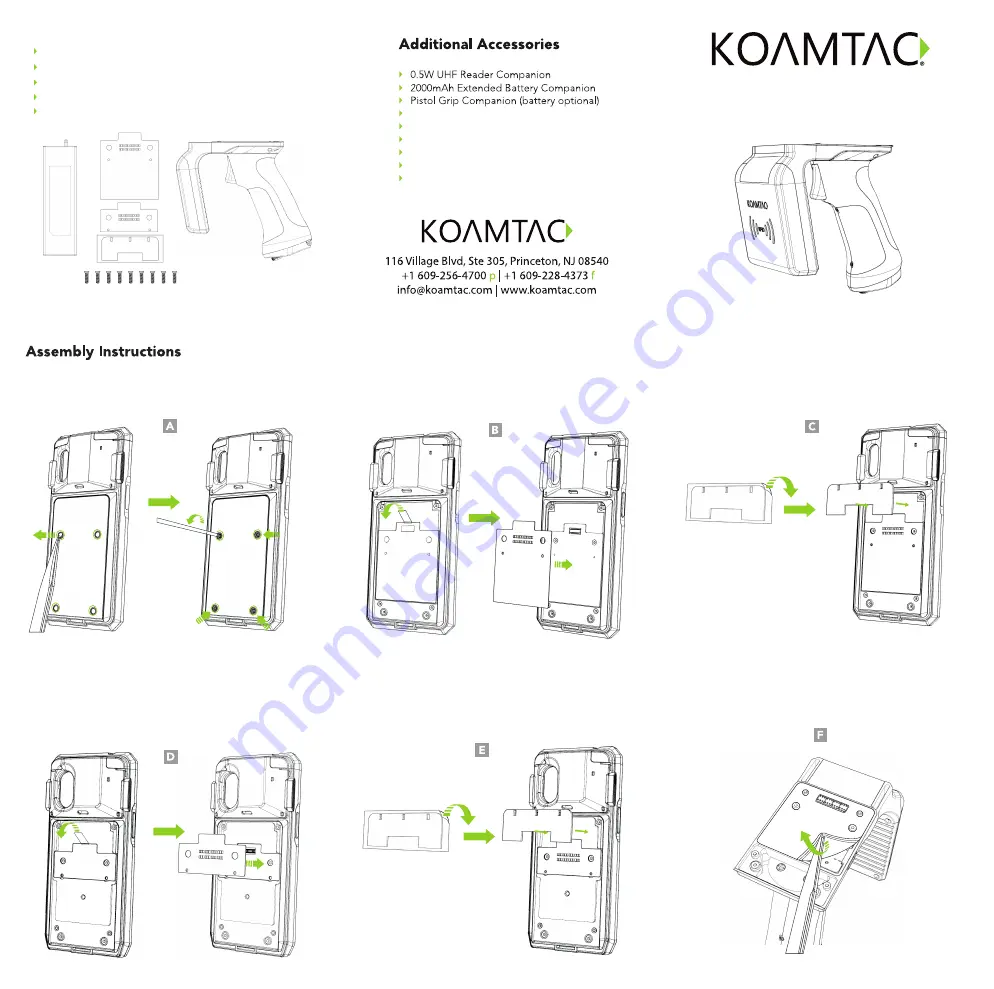
Using tweezers, carefully remove all four (4) screw caps
from the back of the SKX
™
SmartSled
®
. Then, remove all
(4) screws from the back of the SKX. (A)
1. Remove the blue protective film from the front of the
companion PCB. Next, attach the contact board to the
back of the SKX5 as shown in the image. (D)
1. Remove the blue protective film from the front of the
companion PCB. Next, attach the contact board to the
back of the SKXPro as shown below. (B)
2. Remove the transparent protective film from the back
of the companion cushion and attach it to the back of
the SKXPro as shown below. (C)
2. Remove the transparent protective film from the back
of the companion cushion and attach it to the back of
the SKX5 as shown below. (E)
1. Remove the blue protective film from the top of the
SKXSLED-UHF1.0W. (F)
8 1 extra
1 x Contact PCB (SKXPro or SKX5)
SKXPro
Contact PCB
SKX5
Contact PCB
SKXPro or SKX5
Companion Cushion
SKX 1-Slot Charging Cradle
SKX 5-Slot Charging Cradle
XCover 1-Slot Charging Cradle
XCover 5-Slot Charging Cradle
SKXSLED-mPOS
SKXSLED-MSRIC
SKX
™
SmartSled
®
1.0W UHF Reader Companion
Assembly Manual
* All pictures shown are for illustration purposes only.
* Actual product may vary.
Contact PCB Assembly - SKXPro
Contact PCB Assembly - SKX5


