background image

Summary of Contents for KALED40XXXZC Series

Page 1: ......

Page 2: ...e Input Source 9 Navigating the Menu 9 Menu Operation 9 Picture Menu 9 Sound Menu 9 Channel Menu 10 Lock System Menu 10 Setup Menu 10 Media Operating Interface 10 PVR 10 Personal Video Recorder File System 10 Formatting the USB 11 PVR Guide 11 Press the PLAY button to continue playing the program from the point where it was paused DTV EPG Electronic Program Guide 12 External Connection 13 Assembli...

Page 3: ...t the Kogan customer support team Never attempt to make repairs yourself Never push objects of any kind into the set through the cabinet slots as they may touch dangerous voltage points or short circuit parts that could result in a fire or electric shock Never spill any liquids onto the set Use special caution in households where children are present The television is not suitable for children und...

Page 4: ...ys monitor the volume of noise from these devices especially when children are using them Installation Ventilation should not be impeded or limited by covering the ventilation slots with items such as newspapers tablecloths curtains etc At least 10cm of space should be left around the apparatus for sufficient ventilation The television should be situated away from heat sources such as radiators he...

Page 5: ...tub wash bowl kitchen sink laundry tub swimming pool or in a damp basement etc When moving the television to a warm location from a cold location allow some time for any dew or condensation inside the television to evaporate fully before you turn the unit on To prevent injury the television must be securely attached to the floor wall in accordance to the supplied installation instructions Cleaning...

Page 6: ...eadphone support Specifications Accessories Specifications Model KALED40XXXZC Display Screen Size 40 Diagonal Maximum Resolution 1920 x 1080 Power Supply AC 110 240V 50 60Hz TV Receive System PAL SECAM BG DK I DVB T Frequency Range DTV VHF 174MHz 230MHz UHF 474MHz 862MHz Video In PAL NTSC Antenna Input Impedance 75ohm Sound Output 2 x 8W Remote Power Input DC 3V Two AAA batteries Power Consumption...

Page 7: ...Overview The buttons on the lower right panel control your TVs basic features including the on screen menu To use the televisions more advanced features you must use the remote control 6 ...

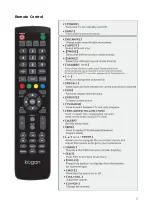
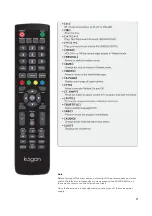
Page 8: ...Remote Control 7 ...
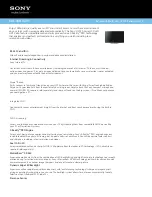
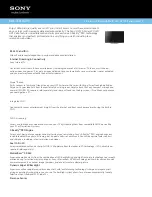
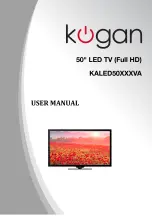
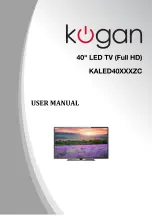
Page 9: ...or turning off the power supply you must switch the television into standby mode by pressing the POWER button on the remote control or on the television set itself Once the television is in standby mode you may turn off the mains power supply ...

Page 10: ... menu 6 Press MENU to return to the previous menu 7 Press EXIT to exit from the menu Notes When an item in the MENU is displayed in grey it means the item is not available or cannot be adjusted in the current menu or submenu Buttons on the TV have the same function as the corresponding buttons on the remote control This manual will focus on the operations using the remote control Menu Operation Pi...

Page 11: ...d Software Update USB Note some adjustment options are only available in DTV mode Media Operating Interface This screen is available in menu mode You can access PHOTO MUSIC MOVIE and TEXT modes PVR Personal Video Recorder File System WARNING Before connecting your USB device to the TV please back up all of the files on it to prevent them from being corrupted or lost A USB disk must be formatted wh...

Page 12: ... pause the DTV program then press it again to resume play The length of time a program can be paused depends upon the setting in the PVR File System Press to stop the Time Shift Press the PLAY button to continue playing the program from the point where it was paused Note Time Shift will stop if you change channels change inputs or go into standby mode while in Time Shift mode Instant Recording 1 S...

Page 13: ... button to continue playing the program from the point where it was paused DTV EPG Electronic Program Guide In DTV mode press EPG to enter the Electronic Program Guide In the Guide menu press REC to set a recording In the Guide menu press BLUE to enter the Reminder menu Press the buttons to adjust the scheduled time then press ENTER to save the setting In the Guide menu press YELLOW to enter the S...

Page 14: ...the Stand Before attaching detaching the stand be sure to turn the TV off Before performing any work spread cushioning out over the base area to lay the TV on This will prevent it from being damaged Stand Installation Instructions 13 ...

Page 15: ...evision Adjust the TV volume accordingly Check that MUTE hasn t been turned on No colour wrong colour or tints Make sure the program itself is broadcast in colour Select the picture menu then adjust the colour and tint submenus Picture rolls vertically Check all connections Blurred or snowy picture distorted sound Check direction location and connections to your antenna Issues may be caused by use...

Reviews: