USER MANUAL
WWW.KOMANDO.COM
Thank you for choosing the Komando Dash Cam.
™
This
manual offers detailed information on how to operate
the device correctly, including: how to work the device,
matters that need attention and technical specifications.
Please read carefully before use.
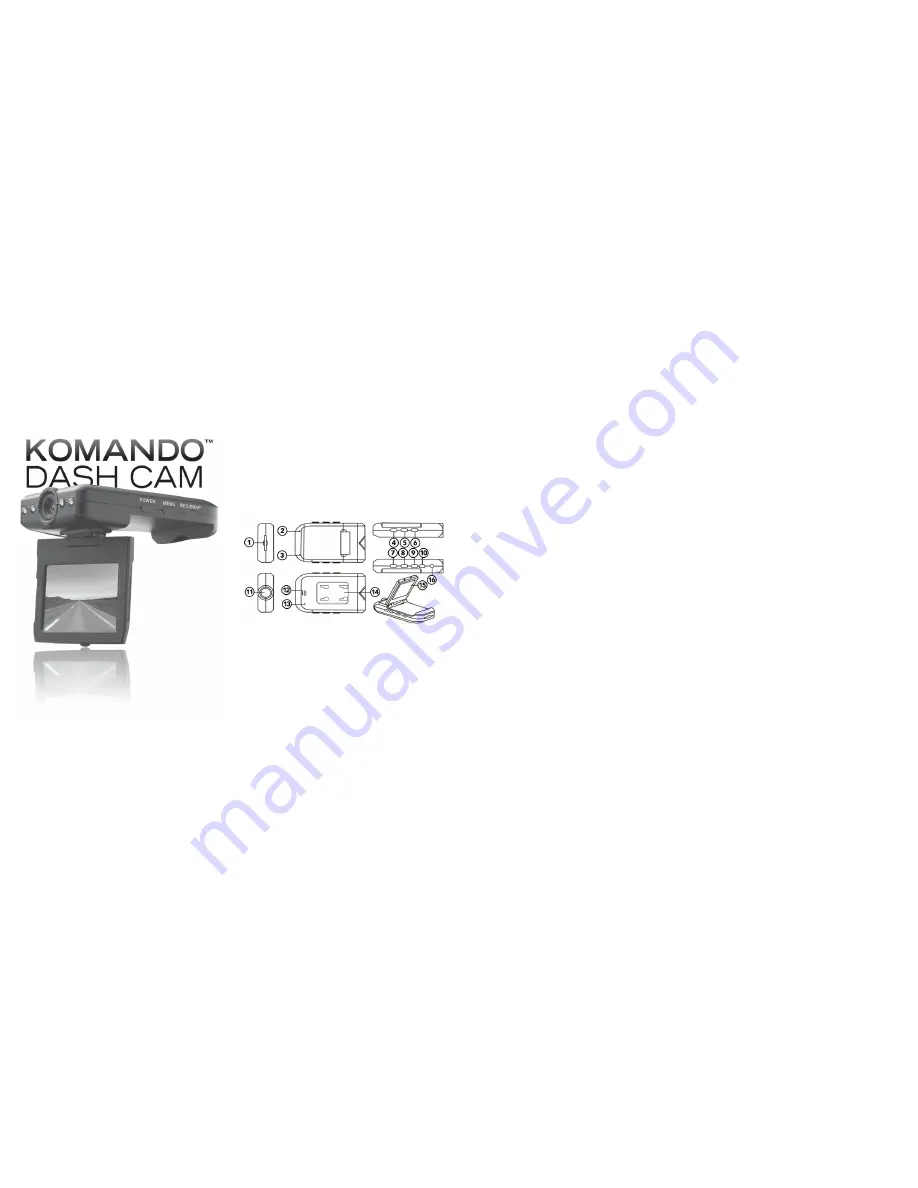
FUNCTION INTRODUCTION:
INCLUDED WITH YOUR KOMANDO DASH CAM:
OPERATING YOUR DEVICE:
1. Memory card slot
2. Indicator light (blue:
working; red: charging)
3. Microphone
4. REC/SNAP button:
(videos /photos; confirm)
5. MENU button
6. POWER button
7. DOWN button
8. UP button
9. MODE button: (recording;
photo; preview)
10. USB Interface
11. Lens
12. Speaker
13. RESET button
14. Bracket slides
15. 2.5 inch LCD screen
16. AV Out: AV Output
interface
1. Komando Dash Cam
™
2. User manual
3. Windshield mounting
bracket
4. USB connecting wire
5. AV line
6. Car-mounted charger
(with 12v/24v to 5v
converter)
7. Memory card
I.
Charge Mode:
A)
Charging Options:
1)
Connect the device to the car charger;
2)
Connect it to your computer with the USB line.
B)
Red light indicator turns on when charging, and
turns off when charging is complete.
C)
When connecting the device to the car charger,
the device will automatically turn on and enter
video mode after starting the car. The device will
continue recording while charging. When the car
is turned off, the device keeps working and will
turn off five seconds later, saving the recorded
files automatically. You can also use the POWER
button to turn off the device, and the files will be
automatically saved.
II.
Function Introduction:
This device has three modes: video, photo and preview. To
switch between modes, simply press the MODE button.
A)
Video Mode:
(memory card must be inserted)
Press and hold the POWER button or connect the
device to the car charger to turn on the device. It
will enter video mode automatically and begin to
record. To stop recording, press the REC/SNAP
button, or turn off the device by pressing the
POWER button. Either way, your recording will
automatically be saved to the memory card. Press
“MENU” to make selections for this mode.
B)
Photo Mode:
(memory card must be inserted)
Turn the device on and press the MODE button to
switch into photo mode. To take a picture, press
the REC/SNAP button. A photo will be taken and
stored on the memory card. Press “MENU” to
make selections for this mode.
C)
Preview Mode: Turn the device on and press the
MODE button twice to enter the preview mode.
Scroll through previews by pressing the UP and
DOWN buttons. The REC/SNAP button is used
as the “Play/Pause” button for videos during
playback. Press it once to play a preview, press
it again to pause the preview.
1)
Delete Function: Enter preview mode and
select the video or photo you wish to delete.
Press the MENU button to open the menu.
Highlight the “Delete” option (use the UP or
DOWN button to highlight). Press the REC/
SNAP button to select the highlighted option
(in this case, the “Delete” option). Use the


