background image

IAN 275078

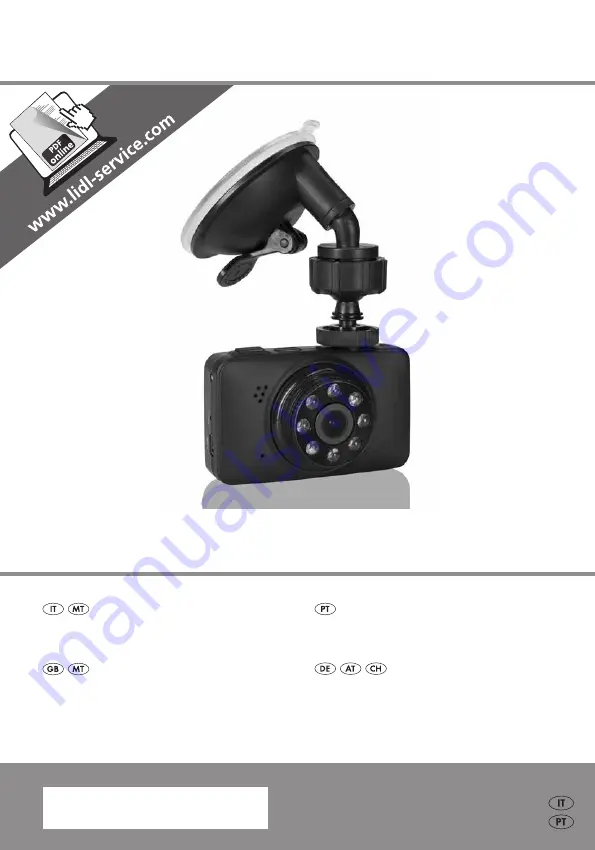
Telecamera Dash cam  cr 5 a2


Dashcam

Bedienungsanleitung und sicherheitshinweise


Telecamera Dash cam

Istruzioni per l'uso e indicazioni relative alla sicurezza

câmara De Tablier

manual de instruções e indicações de segurança


DashboarD camera

operating instructions and safety instructions

Summary of Contents for CR 5 A2

Page 1: ...edienungsanleitung und Sicherheitshinweise Telecamera Dash Cam Istruzioni per l uso e indicazioni relative alla sicurezza C mara de tablier Manual de instru es e indica es de seguran a Dashboard Camer...

Page 2: ...gere aprire la pagina con le immagini e prendere confidenza con le diverse funzioni dell apparecchio Antes de come ar a ler abra na p gina com as imagens e de seguida familiarize se com todas as fun e...

Page 3: ...a e b C d...

Page 4: ...nass Handels GmbH BurgstraSSe 21 44867 Bochum Deutschland Germany www kompernass com Versione delle informazioni Estado das informa es Last Information Update Stand der Informationen 03 2016 Ident No...

Page 5: ...Comandi e funzionamento 11 Accensione e spegnimento esecuzione delle impostazioni 11 Impostazioni di base 11 Men di set up 11 Pronto alla ripresa video 14 Avvio termine della ripresa 14 Pronto allo s...

Page 6: ...mentazione tutelata dal diritto d autore La diffusione o ristampa di qualsiasi genere anche se parziale nonch la riproduzi one delle illustrazioni anche se modificate consentita solo previa autorizzaz...

Page 7: ...ertenza contrassegnata da questo livello di pericolo indica una situazione potenzialmente pericolosa Qualora fosse impossibile evitare tale situazione pericolosa essa pu dare luogo a lesioni Seguire l...

Page 8: ...chio e non effettuare mai lavori di riparazione su di esso Proteggere l apparecchio dall umidit da spruzzi e gocce d acqua e dalla penet razione di liquidi Non esporre mai l apparecchio al calore estr...

Page 9: ...io odore di bruciato o lo sviluppo di fumo staccare immediatamente l apparecchio dall alimentazione di corrente AVVERTENZA Evitare assolutamente di inalare il fumo in quanto esso nocivo Controllare pe...

Page 10: ...a pubblicazione di queste immagini Identificabilit personale Si parla di identificabilit personale quando si pu constatare che una determi nata persona ad un determinato momento si trovava in un deter...

Page 11: ...ED a raggi infrarossi Figura C indicatore di funzionamento coperchio porta mini HDMI fenditura per inserimento schede micro SD display Figura D filettatura per l accoglimento del supporto dello stativ...

Page 12: ...e dall obiettivo AVVERTENZA In caso di fornitura incompleta o in presenza di danni da trasporto o da imballaggio inadeguato rivolgersi alla hotline di assistenza v il capitolo Assistenza Smaltimento d...

Page 13: ...cheda micro SD viene espulsa per un breve tratto e pu ora venire prelevata dall apparecchio AVVERTENZA La telecamera non dispone di una memoria interna Le riprese possono pertanto venire effettuate so...

Page 14: ...desiderati stringere nuovamente a mano le viti a testa zigrinata ATTENZIONE La telecamera deve essere posizionata in modo tale che la visuale del guidato re sia sempre libera Connessione all alimenta...

Page 15: ...nto esecuzione delle impostazioni Per accendere l apparecchio premere il tasto on off L immagine compare sul display della telecamera L apparecchio nuovamente pronto per l uso Per spegnere l apparecch...

Page 16: ...mato questa funzione del menu si pu selezionare con i tasti se si desidera che l apparecchio si spegni automaticamente dopo 1 min 3 min o 5 min di inattivit Se si sceglie Off l apparecchio non si speg...

Page 17: ...ati in modo normale Off o ruotati di 180 On L impostazione pi opportuna dipende dalla posizione in cui la telecamera stata installata Format memory card Formato della scheda di memoria Dopo aver richi...

Page 18: ...ti qui 3 minuti I Indicazione della correzione dell esposizione J Simbolo del pronto alla ripresa video K Il punto rosso lampeggia durante la ripresa L Simbolo di un file protetto dalla cancellazione...

Page 19: ...o verso il basso da 1 a 3 pi scuro Nell impostazione 0 non ha luogo nessuna correzione dell esposizione Selezionare con i tasti la correzione dell esposizione video desiderata ed effettuare la selezio...

Page 20: ...a registrare Se la funzione disattiva l apparecchio non interrompe la ripresa in assenza di movimenti AVVERTENZA Si consiglia di attivare questa funzione solo quando la vettura in posizione di parcheg...

Page 21: ...F Visualizzazione dell ora solo in caso di funzione Timbro data e ora attiva G Simbolo dell autoscatto qui 5 secondi visibile solo se la funzione attiva H Simbolo della correzione dell esposizione I...

Page 22: ...esposizione foto in tre stadi verso l alto da 1 a 3 pi chiaro o verso il basso da 1 a 3 pi scu ro Selezionare con i tasti la correzione dell esposizione foto desiderata ed effettuare la selezione con...

Page 23: ...nare un punto del menu richiamato senza modifica premere il tasto MODE In basso a destra vengono visualizzati la tabella di menu attuale non ch il numero complessivo di tabelle di menu Per chiudere il...

Page 24: ...utti i file Confermare la selezione premendo il tasto Dopo di ci sul display ricompare l elenco dei punti del menu AVVERTENZA L applicazione di queste funzioni per diversi file potrebbe durare alcuni...

Page 25: ...lezionare con i tasti se si intende proteggere il file selezionato dalla cancellazione Write pro tect this file Imposta una protezione di scrittura sul file sbloccare la protezione del file selezionat...

Page 26: ...vo avvio Sostituzione dei fusibili Nell adattatore per auto si trova un fusibile Se l apparecchio non funzionasse il fusibile potrebbe essere guasto Sostituirlo dunque con un fusibile di riserva dello...

Page 27: ...le indicazioni per evitare pericoli e danneggiamenti AVVERTENZA Le riparazioni agli apparecchi elettrici devono essere eseguite solo da personale specializzato addestrato dal produttore Le riparazioni...

Page 28: ...rivolgersi al servizio di assistenza ai clienti Conservazione Smaltimento Conservazione quando l apparecchio non viene utilizzato Se si prevede di non utilizzare l apparecchio per un periodo di tempo...

Page 29: ...4 V max 700 mA tramite rete di bordo dell auto Fusibile dell adattatore per auto T 2 AL 250 V Tensione in uscita dell adattatore per auto 5 V 1 A Memoria Si supportano scheda micro SD sistema di file...

Page 30: ...atori Il prodotto destinato esclusivamente all uso domestico e non a quello commerciale La garanzia decade in caso di impiego improprio o manomissione uso della forza e interventi non eseguiti dalla n...

Page 31: ...uncionamento 37 Ligar e desligar efetuar configura es 37 Configura es b sicas 37 Menu de instala o 37 Operacionalidade para gravar v deos 40 Iniciar terminar grava o 40 Operacionalidade para tirar fot...

Page 32: ...permitido duplicar ou reimprimir total ou parcialmente o presente documento bem como reproduzir imagens mesmo que alteradas sem a autoriza o por escrito do fabricante Indica es sobre marcas USB uma ma...

Page 33: ...imentos graves ou morte AVISO Uma indica o de aviso deste n vel de perigo identifica uma poss vel situa o perigosa Se a situa o de perigo n o for evitada existe o perigo de ferimentos Seguir as instru...

Page 34: ...estas pe as garantido o cumprimento dos requisitos de seguran a Nunca abra o aparelho e n o proceda a quaisquer repara es no mesmo Proteja o aparelho contra salpicos e gotas de gua bem como contra a i...

Page 35: ...eimado ou fumo no aparelho desligue o de imediato da alimenta o de corrente AVISO O fumo n o pode ser inalado uma vez que prejudicial sa de Verifique regularmente se a ventosa est bem fixa ao para bri...

Page 36: ...essoal Existe identificabilidade pessoal quando for poss vel determinar que uma certa pessoa esteve presente num determinado momento num determinado local A identifica o tamb m pode ocorrer atrav s de...

Page 37: ...SET Altifalantes LEDs infravermelhos Figura C Indicador de funcionamento Tampa Liga o HDMI Mini Entrada para cart es Micro SD Ecr Figura D Rosca para fixa o do suporte do trip Tecla ligar desligar Tec...

Page 38: ...Caso falte algum componente ou se verifiquem danos resultantes de embalagem defeituosa ou do transporte contacte a linha direta de Assist ncia T cnica ver cap tulo Assist ncia T cnica Elimina o da em...

Page 39: ...o cart o Micro SD ser ejetada e este pode ser removido do aparelho NOTA A c mara n o possui uma mem ria interna Como tal as grava es fotografias s podem ser efetuadas com um cart o de mem ria inserido...

Page 40: ...contrado a posi o e o alinhamento pretendidos volte a apertar manualmente os parafusos serrilhados ATEN O A c mara deve ser posicionada de modo a nunca obstruir o campo de vis o do condutor Ligar a al...

Page 41: ...a ligar desligar para ligar o aparelho A imagem da c mara surge no ecr O aparelho encontra se agora operacional para a grava o de v deo Para desligar o aparelho mantenha a tecla ligar desligar premida...

Page 42: ...itens do menu Auto Power Off Desativa o autom tica Se ativar esta fun o do menu pode selecionar depois com as teclas se o aparelho desligado automaticamente ap s 1 min 3 min ou 5 min de inatividade S...

Page 43: ...dos s mbolos do ecr e dos menus normal Desligado ou com uma rota o de 180 Ligado Qual a configura o mais adequada aqui depende da forma como colocou a c mara Format memory card Formatar cart o de mem...

Page 44: ...aso 3 minutos I Indica o de corre o de exposi o J S mbolo de operacionalidade para gravar v deos K O ponto vermelho pisca durante a grava o L S mbolo de um ficheiro protegido contra a elimina o Inicia...

Page 45: ...para cima de 1 at 3 mais claro ou para baixo de 1 at 3 mais escuro Na configura o 0 n o efetuada nenhuma corre o da exposi o Selecione a corre o da exposi o do v deo pretendida com as teclas e confir...

Page 46: ...utomaticamente uma nova grava o Com a fun o desligada o aparelho n o interrompe a grava o se n o ocorrerem movimentos NOTA Esta fun o s deve ser ativada quando o ve culo estiver estacionado p ex para...

Page 47: ...a fun o Marca o de data e hora estiver ativada G S mbolo do disparador autom tico neste caso 5 segundos vis vel apenas se a fun o estiver ativada H S mbolo da corre o da exposi o I Indica o de operac...

Page 48: ...osi o da fotografia em tr s passos para cima de 1 at 3 mais claro ou para baixo de 1 at 3 mais escuro Selecione a corre o da exposi o da fotografia pretendida com as teclas e confirme a sua sele o com...

Page 49: ...is esta fun o do menu com a tecla Para voltar a abandonar um item do menu ativado sem efetuar altera es prima a tecla MODE No canto inferior direito exibido o quadro do menu bem como o n mero total de...

Page 50: ...os ficheiros Desbloquear todos os ficheiros Confirme a sua sele o com a tecla De seguida a indica o volta lista de itens do menu NOTA A utiliza o destas fun es em v rios ficheiros pode demorar alguns...

Page 51: ...epois com as teclas se o ficheiro acabado de selecionar deve ser protegido contra a elimina o Proteger este ficheiro contra a escrita se a prote o do ficheiro acabado de selecionar deve ser anulada De...

Page 52: ...tom vel encontra se um fus vel Caso o aparelho n o funcione o fus vel pode estar danificado Neste caso substitua o por um fus vel do mesmo tipo consulte ainda o cap tulo Dados t cnicos Para tal deslig...

Page 53: ...pelo fabricante Repara es inadequadas podem originar perigos graves para o utilizador e danos no aparelho Causas e resolu o de falhas A seguinte tabela ajuda na localiza o e resolu o de pequenas avari...

Page 54: ...vez em quando Elimina o do aparelho O s mbolo ao lado de um contentor de lixo com rodas riscado indica que este aparelho est sujeito Diretiva Europeia 2012 19 EU Esta Diretiva determina que n o pode e...

Page 55: ...solu es de fotogra fias 5 megap xeis 3 megap xeis 2 megap xeis 1 3 megap xeis 0 3 megap xeis 7 megap xeis e 12 megap xeis interpolados Formato das fotografias JPEG Resolu es de v deo Resol 1 1920 x 10...

Page 56: ...n o para uso comercial A garantia extingue se em caso de utiliza o incorreta uso de for a e interven es que n o tenham sido efetuadas pela nossa Filial de Assist ncia T cnica autorizada Os seus direit...

Page 57: ...camera on the windscreen 62 Providing electric power 62 Handling and operation 63 Switching on and off making settings 63 Basic settings 63 Setup menu 63 Video standby mode 66 Start end recording 66 P...

Page 58: ...opyright protection Any copying or reproduction including extracts thereof and the reproduction of images even in a modified state is permitted only with the written authorisation of the manufacturer...

Page 59: ...ous injury or death WARNING A warning at this hazard level indicates a potentially hazardous situation Failure to avoid this hazardous situation could result in physical injury Follow the instructions...

Page 60: ...anteed by using these replacement parts Never open the device and never carry out any repairs yourself Protect the device from moisture spray and dripping water and penetration by liquids Never subjec...

Page 61: ...disconnect it from the power supply immediately WARNING Under no circumstances should the smoke be inhaled as this could be harmful to your health Check regularly to ensure that the suction cup is sec...

Page 62: ...these views Personal determinability Personal determinability exists when it can be established that a certain person was at a certain location at a certain time This identification can be made by mea...

Page 63: ...rophone Mini USB port Reset opening Loudspeaker Infrared LEDs Figure C Operating display Cover Mini HDMI connection microSD card slot Screen Figure D Thread for the tripod mount On Off button button t...

Page 64: ...nt is incomplete or damaged due to defective packaging or carriage contact the Service hotline see the Service section Disposal of packaging materials The packaging protects the device from damage dur...

Page 65: ...an be removed from the device NOTE The camera does not have any internal memory Therefore recordings can only be made with a memory card inserted You can find the maximum recording time depending on t...

Page 66: ...osen the knurled screws and adjust the camera as per your wishes 4 Once you have found the desired position and orientation retighten the knurled screws CAUTION The camera must be positioned so that t...

Page 67: ...on and off making settings Press the on off button to switch on the device The camera image is displayed on the screen The device is now in video standby mode To switch off the device press and hold t...

Page 68: ...on you can the use the buttons to choose whether the device switches off automatically after 1 Min 3 Min or 5 Min of inactivity If you select Off the device will not switch off automatically Confirm y...

Page 69: ...u can then use the buttons to select whether the display icons and the menus are to be displayed in the normal mode Off or rotated by 180 On The best selection depends on how you have mounted the came...

Page 70: ...minutes here 3 minutes I display for exposure correction J symbol for video standby K red dot flashes during recording L symbol for a write protected file Start end recording Press the button repeate...

Page 71: ...deo exposure in three steps upwards from 1 to 3 brighter or downwards from 1 to 3 darker When the setting is set to 0 there is no exposure compensation Use the buttons to select the desired video expo...

Page 72: ...utomatically begin recording again If the function is deactivated the device does not stop recording if no motion is detected NOTE You should only activate this function while the vehicle is parked if...

Page 73: ...splay for photo standby J display for continuous advance function only visible if feature is enabled Taking photos Press the button repeatedly as required to zoom into the subject Hold down the button...

Page 74: ...confirm your selection with the button to return to the list of menu items 3 photos in series If you access this menu option you can then use the buttons to activate or deactivate the function take a...

Page 75: ...l up this menu item with the button To exit the activated menu item without making a change press the MODE button Below right the current menu board as well as the total number of menu boards is shown...

Page 76: ...the button After wards the display will return to the list of menu items NOTE Using this function on a large number of files can take several seconds If you select a video with the buttons the screen...

Page 77: ...is menu option you can then use the buttons to select whether to protect the currently selected file from deletion Write protect this file to remove the write protection for the selected file Unlock t...

Page 78: ...restart the device Changing the fuse The car adapter contains a fuse If the device does not function it may be be cause the fuse is defective Exchange the defective fuse for a replacement fuse of the...

Page 79: ...er Improper repairs can cause considerable risks to users and damage to the device Fault causes and rectification The following table will help to identify and rectify minor faults Fault Possible caus...

Page 80: ...e the built in battery from time to time Disposal of the device The adjacent symbol of a crossed out wheelie bin means that this device is subject to Directive 2012 19 EU This directive states that th...

Page 81: ...nal Photo resolutions 5 megapixels 3 megapixels 2 megapixels 1 3 megapixels 0 3 megapixels 7 megapixels and 12 megapixels interpolated Photo format JPEG Video resolution Res 1 1920 x 1080 pixels frame...

Page 82: ...ded for commercial use The warranty is void in the case of abusive and improper handling use of force and internal tampering not carried out by our authorised service branch Your statutory rights are...

Page 83: ...heibe montieren 88 Stromversorgung herstellen 88 Bedienung und Betrieb 89 Ein und Ausschalten Einstellungen vornehmen 89 Grundeinstellungen 89 Setup Men 89 Video Aufnahmebereitschaft 92 Aufnahme start...

Page 84: ...ung bzw jeder Nachdruck auch auszugsweise sowie die Wieder gabe der Abbildungen auch im ver nderten Zustand ist nur mit schriftlicher Zustim mung des Herstellers gestattet Hinweise zu Warenzeichen USB...

Page 85: ...Todes zu vermeiden WARNUNG Ein Warnhinweis dieser Gefahrenstufe kennzeichnet eine m gliche gef hrliche Situation Falls die gef hrliche Situation nicht vermieden wird kann dies zu Verletzungen f hren D...

Page 86: ...tsanforderungen erf llen ffnen Sie niemals das Ger t und nehmen Sie keine Reparaturen daran vor Sch tzen Sie das Ger t vor Spritz und Tropfwasser und dem Eindringen von Fl ssigkeiten Setzen Sie das Ge...

Page 87: ...cklung feststellen trennen Sie es sofort von der Stromversorgung WARNUNG Der Rauch darf keinesfalls eingeatmet werden da dieser gesundheitssch dlich ist berpr fen Sie regelm ig ob der Saugnapf fest mi...

Page 88: ...er Ansichten Personelle Bestimmbarkeit Eine personelle Bestimmbarkeit liegt vor wenn festgestellt werden kann dass eine bestimmte Person zu einer bestimmten Zeit an einem bestimmten Ort war Die Identi...

Page 89: ...hluss RESET ffnung Lautsprecher Infrarot LEDs Abbildung C Betriebsanzeige Abdeckung Mini HDMI Anschluss Micro SD Karteneinschub Bildschirm Abbildung D Gewinde zur Aufnahme der Stativhalterung Ein Aus...

Page 90: ...jektiv HINWEIS Bei einer unvollst ndigen Lieferung oder Sch den infolge mangelhafter Verpackung oder durch Transport wenden Sie sich an die Service Hotline siehe Kapitel Service Entsorgung der Verpack...

Page 91: ...icro SD Karte wird ein kleines St ck ausgeworfen und kann aus dem Ger t entnommen werden HINWEIS Die Kamera verf gt ber keinen internen Speicher Aufnahmen k nnen daher nur mit eingelegter Speicherkart...

Page 92: ...die R ndelschrauben und justieren die Kamera nach Ihren W nschen 4 Sind gew nschte Position und Ausrichtung gefunden ziehen Sie die R ndel schrauben wieder handfest an ACHTUNG Die Kamera muss so posi...

Page 93: ...en Dr cken Sie die Ein Aus Taste um das Ger t einzuschalten Das Kamerabild erscheint auf dem Bildschirm Das Ger t ist nun in Video Aufnahmebereitschaft Um das Ger t auszuschalten halten Sie die Ein Au...

Page 94: ...r ck Automatische Abschaltung Wenn Sie diese Men funktion aufrufen k nnen Sie anschlie end mit den Tasten ausw hlen ob sich das Ger t nach 1 Min 3 Min oder 5 Min Inaktivit t automatisch abschaltet Wen...

Page 95: ...y Symbole und der Men s normal Aus oder um 180 gedreht Ein angezeigt werden sollen Welche Einstellung hier sinnvoll ist richtet sich danach wie Sie die Kamera angebracht haben Speicherkarte formatiere...

Page 96: ...n I Anzeige f r Belichtungskorrektur J Symbol f r Video Aufnahmebereitschaft K Roter Punkt blinkt w hrend der Aufnahme L Symbol f r eine gegen L schen gesch tzte Datei Aufnahme starten beenden Dr cken...

Page 97: ...ler bzw nach unten von 1 bis 3 dunkler korrigieren In der Einstellung 0 findet keine Belichtungskorrektur statt W hlen Sie mit den Tasten die gew nschte Video Belichtungskorrektur aus und best tigen S...

Page 98: ...omatisch mit einer neuen Aufnahme Bei aus geschalteter Funktion unterbricht das Ger t die Aufnahme nicht wenn Bewegungen ausbleiben HINWEIS Diese Funktion sollten Sie nur aktivieren w hrend das Fahrze...

Page 99: ...ge nur bei aktivierter Funktion Zeit Datums Stempel G Symbol f r Selbstausl ser hier 5 Sekunden nur sichtbar wenn Funktion akti viert ist H Symbol f r Belichtungskorrektur I Anzeige f r Foto Aufnahmeb...

Page 100: ...nach oben von 1 bis 3 heller bzw nach unten von 1 bis 3 dunkler korrigieren W hlen Sie mit den Tasten die gew nschte Foto Belichtungskorrektur aus und best tigen Sie Ihre Auswahl mit der Taste um dan...

Page 101: ...aste aufrufen Um einen aufgerufenen Men punkt ohne nderung wieder zu verlassen dr cken Sie die MODE Taste Unten rechts wird die aktuelle Men tafel sowie die Gesamtzahl der Men tafeln angezeigt Um das...

Page 102: ...gen Sie Ihre Auswahl mit der Taste Anschlie end kehrt die Anzeige dann zur Liste der Men punkte zur ck HINWEIS Die Anwendung dieser Funktionen auf eine Vielzahl von Dateien kann einige Sekunden dauern...

Page 103: ...e end mit den Tas ten ausw hlen ob die gerade angew hlte Datei gegen L schen gesch tzt werden soll Diese Datei schreibsch tzen der Schutz der gerade angew hlte Datei aufgehoben werden soll Diese Datei...

Page 104: ...cherungswechsel Im Kfz Adapter befindet sich eine Sicherung Sollte das Ger t nicht funktionieren k nnte die Sicherung defekt sein Dann wechseln Sie diese gegen eine Ersatzsiche rung gleichen Typs aus...

Page 105: ...rsteller geschult sind Durch unsachgem e Reparaturen k nnen erhebli che Gefahren f r den Benutzer und Sch den am Ger t entstehen Fehlerursachen und behebung Die nachfolgende Tabelle hilft bei der Loka...

Page 106: ...eit zu Zeit aufladen Ger t entsorgen Das nebenstehende Symbol einer durchgestrichenen M lltonne auf R dern zeigt an dass dieses Ger t der Richtlinie 2012 19 EU unterliegt Diese Richtlinie besagt dass...

Page 107: ...ca 6 8 cm Bilddiagonale Foto Aufl sungen 5 MPixel 3 MPixel 2 MPixel 1 3 MPixel 0 3 MPixel 7 MPixel und 12 MPixel interpoliert Foto Aufnahmeformat JPEG Video Aufl sungen Aufl 1 1920 x 1080 Pixel Bildra...

Page 108: ...ltanwendung und bei Eingriffen die nicht von unserer autorisierten Service Niederlassung vorge nommen wurden erlischt die Garantie Ihre gesetzlichen Rechte werden durch diese Garantie nicht eingeschr...

Reviews: