background image


INSTRUCTION MANUAL 


Simrad          RA83/84/85 

RA93/94/95 

Marine Radar 


A L W A Y S   A T   T H E   F O R E F R O N T   O F   T E C H N O L O G Y 


Americas:


Simrad Inc. 
19210 33rd. Avenue West, Suite A 
Lynnwood WA 98036, USA 
Telephon: +1 425 778 8821 
Telefax:     +1 425 771 7211


Supplier: 
 
Europe:


Simrad AB, Trading 

Svalörtsgatan 14 

S-42668 Västra Frölunda, Sweden 

Te46 31 69 51 00 
Telefax:     +46 31 69 51 20


Summary of Contents for Simrad RA83

Page 1: ... R E F R O N T O F T E C H N O L O G Y Americas Simrad Inc 19210 33rd Avenue West Suite A Lynnwood WA 98036 USA Telephon 1 425 778 8821 Telefax 1 425 771 7211 Supplier Europe Simrad AB Trading Svalörtsgatan 14 S 42668 Västra Frölunda Sweden Telephon 46 31 69 51 00 Telefax 46 31 69 51 20 ...

Page 2: ...for GAIN STC settings Chapter 10 Added the AIS sentence 3 4 5 6 7 8 9 10 Amendment policy When any change is applied in the document only the document number of the relevant sheet s and cover sheet are modified and the rest of the sheets are not changed The document number is shown in the footer area right or left bottom of each sheet c 2003 Koden Electronics Co Ltd All rights reserved No part of ...

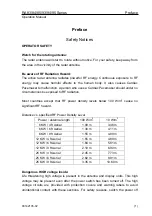
Page 3: ...nsity levels below 100 W m2 cause no significant RF hazard Distance vs specified RF Power Density Level Power antenna length 100 W m2 10 W m2 6 KW 4 ft Aerial 1 09 m 3 46 m 6 KW 6 ft Aerial 1 30 m 4 11 m 6 KW 9 ft Aerial 1 55 m 4 89 m 12 KW 4 ft Aerial 1 55 m 4 89 m 12 KW 6 ft Aerial 1 84 m 5 81 m 12 KW 9 ft Aerial 2 19 m 6 90 m 25 KW 4 ft Aerial 2 45 m 7 73 m 25 KW 6 ft Aerial 2 82 m 8 91 m 25 KW...

Page 4: ... switch off Wait at least five minutes or discharge them to ground before starting your inspection Make sure the main power supply is OFF To prevent an electrical injury due to erroneous power switching make sure that the main power supply and the system power switch are both OFF Also attach a safety label showing that service is in progress Avoid inhaling dust The dust could be a temporary health...

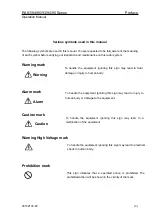
Page 5: ... fatal damage or injury to human body Warning Alarm mark To handle the equipment ignoring this sign may lead to injury to human body or damage to the equipment Alarm Caution mark To handle the equipment ignoring this sign may lead to a malfunction of the equipment Caution Warning High Voltage mark To handle the equipment ignoring this sign may lead to electrical shock to human body Prohibition mar...

Page 6: ...tion you require The titles and contents of each chapter are as follows Chapter 1 GENERAL DESCRIPTIONS Outline of the equipment Equipment category EMC compliance statement System configuration Software type name used Chapter 2 EQUIPMENT SUPPLIED Standard equipment list Spare parts list Installation material list Optional items Chapter 3 TECHNICAL SPECIFICATIONS Antenna specification Processor spec...

Page 7: ... Setting up after installation Setting up option Chapter 5 BASIC OPERATION Introduction Control panel layout Operating controls Getting started Basic radar operations Chapter 6 USING THE MENU RADAR MENU DISP MENU ADJUST MENU SYSTEM MENU MAINTENANCE MENU Operation of EPA Operation of ATA Operation of AIS Chapter 7 GRAPHIC DISPLAYS Entering Graphic Mode Selecting the Graphic Display DISPLAY ITEM SEL...

Page 8: ... required for service Self diagnosis functions provided Trouble shooting On board servicing Chapter 9 MAINTENANCE Periodic inspection and cleaning Chapter 10 TECHNICAL REFERENCES Serial input data sentence detail Tracking data output sentence detail Radar output sentence detail Interface requirements 6 93142105 02 ...

Page 9: ...anual General Descriptions Chapter 1 General Descriptions Contents Page No 1 1 Outline of the equipment 1 1 1 2 Equipment category 1 1 1 3 EMC compliance statement 1 1 1 4 System configuration 1 2 1 5 Software type name used 1 3 93142105 02 Contents ...

Page 10: ... are encapsulated in a water sealed durable plastic case The transceiver unit is contained in a waterproof aluminum case 1 2 Equipment category The RA83 84 85 93 94 95 series of radar is composed of the component units in the following categories specified in the IEC 60945 4th edition Para 4 4 Antenna Unit Type RW701A 04 06 or RW701B 09 RB717A RB718A RB719A Exposed to the weather formerly Class X ...

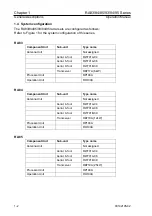
Page 11: ... RW701A 06 Aerial 9 foot RW701B 09 Transceiver RB717A 6kW Processor Unit RP100A Operation Unit RO100A RA84 Component Unit Sub unit Type name Antenna Unit Not assigned Aerial 4 foot RW701A 04 Aerial 6 foot RW701A 06 Aerial 9 foot RW701B 09 Transceiver RB718A 12kW Processor Unit RP100A Operation Unit RO100A RA85 Component Unit Sub unit Type name Antenna Unit Not assigned Aerial 4 foot RW701A 04 Aeri...

Page 12: ...01B 09 Transceiver RB718A 12kW Processor Unit RP100A Operation Unit RO100A RA95 Component Unit Sub unit Type name Antenna Unit Not assigned Aerial 4 foot RW701A 04 Aerial 6 foot RW701A 06 Aerial 9 foot RW701B 09 Transceiver RB719A 25kW Processor Unit RP100A Operation Unit RO100A 1 5 Software type name used The RA83 84 85 93 94 95 series of radar uses the following type of software NOTE The asteris...

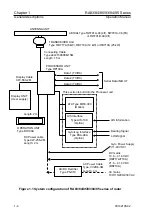
Page 13: ...Type PS 010 DC mains 10 8 41 6 VDC RB717A 718A 21 6 41 6 VDC RB719A This section is built into the Processor unit Data 1 TX RX Data 2 TX RX Data 3 TX RX Gyro Log Interface Type KSA 08A Option DC Power cable Type CW 256 2M Length 2 m AIS Interface Type AIS 100 Option ATA Type MRE 300 Option Length 2m Display UNIT User supply Display Cable CW 560 2M AIS Information OPERATION UNIT Type RO100A Bearing...

Page 14: ... Chapter 2 Operation Manual Equipment Supplied Chapter 2 Equipment Supplied Contents Page No 2 1 Standard equipment list 2 1 2 2 Spare parts list 2 4 2 3 Installation material list 2 4 2 4 Optional items 2 5 93142105 02 Contents ...

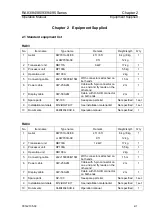
Page 15: ... 1 set 9 Installation materials M12 BOLT KIT See installation material list Not specified 1 set 10 Documents RA80 90SER OM E Operation manual Not specified 1 RA84 No Item name Type name Remark Weight length Q ty 1 Aerial RW701A 04 06 or RW701B 09 4 ft 6 ft 9 ft 6 kg 8 kg 12 kg 1 2 Transceiver unit RB718A 12 kW 17 kg 1 3 Processor unit RP100A 5 5 kg 1 4 Operation unit RO100A 2 kg 1 5 Connecting cab...

Page 16: ...als M12 BOLT KIT See installation material list Not specified 1 set 10 Documents RA80 90SER OM E Operation manual Not specified 1 RA93 No Item name Type name Remark Weight length Q ty 1 Aerial RW701A 04 06 or RW701B 09 4 ft 6 ft 9 ft 6 kg 8 kg 12 kg 1 2 Transceiver unit RB717A 6 kW 17 kg 1 3 Processor unit RP100A 5 5 kg 1 4 Operation unit RO100A 2 kg 1 5 Connecting cable 242J159098B 15M With conne...

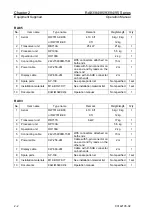
Page 17: ...als M12 BOLT KIT See installation material list Not specified 1 set 10 Documents RA80 90SER OM E Operation manual Not specified 1 RA95 No Item name Type name Remark Weight length Q ty 1 Aerial RW701A 04 06 or RW701B 09 4 ft 6 ft 9 ft 6 kg 8 kg 12 kg 1 2 Transceiver unit RB719A 25 kW 21 kg 1 3 Processor unit RP100A 5 5 kg 1 4 Operation unit RO100A 2 kg 1 5 Connecting cable 242J159098B 15M With conn...

Page 18: ...ar φ 5 x 25 1 Motor power supply 3 Fuse 0 3A Normal blow Tubular φ 5 x 25 1 High voltage power supply 4 Motor brush 24Z125209B Not specified Not specified 1 set Antenna motor 2 3 Installation material list RA83 84 85 93 94 95 Common use No Description Rating Q ty Use 1 Hexagonal bolt B12X55U 4 Antenna unit 2 Nut N12U 8 Antenna unit 3 Plain washer 2W12U 8 Antenna unit 4 Spring washer SW12U 4 Antenn...

Page 19: ... For Navigator One end with a 6 pin connector and flying leads on the other end 5 m CW 388 5M For Gyro Log I F One end with 10 pin connector and flying leads on the other end 5 m 4 Connecting cable CW 561 10M For Remote Display With 12 pin connector on both ends 10 m 5 Display Cable CW 560 2M With D sub connector on both ends 2 m 6 Rectifier PS 010 With two 5 A fuses 3 5 kg 7 AC power cable VV 2D8...

Page 20: ...nts Page No 3 1 Antenna specification 3 1 3 2 Processor specification 3 1 3 3 ATA Specification Option 3 2 3 4 AIS Specification Option 3 3 3 5 Serial data and sentence used 3 3 3 6 Power Supply 3 3 3 7 Compass Safe Distance 3 4 3 8 Environmental specification 3 4 3 9 Mechanical specification 3 4 93142105 02 Contents ...

Page 21: ...00 Hz 400Hz 96NM IF center frequency 60 MHz IF bandwidth 15 MHz S M1 3 MHz M2 L Noise figure Better than 6 dB Operation in wind 100 knots as relative Water proofing grade IPX6 IEC 60529 3 2 Processor specification Effective diameter 269 mm at 18 inch LCD Resolution 1280 x 1024 pixels Video level 8 levels Presentation mode Head up north up course up and true motion Range scale NM 1 8 1 4 1 2 3 4 1 ...

Page 22: ... 8 nm range Range data accuracy 70 meters or 1 of the range scale selected whichever is the greater Bearing data accuracy 1o maximum Navigation data display Data of own ship s position latitude longitude 3 3 ATA Specification Option Acquisition Manual Tracking Automatic Number of targets tracked Up to 10 targets Numerical data output Distance bearing speed course CPA and TCPA Alarm Collision alarm...

Page 23: ...Formatter ALR VDO VDM 3 5 Serial data and sentence used Serial data IEC 61162 1 or NMEA 0183 ver 2 0 Sentence BWC GGA GLC GLL HDT RMB RTE VBW VDR VHW VTG WPL 3 6 Power Supply Mains Input Voltage 24 VDC 32 VDC Input Voltage Tolerance 10 8 VDC 41 6 VDC for RA83 84 93 94 21 6 VDC 41 6 VDC for RA85 95 Input Power 170 W nominal at 24 VDC Transient Protection Specified to the requirements of IEC 60945 4...

Page 24: ...sure environmental specifications are as follows 1 Temperature and humidity Operating temperature Storage temperature Humidity Antenna 25o C 55o C 70o C 93 3 at 40o C Display 15o C 55o C 55o C 93 3 at 40o C 2 Vibration 2 5Hz up to 13 2 Hz Amplitude 1mm 10 Maximum acceleration 7m s2 at 13 2Hz 13 2 Hz up to 100Hz Maximum acceleration 7 m s2 constant 3 9 Mechanical specification Dimensions W Width x ...

Page 25: ...5 93 94 95 Series Chapter 3 Operation Manual Technical Specifications Antenna unit 29kg RW701B 09 65 lb RW701B 09 9Feet 2740 107 7 8 Figure 3 1 External dimensions of the Antenna unit RB717A 718A 93142105 02 3 5 ...

Page 26: ...Chapter 3 RA83 84 85 93 94 95 Series Technical Specifications Operation Manual 33kg 73lb RW701B 09 9Feet 2740 107 7 8 Figure 3 2 External dimensions of the Antenna unit RB719A 3 6 93142105 02 ...

Page 27: ... Series Chapter 3 Operation Manual Technical Specifications Processor unit Figure 3 3 External dimensions of the Processor unit RP100A Figure 3 4 External dimensions of Operation Unit RO100A Operation unit 93142105 02 3 7 ...

Page 28: ...4 3 4 6 1 Installing the Transceiver Unit 4 3 4 6 2 Fitting the Aerial 4 4 4 6 3 Connecting the cable 4 5 4 6 4 Installing the Processor Unit and Operation unit 4 7 4 6 4 1 Table mounting 4 7 4 6 4 2 Flush mounting 4 10 4 6 5 Connecting the cable to the Processor unit 4 12 4 6 6 Link setting for the gyrocompass 4 13 4 6 7 Ferrite core assembling for Power cable 4 14 4 7 Setting up after installati...

Page 29: ...1 Connecting the Remote Display 4 20 4 8 2 2 Required set up 4 20 4 8 2 3 Possible operation on Remote Display 4 20 APPENDIX 1 4 22 Installation of the ATA module MRE 300 4 22 Installation of the AIS module AIS 100 4 22 Installation of the Gyro Interface module KSA 08A 4 23 APPENDIX 2 4 26 Optional cables pinouts and cable color coding designation 4 26 93142105 02 Contents2 ...

Page 30: ...ed in the package If not report this to the insurance agent for tracing missing goods or refund 4 3 Inspection of each component unit and accessories Carefully check the exterior of each component unit for dents damage etc Also check the inside of component units for electrical and mechanical damage 4 4 Setting the units To achieve the best operational performance the following factors must be con...

Page 31: ...t 6 Keep a safe distance from the magnetic compass standard 0 60 m steering 0 40 m 4 5 Cable routing and connections 4 5 1 Antenna 1 The cable connecting the antenna and display should be run separately away from other cables such as radio antenna feeders power cables etc Under no circumstances should it be in parallel arrangement with other cables These precautions are essential to avoid radio in...

Page 32: ... when you attempt to install the antenna unit 1 Drill four fixing holes of 14 mm diameter on the fitting surface of a radar platform as shown in Figure 4 1 2 Fit the transceiver unit on the position and fix it using the 12 mm stainless bolts prepared as installation materials Fix with four screws Double nuts Spring washer Plain washer M12 Hexagonal bolt Platform Antenna base Figure 4 1 Plan view o...

Page 33: ... rotating base Orient the aerial front face the company logo printed on it to the direction to which two arrow marks on the rotating base point 3 Fix the aerial with four bolts attached to the aerial base Aperture Aerial Rotating base Arrow Mark Protection cap Rotating base Plain washer Spring washer Fixing Bolt Figure 4 3 Fitting the aerial onto the rotating base 4 4 93142105 02 ...

Page 34: ...it 5 Slide the rubber sealing washer and retainer plate onto the cable 6 Fix the cable retainer plate over the dressed braid using three fixing bolts 7 Fix the antenna cable with the cable clamp 8 Connect the antenna cable to the Modulator PCB Refer to the interconnection diagram for detail TR unit fixing bolts Remove these connectors Fixing bolt Fixing plate Interconnection cable Clump 5 mm maxim...

Page 35: ...ger 6 6 Red Sheild DATA 40V RTN Blue Larger 7 7 8 Brown Sheild BP SHF P2 9 Braid BP SHF RTN Description Color No 10 Gray Coaxial V TRIG 24V Blue 1 11 NC NA 2 12 Red Larger 40V 12V Orange Larger 3 13 Yellow Larger 40V DATA RTN Braid 4 14 Braid V TRIG RTN DATA Red Sheild 5 15 Green Larger 40V RTN BP SHF R Braid 6 16 Blue Larger 40V RTN BP SHF Brown Sheild 7 V TRIG RTN Braid 8 V TRIG Gray Coaxial 9 G...

Page 36: ...table mount or flush mount mode 4 6 4 1 Table mounting Processor unit 1 Determine the location observing the precaution given in Para 4 4 2 2 Place the Processor Unit onto the position where the unit is installed and fix it using the truss tapping screws prepared in the installation material kit 4 positions Use M4 4 mm tapping screw with 25 mm length or more for good security 4 positions Processor...

Page 37: ...o so insert a thin flat screwdriver into a gap between the cover and the operation unit Apply gentle pressure to gradually pry the cover off the unit 2 Remove the mounting bracket from the operation unit by loosening the M5 screw 4 positions 3 Determine the place to install the bracket and mark the point of screw 4 positions 4 Put the bracket in place and fix with 5M 5 mm tapping screw 4 positions...

Page 38: ...n Manual Installation M5 5 mm tapping screw 4 positions Operation unit Screw cover 4 positions Figure 4 8 Mounting the Control unit M5 5 mm Screw 4 positions Mounting bracket Figure 4 9 Service space required for the Operation unit 93142105 02 4 9 ...

Page 39: ...ation unit 2 Remove a screw cover which is fitted on each corner of the Operation unit front face Refer to Figure 4 13 3 Put the Operation unit and connecting cable into the aperture flush with the panel surface Connect the cable to the Processor unit at the specified receptacle Refer to Figure 4 14 4 Fasten the Operation unit to the panel using a 4 mm tapping screw 4 positions In case you use M4 ...

Page 40: ...tallation 93142105 02 4 11 Screw covers 4 pcs Figure 4 12 Installing the Operation Unit onto the panel M4 Tapping screws 4 pcs Operation Unit Mounting bracket Figure 4 11 Removing the Operation Unit from the Mounting Bracket Screw covers 4 pcs M4 screws 4 pcs ...

Page 41: ... 2 OUT A N0 3 OUT B No 4 IN A No 5 IN B No 6 GND Data connector pin assignment Gyro Log Connections See Para 10 4 1 Pin No NAME SYNC STEP 1 S1 X X 2 S2 X X 3 S3 X X 4 R1 X NC 5 R2 X NC 6 COM NC X 7 GND Frame ground 8 LOG 1 Mechanical contact signal 9 LOG 2 Mechanical contact signal 10 N C Connecting cable Type 242J159098B 15M Standard length L 15 m Power cable CW 256 L 2 m 5 2 3 4 Pin assignment o...

Page 42: ...tions for J721 to J725 from 2 3 to 1 2 on the Main Logic PCB E47 700 as shown below Change setting from 2 3 to 1 2 applicable for J721 to J725 1 2 3 1 2 3 KSA 08A PCB module E47 510 Link pins for J721 to J725 for the gyrocompass voltage setting Main cabinet chassis Main Logic PCB E47 700 Figure 4 14 Locations of the gyrocompass links on the Main Logic PCB 93142105 02 4 13 ...

Page 43: ...nual 4 6 7 Ferrite core assembling for Power cable Loop the power cable around the ferrite core three turns at position of 40 cm from the connector as shown in figure 4 15 Ferrite core Connector Figure 4 15 Ferrite core assembling for Power cable 4 14 93142105 02 ...

Page 44: ...e standby condition is established turn the radar on to enter the following menu functions 4 7 1 Transmission timing SYSTEM MENU SYSTEM SETUP DELAY Adjusts the transmission delay time in order to match the timing of radar transmission and the start of the radar sweep In practice refer to the following figures that illustrate the result of the setting whether it is properly adjusted or not To effec...

Page 45: ...d is arisen to change these settings use the following procedures Resetting must be carried out in the following order 1 Manual GAIN setting 2 STC Height setting 3 Manual STC setting When completed be sure to record respective setting values in the GAIN SEA HEIGHT sheet prepared in this paragraph 4 7 3 1 Manual GAIN setting 1 Press and hold the MODE key and turn the power on When a beep is heard r...

Page 46: ...e residual clutter speckle is shown 5 Turn the SEA control either clockwise or counterclockwise to see the effect of the STC If the effect is uniform in both long and short ranges the STC Height selection is considered appropriate In such a case when the short range sea return is suppressed earlier that that of the long range or vice versa use the following procedure to correct 6 Go SYSTEM SYSTEM ...

Page 47: ... press the ENT key 5 Set SEA GAIN and RAIN to MANUAL mode 6 Set SEA to 10 notch Maximum 7 Go ADJUST PRESET SEA MANUAL and display the numeral entry window 8 Press the Joystick up or down to allow the background noise speckle is reduced to about 6 NM Press the ENT key to fix the setting Record the value 9 Repeat the above procedure to the rest of the range scales using the same value 10 Change rang...

Page 48: ...M SP 0 25NM SP 0 125NM SP STC HEIGHT Initial setting New setting 4 8 Setting up Option 4 8 1 AIS Interface Option DISP MENU NAV AIS Activate AIS function from DISP NAV AIS menu Automatic Identification System AIS will automatically display ships symbol and data around your ship The range of the data display ships can be set from RADAR AIS menu 8 7 Pin assignment on Data Connector Top view 6 5 4 3 ...

Page 49: ...ter does such as gain STC FTC range scale change off centering changing mode of operation VRM EBL fixed rings etc In the following circumstances the display presentation becomes abnormal but is not fault 1 When the transmission is turned off the slave screen is displayed with plural coaxial video caused by non updated video data 2 When the master display is set to short range and the remote displa...

Page 50: ... 2 DATA AIS REMOTE Remote Display External Display Connecting cable CW 561 10M 10m SCANNER Figure 4 17 Remote display connection Pin No NAME 1 VIDEO OUT 2 TRIG OUT 3 GND 4 AZIP OUT 5 SHF OUT 6 GND 7 VIDEO IN 8 TRIG IN 9 GND 10 AZIP IN 11 SHF IN 12 12Vdc Not used 1 2 3 4 5 6 7 8 9 12 11 10 Pin assignment on REMOTE Connector Top view 93142105 02 4 21 ...

Page 51: ...e module using the four 3 mm fixing screws prepared in the ATA module kit Installation of the AIS module AIS 100 The AIS module AIS 100 is installed inside the processor unit Use the following instructions for installation 1 Locate the position of the four fixing studs on the Main Logic PCB E47 700 prepared for the AIS module Refer to the figure below 2 Put the AIS module AIS 100 on the studs and ...

Page 52: ...essing is necessary to prevent the AIS alarm message from being shown mistakenly on the display Installation of the Gyro Interface module KSA 08A The Gyro Interface module KSA 08A is installed inside the processor unit Use the following instructions for installation 1 Dismount the Main Logic PCB E47 700 disconnecting cables connected to the PCB 2 Unscrew the four 3 mm fixing screws on the corner o...

Page 53: ...A Main Logic PCB E47 700 1 J512 J708 2 J515 J707 3 J517 518 J718 GYRO connector pinouts and cable color coding designation Cable type name Port name Pin No Signal name Color code CW 388 5M GYRO 1 S1 Red dot Orange 2 S2 Black dot Orange 3 S3 Red dot Grey 4 R1 Red dot White 5 R2 Black dot White 6 COM Red dot Yellow 7 GND Shield 8 LOG1 Red dot Pink 9 LOG2 Black dot Pink 10 NC 4 24 93142105 02 ...

Page 54: ...lation J517 J518 Main cabinet chassis J512 J515 Main Logic PCB E47 700B J718 KSA 08A PCB module E47 510 ATA MRE 300 PCB module E35 703 J707 J708 AIS 100 PCB module E47 720 Figure A 2 Fitting ATA AIS and Gyro Interface modules into Main Logic PCB 93142105 02 4 25 ...

Page 55: ... GND Green REMOTE connector pinouts and cable color coding designation Cable type name Port name Pin No A Pin No B Signal name Color code CW 561 10M REMOTE 1 7 VIDEO OUT Coax Black 1D White 2 8 TRIG OUT Coax Black 2D White 3 9 GND Coax Shield 4 10 AZIP OUT White 5 11 SHF OUT Yellow 6 6 GND Coax Shield 7 1 VIDEO IN Coax Black 3D White 8 2 TRIG IN Coax Black 4D White 9 3 GND Coax Shield 10 4 AZIP IN...

Page 56: ...ng measurement using a single EBL 5 11 5 5 7 Bearing measurement using two EBLs 5 11 5 5 8 Range measurement using Range Rings 5 12 5 5 9 Range measurement using VRM 5 12 5 5 10 Range measurement with two VRMs 5 12 5 5 11 Measuring the distance and bearing between any two points by offset 1st EBL 1st VRM 5 12 5 5 12 Picture off centering 5 13 5 5 13 Selection of presentation mode 5 13 5 5 14 Setti...

Page 57: ...ches are grouped for respective functions Figure 5 1 Control panel layout Basic Radar Controls RADAR and CAL MENU keys Radar Control Keys Menu Selection Keys Joystick 5 3 Operating Controls All necessary radar controls and functional settings can be made on the display control panel For fundamental radar operations such as turning on and off the radar transmit range change gain control anti clutte...

Page 58: ...key again The system returns to standby mode RANGE switches RANGE SP LP switch BRILL control SP LP PULSE BRILL The RANGE key changes the range scale A press of the key or key increases or decreases the range scale respectively The SP LP key is used to change the transmission pulse length to either long or short Default is a standard pulse length Subsequent pressing of the key toggles the pulse len...

Page 59: ...r narrow areas The AUTO1 and AUTO2 STC provides a hands free Anti clutter sea effect The mode will display as AUTO1 AUTO2 HARBOR and SEA MANUAL in sequence In the HARBOR and Auto Anti clutter Sea modes the manual control is disabled SEA RAIN control The RAIN control is used to reduce the clutter echo from rain or snow Turning the control CW reduces the clutter echo with maximum effect at a full CW...

Page 60: ... used to select these markers in the following cyclic order First press 1st VRM Second press 2nd VRM Third press Parallel Cursor Subsequent press of the key repeats the above steps To select the second VRM press MENU key and select 2nd VRM from the DISP MARK menu Then press ENT key and select ON To erase the second VRM select OFF from the menu To select the Parallel Index line select PI from the s...

Page 61: ... RM Head Up Relative Motion Second press N UP RM North Up Relative Motion Third press C UP RM Course Up Relative Motion Fourth press N UP TM North Up True Motion Further press of the key returns the picture mode to the H UP RM mode The DATA DISP key is used to show navigational information on the upper right of the screen Every press of the key displays the following information in sequence First ...

Page 62: ... of each tracked target For detail refer to Para 6 6 Operation of EPA or Para 6 7 4 Using ATA The ACQ key is used in the EPA ATA function in conjunction with the TARGET key to acquire a target for tracking For detail refer to Para 6 6 Operation of EPA or Para 6 7 4 Using ATA The DELETE key is used in the EPA ATA function in conjunction with the TARGET key to cancel a plotted target For detail refe...

Page 63: ...s all technical settings for the radar operation and Performance Monitor The AUDIO OFF key is used to temporarily turn off the audio alarm A press of the key will silence the alarm The HL OFF key is used to momentarily remove the Heading Line from the screen When the key is pressed and held the Heading Line will be removed and when released it appears again 5 4 Getting Started 1 Press the POWER ON...

Page 64: ... measurement with EBL and two EBLs Range measurement with VRM and two VRMs Picture off centering Selection of presentation mode Guard Zone Alarm Control panel brilliance All available screen presentations are shown in Figure 5 2 and respective meanings are given under the illustration 5 5 1 Range scale selection A press of the RANGE or RANGE key will increase or decrease the range scale by step 5 ...

Page 65: ... DRIFT 20 3KT SET 083 6 COG LAT LON RNG T BRG WP RT01 DGPS LAT LON R02 345 NM CURSOR TARGET XTE CPA TCPA COG T BRG RNG SOG 2 6 NM 5 3 MIN 126 8 21 7 KT 338 4 13 7 NM VECT 3 MIN ID TARGET ID COG SOG 21 7 KT CPA TCPA 4 3 NM 12 6 MIN MAN LIM CPA TCPA 0 5 NM 5 3 MIN ATA DATA 338 0 338 0 13 7NM 02 01 UN RELIABLE MMSI 4310236 52 PL OT DAT A AIS DATA DISP LIM 3 0 NM PO SITION NO VALID SENSOR GYRO GN D 35...

Page 66: ...rst the gain control will be defaulted to manual mode Set the gain control as appropriate to your operational needs As a standard setting turn the GAIN control clockwise to 3 4 of the full excursion This provides slight noise speckles on the mid ranges and adequate speckles on the long ranges To set the auto gain mode select AUTO1 AUTO2 or HARBOR by ADJUST ADJUST MENU The receiver gain will be aut...

Page 67: ...To set the auto RAIN clutter control select AUTO1 or AUTO2 by ADJUST ADJUST MENU The clutter echo from rain or snow will be reduced automatically and the manual rain clutter control will become inactive 5 5 6 Bearing measurement using a single EBL 1 Activate the 1st EBL from the DISP MARK menu with select ON The EBL will be displayed in a dashed line with the bearing display in the bottom left of ...

Page 68: ...o a target Always place the VRM on the right front of the target 3 To erase the VRM select OFF from the DISP MARK 1st VRM menu item 5 5 10 Range measurement with two VRMs 1 Activate the 2nd VRM from the DISP MARK menu with select ON The 2nd VRM will be shown with 1st VRM in a dotted line with the distance displayed shown underneath the 1st VRM display An arrow mark will be shown on the front of th...

Page 69: ...en radius Use the following procedure 1 Move the cross cursor to a desired point to be offset 2 Press the OFF CENTER key The entire radar picture will be moved to the specified point 3 A further press of the key will reset the picture to the center position 5 5 13 Selection of presentation mode The following four kinds of presentation modes are available 1 Head Up Relative Motion 2 North Up Relati...

Page 70: ...lay To achieve the True Motion display a bearing sensor and a speed sensor must be connected to the radar system to provide true bearing and true speed information 000 0 REL North Up Relative Motion N UP RM Own ship s position is fixed to the center of the screen meanwhile the azimuth bearing scale is stabilized in which true north refers to the cursor scale of 000 0 degree When own ship changes h...

Page 71: ...nd width of the Guard Zone Reference drawing Figure 5 4 The outline of the Guard Zone Alarm 1 Press the EBL SEL key and rotate the EBL control to set up the width of the alarm zone An arrow mark will be shown on the front of the WIDTH to indicate width is active to control A further press of the key will return to control the Guard Zone in azimuth 2 Press and hold the VRM SEL key and rotate the VR...

Page 72: ...ure 1 Keep pressing the PANEL key to change the panel illumination in 10 cyclic steps starting from OFF increasing decreasing and finally to OFF again 5 5 16 Displaying the navigational data Navigational data such as own ship s position waypoint position and the distance and bearing to a waypoint can be shown on the screen Press the DATA DISP key to display this data on the screen NOTE 1 A navigat...

Page 73: ...ngitude and waypoint position in bearing and distance OWN SHIP L L WP L L Own ship s position and waypoint position in latitude longitude grid OWN SHIP S POSITION DISPLAY OWN SHIP DGPS 12 O 34 567 N 34 O 43 568 E Own ship s position is obtained from a Differential GPS receiver WAYPOINT POSITION DISPLAY WP RT01 DGPS 12 O 37 123 N 34 O 42 432 E The position of Waypoint No RT01 is obtained from a Dif...

Page 74: ...raction When the air being warmed up in an inland area flows over the cold sea the microwave is bent downwards In this case a detectable radar range may increase This situation may occur produced in warm coastal regions and it becomes noticeable as the temperature difference becomes larger Ducting When two or more layers of different temperature come into contact with one another the radar wave ma...

Page 75: ... distance between two targets in azimuth is shorter than the radar beam width The distance between two targets in azimuth is longer than the radar beam width 2 Range discrimination The range discrimination is defined as the minimum distance where two different targets situated in line on the same bearing are shown separated The range discrimination is dependent on the transmission pulse length Len...

Page 76: ...choing area is large It is represented as wide spreading echoes on the screen Since the sand beach on the port side is deep but is not topographic The echoes are shown weak The windbreak forest produces strong echoes and it is shown as massive echoes in high contrast The echoes reflected from the sea surface change from time to time depending on the wind speed and direction These echoes are shown ...

Page 77: ...alse echoes reduce the gain slightly or apply A C sea control Height of antenna affects the short range target detection If the antenna is mounted too high the radar beam may skip the target causing no echo detection The vertical beam width of the radar antenna also affects the close range detection If the funnel mast or other structures are located near a radar antenna the radar beam will be bloc...

Page 78: ...ll be automatically emitted from the SART so that other ships and or aircrafts can identify its location When your ship carrying the X band radar comes within 8 miles of a ship in distress the SART picks up the radar signal and responds to it The signal consists of 12 sweeps and is emitted in the frequency range of 9 2 GHz through to 9 5 GHz The SART has two sweep times that switch from slow sweep...

Page 79: ...m width of the radar signal received SART position Current position Bandwidth of the radar Signal received Slow sweep signal SART position Fast sweep signal Slow sweep signal Fast sweep signal Sweep start 9 500 MHz 9 200 MHz 7 5µsec sweep time 95µsec sweep time SART mark length The SART signal presentation and its signal timing 93142105 02 5 23 ...

Page 80: ...6 6 6 2 1 2 VRM Unit 6 6 6 2 1 3 RANGE RINGS 6 6 6 2 1 4 BRG TRUE REL Bearing True or Relative 6 7 6 2 1 5 STERN MKR Stern Marker 6 7 6 2 1 6 CURSOR L L Cursor Position Indication 6 7 6 2 2 ECHO Echo Menu 6 7 6 2 2 1 TRAILS Echo Trail Setting 6 7 6 2 2 2 IR Interference Rejection 6 7 6 2 2 3 ENH Echo Enhancement 6 7 6 2 2 4 TUNE Receiver Tuning Mode 6 8 6 2 2 5 MAIN TUNE Manual Tuning Set 6 8 6 2 ...

Page 81: ...GAIN AUTO MANUAL Gain Preset 6 12 6 3 2 4 SEA AUTO MANUAL HARBOR STC Preset 6 13 6 3 2 5 RAIN AUTO MANUAL FTC Preset 6 13 6 3 2 6 MBS Main Bang Suppression 6 13 6 3 2 7 TARGET LEVEL Target Detection Level 6 14 6 4 SYSTEM MENU 6 14 6 4 1 I O SETUP 6 14 6 4 1 1 HDG INPUT Heading Input 6 14 6 4 1 2 GYRO SET Gyro Initial Setting 6 14 6 4 1 3 SEA STAB SPD Water Speed Input 6 15 6 4 1 4 GND STAB SPD Gro...

Page 82: ...6 23 6 6 2 CPA and TCPA 6 24 6 6 3 EPA plotting on the screen 6 24 6 6 4 Alarm display 6 24 6 6 5 Explanation of the EPA terms 6 25 6 6 6 VECT TIME Selecting the Vector Time 6 26 6 6 7 EPA symbols 6 26 6 6 8 WARNING LIMIT Setting the Warning Limit of CPA and TCPA 6 27 6 6 9 TARGET ALL CLEAR Clearing all target plots 6 27 6 6 10 ID DISP Displaying Target ID Number 6 27 6 6 11 Correcting the latest ...

Page 83: ...3 94 95 Series Using The Menu Operation Manual Page No 6 8 Operating the AIS 6 32 6 8 1 Outline of AIS 6 32 6 8 2 Setting the AIS to work 6 32 6 8 3 AIS data display 6 32 6 8 4 AIS target symbols 6 33 Contents 4 93142105 02 ...

Page 84: ... S O G 2 1 7 K T C P A T C P A 4 3 N M 1 2 6 M I N 100 110 120 130 140 150 160 170 080 070 060 050 040 030 020 010 270 0 250 240 230 220 210 0 290 300 310 190 200 320 330 340 350 000 180 26 28 M A N L I M C P A T C P A 0 5 N M 5 3 M I N E P A D A T A 3 3 8 0 3 3 8 0 1 3 7 N M X B A N D L P I R 1 E N H 12 MIN F F S E T O F F F F S E N T 0 2 0 1 U N R E L I A B L E 12 MMSI 4 3 1 0 2 3 6 5 2 P L O T ...

Page 85: ... Press the Joystick up or down to select the item 8 Press the ENT key to activate the selection sequence 9 Press the Joystick up or down to select a status or parameter of the item selected When the parameter is numerical the numerical keypad can be used for the selection 10 Press the ENT key to fix the selection NOTE When you have finished setting the relevant menu functions exit the menu by pres...

Page 86: ...s Speed Indication Meaning Selection LOG DOLOG SPD Ship s Speed indication LOG or DOLOG LOG Magnetic Log or Mechanical Log DOLOG Doppler Log NOTE This item is for display only To change the selection go to SYSTEM I O SETUP SEA STAB SPD or GND STAB SPD Indication Meaning Selection MAN SPD Manual Speed 0 to 99 9 KT NOTE To set the speed go to SYSTEM IO SETUP SEA STAB SPD Indication Meaning Selection...

Page 87: ...ata may deviate when a navigator unit is used in latitude above 70 degrees CAUTION Data Indication OWN SHIP DGPS Own Ship Information Input Device Name Select with DATA DISP key LAT Latitude COG LOP1 LON Longitude SOG LOP2 WP RT01 DGPS Waypoint Information Route Name Input Device LAT Latitude Bearing LON Longitude Range XTE Cross Track Error DEPTH K W Depth NOTE K means the depth from the Keel W m...

Page 88: ...Limit for Time to CPA Min 1 to 63 Min 6 1 8 Data indication The following data are shown in the data window EPA ATA DATA Plot Mode Select with DISP NAV PLOT MODE menu ATA option TARGET ID ID for Operating Target AGE EPA Life CPA Closest Point of Approach TCPA Time to CPA CSE COG Course Course Over Ground STW SOG Speed Through Water Speed Over Ground RNG Range T R BRG True or Relative R Bearing AIS...

Page 89: ...FF ON 1st EBL Electronic Bearing Line No 1 OFF ON 2nd EBL Electronic Bearing Line No 2 OFF ON PI Parallel Index Line Cursor OFF ON NOTE The underlined items are default values To change the bearing and interval of the parallel index line use the following procedure 1 Set the screen to normal display mode 2 Keep pressing the EBL SEL key until the wedge symbol points to the letters PI shown in the l...

Page 90: ...Indication Meaning Selection TRAILS Radar Echo Trails OFF EVERY 15SEC 30SEC 1MIN 3MIN 6MIN 12MIN OFF The TRAILS function is turned off EVERY scan All ship s echoes are plotted on every picture scan 15SEC 30SEC 1MIN 3MIN 6MIN and12MIN All ships tracks are plotted every specified time 15 sec 30 sec 1 min 3 min 6 min or 12 min 6 2 2 2 IR Interference Rejection Indication Meaning Selection IR Interfer...

Page 91: ... yellow with white characters and dark blue background 6 2 2 7 RADAR VIDEO Radar picture color The radar picture can be changed to your requirements as follows Indication Meaning Selection MONO Mono color picture Picture color changes automatically to yellow in DAY mode and green in NIGHT mode YELLOW Yellow picture color Fixed to yellow irrelevant to DAY or NIGHT GREEN Green picture color Fixed to...

Page 92: ...To do so highlight the TARGET ALL CLEAR sign and press the ENT key Indication Meaning Selection TARGET ALL CLR All plotted targets cleared None 6 2 3 4 ID DISP ID Number Display When this item is set to ON the target number is indicated beside the target symbol mark Indication Meaning Selection ID DISP Target ID Display OFF ON 6 2 3 5 AIS Automatic Identification Systems Data Display This function...

Page 93: ...EC 30SEC 1MIN 3MIN 6MIN 12MIN 6 3 ADJUST MENU The ADJUST menu has two sub menus ADJUST and PRESET Details of each sub menu are as follows 6 3 1 ADJUST 6 3 1 1 Screen Contrast Settings Indication Meaning Selection VIDEO CONTR Radar Video Contrast 0 to 99 Changes the brilliance of the radar echo presentation Indication Meaning Selection MARKER CONTR Marker Contrast 0 to 99 Changes the brilliance of ...

Page 94: ...ol giving an optimized radar picture while it is activated The AUTO 1 is suited for coastal navigation In this mode the picture is optimized for short and mid ranges with reduced noise and weather clutters The AUTO 2 is used for open sea navigation In this mode the sea and weather clutters are effectively reduced while the long range performance is maintained The HARBOR mode is used for the naviga...

Page 95: ...E Tuning Meter Center Preset 0 to 99 To make tuning meter preset carry out the following procedure 1 Open the DISP ECHO menu and set TUNE to MANUAL and press the Joystick up or down to obtain the largest radar video presentation 2 Press the ENT key to fix the setting 3 Highlight MANUAL TUNE in the ADJUST PRESET menu and press the ENY key 4 Perform the manual tuning by pressing the Joystick up or d...

Page 96: ...e Joystick and press the ENT key to fix the entry HARBOR This function is used to preset the Anti Sea Clutter effect used in a confined area such as a harbor waterway etc Run your radar in a harbor for instance and select the most suited level with the Joystick and press the ENT key 6 3 2 5 RAIN AUTO MANUAL FTC Preset Indication Meaning Selection RAIN AUTO MANUAL FTC Preset 1 to 16 RAIN AUTO This ...

Page 97: ...O SETUP SYS SETUP and BITE functions Details of each function is as follows 6 4 1 I O SETUP This function is used to select the data source supplied from a speed sensor and a bearing sensor NOTE This menu is protected from ordinary operations To use this function turn off the radar first Press and hold the MODE key and turn the radar on again When the standby condition is established turn the rada...

Page 98: ...ection SEA STAB SPD Water Speed Input MAN PULSE VHW VBW NOTE for NMEA sentences VHW and VBW When the VHW sentence is selected the Doppler Log or a speed log Magnetic or Mechanical can be selected according to the talker device name included in the sentence When the VBW sentence is selected only the Doppler LOG is selected The relation of the sentences and available device names is shown in the fol...

Page 99: ...tence is selected only the Doppler LOG is selected When the VTG sentence is selected the Doppler LOG or the GPS receiver is selected Table 6 3 The relation of the sentences and available device names Sentence Talker identifier available On screen display Device name VD DO LOG Doppler LOG VM LOG Speed LOG magnetic VHW VW LOG Speed LOG mechanical VBW VD DO LOG Doppler LOG VDR VD DO LOG Doppler LOG G...

Page 100: ... used to select the interval of transmission of outgoing signals Indication Meaning Selection SERIAL TRANSMIT Serial Output Interval 0 1 to 9 9 SEC 6 4 2 SYSTEM SETUP This menu is used to select various functional parameters which are specific to respective users and their operating conventions NOTE This menu is protected from ordinary operations To use this function turn off the radar se first Pr...

Page 101: ...o allow the entire radar picture to be set to correct bearings Indication Meaning Selection HDG Radar Echo Bearing Set 0 0 to 359 9 Use the following procedure for correction First take an optical bearing of a stationary target located within viewable range using a standard magnetic compass Second measure the target bearing on the radar If the deviation is found more than 1 degree on the screen ca...

Page 102: ...POSITE The picture is brought back in parallel to the course taken to a point on the circle of 66 of the screen radius Refer to Figure 6 1 for detail 66 circle of the screen radius Current ship s bearing CENTER reset OPPOSITE Figure 6 1 Resetting point in the True Motion mode 6 4 2 7 KEY SOUND Key Click Sound This menu is used to turn on or off the key click Indication Meaning Selection KEY SOUND ...

Page 103: ... Mode PAINT PLOT PAINT The ship s trail is displayed for the time specified by the operator Once selected the trail is displayed every picture scan for a specified time After fully displayed within the time the entire trail length is first shortened to 2 3 of a total length and then it continues to stretch to its full length The PAINT is a default setting PLOT The trail is plotted every specified ...

Page 104: ...sign 4 Press the ENT key to fix the selection The alarm test will start 5 In approximately 10 seconds various alarm messages will be shown and an audio alarm will be activated NOTE NO audio alarm sounds if the BUZZER OFF status is activated 6 To cancel the ALARM TEST function set the ALARM TEST to OFF or set the radar to standby mode once and then transmit again 6 4 3 2 ATA TEST ATA Tracking Test ...

Page 105: ...Key and turn the unit on 6 5 1 ANTENNA The following maintenance test items will be shown Items shown Meaning Normal indication range TUNING LEVEL Tuning Level Indicator 10 to 20 TUNING VOLTAGE Tuning Voltage Level Monitor 50 to 240 250V HT 250V monitor 100 to 180 MAG CURRENT Magnetron Current Monitor 5 to 240 P M RX Performance Monitor Receiver Level 10 to 240 P M TX Performance Monitor Transmitt...

Page 106: ... P A 4 3 N M 1 2 6 M I N 100 110 120 130 140 150 160 170 080 070 060 050 040 030 020 010 270 260 250 240 230 220 210 280 290 300 310 190 200 320 330 340 350 000 180 M A N L I M C P A T C P A 0 5 N M 5 3 M I N E P A D A T A 3 3 8 0 3 3 8 0 1 3 7 N M X B A N D L P I R 1 E N H T R A I L S 12 MIN O F F S E T B Z O F F O F F S E N T P M 0 2 0 1 U N R E L I A B L E 12 MMSI 4 3 1 0 2 3 6 5 2 P L O T D A ...

Page 107: ... 4 Alarm display When 10 minutes has elapsed since a target has been plotted on the screen the system judges that the reliability of the plot data is lost and accordingly turns the audio alarm on together with the screen message UNRELIABLE PLOT DATA and the blinking symbol shown Responding to the audible alarm and the screen message you must update the plot If you leave the plotted data without up...

Page 108: ... be switched to true or relative by pressing the TRUE REL key STW SOG Speed The true speed of a plotted target can be switched to true or relative by pressing the TRUE REL key VECT Vector The vector time of a plotted target BRG Bearing The bearing of a target plotted in true or relative mode The bearing display is referenced to own ship DIST Distance The distance of a target plotted from own ship ...

Page 109: ...et data can be displayed when its target number is assigned highlighted This symbol appears when a target is plotted for more than two points with its target number assigned The target data is shown in the right side of the screen Warning symbols The following symbols are used in the EPA functions to notify the operator of a high risk target or invalid plotting These symbols will blink when they a...

Page 110: ... to 19 9 NM TCPA 1 Minute to 63 Minutes 6 6 9 TARGET ALL CLEAR Clearing all target plots Use the DISP NAV TARGET ALL CLR menu 6 6 10 ID DISP Displaying Target ID Number Using this function the target ID number can be tagged on each displayed target Use the DISP NAV ID DISP menu 6 6 11 Correcting the latest plotting position In case you find a wrong plotting and need to correct it carry out the fol...

Page 111: ...llation instruction To run the ATA function the bearing signal and the speed signal must be supplied to the Processor unit ATA module MRE 300 Option Gyro log Interface KSA 08A Option Bearing signal Speed signal LOG Processor unit Figure 6 7 Configuration of ATA WARNING The accuracy of the auto tracking function provided by the ATA could be affected by the following factors 1 Sea clutter and weathe...

Page 112: ...th a dashed acquire mark with an ID number shown nearby 3 To acquire a next target press the TARGET key to set the next target ID 4 Repeat step 1 and 2 for other targets up to ID number 9 5 Press the DELETE key to cancel the target tracking The symbol of the target and data will be cleared NOTE The target detection echo level can be set with the menu ADJUST PRESET TARGET LEVEL 6 7 5 ATA symbols Ac...

Page 113: ...the symbol This symbol appears when the target enters the Guard Zone The symbol is shown overlaid on the target and is automatically deleted as the target leaves the zone 6 7 6 Setting the Guard Zone The Guard Zone Alarm warns the operator an entry of a target to a preset alarm zone When the target enters the zone a flashing equilateral triangle with its apex down is shown to mark the target Refer...

Page 114: ...press of the key will return to control the Guard Zone in range 6 Press the ENT key to fix the settings The Guard Zone will be shown on the screen Caution In the following circumstances the alarm function will become inoperative The ALARM range and bearing displays accordingly flicker to notify that the function is inoperative 1 When the alarm zone is set lower than 0 5 NM 2 When the alarm zone is...

Page 115: ...ction AIS AIS data display OFF SYMBOL OFF ON 2 In the RADAR menu select LIM AIS range Selecting the LIM range causes the AIS symbols to be displayed within the LIM range 3 The AIS symbols are displayed on the target echoes which are termed activated target The AIS interface can handle up to 20 targets for AIS processing The targets of 21 up to 40 are deemed to be sleeping targets or unprocessed ta...

Page 116: ...ttings being made for the radar plotting function Rate Of Turn Indicator 12 12 AIS vector speed and course over ground Heading Direction fixed length The target turning to the starboard Target number Figure 6 9 Activated Target Symbol Sleeping Target A target which is not activated by the AIS user is termed Sleeping Target The target has no ID vectors or ROT information only showing the presence o...

Page 117: ...t the buzzer does not sound and the symbol will disappear automatically approx 1 minute later Figure 6 12 Alarm Target Symbol Figure 6 13 Lost Target Symbol NOTE The radar vector generated by EPA or ATA and the AIS vector may differ in terms of the vector length and its direction This is not a fault The radar vector is developed based on the past target positions stored either by manual plotting E...

Page 118: ...Selecting the Graphic Display DISPLAY ITEM SELECT MENU 7 2 7 2 1 Selecting each item 7 2 7 2 2 NAVLINE 7 3 7 2 3 MAP 7 3 7 3 Registering or modifying the NAVLINE data NAVLINE DATA INPUT MENU 7 4 7 3 1 Registering or modifying the MAP data COAST LINE INPUT MENU 7 5 7 3 2 Registering or modifying the MARK data MARK INPUT MENU 7 6 93142105 02 Contents ...

Page 119: ...dotted line Navigation lines Dash dotted line Lighthouse Mooring buoy Land based radar station Figure 7 1 An example of the graphic display Specifying nodes on each graphic in the latitude and longitude creates both navigations lines and coastlines 7 1 Entering the Graphic Mode Put the radar to standby mode and press the MENU key Pressing the MENU key toggles the graphic mode of display in the fol...

Page 120: ...s 1 Move the Joystick to the right highlighting the OFF sign and press the ENT key The OFF sign will blink accordingly 2 Move the Joystick further to the right to show the blinking ON sign 3 Press the ENT key to fix the selection of the graphic display The ON sign will become stationary and the selected graphic display will be shown overlaid with a normal radar picture The above procedure applies ...

Page 121: ...ign which is shown in the lower right corner of the screen Before displaying the NAVLINE you must enter the position signal from the NAVIGATOR EPFS NAVLINE NAVLINE No 1 NAVLINE No 0 NAVLINE No 9 A0 A9 B0 B9 A0 A9 B0 B9 A0 A9 B0 B9 Figure 7 2 Structure of NAVLINE 7 2 3 MAP The MAP function is used to make artificial warning zones warning spots or landmarks for fixed targets including coastlines buo...

Page 122: ...s 1 Select the NAVLINE INPUT MENU The following list will accordingly be shown on the screen Table 7 2 NAV LINE INPUT MENU NAVLINE NUMBER 0 POSITION NUMBER LATITUDE N S LONGITUDE E W A0 12o 34 567 N 123o 45 678 E A1 A2 A3 A4 A5 A6 A7 A8 A9 B0 B1 B2 B3 B4 B5 B6 B7 B8 B9 2 Move the Joystick up or down to highlight the number shown right to the words NAVELINE NUMBER and press the ENT key The number w...

Page 123: ...epeat step 7 and after 8 Press the ENT key to fix the entry The blinking alphanumeric data will become stationary 9 To continue the registration repeat the step 5 and after 7 3 1 Registering or modifying the MAP data COAST LINE INPUT MENU 1 Select the COASTLINE input menu The following table will be accordingly shown Table 7 3 COASTLINE INPUT MENU MAP NUMBER 0 COASTLINE NUMBER 0 POSITION NUMBER LA...

Page 124: ...eded move the Joystick left or right to highlight the part for correction and enter new data 10 Press the ENT key to fix the entry The blinking alphanumeric data will become stationary 11 To continue the entry of position data for other position numbers or change the data repeat the step 8 and after 7 3 2 Registering or modifying the MARK data MARK INPUT MENU 1 Select the MARK INPUT menu The follo...

Page 125: ...correction is needed move the Joystick left or right to highlight the part for correction and enter new data 8 Press the ENT key to fix the entry The blinking alphanumeric data will become stationary 9 To continue the entry of position data for other position numbers or change the data repeat the step 5 and after Table 7 5 MARKS USED IN THE MAP No Mark shape Applicable objects 0 Light 1 Lighthouse...

Page 126: ...Chapter 7 RA83 84 85 93 94 95 Series Graphic Display Operation Manual 8 Surface object wreck Hazardous point etc 9 Rush tidal current eddy etc 7 8 93142105 02 ...

Page 127: ...rd Servicing Contents Page No 8 1 Information required for service 8 1 8 2 Self diagnosis functions provided 8 1 8 2 1 Alarm messages 8 1 8 2 2 Status indicators 8 2 8 3 Trouble shooting 8 3 8 3 1 First line faultfinding 8 3 8 3 2 Faultfinding chart 8 4 8 4 On board servicing 8 18 8 4 1 Replacing the fuses 8 18 93142105 02 Contents ...

Page 128: ...iagnosis functions provided The equipment provides on screen alarm messages and the status indicator inside the display unit 8 2 1 Alarm messages The following alarm messages will be shown as a result of diagnosis by the built in self check function if the equipment becomes faulty Details are as follows Table 8 1 Alarm messages shown on the screen Alarm messages 8 rs T Diodes he p cessor unit Thes...

Page 129: ... o T faults D Radar does not turn on 1 Power cable is disconnected 2 Power supply e is outside of the specified value 3 Main fuse is blown 1 Connect the power cable and secure the cable plug connection 2 Use properly rated power supply 3 Replace the fuse with new one voltag Radar turns on but othing displayed on th reen 1 Brilliance control i position defective D driving circuits are defective 1 T...

Page 130: ... Marker video contra properly set Re adjust referring to para 6 2 2 Call fo Heading Line is missing 1 Heading Line signal is not applied to 1 k for cable connections the display Chec for HL signal at antenna and display units Description of faults Possible cause of failures Corrective measures Aerial does not rotate rn 1 Motor fuse is blown 2 Turning motor is not powered 3 Turning motor brushes ar...

Page 131: ...Chapter 8 RA83 84 85 93 94 95 Series Trouble Shooting And On Board Servicing Operation Manual e Go to 5 Faulty radar pictur 8 4 93142105 02 ...

Page 132: ...g connections correct 1 J701 Main Logic PCB and Power Supply PCB 2 J704 and Operation Unit Is the voltage on J704 14 and 16 pins on Power Supply PCB about 0 V when the unit is powered Is 5V on J602 16 pin correct Y Is the power supply voltage range 21 6 41 6 V correct N Y Y Is the fuse rating correct N N Y Is the polarity of power supply line correct Replace the fuse Correct the polarity Power sup...

Page 133: ...20 pin and GND normal Performance Monitor is faulty Y Modulator PCB or Main Logic PCB is faulty Are the antenna cable connections at Antenna and Processor units correct N Is 5V on J5 12 pin in Modulator Unit normal Modulator PCB is faulty Modulator PCB is faulty N Y Y Is 12V present at J2 2 in Antenna unit N Y Y Disconnect Modulator Connector J6 and check if 12V on J711 3 pin is normal Disconnect ...

Page 134: ...sitivity normal throughout the entire range scales Y Is the error message AZIMUTH ABNORMAL shown Go to 9 Antenna faults Pulse selection not operative Does the antenna rotate freely Does the sweep line skip near the HM Heading Marker N Is the error message HEADING LINE ABNORMAL shown Y N Y N Is the radar echo displayed Y Is the error message RADAR VIDEO ABNORMAL shown N Go to 9 Antenna faults Radar...

Page 135: ...l setting performed Is the HDG INPUT sub menu set to GYRO in SYSTEM I O SETUP MENU Is the ship s main supply provided to Interface unit Is the power supply voltage within the range 11 40 V specified Set ship s supply voltage within the specified range Supply ships main voltage Set the HDG INPUT to GYRO Perform initial gyro bearing settings Correct the connections Gyro Interface unit is faulty 8 8 ...

Page 136: ... LOG Gyro Interface unit is supplied with main power supply Y N Is the gyro bearing initial setting performed Is the SEA STB SPD sub menu set to PULSE in SYSTEM I O SETUP MENU Set the voltage within the specified range Take necessary measures to supply the ship s power supply Set the SEA STB SPD menu to PULSE Perform the initial gyro bearing settings Correct the faulty connection Gyro Interface un...

Page 137: ...to IEC 61162 1 format SERIAL GPS SERIAL COMPASS and SERIAL LOG format Y Are the incoming serial data from DATA 1 2 and 3 acceptable format Is the input signal level at the following points in Main Logic PCB 4V or more J712 4 and 5 pins J713 4 and 5 pins J714 4 and 5 pins Is the serial data IEC 61162 1 properly received via DATA 1 2 and 3 connector and displayed Press and hold the MODE key and turn...

Page 138: ...faulty connections Operation Unit is faulty Y Y Correct faulty connections N Y N Operation Unit or Main Logic PCB is faulty N Press the MENU key 5 times Is the panel check display shown The MENU key is faulty Y Any faulty control or key switch detected Detected control or key switch needs to be replaced Is the connection between the display and ship s main supply correct Press and hold the MODE ke...

Page 139: ...N Main Logic PCB is faulty Is the RGB signal presented at the J218 and J219 connector Texts and graphics displays are erratic Main Logic PC B is faulty 9 Antenna unit Y Disconnect P6 J6 from the Modulator PCB Is the fault removed 12V line is shorted Y N Y Disconnect P1 J1 from the Modulator PCB Is the fault removed N Disconnect P5 J5 from the Modulator PCB Is the fault removed IF PCB is faulty N P...

Page 140: ...Finished Is the fault corrected N Can the antenna be rotated manually Check if the following conditions are observed 1 The antenna gets caught with a rope 2 Turning gear mechanism gets stuck Is the Motor Fuse F2 normal not blown Pulse length A ns B ms SP 100 0 5 M1 200 0 67 or 0 77 M2 550 1 or 1 25 LP 1050 2 or 2 5 0 V 5 V Waveform on TP2 B A 1 Motor is faulty N Y Disconnect P4 J4 from the Modulat...

Page 141: ...c HM signal 1 2 msec Azimuth signal 5 V 2 5 V 0 V Normal Azi HM signals on J1 7 5 V 0 V 10 ms Is the HM pulse signal on J4 2 Modulator PCB normal The error message HEADING LINE ABNOTMAL is shown Is the Azi Pulse signal present on J1 7 Modulator PCB normal The error message AZIMUTH ABNORMAL is shown Is the HM signal on J1 7 Modulator PCB normal See waveform above Internal wirings in the Antenna uni...

Page 142: ...Is the Mod HT fuse F3 normal not blown Y Modulator PCB is faulty Check for cable connection between antenna and processor Modulator PCB is faulty Modulator PCB is faulty Internal wiring in the Antenna unit or Power Supply in the Processor unit is faulty The magnetron is faulty N Is 24V supply on J1 1 IF Amplifier normal Manual tuning is faulty N Y Y Does the voltage on J2 3 IF PCB vary from 6 V to...

Page 143: ...ut 2 V Y N Does the automatic tuning function become normal Check for the cable connection between IF PCB J1 and Modulator PCB IF PCB is faulty Finished N Y Y No picture Is the error message MAGNETRON CURRENT ABNORMAL shown N Y Does the MIC monitor voltage lies within 30 70 mV Is the video signal connection normal in the Antenna Cable N The magnetron is faulty MIC module is faulty Repair a faulty ...

Page 144: ...Trouble Shooting And On Board Servicing Poor sensitivity N Y Is the error message MAGNETRON CURRENT ABNORMAL shown N Y Is the MIC monitor voltage in the following range 30 70 mV The magnetron is faulty MIC module is faulty IF PCB is faulty 93142105 02 8 17 ...

Page 145: ...ows Fuse type and ratings Fuse name Shape Dimensions in mm Fuse Type Ratings Main fuse Tubular type φ6 3 x 32 Normal Blow 15 A Modulator fuse Tubular type φ5 x 20 Normal Blow 0 3 A Drive Motor fuse Tubular type φ5 x 20 Normal Blow 5 A Location of the fuses Processor unit SCANNER DATA 1 DATA 2 DATA 3 AIS REMOTE MAIN GYRO Modulator fuse Drive Motor fuse Main fuse Figure 8 2 Fuses provided on the pro...

Page 146: ...4 85 93 94 95 Series Chapter 9 Operation Manual Maintenance Chapter 9 Maintenance Contents Page No 9 1 Periodic inspection and cleaning 9 1 9 1 1 Monthly check 9 1 9 1 2 Yearly check 9 1 93142105 02 Contents ...

Page 147: ...ging which accumulates dust 9 1 2 Yearly check Check the motor brushes of the antenna unit every 2 000 working hours Replace them if the brushes are less than 6 mm in length Figure 9 1 Details of motor brushes Figure 9 1 Criteria of the Motor Brush replacement 1 Loosen the four fixing screws that fasten the front side cover and remove the cover The antenna motor will be found in the lower part in ...

Page 148: ...r 9 RA83 84 85 93 94 95 Series Maintenance Operation Manual Gently turn the screwdriver counter clockwise to remove the motor brush Antenna housing unit Figure 9 2 Replacing the motor brushes 9 2 93142105 02 ...

Page 149: ...tail 10 5 10 3 Radar data output sentence detail 10 5 10 3 1 Own Ship Data 10 5 10 3 2 Radar System Data 10 6 10 4 Interface requirements 10 6 10 4 1 Input requirements 10 6 10 4 2 Data input output serial line 10 7 10 4 3 External monitor signal interface 10 8 10 4 4 Data input output serial line AIS 10 9 10 4 5 Radar Signal input output 10 10 10 4 6 Talker identifier accepted 10 11 93142105 02 C...

Page 150: ...s not displayed 3 Checksum Checksum is the total of all the EX ORed data between the and asterisk signs BWC Bearing Distance to Waypoint BWC xxxx xxx N S xxxxx xxx E W xxx x T xxx x N xxx a hh CR LF GGA Global Positioning System Fix Data GGA xxxx xxx N S xxxxx xxx E W x hh CR LF Sentence format Talker device Waypoint latitude N North S South Waypoint longitude E East W West Waypoint Bearing true C...

Page 151: ...e entered in 2 out of 5 TD fields Otherwise the fields will be void This field is not used Sentence format Talker device Start of sentence Checksum Heading True Note for Talker Device Only HE North Seeking Gyro and HN Non north Seeking Gyro are accepted Sentence format Talker device Waypoint latitude N North S South Waypoint longitude E East W West Waypoint Bearing true Checksum Mode indicator Way...

Page 152: ...hecksum Note for Talker device identifier Only VD Doppler Speed Log is accepted Sentence format Talker device Longitude Water Speed Knots Start of sentence This field is not used Checksum Longitudinal ground speed Knots Traverse ground speed Knots A Valid data These fields are not used Note 1 In case the speed data in knots is not available then the metric speed data field will be recovered and us...

Page 153: ...rt of sentence Total of sentence Message part 6bit field Sentence number Message number Channel number Fill bit Sentence format Alarm condition A threshold exceeded V not exceeded Talker device Checksum Start of sentence Time of alarm condition change UTC Local alarm number Alarm s description text Alarm s acknowledge state A acknowledge V unacknowledge Channel number Message number Sentence numbe...

Page 154: ... hh CR LF Sentence format Talker device Target distance from own ship Target number 0 to 9 Target speed Distance of Closest Point of Approach Target course true Checksum Type of acquisition These fields are not used Target status See Note Speed distance units nm User data Start of sentence Bearing from own ship Time to CPA min Note for Target status L Lost tracked target has been lost Q Quary targ...

Page 155: ...cteristics Power Voltage 24 32VDC 10 30 Consumption 170 W Gyro compass Synchro Voltage value 50VAC or 100VAC 10 50 60 Hz 10 Gear ratio 1 360 1 180 1 90 Stepper Voltage value 21 6 to 38 5 V See NOTE or 63 to 77 V Standard Gear ratio 1 360 1 180 1 90 Serial To IEC61162 1 via opto isolator LOG Mechanical input PRR 100 200 400 pulse nm Input type opto isolator 5V 5mA Pulse width 100 ms min Electronic ...

Page 156: ...pto isolator Type TLP113 Toshiba Serial Data output talker side The IEC61162 1 standard signal can be transmitted Device RS422 Driver IC Type LT1791CS Linear Technology Vcc 150 A Data Input TLP113 470 B Data Input IN B 1 IN A 1 Serial data input circuit LT1791CS TX Data Output OUT B OUT A Serial data output circuit Pin assignment on Data Connector Top view 6 5 4 3 2 1 Data connector pin assignment...

Page 157: ... 7 8 9 10 11 12 13 14 15 The signal specifications are as follows Name Frequency Polarity Pulse width Level Impedance Horizontal sync signal 64 0kHz Negative 1 04 µs TTL 200 Ω Vertical synchronous signal 60 0Hz Negative 46 9 us TTL 200 Ω R G B Video signal Positive 0 7 Vp p 75 Ω Horizontal and Vertical synchronous signal output circuit 1 5 GND Signal return H SYNC V SYNC TC74AC04F Horizontal and V...

Page 158: ...echnology Serial Data output talker side The IEC61162 1 standard signal can be transmitted Device RS422 Driver Receiver IC Type LT1791CS Linear Technology B Data Input LT1791CS IN A 1 IN B 1 Isolated from ground A Data Input Serial data input circuit OUT B TX Data Output OUT A LT1791CS Isolated from ground Serial data output circuit Pin assignment on Data Connector Top view 7 6 2 1 Data connector ...

Page 159: ...UT 2 TRIG OUT 3 GND 4 AZIP OUT 5 SHF OUT 6 GND 7 VIDEO IN 8 TRIG IN 9 GND 10 AZIP IN 11 SHF IN 12 12Vdc DIP Switch S1 6 on the Logic PCB E47 700B in the Processor Unit RP100A The Processor Unit can be used as a radar remote display When the status switch S1 6 is set to ON the display unit is operated with the radar signal supplied from external main display When the status switch is set to the REM...

Page 160: ... DGPS See NOTE GLONASS receiver GL GLO Global navigation satellite system GN GNSS Integrated navigation IN INS Loran C LC LOR Electronic positioning system SN EPFS Gyro north seeking HE GYRO Gyro non north seeking HN GYRO Compass magnetic HC MAG Doppler other general VD DOLOG Speed LOG water magnetic VM LOG Speed LOG water mechanical VW LOG Other device display talker identifier NOTE The on screen...

Reviews: