background image


3

E

Owner’s Manual

Summary of Contents for EASYSTART M50

Page 1: ...3 E Owner s Manual ...

Page 2: ...product in excessively dusty or smoky locations Data handling Incorrect operation or malfunction may cause the contents of memory to be lost so we recommend that you save important data on media Please be aware that Korg will accept no responsibility for any damages which may result from loss of data This product uses the T Kernel source code in compliance with the T License of the T Engine forum ...

Page 3: ...ey M50 61 References in these manuals to the M50 refer to all of these models collectively Abbreviations for the manuals OM PG In the documentation references to the manuals are abbreviated as follows OM Owner s Manual PG Parameter Guide Procedure steps 1 2 3 These indicate the steps of a procedure Symbols Note Tips These symbols respectively indicate a caution a MIDI related explanation a supplem...

Page 4: ...30 Using Tone Adjust 32 Restoring settings you ve edited 32 Saving your edits 33 Detailed Editing with Programs 34 Basic oscillator settings 34 Using LFOs and Envelopes EGs 36 Using Alternate Modulation AMS and the AMS Mixers 37 Controlling Pitch 37 Using Filters 38 Using the Amp section 40 Arpeggiator settings 42 Drum Track settings 42 Effects 42 Automatically importing a Program into Sequence mo...

Page 5: ...or in Program mode 73 Using the arpeggiator in Combination mode 76 Other settings for the arpeggiator 77 Linking the arpeggiator to program combinations 77 Arpeggiator synchronization 77 Creating a user arpeggio pattern 77 Drum Track function 79 Performing with the Drum Track function 79 Using the Drum Track function in Program mode 79 Using the Drum Track function in Combination mode 80 Other set...

Page 6: ...Arpeggiator 100 Drum Track function 100 Drum Kits 100 Effects 100 MIDI 101 Damper pedal does not respond correctly 101 Media 101 Connections with a computer 101 Included CD ROM 102 Initialization 102 Error messages 103 Error and confirmation messages 103 Specifications and options 107 Specifications 107 Options 108 Operating requirements 109 MIDI Implementation Chart 110 Index 111 ...

Page 7: ...cable through the cable hook located on the rear of the M50 Be careful not to bend the base of the plug unnecessarily Example of removing the cable from the cable hook 5 Connect the M50 to your mixer or monitor system Connect the M50 s AUDIO OUTPUT L MONO and R jacks to your mixer or amplified monitor speakers If you re monitoring through headphones connect them to the headphone jack located on th...

Page 8: ...ANK SELECT A GM switches to select other banks of programs With the factory settings contain preloaded programs Select and play these programs to hear their sounds For details on the programs in each bank please see Overview Program Banks on page 28 4 Press the popup button located at the left of Program Select in the display A list of the programs in each bank will appear Use the tabs located at ...

Page 9: ... the programs 4 Use the BANK SELECT A D switches to select combinations of other banks With the factory settings contain preloaded programs Select and play these combinations to hear their sounds 5 As in Program mode you can select combinations from the menu by bank or by category As described in steps 4 and 5 of Selecting Programs on page 2 go ahead and select and play combinations in the same wa...

Page 10: ...ave the values that are stored in the program Note Depending on the program that s selected operating knob 4 may not produce any effect 3 Adjust the tempo of the arpeggio You can adjust the tempo either by turning the TEMPO knob or by pressing the TAP TEMPO switch several times at the desired interval Performing with the Drum Track This feature provides an easy way to play a wide variety of Drum T...

Page 11: ...Protect Song setting Then load the data again Playing the demo songs 1 Press the MODE SEQ switch the LED will light to enter Sequencer mode 2 Access the P0 Play REC Program T01 08 page If this page is not displayed you ll need to press the EXIT switch a few times 3 Let s start by listening to song S000 Verify that song S000 is selected If another song is selected press the song name display area S...

Page 12: ... For details refer to steps 6 and 7 on the preceding page 2 Make sure that the RPPR check box is checked If this is checked RPPR will operate If this is unchecked RPPR will not operate 3 Press a key C 2 or above The pattern assigned to that key will begin playing A pattern such as a drum pattern or bass phrase etc can be assigned to each of the seventy two keys C 2 C8 indicated in the illustration...

Page 13: ...of the modulation source in various ways Programs Drum Tracks and each of the sixteen timbres tracks has its own three band EQ letting you make detailed adjustments to the tonal character To let you shape the final character of the overall sound the effect section provides up to five insert effects two master effects and one total effect In addition to delay and reverb a total of 170 high quality ...

Page 14: ...ur knobs of the control surface give you greater expressive power when using realtime control functions to create and control your sounds Along with the chord trigger switches you can use these knobs as an external mode setup for controlling an external MIDI device Editor Plug In Editor The bundled M50 Editor and M50 Plug In Editor software are applications that let you edit M50 sounds such as pro...

Page 15: ...front panel CONTROL ASSIGN switches to switch between the various control surface functions You can also view and edit the control surface settings in the display P0 8 Control Surface page in each mode CONTROL ASSIGN Knobs 1 4 The functions of these four knobs will change based on the REALTIME CONTROL EXTERNAL and ARP switches as described below For more details please see Control Surface knobs on...

Page 16: ... switches to select the bank of timbre programs in a combination or the bank of track programs in a song see page 45 and page 55 10 VALUE controller Use this controller to edit the parameter that s selected in the display VALUE slider Inc q and Dec u switches VALUE dial 0 9 and ENTER switches ENTER switch Together these controls specify and confirm the value of the selected parameter See page 17 C...

Page 17: ...PUT L MONO jack These are the main stereo audio outputs Use the VOLUME slider to adjust the volume See page 24 PHONES jack Connect your headphones here This jack will output the same signal as the AUDIO OUTPUT L MONO and R jacks The headphone volume is controlled by the VOLUME slider 3 PEDALS You can connect a damper pedal foot switch and foot pedal to these jacks This gives you a broader range of...

Page 18: ...election To enter the parameter value press the desired value in the popup menu Popup menu Pin This switches the popup menu display between locked and unlocked When locked the pin will be shown closed and the popup menu will remain displayed even after you press a parameter value When unlocked the pin will be shown opened and the popup menu will close immediately when you press a parameter value g...

Page 19: ... and release the button The dialog box will close The EXIT switch corresponds to the Cancel button Done button and Exit button j Radio buttons Press a radio button to select one value from two or more choices k Other objects To modify the parameter value of an object shaped like a slider or knob first touch the object and then use the VALUE controllers to modify the value There are also buttons wh...

Page 20: ...or drum track Plus you can use up to five insert effects two master effects and one total effect Sequencer mode Sequencer mode lets you record playback and edit MIDI tracks You can Use the sixteen track MIDI sequencer to record and play back songs Record a single MIDI track at a time or record as many as all sixteen tracks simultaneously You can also record exclusive messages Record using two arpe...

Page 21: ...OGRAM MS1 Multisample MS2 Multisample MS3 Multisample MS4 Multisample Drum Kit MS1 Multisample MS2 Multisample MS3 Multisample MS4 Multisample Drum Kit Arpeggiator B Arpeggiator A Drum Track Drum Track IFX 1 IFX 5 MFX 1 MFX 2 TFX Insert Master Final Effect TIMBRE1 1 TIMBRE8 TIMBRE2 TIMBRE3 TIMBRE4 TIMBRE5 TIMBRE6 TIMBRE7 PROGRAM PROGRAM PROGRAM PROGRAM PROGRAM PROGRAM PROGRAM PROGRAM TIMBRE9 TIMBR...

Page 22: ...desired mode is selected For details on selecting a mode see Selecting modes above In this explanation we ll use Combination mode as an example Press the COMBI switch Note The Combi P0 Play page will appear This is shown in the upper left of the display Selecting a page In Combination Program Global and Sequencer modes you can press the PAGE SELECT switch to view a list of the pages that make up t...

Page 23: ...ms etc or hold down the ENTER switch and press a note on the keyboard to enter a note or velocity value keyboard input 3 You can use knobs 1 4 to edit parameters that are assigned to the control surface Note You can use the COMPARE switch to compare the sound you re editing with the original unedited sound VALUE slider This edits the value of the selected parameter This slider is convenient when y...

Page 24: ...time record a MIDI track Take 1 2 Once again realtime record on the same track Take 2 3 Press the COMPARE switch The LED will light and take 1 will be recalled 4 Press the COMPARE switch once again The LED will go dark and take 2 will be recalled 5 If at step 3 you once again realtime record on the same track take 3 the object of the Compare function will now be take 1 6 If at step 4 you once agai...

Page 25: ...me renaming You can edit the name of an edited program combination song drum kit or arpeggio pattern You can also change the names of the program and combination categories For details please see Editing names on page 91 Using Controllers In addition to using the keyboard the M50 lets you control the sound by using the joystick SW1 and SW2 switches knobs 1 4 chord trigger switches damper pedal and...

Page 26: ...l surface consists of four knobs three control assign switches REALTIME CONTROLS EXTERNAL and ARP that select the functions that will be controlled and the RESET CONTROLS switch which resets each function You can apply modulation to sounds or edit them You can control the arpeggiator You can control external MIDI devices 1 Press one of the REALTIME EXTERNAL or ARP switches to select the group of f...

Page 27: ...itch 3 Press the chord trigger switch to which you d like to assign the notes That s it The notes are now assigned to the chord trigger switch Press CHORD ASSIGN and then play notes This method lets you create a chord out of widely spaced notes even if you can t play all of the notes simultaneously 1 Press the CHORD ASSIGN switch 2 Play a single note or a chord of up to 8 notes You can play a sing...

Page 28: ... PG page 228 and page 384 Damper Pedal The damper pedal is also sometimes called the sustain pedal It acts like the similarly named pedal on an acoustic piano when you hold down the pedal notes will continue to sustain even when you lift your hands off of the keyboard In Combination and Sequence mode you can also make settings so that the damper will affect some sounds but not other sounds Foot Sw...

Page 29: ...ges If you edit a program and then select a different program or turn off the power the changes you made will be lost The same is true for a combination The settings you edit in Sequencer mode and Global mode are remembered as long as the power is on but will be lost when you turn off the power so be sure to save all your data before turning the power off 1 Lower the M50 s VOLUME slider Also turn ...

Page 30: ...AMPER ASSIGNABLE PEDAL ASSIGNABLE SWITCH INPUT INPUT MIDI IN MIDI IN MIDI OUT MIDI OUT R L MONO AUDIO OUTPUT Monitor OUTPUT Computer Mixer Analog audio output Powered monitors etc MIDI keyboard Connections to MIDI equipment Pedal connections etc MIDI cable AC adapter power supply connector Power cable Included to an AC outlet Connecting the AC adapter Connections to computers ...

Page 31: ...an use the foot switch to turn the sostenuto or soft pedal effect on off to turn the arpeggiator on off to switch programs or combinations or to control tap tempo You can use the foot pedal to control volume or modulation Connecting a damper pedal This pedal can provide a damper effect as you play This instrument also supports half damping Here s how to connect an optional Korg DS 1H damper pedal ...

Page 32: ...vice you can transfer sound settings and performance data such as note messages between your external MIDI device and the M50 About MIDI MIDI stands for Musical Instrument Digital Interface and is a world wide standard for exchanging various types of musical data between electronic musical instruments and computers When MIDI cables are used to connect two or more MIDI devices performance data can ...

Page 33: ...ogram change messages let you select Programs remotely PG page 218 page 220 and page 392 Selecting a program using Program Select and the VALUE controllers 1 Press the MODE PROG switch The LED will light Refer to the illustration below for the switches The M50 will enter Program mode 2 Access the Prog P0 Play Main page This is shown in the top line of the display If a different page is shown press...

Page 34: ...menu displays the Programs contained in that bank 2 Press the tabs in the left of the display to select banks 3 Press one of the program names in the center area to select a program The selected program will be highlighted and the program will change Alternatively you can use the q u switches to switch programs Play the keyboard or pressing the chord trigger switches to hear the program you select...

Page 35: ...o discard it You will return to the main category 5 When you are satisfied with the selected program press the OK button to close the menu If instead you press the Cancel button your selection will be discarded and you will return to the program that had been selected when you opened the popup menu Using Controllers For details on performing with the joystick and the control surface see Using Cont...

Page 36: ...VALUE slider to edit the value Controlling Volume Mute and Solo for Oscillators 1 2 and the Drum Track In the Prog P0 Play OSC DrumTrk Mixer page you can adjust the volume of the oscillators and drum track and make mute and solo settings 1 Access the Prog P0 Play OSC DrumTrk Mixer page 2 Select a slider in the display and use the VALUE slider etc to adjust the volume of oscillators 1 and 2 and the...

Page 37: ...aying through a wah pedal Reset Next let s say that you decide that s not really what you wanted so we ll set the knobs back to their default values Although you could return the knob to its middle position and then make fine adjustments to set it precisely to the center there is an easier way 1 Hold the RESET CONTROLS switch 2 While holding RESET CONTROLS switch first move knob 1 and then knob 2 ...

Page 38: ... more edge 9 Look at the assignments for switches 6 and 7 in the display These are programmed to raise the Filter Cutoff and Filter Resonance respectively Switches are just on off but you can set a specific value for the On position notice the 10 and 40 in the switch s value boxes 10 Press each of the two switch buttons The sound now has a more interesting character due to the filters Since it s b...

Page 39: ...ited a program you must save it if you want to keep the changes you ve made If you re select the program or turn off the power after editing your edits will be lost For details please see Writing a Program or Combination on page 88 You can also save programs on an SD card as PCG files For details please see Saving to media Media Save on page 91 ...

Page 40: ...he program type Note Double Programs use twice as many voices as Single Programs Stereo Multisamples use twice as many voices as Mono Multisamples If using velocity crossfade switching the multisample will use twice as many voices as usual Polyphonic monophonic playing The Voice Assign Mode selects whether the Program will play polyphonically Poly or monophonically Mono When this is set to Poly yo...

Page 41: ...ereo Note that stereo Multisamples will require twice as many voices as mono Multisamples Multisamples are organized by category such as piano guitar bell etc 4 Press the Multisample popup for MS1 This brings up a list of Multisamples organized by category Use the tabs at the left of the display to browse through the different categories 5 Select a Multisample by touching its name in the list 6 Pr...

Page 42: ... hold effect which is great for modulating a resonant filter 3 After looking at the different waveforms select Triangle 4 Select the Shape parameter and use the VALUE slider to move through its different settings from 99 to 99 Notice how the shape of the waveform becomes more curved and how 99 emphasizes the lower part of the shape and 99 emphasizes the upper part 5 Select the Phase parameter and ...

Page 43: ...ination and the original version to control another Finally you can cascade the two AMS Mixers together by using AMS Mixer 1 as an input to AMS Mixer 2 For details please see 6 1 OSC1 AMS Mix1 on page 52 of the Parameter Guide Tips for using AMS When making settings for alternate modulation think of the effect that you wish to produce what type of modulation will be necessary to produce that effec...

Page 44: ...nd Pass and Band Reject The Serial routing uses both Filter A and Filter B The oscillator first goes through Filter A and then the output of Filter A is processed through Filter B Parallel also uses both Filter A and Filter B The oscillator feeds both filters directly and allow independent settings for each and the outputs of the two filters are then summed together The 24dB 4Pole routing merges b...

Page 45: ... Filter1 2 Modulation page The Intensity to A and Intensity to B settings control the basic amount of EG modulation for filter frequencies A and B respectively before other modulation The Velocity to A and Velocity to B settings let you use velocity to control the amount of EG modulation The AMS setting selects an AMS modulation source to scale the amount of the Filter EG applied to Filters A and ...

Page 46: ...me levels For example the volume of a piano note begins at a high volume the instant you play the note and then decreases gradually The volume of an organ note on the other hand remains constant as long as you continue pressing the key The volume of a note on a violin or wind instrument can be varied during the note by the musician i e by regulating the amount of pressure on the bow or the force o...

Page 47: ...ol how the volume changes over the course of a note Every instrument has its own characteristic volume envelope This is part of what gives each instrument its identifiable character Conversely by changing the volume contour for instance applying a string like Amp EG curve to an organ multisample you can produce interesting and unusual sounds Drive The Drive circuit adds saturation and overdrive to...

Page 48: ...ut the arpeggiator please see page 73 Drum Track settings You can use the M50 s rich variety of drum patterns to accompany you with high quality drum programs while you perform using a program Playing along with Drum Track patterns is often a useful way to come up with new phrases For more about the Drum Track function please see page 79 Effects For details please see Using Effects on page 67 Auto...

Page 49: ...lect menu Using the Category Program Select menu Using a foot switch PG page 228 Sending MIDI program change messages to select Programs remotely PG page 95 page 218 page 220 and page 392 Selecting a program using Combination Select and the VALUE controllers 1 Press the MODE COMBI switch The LED will light Refer to the illustration below for the switches The M50 will enter Combination mode 2 Acces...

Page 50: ...inations arranged by category such as keyboard organ bass and drums When shipped from the factory the preloaded Combinations are organized into 16 categories each with several sub categories Press the Category Select popup button to access the menu and make your selection The selection method is the same as in Selecting by Category Program Select menu on page 29 refer to that page for details Cate...

Page 51: ...lect programs by category You can transmit MIDI program changes from a connected external MIDI device See PG page 393 Note To select the timbre program via MIDI program change the timbre s status must be set to INT Adjusting the mix Adjusting the volume of each timbre 1 Access the Combi P0 Play Mixer T01 08 page This page shows the volume pan and Program assignments for all 8 Timbres 2 Select the ...

Page 52: ... if you want to keep the changes you ve made If you re select the combination or turn off the power before saving your edits will be lost For details please see Writing a Program or Combination on page 88 You can also save combinations on an SD card as PCG files For details please see Saving to media Media Save on page 91 ...

Page 53: ...rameters as desired To add finishing touches to the sound set up the Insert Master and Total Effect as desired on the P8 IFX and P9 MFX TFX pages respectively These effects can be different from those associated with the individual Programs in Program mode if desired In addition you can make arpeggiator and drum track settings on the P7 ART DT page and controller settings on the P1 Controllers pag...

Page 54: ...page 4 For Timbres 1 3 set Status to INT and MIDI Channel to Gch the Global Channel 5 Access the P4 Zone Delay Key Z T01 08 page 6 Set Timbre 1 s Top Key to G9 and its Bottom Key to C4 You can also enter a note value by selecting the parameter and then playing the desired note on the keyboard while holding down the ENTER switch 7 Set Timbres 2 and 3 to a Top Key of B3 and a Bottom Key of C 1 Key Z...

Page 55: ...u re playing an internal Program this should be set to INT If the status is set to Off EXT or EX2 that Timbre s internal sounds will not be played Off simply disables the Timbre entirely The EXT and EX2 settings allow the Timbre to control an external MIDI device For details please see Status on page 95 of the Parameter Guide Bank Select when status EX2 When the Status is set to EX2 these paramete...

Page 56: ...rams specified for each key zone If you wish to change the playback pitch of a drum program use Detune If you change the Transpose setting the relationship between notes you play and drum note assignments will change Editing Programs with Tone Adjust Using Tone Adjust you can make detailed edits to Programs within the context of the Combination These edits will not affect the original Program or a...

Page 57: ...ls on each mode and how to access each page please see Basic operations on page 16 Songs A song consists of MIDI tracks 1 16 a master track song parameters such as the song name arpeggiator Drum Track function effect and RPPR parameters and 100 user patterns A maximum of 128 such songs can be created on M50 MIDI tracks 1 16 each consist of setup parameters located at the start location and musical...

Page 58: ...ser pattern it will be stored in internal memory and this data will not disappear even when you turn off the power Cue List The cue list allows you to playback multiple songs in succession The M50 lets you create twenty cue lists Each cue list lets you connect up to 99 songs and specify the number of times that each song will repeat The menu command Convert to Song lets you convert the songs in a ...

Page 59: ... T01 08 and T09 16 pages you can change the volume mute and solo settings of each track For details please see SEQ P0 Play REC on page 129 of the Parameter Guide Muting just a specific track Monitoring just a specific track Mute Solo functions The M50 provides a Mute function that lets you silence specified MIDI tracks 1 16 and a Solo function that lets you hear the specified track or channel by i...

Page 60: ...playback by holding down the ENTER switch and pressing the LOCATE switch When you select a song the LOCATE setting is automatically initialized to 001 01 000 For details please see Set Location Set Location for Locate Key on page 192 of the Parameter Guide Loop playback When recording or playing back a song you can loop individual MIDI tracks that are playing In the P0 1 Play REC Play Loop T01 08 ...

Page 61: ...ck settings Since we re going to record a new song in this example we will start by explaining how to assign a program to each MIDI track and make basic settings such as volume 1 Assign a program to each MIDI track Use Program Select to assign a program to each MIDI track The method is the same as when assigning a program to a timbre in a combination see page 45 You can copy various settings from ...

Page 62: ...ture you specified has now been recorded on the Master track If you press the SEQUENCER START STOP switch during the pre count the time signature won t be recorded 7 Set the REC Resolution if necessary When you record in real time on a MIDI track this parameter specifies how the timing of the recorded MIDI data will be corrected The timing will also be corrected when you record automation data in ...

Page 63: ...tion the RPPR function and the arpeggiator to record multiple tracks of musical data at once or when you play back existing sequence data on an external sequencer and record it onto M50 s sequencer in real time Recording setup In P0 1 Play REC Preference page Recording Setup select the realtime recording method you want to use Overwrite When recording for the first time you will normally select th...

Page 64: ... one measure 6 Next play the E3 note of the keyboard to record the snare for one measure and then the F 3 note to record the hi hat 7 Press the SEQUENCER START STOP switch to stop recording 8 Play back the result and listen to the drum performance you recorded Press the SEQUENCER START STOP switch When you ve finished listening press the START STOP switch once again to stop playback 9 If you re no...

Page 65: ...eleted To input a chord simultaneously press the notes of the desired chord Even if you do not press them simultaneously notes that are pressed before you fully remove your hand from all keys on the keyboard will be input at the same location If you want to verify the pitch of the note that you will input next press the PAUSE switch In this state playing a key will produce a sound but will not inp...

Page 66: ...n Note Make sure that the global MIDI channel Global P1 MIDI MIDI Basic page MIDI Channel is set to 01 1 Create a new song For details please see Creating a Song on page 55 2 Select the menu command Copy From Combi A dialog box will appear Select the program or combination that you want to copy i e the copy source We will copy the effect settings of the combination as well so check the IFXs MFXs a...

Page 67: ...Global P1 MIDI MIDI Routing Enable Control Change and Enable Exclusive settings must be checked Go to Global mode and verify that these items are checked Note Use Param MIDI Out in Global P1 MIDI Basic page to specify whether control change messages or system exclusive messages will be transmitted when you edit the Pan CC 10 Volume CC 7 or Send 1 2 level CC 93 and CC 91 parameters In this case the...

Page 68: ...ed data will be added to the previously recorded data 9 If you want to delete specific data while you continue pattern recording you can press the SEQUENCER REC WRITE switch or check the Remove Data check box For details refer to step 6 of Loop All Tracks on page 58 10 Press the SEQUENCER START STOP switch to stop recording If you made a mistake or decide to re record press the SEQUENCER START STO...

Page 69: ...using Revert in this way you can work efficiently when assigning contiguous or nearby pattern numbers or tracks As described above assign several other patterns such as P003 and higher 11 Press the C 2 key The assigned pattern will play 12 Take your finger off the C 2 key and press the D2 key The pattern will change and playback will begin At this time the pattern operation will depend on the Sync...

Page 70: ...have started at the beat or measure and the beginning of the pattern will be compressed so that the remainder of the playback will be correct 4 To turn off the RPPR function uncheck the RPPR check box Play RPPR while a song plays back RPPR can be played in synchronization with the playback of a song Pattern playback for a key with a Sync setting of SEQ will synchronize to the playback of the song ...

Page 71: ...tep will be inserted If you press the Copy button the selected step will be copied If you press the Insert button the copied step will be inserted 3 Set the last step to End If you set this to Continue to Step01 the cue list will play back repeatedly 4 In Repeat specify the number of times that the song for that step will be repeated For this example set Step 02 S001 VERSE to 02 5 Specify whether ...

Page 72: ... data you ve created will be reproduced faithfully we recommend that you use Save All to save it For details please see Saving to media on page 87 When you turn off the power the Sequencer mode settings the recorded songs and the user pattern data will be lost Saving a template song If you want the programs track parameters effect settings and arpeggiator settings etc used by a song to be saved as...

Page 73: ...th Master effects only the Wet processed signal will be output The output signals from the Master Effects are routed to the L R bus with the output level specified by Return1 and Return2 These output signals are mixed with the output signals from the bus specified by Bus IFX Output Select P8 Routing page in each mode L R or with the output signals from the bus specified by Bus IFX Output Select P8...

Page 74: ... sound of each timbre track program Then you can use the master effects to create overall ambience and use the total effect to make final adjustments In Combination mode you can make these settings for each combination and in Sequencer mode you can make them for each song In Sequencer mode you can switch between effects or modify the effect parameters and record these changes so that effects will ...

Page 75: ...ert effects 5 Access the Prog P8 IFX Insert FX Setup page 6 Choose the effect type that you want to use for each insert effect IFX1 5 When you press the popup button all effects will be displayed organized into ten categories Use the pages located at the left and right to select a category and choose an effect from the desired category on the display You can use the Copy Insert Effect menu command...

Page 76: ...ster effects will not apply Send 1 corresponds to MFX1 and Send 2 corresponds to MFX2 12 Access the Prog P9 MFX TFX Routing page 13 In MFX1 and MFX2 select the type of each master effect The procedure is the same as when selecting an insertion effect see step 6 Note You can only select a double size effect for MFX1 For details please see Double size effects on page 70 14 Press the On Off button to...

Page 77: ...end level is determined by multiplying this by the Send 1 or Send 2 settings for oscillators 1 and 2 within the program selected by the timbre If the program parameter Send 1 or Send 2 is set to 0 the resulting level will still be 0 even if you raise this send level If Bus IFX Output Select is set to IFX1 5 the send levels to the master effects are set by Send1 and Send2 Insert FX Setup page follo...

Page 78: ...tiple modulation type effects will not be synchronized even if you set them to the identical Frequency since the LFOs are being generated independently However if you select Common 1 or Common 2 for the LFO Type parameter of a modulation type effect the effect will use the one of the common LFOs instead of its own individual LFO This allows you to use a single Common FX LFO to control two or more ...

Page 79: ...ss the ARP ON OFF switch the LED will light to turn on the arpeggiator Arpeggios will begin sounding when you play the keyboard 2 As described in the following sections Settings using controllers and Settings in the display move the controllers or modify the parameters to change the way in which the arpeggios are played Settings using controllers Arpeggiator on off Each time you press the ARP ON O...

Page 80: ...he pattern and turning it toward the right will lengthen the pattern When the knob is in the center position 12 o clock the value of the program parameter Length Global P6 Arpeggio Pattern Setup page will be used This adjustment is available only if you ve selected a user arpeggio pattern U0000 INT U1027 USER If the arpeggio pattern is one of the preset arpeggio patterns P0 P4 turning the knob wil...

Page 81: ...igger each note in the order in which you actually played the notes Setting the arpeggio to continue playing even after you have taken your hand off the keyboard You can select whether the arpeggio will continue playing when you take your hand off the keyboard or whether the arpeggio will stop Press the Latch check box to make this setting Checked The arpeggio will continue playing even after you ...

Page 82: ...en the ARP ON OFF switch is on However the arpeggiator will only play a timbre if the table next to the check boxes assigns arpeggiator A or B to a timbre T 1 16 You make these settings in Combi P7 ARP DT ARP Setup T01 08 T09 16 page Arpeggiator Assign see PG page 107 Arpeggiator A Arpeggiator B For each arpeggiator A and B you can make settings for Pat Pattern Select Reso Resolution Octave Sort L...

Page 83: ...s or whether the arpeggiator status will not change when you switch programs or combinations With the factory settings the former is selected Use the latter when you want to keep the same arpeggio pattern running and change only the program sound This setting is made in Load ARP when changing Global P0 Basic Setup Basic page See PG page 217 Arpeggiator synchronization For details on synchronizatio...

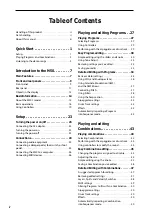
Page 84: ...Arpeggiator function 78 ...

Page 85: ...tion on off 1 Press the MODE PROG switch to enter Program mode and select the desired program For details please see Selecting Programs on page 27 2 Press the DRUM TRACK ON OFF switch The ON OFF switch will light or blink depending on the setting Trigger Mode of the program If lit The Drum Track pattern will start according to the Sync setting When you turn it off the pattern will stop This will o...

Page 86: ...tails please see Selecting Combinations on page 43 2 Press the DRUM TRACK ON OFF switch The ON OFF switch will light or blink depending on the setting Trigger Mode of the combination If lit The Drum Track pattern will start according to the Sync setting When you turn it off the pattern will stop This will occur if the Trigger Mode parameter is set to Start Immediately If blinking The Drum Track pa...

Page 87: ... OFF switch to verify that the pattern plays correctly The method of triggering will depend on the Trigger settings If the Trigger Mode parameter is set to Start Immediately the Drum Track pattern will start when you press the ON OFF switch For details on the Trigger settings please see 7 4b Trigger on page 62 of the Parameter Guide Other settings for the drum track Settings for the drum track inc...

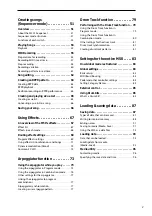
Page 88: ...Drum Track function 82 ...

Page 89: ...r details please see Master Tune on page 216 of the Parameter Guide For details please see Key Transpose on page 216 of the Parameter Guide Adjusting the way in which velocity or after touch will affect the volume or tone You can specify the degree to which the volume or tone will be affected by a note s velocity or by messages such as aftertouch received from MIDI IN For details please see Veloci...

Page 90: ...e M50 In the Global P1 MIDI MIDI Basic page and the MIDI Routing page you can make settings for the global MIDI channel the Local Control on off setting MIDI clock MIDI routing and MIDI filtering You can also use a menu command in this page to transmit MIDI exclusive data dumps For details please see Dump on page 253 of the Parameter Guide Pedal and other controller settings In the Global P2 Contr...

Page 91: ...the preloaded external control templates and their corresponding application settings Using Drum Kits What s a Drum Kit A drum kit is a collection of drumsamples samples comprising a kit element assigned to each key Drum kits have the following features A different sound will play for each note A drumsample one drum instrument is assigned to each key You can assign up to four drum samples to each ...

Page 92: ...Settings for the entire M50 86 ...

Page 93: ...t Data that you edit in Sequencer mode can only be saved to media it cannot be saved in internal memory About preloaded data and preset data Preloaded data refers to the data that is loaded in the M50 when it is shipped from the factory You are free to rewrite this data and with the exception of the demo songs the data will be written to the location as described in Writing to internal memory This...

Page 94: ... the category of the Program Combination 6 Select a Sub Category as well For combinations the category and sub category you specify here can be selected in the following pages Prog P0 Play Category Combi P0 Play Program T01 08 09 16 Category Seq P0 1 Play REC Program T01 08 09 16 Category For Programs the category sub category you specify here can be selected in the following pages Combi P0 Play P...

Page 95: ...fer is written to the specified program or combination number of the specified bank If you select another program or combination without writing your edits the data of the newly selected program or combination will overwrite the edited data in the edit buffer and your changes will be lost Note When you press the COMPARE switch in Program mode or Combination mode the data from memory i e the conten...

Page 96: ... power without writing the modified data in the memory area will be lost Memory protect To prevent Programs Combinations Songs Drum Kits and User Arpeggio Patterns from being overwritten accidentally the M50 provides a Memory Protect setting that prohibits writing to memory Before you save edited data or load data from media use the following procedure to turn the memory protect off uncheck the ap...

Page 97: ...rd slot With the card label facing upward insert the con nector end of the card into the SD card slot and press it in until you hear a click Make sure that the card is oriented correctly when you insert it Forcing it in the wrong direction may damage the slot or the card and the data may be lost Removing a card Never remove an SD card from the slot while loading saving or formatting is in progress...

Page 98: ...e the file before you save it For details please see Editing names on page 91 Please note when saving When using Save All PCG SNG and Save PCG to save combinations you should also remember to save the programs used by each timbre or the drum kits and user arpeggio patterns used by the programs at the same time Similarly when saving programs you should also remember to save the drum kits user drum ...

Page 99: ... kits Global settings User Arpeggio patterns and Drum Track patterns in a single operation When loading Programs Combinations Songs or Drum Kits you must make sure that the Global mode memory protect setting is unchecked For details please see Memory protect on page 90 Note Please see page 90 for details on the media from which you can load data 1 Make sure that the media is ready for you to load ...

Page 100: ...ialog box Note When you press the keyboard of the M50 you will hear the combination you have selected However the internal programs will be used as the program of each timbre 2 Press the Load button Alternatively choose the menu command Load Selected A dialog box will appear 3 Use the Combination upper line to select the load source combination and use To Combination lower line to specify the dest...

Page 101: ...pdate data You can update the M50 s system by downloading the most recent version of the system file from the Korg website http www korg com to your computer and loading it into the M50 For details on the procedure refer to the Korg website and to Update System Software on page 252 of the Parameter Guide Use the Global mode menu command Update System Software to load the system update data ...

Page 102: ... Quick Format Normally you should use Quick Format to initialize the media Full Format All blocks on the media will be erased Normally there is no need to apply a Full Format you should simply execute Quick Format 6 Press the OK button to format or press the Cancel button if you decide to cancel When you press the OK button a message will ask you for confirmation Press the OK button once again to ...

Page 103: ...nternal memory If you want to keep the existing data that is stored in internal memory use Save All PCG SNG or Save PCG to save your data to external media before you continue 1 Access the Global mode P0 Basic Setup Basic page Press the MODE GLOBAL switch to enter Global mode If the Global P0 Basic Setup Basic page is not shown press the EXIT switch 2 Press the menu button and choose Load Preload ...

Page 104: ... unable to select commands from the menu do the following 1 Press the GLOBAL switch 2 Press the EXIT switch twice 3 Hold down the ENTER switch and press 3 on the numeric keypad The Touch Panel Calibration page will appear Follow the on screen instructions to re calibrate the touch panel Can t switch modes or pages If you re doing any of the following you may not be able to change modes or switch t...

Page 105: ...lay chords Could the program s Voice Assign Mode be set to Mono PG p 15 Pitch is incorrect In the Global P0 Basic Setup page are the Master Tune and Transpose settings correct PG p 216 In the Prog P2 OSC Pitch page is the Pitch Slope set to 1 0 PG p 23 In the combination or song are the Transpose and Detune settings of each timbre track set appropriately PG p 97 p 153 In the timbre track settings ...

Page 106: ...N OFF switch turned on lit p 79 You pressed the DRUM TRACK ON OFF switch but the drum track pattern did not start Is the DRUM TRACK ON OFF switch blinking Trigger Mode is set to Wait KBD Trig The drum track pattern will start when you play the keyboard or receive a note on PG p 62 Did you select a pattern that does not contain data Could P000 Off be selected as the pattern PG p 62 If the drum trac...

Page 107: ...correctly p 91 Could the media s write protect setting be turned on Can t save load data on the SD card Is the media inserted correctly p 91 Has the media been formatted p 96 Could the media s write protect setting be turned on The date of the data is wrong The files you saved have the incorrect date The M50 does not contain an internal calendar Use the menu command Set Date Time Media Utility pag...

Page 108: ...ot recognize the M50 Check the M50 s assignments and USB MIDI port settings The connected device or software may not support the messages you are transmitting Refer to the manual of the connected device or software to verify that it responds to the messages you are transmitting If you want to transmit and receive system exclusive data the MIDI Filter Enable Exclusive dialog box must be selected Gl...

Page 109: ... To solve this problem Set a destination measure that is outside of the source range Destination is empty Meaning When editing the track or pattern that was specified as the destination contains no musical data To solve this problem Select a track or pattern that contains musical data Destination measure is empty Meaning The measure that was specified as the destination contains no data Specify a ...

Page 110: ...dit operation would cause the track length to exceed 999 measures Delete unnecessary measures Measure size over limit Meaning When loading a Standard MIDI File the number of events in a measure exceeded the maximum approximately 65 535 events Meaning The attempted edit operation would cause the maximum number of events in a measure approximately 65 535 to be exceeded To solve either of these probl...

Page 111: ...ee memory Not enough memory to load Meaning When you attempted to load a SNG file or a standard MIDI file in Media mode there was insufficient free memory in the sequence memory To solve this problem Delete other song data etc to regain free memory Not enough memory to open pattern Meaning There was insufficient sequencer memory to open the pattern so editing is not possible Either delete unwanted...

Page 112: ...an be accessed by the load or open operation Alternatively the data is damaged etc and cannot be loaded or accessed This file is already loaded Meaning When loading a divided PCG file you attempted to load a file that had already been loaded Load the PCG files that have not yet been loaded U Unable to create directory Meaning You attempted to create a directory that would exceed the maximum path n...

Page 113: ...amples 4 way velocity switches with crossfades and adjustable crossfade shapes Linear Power Layer The number of Combinations Programs Drum Kits User Combinations 512 Combinations 384 Preload User Programs 640 Programs 608 Preload User Drum Kits 48 Drum Kits 32 Preload Preset Programs 256 GM2 Programs 9 GM2 Drum Programs Effects 5 Insert Effects In line processing stereo in stereo out 2 Master Effe...

Page 114: ...C WRITE START STOP TEMPO Switches TAP TEMPO TEMPO Knob Other Switches PAGE SELECT EXIT VOLUME Slider display contrast Audio Outputs Analog AUDIO OUTPUT L MONO R 1 4 TS Mono unbalanced Volume slider controls only L Mono and R Output Impedance 1 1kΩ stereo 550Ω mono L Mono only Maximum Level 16 0 dBu Load Impedance 10 kΩ or greater Headphone output 1 4 TRS Stereo Volume slider Output Impedance 33Ω M...

Page 115: ... version 10 4 11 or later Formats supported by M50 Plug In Editor Windows VST RTAS Macintosh VST Audio Unit RTAS M50 Plug In Editor must also satisfy the operating requirements of the host application You cannot run multiple instances of the M50 Editor and M50 Plug In Editor on the operating system This means that you can t use this editor to edit two or more M50 units simultaneously Appearance an...

Page 116: ... 38 96 97 100 101 0 119 0 119 120 121 Notes P A C E Transmitted received when Global P1 MIDI Filter Program Change Aftertouch Control Change Exclusive is Enable respectively 1 When Global P1 MIDI Clock is Internal transmitted but not received The opposite for External MIDI USB 2 Valid if assigned as a MIDI control change in Global P2 Controllers The number shown here is the CC default assignment 3...

Page 117: ...Control Surface 3 9 20 30 74 85 Controller setting 29 Convert Cue List 66 Drum Track pattern 52 61 Copy 60 Auto Song Setup 60 Chord trigger switch 21 Combination 60 Effect 69 Pattern 57 Program 60 Step 65 Cue List 6 7 52 65 Convert to Song 66 Cutoff Frequency 39 D Damper pedal 22 25 Data filer 92 Demo song 5 Detune 50 Display 8 12 Dmod 72 Double Program 34 Double size effects 70 Drive 41 Drum Kit ...

Page 118: ...45 55 Parameter 12 17 Pattern 52 61 PCG 87 Performance Arpeggiator 4 Chord trigger switch 21 Drum Track 4 RPPR 6 Pitch 37 Pitch bend 37 Pitch EG 38 Playback 53 Polyphony 34 Portamento 38 Power 23 84 Power On Mode 84 Preload data 97 Program 27 55 73 Edit 30 34 Effect 69 Select 27 45 55 Type 34 Protect 84 R Realtime control 30 Realtime Control knob Function 31 Realtime recording 57 58 Rear panel 11 ...

Page 119: ... 57 Tempo 56 73 79 Time signature 56 61 Tone Adjust 50 Assigned the parameter 32 Total effect 67 70 Track 55 Transpose 50 83 Tremolo 41 U USB connector 11 V VALUE controller 10 VALUE slider 21 Velocity 20 Curve 83 Velocity crossfade 35 48 Velocity split 35 Velocity Switch 48 49 Vibrato 37 Volume 9 30 36 40 45 53 55 W Waveform 36 Write 87 Drum Kit 89 Global setting 89 Program Combination 88 User Ar...

Page 120: ... product via the internet through mail order and or via a telephone sale you must verify that this product is intended to be used in the country in which you reside WARNING Use of this product in any country other than that for which it is intended could be dangerous and could invalidate the manufacturer s or distributor s warranty Please also retain your receipt as proof of purchase otherwise you...

Reviews: