background image

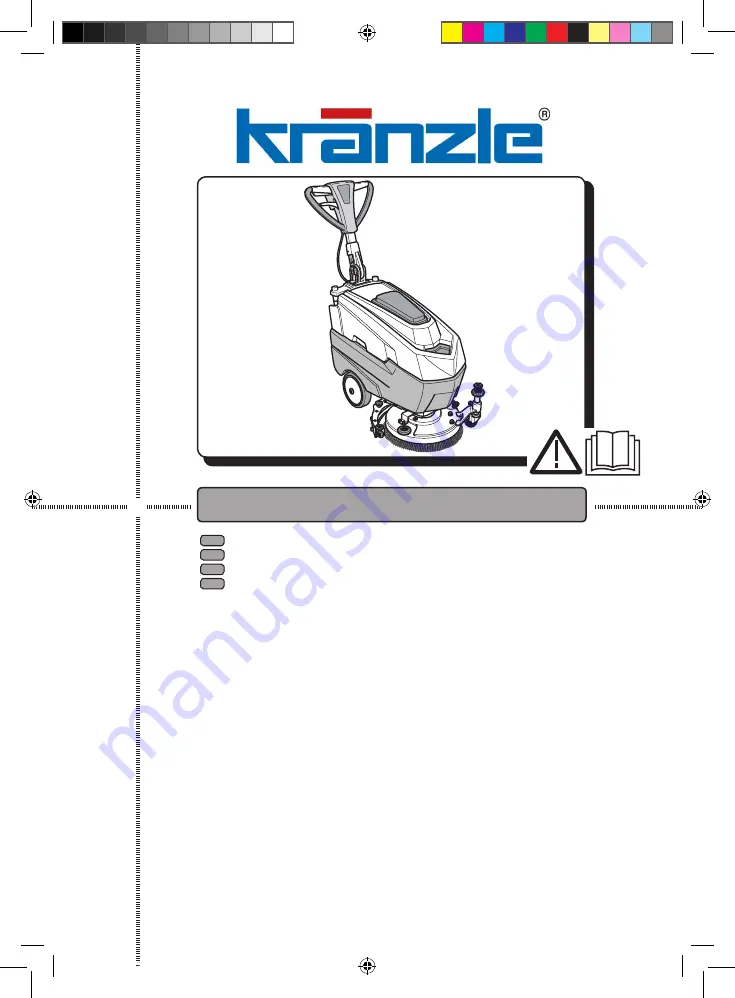
IT

Uso e Manutenzione

EN

Use and Maintenance

FR

Utilisation et Entretien

DE

Gebrauch und wartung

SSM 385

SSM 385

Copertina FRECCIA 15_1ed_06-2013.indd   1

02/08/13   09:56

Summary of Contents for SSM 385 BC

Page 1: ...IT Uso e Manutenzione EN Use and Maintenance FR Utilisation et Entretien DE Gebrauch und wartung SSM 385 SSM 385 Copertina FRECCIA 15_1ed_06 2013 indd 1 02 08 13 09 56 ...

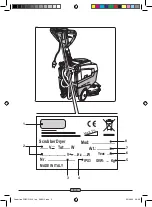
Page 2: ...0 2 IPX3 GVW Kg Year Art Mod Scrubber Dryer V Tot W Nr MADE IN ITALY V Hz W 1 8 2 3 4 5 6 7 Copertina FRECCIA 15_1ed_06 2013 indd 2 02 08 13 09 56 ...

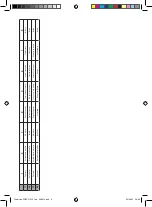
Page 3: ...rial N Degree of protection Weight in running order Year of manufacture Item code Model FR Producteur Caractéristiques électriques N Matricule Degré de protection Poids en ordre de marche Année de construction Référence de l article Modèle DE Hersteller Elektrische Eigenschaften Matrikelnr Schutzgrad Gewicht bei Betrieb Baujahr Artikelnummer Modell Copertina FRECCIA 15_1ed_06 2013 indd 3 02 08 13 ...

Page 4: ...Copertina FRECCIA 15_1ed_06 2013 indd 4 02 08 13 09 56 ...

Page 5: ...zioni originali EN English EN 1 Translation of original instructions FR Français FR 1 Traduction des instructions d origine DE Deutsch DE 1 Übersetzung der Originalanleitung Copertina FRECCIA 15_1ed_06 2013 indd 5 02 08 13 09 56 ...

Page 6: ...Copertina FRECCIA 15_1ed_06 2013 indd 6 02 08 13 09 56 ...

Page 7: ...o e affidabilità nel tempo Noi siamo coscienti che un buon prodotto per restare tale nel tempo necessita di con tinui aggiornamenti mirati a soddisfare le aspettative di chi quotidianamente ne fa uso In tal senso noi ci auguriamo di avere in lei non solo un cliente soddisfatto ma anche un partner che non esita a trasmetterci opinioni e idee derivanti dalla personale quotidiana esperienza FRECCIA 1...

Page 8: ... 9 1 b Preparazione macchina e scelta ciclo IT 8 9 1 c Regolazione impronta a terra della spazzola IT 8 9 1 d Regolazione ruota anteriore IT 8 9 1 e Uso della macchina IT 9 9 1 f Fine uso e spegnimento IT 9 9 1 g Parcheggio macchina IT 9 9 1 h Allarmi durante il funzionamento IT 9 9 1 i Contaore IT 10 10 1 Scarico acqua di recupero IT 10 11 1 Manutenzione e pulizia IT 10 11 1 a Svuotamento e puliz...

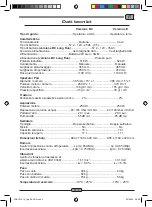
Page 9: ...i min Pressione specifica 35 gr cm2 35 gr cm2 Trazione Pendenza massima superabile a pieno carico 2 2 Aspirazione Potenza motore 250 W 250 W Depressione colonna acqua 68 700 mbar mmH2 O 68 700 mbar mmH2 O Portata d aria 28 l sec 28 l sec Rumorosità 65 dB A 65 dB A Serbatoio Tipologia Doppio serbatoio Doppio serbatoio Riciclo No No Capacità soluzione 15 l 15 l Capacità recupero 17 l 17 l Dimensioni...

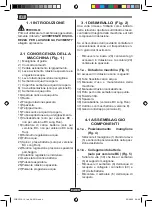
Page 10: ...te rotazione spazzola 27 Pulsante erogazione acqua 3 1 DISIMBALLO Fig 2 Una volta rimosso l imballo come indicato nelle istruzioni riportate sull imballo stesso controllare l integrità della macchina e di tutti i componenti in dotazione Se si riscontrano danni evidenti contattare il concessionario di zona e il trasportatore en tro 3 giorni dal ricevimento Rimuovere la busta 28 contenente gli acces...

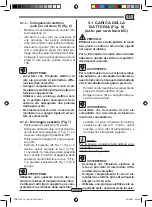
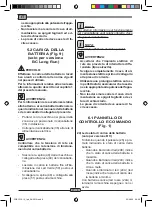
Page 11: ...ante 26 Fig 1 che si spegne AVVERTENZA Utilizzare solo spazzole fornite dal co struttore relative al modello di macchina L utilizzo di altri tipi di spazzole può com promettere la sicurezza della macchina 5 1 CARICA DELLA BATTERIA Fig 8 solo per versione BC PERICOLO Effettuare la carica delle batterie in locali ben areati e conformi alle norme vigenti nel paese di utilizzo Per le informazioni rela...

Page 12: ...atterie Scollegare la spina 48 e collegarla alla presa 51 posta sulla macchina NOTA Per ulteriori informazioni sul funzionamento del caricabatterie vedi relativo libretto d uso allegato al caricabatteria NOTA E possibile effettuare ricariche parziali AVVERTENZA Accertarsi che l impianto elettrico di rete sia provvisto di interruttore diffe renziale tipo salvavita Svolgere completamente il cavo di ...

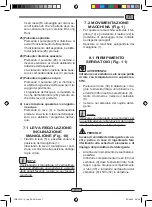
Page 13: ...iù vicina NOTA Posizionando il maniglione 1 verticalmen te si può effettuare una pulizia più accurata degli angoli facendo ruotare su se stessa la macchina 7 2 MOVIMENTAZIONE MACCHINA Fig 1 Per spostare la macchina sollevare il ter gitore 14 e posizionare il ruotino 22 in posizione di parcheggio come indicato nei rispettivi paragrafi Spostare la macchina spingendola dal maniglione 1 8 1 RIEMPIMENT...

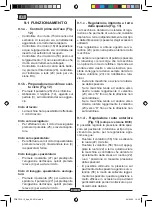
Page 14: ...otata di un sistema di rego lazione che permette di avere una costante impronta a terra indipendentemente dal tipo e dalle dimensioni spessore degli accessori utilizzati Tale regolazione si ottiene agendo sul vo lantino 23 posto nella parte anteriore della macchina Se durante le operazioni di pulizia spazzola in rotazione ci si accorge che la macchina non procede in modo rettilineo ma tende ad and...

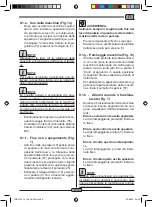
Page 15: ...ante 25 Sollevare il tergipavimento 14 premen do il pedale 3 fino a finecorsa aggan ciandolo nell apposito incastro AVVERTENZA Sollevare sempre il tergitore alla fine dei lavori di pulizia in quanto si evita la defor mazione delle racle in gomma Premere il pulsante 26 che si spegne Staccare il cavo di alimentazione elettrica dalla presa solo per versione E 9 1 g Parcheggio macchina Fig 13 Alla fin...

Page 16: ...atoio 6 dell acqua di recupero risulta pieno è necessario svuotarlo agendo come segue NOTA Per lo smaltimento dell acqua di recupero at tenersi alle norme vigenti nel paese di utiliz zo della macchina Posizionarsi con la macchina vicino a una piletta di scarico Staccare il tubo 15 dal supporto Togliere il tappo 58 dal tubo 15 e sca ricare completamente l acqua contenuta nel serbatoio 11 1 MANUTENZ...

Page 17: ...e una corretta pulizia del tergi tore 14 è necessario rimuoverlo agendo come segue Estrarre verso l esterno il gruppo tergitore 14 Staccare il tubo 16 dal tergitore 14 Allentare i pomelli 65 e rimuovere il ter gitore 14 Lavare il tergitore e in particolar modo le gomme 66 e l interno del raccordo di aspirazione 53 NOTA Se durante il lavaggio si nota che le gomme 66 si presentano rovinate o usurate...

Page 18: ...di pavimento e gomme in poliuretano per pavimenti di offici ne meccaniche sporchi di olio 11 1 g Regolazione incidenza tergi tore Fig 20 Abbassare il tergitore agendo sull apposi ta leva Avviare l aspiratore e procedere per qual che metro quindi spegnere l aspiratore e fermare la macchina Controllare l incidenza delle gomme 66 sul pavimento Fig A troppo schiacciata Fig B troppo sollevata Fig C pos...

Page 19: ...piratore non funziona Errore sovracorrente uscita aspiratore oppure circuito aperto aspiratore Motore aspirazione danneg giato Pulsante abilitazione aspira tore non premuto Vedi paragrafo Allarmi du rante il funzionamento Sostituire la turbina Premere il pulsante La macchina non asciuga bene lasciando tracce di ac qua nel pavimento Aspiratore spento Tubo di aspirazione intasato Gomme tergitore non...

Page 20: ...zola consumata Usare spazzole o detergenti adatte al tipo di pavimento o di sporco da pulire Sostituire la spazzola Versione BC A1 Scheda elettronica BAT Batteria 2x 12V U1 Carica batterie 5A Y1 Elettrovalvola F1 Fusibile 30A generale M1 Motore aspirazione M2 Motore spazzola P1 Interruttore ON OFF P2 Pulsante spazzola P3 Interruttore aspirazione P4 Interruttore elettrovalvola R1 Indicatore scarica...

Page 21: ...IT IT 15 SCHEMI ELETTRICI Versione BC FRECCIA 15_1ed_06 2013 indd 15 02 08 13 09 56 ...

Page 22: ...ola M1 Motore aspirazione M2 Motore spazzola MB Morsettiera P1 Interruttore aspirazione P2 Interruttore spazzola P3 Pulsante spazzola P4 Interruttore elettrovalvola RFI Filtro antidisturbo rete FRECCIA 15_1ed_06 2013 indd 16 02 08 13 09 56 ...

Page 23: ...are aware that in order for a good product to stay that way over time it requires continuous updates aimed at meeting the expectations of those who use it on a daily basis For this reason we hope that you will not only be a satisfied customer but also a partner who does not hesitate to give us your opinions and ideas originating from your personal day to day experience FRECCIA 15_1ed_06 2013 indd ...

Page 24: ...the machine and choosing the cycle EN 8 9 1 c Adjusting the brush ground contact EN 8 9 1 d Adjusting the front wheel EN 8 9 1 e Using the machine EN 9 9 1 f End of use and switching off EN 9 9 1 g Parking the machine EN 9 9 1 h Warnings while using the machine EN 9 9 1 i Timer EN 10 10 1 Draining the recovery water EN 10 11 1 Maintenance and cleaning EN 10 11 1 a Emptying and cleaning the clean w...

Page 25: ...rpm Specific pressure 35 g cm 35 g cm Traction Maximum gradient which can be overcome at full load 2 2 Aspiration Motor power 250 W 250 W Negative pressure water column 68 700 mbar mmH2 O 68 700 mbar mmH2 O Air flow rate 28 l sec 28 l sec Noise level 65 dB A 65 dB A Tank Type Dual tank Dual tank Recirculation No No Solution capacity 15 l 15 l Recovery capacity 17 l 17 l Dimensions lxhxb 864 x 1160...

Page 26: ...tion button 27 Water delivery button 3 1 UNPACKING Fig 2 Once the packaging has been removed as shown in the instructions on the packaging it self check that the machine and all the com ponents supplied are intact If any evident damage is found contact the area agent and the carrier within 3 days of receipt Remove the pack 28 containing the ac cessories supplied and the box 29 con taining the brus...

Page 27: ...ers 4 Fig 1 and press the button 26 Fig 1 and the light turns off WARNING Use only brushes provided by the manu facturer according to the model of the ma chine Using other types of brushes may com promise the safety of the machine 5 1 CHARGING THE BATTERY Fig 8 for BC version only DANGER Charge the batteries in well ventilated ar eas which comply with standards in force in the country of use For s...

Page 28: ...e shuts down or doesn t start up The red LED R flashes for a few sec onds indicating that the battery must be charged not for BC Long Runversion section is appropriate for the appliance power rating Never let the power cable run over sharp edges and do not tread on it The socket must be easily accessible 5 2 CHARGING THE BATTERY Fig 9 for BC Long Run version only DANGER Charge the batteries in wel...

Page 29: ...By positioning the handle 1 vertically it is possible to effect a more thorough cleaning of corners by rotating the machine on itself 7 2 MACHINE HANDLING Fig 1 To move the machine lift the wiper 14 and place the wheel 22 in the parking position as indicated in the respective paragraphs Move the machine by pushing its handle 1 8 1 FILLING THE TANK Fig 11 WARNING Only add clean mains water to the t...

Page 30: ... of the type and size thickness of the accessories that are used This adjustment is obtained by turning the handwheel 23 located in the front part of the machine If while cleaning brushes rotating you no tice that the machine does not move straight but tends to go to the right or the left this can be corrected using the same handwheel 23 with small rotations Start the machine and begin the rotatio...

Page 31: ...urning it off Disconnect the electric power cable from the socket for E version only 9 1 g Parking the machine Fig 13 At the end of the work day manually lift the front part of the machine using your hand to keep the wheel 22 on the ground until hearing an engagement click The brush will remain lifted in this position preventing its deformation To lower the brush slightly lift the front part of th...

Page 32: ...ANCE AND CLEANING WARNING For information and warnings regarding maintenance or cleaning follow the in formation given in the General warnings during maintenance in chapter 1 in this manual OPERATIONS TO PERFORM DAILY 11 1 a Emptying and cleaning the clean water tank Fig 16 WARNING At the end of the washing operations it is compulsory to drain and clean the clean water tank to prevent deposits or ...

Page 33: ...RFORM WHEN NECESSARY 11 1 e Replacing the brush Fig 1 7 It becomes necessary to replace the brush when it is worn with bristles shorter than 2 cm or it must be replaced according to the type of floor to wash to replace it proceed as follows Plug in the electrical cord only for ver sion E Lift the machine up slightly at the front levering the grips on the handle Press the button 26 Fig 1 to enable ...

Page 34: ...rrect position Take off the squeegee from the machine To set up loosen the screw 70 of the wheel 71 and move the wheel vertically in the slot by lifting the wheel the angle of incidence increases viceversa it de creases 11 1 h Replacing the fuses for BC version only Fig 21 WARNING Replace the blown fuse with one with the same amperage Pull the plug 21 BC Long Run version only Unscrew the two bolts...

Page 35: ...on Aspirator does not work Suction unit outlet overcur rent error or suction unit open circuit error Intake motor damaged Aspirator enabling button not pressed See paragraph Warning signals while using the ma chine Replace the turbine Press the button The machine does not dry well leaving traces of water on the floor Aspirator off Aspiration tube blocked Squeegee rubbers not cor rectly set up Reco...

Page 36: ... floor cleaning Unsuitable brushes or deter gent Brush worn Use brushes or detergents which are suitable for the type of floor or dirt to be cleaned Replace the brush BC version A1 Printed circuit board BAT 2x 12V battery U1 5A battery charger Y1 Electrovalve F1 Main fuse 30A M1 Vacuum motor M2 Brush motor P1 ON OFF switch P2 Brush button P3 Vacuum interruptor P4 Electrovalve interruptor R1 Batter...

Page 37: ...EN EN 15 WIRING DIAGRAMS BC version FRECCIA 15_1ed_06 2013 indd 15 02 08 13 09 57 ...

Page 38: ...olenoid valve M1 Aspiration motor M2 Brush motor MB Terminal board P1 Aspiration switch P2 Brush switch P3 Brush button P4 Solenoid valve switch RFI Net filter E version FRECCIA 15_1ed_06 2013 indd 16 02 08 13 09 57 ...

Page 39: ...ion et de fiabilité dans le temps Nous sommes conscients que pour qu un produit reste tel quel dans le temps il faut constamment le renouveler afin de satisfaire les attentes de ceux l utilisent quotidienne ment Nous espérons donc que vous serez un client satisfait mais aussi un collaborateur qui n hésite pas à nous faire partager les opinions et les idées de ceux qui l utilisent au quotidien FREC...

Page 40: ...on FR 8 9 1 b Péparation de la machine et choix du cycle FR 8 9 1 c Réglage de l empreinte au sol de la brosse FR 8 9 1 d Réglage de roue avant FR 8 9 1 e Utilisation de la machine FR 9 9 1 f Fin d utilisation et arrêt FR 9 9 1 g Rangement de la machine FR 9 9 1 h Alarmes durant le fonctionnement FR 9 9 1 i Compteur d heures FR 10 10 1 Vidange eau de récupération FR 10 11 1 Entretien et nettoyage ...

Page 41: ...30 tours min 155 tours min Pression spécifique 35 gr cm2 35 gr cm2 Traction Pente maximale autorisé à pleine charge 2 2 Aspiration Puissance moteur 250 W 250 W Dépression colonne d eau 68 700 mbar mmH2 O 68 700 mbar mmH2 O Débit d air 28 l sec 28 l sec Niveau sonore 65 dB A 65 dB A Réservoir Type Double réservoir Double réservoir Recyclage Non Non Capacité solution 15 l 15 l Capacité récupération ...

Page 42: ...ton de l aspirateur 26 Bouton de rotation de la brosse 27 Bouton de distribution d eau 3 1 DÉSEMBALLAGE Fig 2 Une fois que vous avez enlevé l emballage comme indiqué selon les instructions repor tées sur l emballage vérifier l intégrité de la machine et de tous ses composants Si vous constatez des dommages contacter le concessionnaire de la zone et le transpor teur au maximum trois jours après la ...

Page 43: ...ançant la rotation de la brosse jusqu à entendre un CLICK d accrochage de la brosse puis relâcher le levier 4 Fig 1 et appuyer sur le bouton 26 Fig 1 qui s éteint AVERTISSEMENT Utiliser uniquement les brosses fournies par le constructeur pour le modèle spéci fique de machine L utilisation d un type de brosse diffé rent peut compromettre la sécurité de la machine 5 1 CHARGEMENT DE LA BATTERIE Fig 8...

Page 44: ...m Lorsque la LED est allumée 24C elle indique que l état de charge de la AVVERTISSEMENT S assurer que l implant électrique de réseau soit équipé d interrupteurs diffé rentiels type disjoncteur différentiel Dérouler complètement le câble d ali mentation électrique avant de le rac corder à la prise de courant électrique N utiliser une rallonge électrique seu lement que si elle est en parfait état vé...

Page 45: ...ER DE RÉGLAGE DE L INCLINAISON DU MANCHE Fig 10 En tirant sur le levier 5 il est possible de changer la position du manche 1 en relâchant le manche se positionne et se bloque dans la position obligatoire la plus proche NOTE En positionnant le manche 1 verticalement il est possible d effectuer un nettoyage plus soigné des angles en faisant pivoter la ma chine sur elle même 7 2 MANUTENTION DE LA MAC...

Page 46: ... de l eau puis ap puyer sur le levier 4 pour lancer le cycle Cycle de lavage de brossage et de sé chage Appuyer sur le bouton 25 pour lancer l aspirateur le bouton 27 pour prédispo ser la distribution de l eau puis appuyer sur le levier 4 pour démarrer le cycle 9 1 c Réglage de l empreinte au sol de la brosse Fig 13 La machine est munie d un système de ré glage qui permet d avoir une empreinte au ...

Page 47: ...n relâchant les leviers 4 et en appuyant sur le bouton 27 continuer avec l aspirateur branché pour aspirer tout le liquide présent sur le sol ensuite éteindre l aspirateur en appuyant sur le bouton 25 Soulever la raclette 14 en poussant sur la pédale 3 jusqu en fin de course et en l accrochant dans l encastrement prévu à cet effet AVERTISSEMENT Toujours soulever le groupe suceur à la fin des trava...

Page 48: ...uivi de plu sieurs clignotements de la led B corres pond aux milliers des heures 10 1 VIDANGE EAU DE RÉCUPÉRATION Fig 15 A la fin du cycle de lavage ou bien quand le réservoir 6 de l eau de récupération est plein il faut le vider en opérant comme décrit ci dessous NOTE Pour l élimination de l eau de récupération se référer aux normes en vigueur dans le pays d utilisation de la machine Placer la ma...

Page 49: ...e ressorte du tuyau de décharge Remonter l ensemble en procédant en sens inverse 11 1 c Nettoyage du groupe suceur Fig 18 Pour effectuer un nettoyage du groupe su ceur 14 il faut l enlever comme indiqué ci dessous Extraire vers l extérieur le groupe suceur 14 Débrancher le tube 16 du groupe 14 Dévisser les volants de serrage 65 et enlever le groupe 14 Laver le groupe et plus particulièrement les p...

Page 50: ... caoutchouc Le caoutchouc en para pour tous les types de sols et le caoutchouc en polyuréthane pour les sols d atelier mécanique présentant des traces d huile 11 1 g Réglage incidence suceur Fig 20 Abaisser le suceur en agissant sur le levier spécial Démarrer l aspirateur et se déplacer de quelques mètres ensuite éteindre l aspi rateur et arrêter la machine Contrôler l incidence des raclettes en c...

Page 51: ...e fonctionne pas Erreur surintensité sortie as pirateur ou bien circuit ouvert aspirateur Moteur d aspiration endom magé Le bouton commandant l as piration n est pas enclenché Voir paragraphe Alarmes durant le fonctionnement Remplacer la turbine Enclencher le bouton La machine ne sèche pas correctement et laisse des traces d eau sur le sol L aspirateur est éteint Le tuyau d aspiration est en crass...

Page 52: ...és La brosse est usée Utiliser des brosses ou des détergents adaptés au type de sol ou selon le degré de saleté à nettoyer Substituer la brosse Version BC A1 Fiche électronique BAT Batterie 2x 12V U1 Chargeur de batterie 5A Y1 Electrovalve F1 Fusible 30A général M1 Moteur aspiration M2 Moteur brosse P1 Interrupteur ON OFF P2 Bouton brosse P3 Interrupteur aspiration P4 Interrupteur électrovalve R1 ...

Page 53: ...FR FR 15 SCHÉMAS ÉLECTRIQUES Version BC FRECCIA 15_1ed_06 2013 indd 15 02 08 13 09 57 ...

Page 54: ...ovalve M1 Moteur aspiration M2 Moteur brosse MB Bornier P1 Interrupteur aspiration P2 Interrupteur brosse P3 Bouton brosse P4 Interrupteur électrovalve RFI Filtre antibrouillage réseau FRECCIA 15_1ed_06 2013 indd 16 02 08 13 09 57 ...

Page 55: ...ge Lebensdauer entwickelt Uns ist bewusst dass ein gutes Produkt um im Laufe der Zeit gut zu bleiben ständig verbessert werden muss um die jene zufrieden zu stellen die tagtäglich mit ihm umge hen Daher wünschen wir uns dass Sie nicht nur ein zufriedener Kunde sind sondern auch ein Partner der sich nicht davor scheut uns seine Meinungen und seine jeden Tag mit dem Gerät gemachten Erfahrungen mitte...

Page 56: ...ktionswahl DE 8 9 1 c Einstellung des Bürstenandrucks am Boden DE 8 9 1 d Einstellung Vorderrad DE 8 9 1 e Gebrauch der Maschine DE 9 9 1 f Nach Gebrauch der Maschine und Ausschalten DE 9 9 1 g Parken der Maschine DE 9 9 1 h Betriebsalarme DE 9 9 1 i Betriebsstundenzähler DE 10 10 1 Entsorgung des Schmutzwassers DE 10 11 1 Wartung und Reinigung DE 10 11 1 a Leeren und Reinigen des Frischwassertank...

Page 57: ...her Druck 35 gr cm2 35 gr cm2 Antrieb Max Schräge bei vollem Gewicht 2 2 Ansaugung Motorleistung 250 W 250 W Unterdruck Wassersäule 68 700 mbar mmH2 O 68 700 mbar mmH2 O Luftmenge 28 l sek 28 l sek Geräuschentwicklung 65 dB A 65 dB A Tank Typ Doppeltank Doppeltank Wiederverwendung Nein Nein Frischwasser 15 l 15 l Schmutzwasser 17 l 17 l Bemessungen lxhxb 864 x 1160 x 429 mm 855 x 1160 x 429 mm Ger...

Page 58: ... 2 Ist das Verpackungsmaterial einmal besei tigt so wie wie auf dem Verpackungsmate rial selbst gezeigt überprüfen Sie dass die Maschine und ihr Zubehör vollständig ist Werden eindeutig Schäden festgestellt so informieren Sie innerhalb von 3 Tagen den zuständigen Gebietsvertreiber und das Transportunternehmen Entfernen Sie die Hülle 28 mit den Zu behörteilen und die Kartonschachtel 29 mit der Bürs...

Page 59: ...hin aufleuchtet dann die Hebel 4 Abb 1 drücken wobei sich die Bürste zu drehen beginnt bis Sie den KLICK beim Einrasten der Bürste hören daraufhin die Hebel 4 Abb 1 loslassen und zum Aus schalten den Knopf 26 Abb 1 drücken ACHTUNG Ausschließlich vom Hersteller für das ent sprechende Modell freigegebene Bürsten verwenden Die Verwendung von ungeeigneten Bürs ten kann die Maschinensicherheit beein tr...

Page 60: ...ergiestatus der Batterie auf dem Maximalstand ist Wenn das Led 24C aufleuchtet be deutet das dass der Energiestatus der Batterie ungefähr bei der Hälfte liegt HINWEIS Vergewissern Sie sich dass die Elektroan lage mit einem Fehlerstromschutzschalter Typ Schutzleiter ausgestattet ist Das Stromkabel immer vollständig aus rollen bevor es an die Steckdose ange schlossen wird Benutzen Sie nur ein Verlän...

Page 61: ...ANGE Abb 10 Durch Ziehen des Hebels 5 ist es mög lich die Position der Handstange 1 zu ändern Sobald der Hebel losgelassen wird blo ckiert die Handstange in der nächstlie genden vorgegebenen Position BEMERKUNG Wenn die Handstange 1 in vertikaler Posi tion festgestellt wird ist eine genauere Rei nigung der Ecken möglich in dem man die Maschine um sich selbst drehen lässt 7 2 BEWEGUNG DER MASCHINE A...

Page 62: ...27 drücken um die Wasser abgabe zu ermöglichen dann die Hebel 4 drücken um den Zyklus zu aktivieren Wasch Kehr und Trockendurchgang Den Knopf 25 drücken um die Saug funktion zu aktivieren den Knopf 27 um die Wasserabgabe zuzulassen und dann die Hebel 4 um den Zyklus zu aktivie ren 9 1 c Einstellung des Bürstenan drucks am Boden Abb 13 Die Maschine ist mit einem Regelsystem ausgestattet das unabhän...

Page 63: ...inigungsarbei ten bevor Sie das Gerät ausschalten lassen Sie die Hebel 4 los um die Dre hung der Bürste und die Wasserabgabe zu stoppen Drücken Sie den Knopf 27 um mit dem Sauger die sich auf dem Fußboden befindende Flüssigkeit auf zunehmen schalten Sie daraufhin den Sauger ab indem Sie den Knopf 25 drücken Um den Fußbodenwischer 14 zu he ben das Pedal 3 betätigen bis der Endanschlag erreicht wird...

Page 64: ... so oft wie tausend Stunden gezählt wurden 10 1 ENTSORGUNG DES SCHMUTZWASSERS Abb 15 Nach dem Arbeitsdurchgang oder wenn der Schmutzwassertank 6 voll ist muss er auf folgende Art geleert werden BEMERKUNG Zur Entsorgung des Schmutzwassers halten Sie sich an die Regeln des Landes in dem die Maschine eingesetzt wird Stellen Sie sich mit der Maschine in die Nähe eines Abflusses Den Schlauch 15 vom Trä...

Page 65: ... Wasser austritt Bauen Sie alles in umgekehrter Reihen folge wieder ein 11 1 c Reinigung des Wischers Abb 18 Um den Wischer 14 richtig zu reinigen muss er folgendermaßen entfernt werden Die Wischergruppe herausziehen 14 Den Schlauch 16 vom Wischer 14 ab ziehen Die Drehknöpfe 65 lockern und den Wi scher 14 entfernen Den Wischer und besonders die die Gummis 66 säubern ebenso wie das Innere des Ansau...

Page 66: ...e ein BEMERKUNG Es können zwei Gummitypen verwendet werden Paragummis für alle Arten von Bö den oder in Polyurethan für mechanische Werkstätten mit Ölverschmutzungen 11 1 g Druckeinstellung der Wi schergummis Abb 20 Den Bodenwischer mit dem entsprechen den Hebel herunterlassen Den Ansauger einschalten und einige Meter weit fahren den Ansauger wieder ausschalten und die Maschine anhalten Den Druck ...

Page 67: ...sauger funktioniert nicht Störung Überstrom am An saugerausgang oder Strom kreis Ansauger offen Staubsaugermotor be schädigt Schaltknopf zum Einschal ten der Ansaugers nicht ge drückt Siehe Abschnitt Betriebsa larme Turbine auswechseln Schaltknopf drücken Die Maschine trocknet nicht gut und hinterlässt auf dem Boden Wasserspuren Ansauger ausgeschaltet Ansaugschlauchverstopft Wischergummis nicht ri...

Page 68: ...verbraucht Benutzen Sie dem Boden oder dem Grad der Ver schmutzung angepasste Bürsten und Reinigungsmit tel Bürste ersetzen Ausführung BC A1 Elektronische Schaltkarte BAT Batterie 2x 12V U1 Batterieladegerät 5A Y1 Elektroventil F1 Schmelzsicherung 30A allgemein M1 Ansaugmotor M2 Bürstenmotor P1 On Off Schalter P2 Bürstentaste P3 Ansaugschalter P4 Elektroventilschalter R1 Leeranzeiger CN1 Lenkerste...

Page 69: ...DE DE 15 ELEKTRISCHE SCHALTPLÄNE Ausführung BC FRECCIA 15_1ed_06 2013 indd 15 02 08 13 09 57 ...

Page 70: ...g E EV Elektroventil M1 Ansaugmotor M2 Bürstenmotor MB Klemmenleiste P1 Ansaugschalter P2 Bürstenschalter P3 Schaltknopf Bürste P4 Elektroventilschalter RFI Netzentstörfilter FRECCIA 15_1ed_06 2013 indd 16 02 08 13 09 57 ...

Page 71: ...Copertina FRECCIA 15_1ed_06 2013 indd 7 02 08 13 09 56 ...

Page 72: ...d 49 0078 48 1 ed 07 2015 Copertina FRECCIA 15_3ed_02 2014 indd 8 24 02 14 11 56 Kränzle AG Tel 41 0 56 201 44 88 Fax 41 0 56 201 44 89 http www kraenzle ch e mail info kraenzle ch Oberebenestrasse 21 5620 Bremgarten Schweiz ...

Reviews: