background image

Summary of Contents for Home Theater Standard

Page 1: ... rilE I EAr ER IN AUCIIO ENCtINEERINO HomeTheater Standard Surround Preamp Processor Instructions for Use Owner s Reference ...

Page 2: ...ureall cableterminations areof the highestquality andfree fromfrayedends shortcircuits or cold solder joints THEREARENO USERSERVICEABLE PARTSINSIDE ANYKRELLPRODUCT Please contactyourauthorized Krell dealer distributor or Krell if youhave anyquestions not addressed in this Owner s Reference Thisproduct is manufactured in theUnited States of America Krell is a registered trademark of Krell Industrie...

Page 3: ...D CONFIGURATION OVERVIEW SYSTEM SETUPAND CONFIGURATION Navigatingthe Menu Accessingthe MainMenu ConfigureSpeakers Listening Room Setup Calibrate Volume ConfigureDevices ConfigureLevel Adjustment Operation SAVINGSETUP RECALLING SETUP ANDRESTORING FACTORY DEFAULTSYSTEM CONFIGURATION SETTINGS OPERATING THE HOMETHEATERSTANDARD On Off Stand by TapeInput andOutput MainZoneand Zone2 Operation OtherOperat...

Page 4: ...Illustrations FIGURE 1 TheHome Theater StandardFront Panel FIGURE 2 TheHome Theater Standard BackPanel FIGURE 3 TheHome Theater StandardRemote Control Page 7 13 17 iV Krell Home TheaterStandard ...

Page 5: ...e Theater Standard into any system TheHome Theater Standard s flexible modulararchitecture allows you to upgrade hardwareand software to accommodate future surround sound formats and design enhancements Theowner s reference manualcontains important information on placement installation andoperation of the Krell Home TheaterStandard Pleaseread this information carefully A thoroughunderstandingof th...

Page 6: ...that the component is stand bymode a low powerconsumption status that keepsthe audioandregulator circuits at idle Krell recommends leavingthe component in the stand bymode when it is not playingmusic Operational Mode When the component is in the stand bymode andyou pressthe powerbutton onthe front panelor the power keyon the remotecontrol the blue power LED illuminates The component is in the oper...

Page 7: ...Port developer s reference the readthis first insert andthe warrantyregistration card Carefully removethe unit and accessories from the box Remove the foamend caps andprotective plastic wrapfrom the unit Note If anyof theseitems are not included in the shippingbox p easecontact your authorizedKrell dealer distributor or Krell for assistance Saveall packingmaterials If youmustship your Home Theater...

Page 8: ...tion Further the Home TheaterStandard requires at least three inches 7 cm of clearancebetween other connected components For installationsinsidecabinetry extraventilationmay benecessary AC POWERGUIDELINES TheHome TheaterStandardhas superbregulation anddoesnot require a dedicated ACcircuit Avoidconnections throughextensioncordsor multiple ACadapters High quality 15amp grounded ACstrips are acceptab...

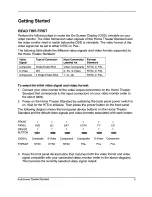
Page 9: ...t your videomonitorto the videooutput connectorsonthe Home Theater Standard that corresponds to the input connectors onyourvideomonitor refer to theabove table 2 Power on the Home TheaterStandardby switching the backpanel powerswitch to on Waitfor the HTS to initialize Then pressthe power buttononthe front panel Thefollowing diagram shows the front panel devicebuttonson the Home Theater Standard a...

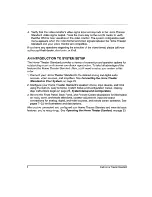
Page 10: ...doffers you ll needto set up your systemin this order 1 Connectyour Home Theater Standardto the desired analog and digital audio sources video sources and amplifiers SeeConnectingthe Home Theater Standard to Your System on page 23 2 Configure your Home Theater Standard s speaker volume input devices and trims using the built in easy to follow SystemSetupand Configuration menus Step by step instruc...

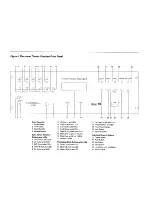
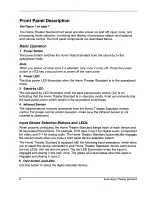
Page 11: ...rd USER 23 29 24 STEREO MUSlO1 0 O 25 26 30 10 CDButton andLEDs 11 TunerButton andLEDs 12 Auxl Button andLEDs 13 Aux2Button andLEDs 14 TapeNCR2 Button and LEDs 15 MainZoneandZone2 Button 16 MainZoneandZone2 LEDs 17 InfraredEmitter ProcessingMode ButtonsandLEDs 18 StereoButton andLED 19 Music1Button andLED 20 Music2Button andLED 21 ProLogicButtonandLED 22 Preamp Button andLED 23 FrontPanelDisplay 2...

Page 12: ... the up position at all times 4 Infrared Sensor The infrared sensor receives commands from the Home Theater Standard remote control For proper remotecontrol operation makesure the infrared sensoris not coveredor obstructed Input Device Selection Buttons and LEDs When properly configured the Home Theater Standard keeps track of each device and its associated connections For example DVD uses Coax1fo...

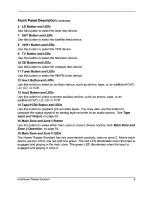
Page 13: ...nd LEDs Usethis button to select a second auxiliary device suchas phono tape or an additional DVD LD CD or VCR 14 Tape VCR2Button and LEDs Usethis button to playbackpre recordedtapes Youmayalso usethis button to compare the output signal of an analog tape recorder to an audio source SeeTape Input and Output on page53 15 Main Zoneand Zone2 Button Usethis button to select either mainzone or zone2 de...

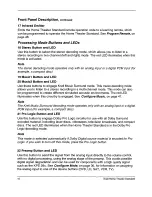
Page 14: ...this circuitry is engaged SeeConfigure Music on page47 Note TheKrell MusicSurrounddecodingmode operates only with an analog input or a digital PCM input for example a compactdisc 21 Pro Logic Button and LED Usethis button to engage DolbyPro Logic circuitry for usewith all DolbySurround encoded material including laser discs videotapes television broadcasts and compact discs Thered LEDilluminates w...

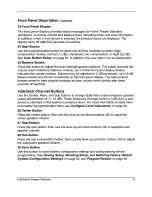
Page 15: ...front paneldisplay Thebalancelevel buttonsrevert to their original functionsasmainvolume level controlsafter three seconds of inactivity Individual Channel Buttons Usethe Center Rear andSubbuttons to change taste trims make temporaryspeaker output adjustments of 10dB Thesetemporary changes revert to 0 dBwhen a new deviceis selectedor the system is powered down Formore informationontaste trims andm...

Page 16: ...els for the centerspeaker rear speakers andsubwoofers Thevolume level is shown in the front paneldisplay SeeSystem Setupand Configuration on page26 31 Recall Button Usethis buttonto recall previouslystoredsystem configurationsettings SeeSaving Setup Recalling Setup and Restoring FactoryDefault SystemConfiguration Settings on page52 12 Krell Home Theater Standard ...

Page 17: ...ht 39 VCR1 OutLeft andRight 40 Zone 2 OutLeft andRight 41 S 1 S 2 S 3 S 4 S 5LeftandRightInputs 41 44 43 47 49 Digital Audio InputsandOutputs 42Digital OpticalInputs 43Digital AudioInputs 44Digital AudioOutputs VideoInputsandOutputs 45 S videoOutputs 46 S videoInputs 47 Composite VideoOutputs 48Composite ideoInputs 49 Component Video Outputs 50 Component VideoInputs 46 51 52 o 0 o oOO 50 48 54 55 ...

Page 18: ... 34 Multi Channel Audio Output Connector TheHome Theater Standardis equippedwith a multi channel audio output with a DB 25 connector whichcontains the output connectionsfor all the output channels left center right left rear right rear andsubwoofer 35 B 1 Left andRight Inputs TheHome Theater Standard is equippedwith one set of balanced inputs with connectors TheXLRpin configurations are as follows...

Page 19: ...s 44 Digital AudioOutputs TheHome TheaterStandardis equippedwith two digital audio outputs one coaxial with an RCA connector and one EIAJoptical with a TosLink connector Video Inputs and Outputs 45 S video Outputs TheHome Theater Standard is equippedwith two S video outputs with DIN connectors ThemainS video output labeled OSD on back panel includes on screendisplay For dubbingpurposes the secondS...

Page 20: ...itted with an optional PHAST Link connector instead of an RS 232 connector for integrating the HTS within a PHAST system Contact yourauthorized Krell dealer distributor or Krell for information aboutthis connection option 52 RC 5In TheRC 5input makes custominstallation easyandsecureby acceptingbaseband RC 5input commands from hardwiredremotecontrollers 53 12 VDC Out andIn The12VDC outputsendsa 12 ...

Page 21: ...DKey 65 TunerKey 66 Auxl Key 67 Aux2Key 75 68 VCRKey 76 69 TapeKey ProcessingMode 60 Keys 61 70 Stereo Key 64 71 M1Key 65 72 M2Key 73 ProLogic Key 74 PreampKey 74 ControlFunction 71 Keys 75 Bal Key 70 76 Cntr Key 72 77 Rear Key 78 SubKey 79 Prey Key 80 Level Keys 81 MenuKey 82 Mute Key 83 Enter Key 84 THXKey Power Zone 59 58 81 79 82 78 77 63 62 67 66 69 68 84 73 Krell Home Theater Standard 17 ...

Page 22: ...compartment on the backof the remotecontrol 1 Place the remoteface downon the table 2 Useyour thumbnail or a small jeweler s or eyeglassscrewdriver to movethe small tab towardthe center of the remote while using your index fingernail or screwdriver to pull down gently onthe slot to the right of the tab Thebattery compartment will slide out 3 Placethe battery plus side up in the battery tray 4 Slid...

Page 23: ...Key Usethis keyto select the mainzonefor a device 59 Z2 Key Usethis key to select zone2 for a device SeeMainZoneandZone2 Operation on page 54 Note TheHome Theater Standarddefaults to the main zone To activate a device in zone2 youmustpress the remotecontrol Z2 key 59 before selecting a device Device Selection Keys 60 DVDKey Usethis keyto select the digital videodiscdevice 61 LD Key Usethis keyto s...

Page 24: ...appropriate decoding format DolbyDigital or DTS if oneof thesesignals is present 70 Stereo Key Usethis key to select the stereo decodingmode whichallows youto listen to a stereo recording for example a compactdisc in two channel left andright mode Note Thestereo decodingmode operates only with an analog input or a digital PCM input for example a compactdisc 71 M1 Key 72 IV12Key Usethese keys to en...

Page 25: ...o convert the volumelevel controls to balancecontrols SeeBalance Button 25 on page11 Usethe Center Rear and Subkeys to changetaste trims maketemporary speaker output adjustments of 10 dB Thesetemporarychangesrevert to 0 dB whena new device is selected or the systemis powered down For moreinformation on taste trims and master programmable trims see ConfigureLevel Adjustment on page39 76 Cntr Key Us...

Page 26: ...nus 82 MuteKey Usethis key to mutethe Home TheaterStandard soutput VOLUME MUTE appearsin the front paneldisplay 83 Enter Key Usethis keyto select menu itemsor to displaythe currentsystem conditions 84 THXKey Thiskeyis reserved for future use for units equipped with THX processing 22 Krell Home Theater Standard ...

Page 27: ... and outputs Neatly arrange and organize wiring to and from the Home Theater Standardand all components Separate ACwires from audio cables to prevent humor other unwanted noise from being introduced into the system 3 For analoginput sources connectthe right andleft outputsof your source componentsto the inputs on the Home Theater Standard The Home Theater Standardis equippedwith six sets of single...

Page 28: ...arately Thecomb filter within the sourceunit performsthis separation If the source scomb filter is superior to the onewithin the video monitor use the S video connections Otherwise use compositevideo input The Home Theater Standard is equippedwith two S video outputs two composite video outputs and one set of component video outputs OneS video output one composite video output and the component vi...

Page 29: ...ATE VOLUME CalibrateVolume Setuplets youmatch the level of different speakers andamplifiers in yoursystem 4 CONFIGURE DEVICES ConfigureDevices Setuplets youassigneachdevice sinputs modes andtriggers 5 CONFIGURE LEVEL ADJUSTMENT ConfigureLevelAdjustment Setuplets youselect mode device andanaloginput trims These fixed positive or negativevolume offsets let youmaintainlevel matching while switchingbe...

Page 30: ...stem press the remotecontrol menukey 81 Note Some options in the Home TheaterStandardare designedspecifically for digital and or analogdevices To usethe digital or analogoptions youmustconnectthe correct format device for the desired option It is easier to understandthe numerous options available to youthrough the Home TheaterStandardif you havea specific configuration example Thefollowing section...

Page 31: ...URESPEAKERS LISTENING ROOM SETUP CALIBRATE VOLUME CONFIGURE DEVICES CONFIGURELEVEL ADJUSTMENT OPERATION 1 CONFIGURESPEAKERS Thefirst menu option configure speakers allows youto engage or disablespeakers in yoursystem andselect bass rangebased onyourspeakers lowfrequency capabilities Speaker Setup Use the keyto highlightCONFIGURE SPEAKERS thenpresstheenter 83 key The SPEAKERSETUP screen appears KRE...

Page 32: ...fault settings do not correspondto your speakers youcan modifythe speaker settings usingthe following steps Enable Disable a Speaker Usethe direction keys 80 to select the speakeryouwish to enable Pressenter 83 select YES Usethe direction keysto select the speakeryouwish to disable Pressenter 83 select NO Select Bass Range Tochangethe settings for the front center or rear speakers usethe direction...

Page 33: ... keys 80 to highlight LISTENING ROOM SETUP andpressenter 83 LISTENING ROOM SETUPscreenappears KRELL HTS LISTENING ROOM SETUP LEFT CENTER RIGHT 0 FT 0 FT 0 FT L REAR SUB R REAR 0 FT 0 FT 0 FT Usethe key 80 procedure to input the settheselection When youaccessthe LISTENING ROOM SETUP screen the cursoris blinking at the LEFT speaker Pressenter 83 thenusethe key 80 to increasethe number to the correct...

Page 34: ... Use the keys 80 to highlight CALIBRATE VOLUME on the main menu and press enter 83 The CALIBRATE VOLUME screen appears KRELLHTS CALIBRATEVOLUME SELECTTHE CHANNEL LEVELCALIBRATION METHOD AUTONOISE SEQUENCE MANUAL NOISE SEQUENCE PROGRAM MATERIAL The auto noise sequencescrolls through the different speaker channels automatically allowing you to quickly calibrate channels The manual noise sequencerequ...

Page 35: ...for the remaining speakers When all the speakers are set press the previouskey 79 twice to return to the mainmenu Manual Noise Sequence Setthe SPL meterto Cweighting andslowresponse After initializing the LEFT channel dBsetting is highlighted Pressenter 83 Youhearwhitenoisefromthe left speaker the dBsettingstarts blinking Use the T keys 80 to adjustthesetting until the SPL meterreads75 dR Pressent...

Page 36: ...urthmain menu option configure devices allowsyouto configure inputs modes and triggersfor each device in thesystem First selecta device that you want to configure Next assign a videoinput videoformat audio input s anddefaultdecoding mode for each connected device Youmay alsodefine12V trigger operation for each device KRELL HTS MAIN MENU CONFIGURE SPEAKERS LISTENING ROOM SETUP CALIBRATE VOLUME H CO...

Page 37: ...H BETWEEN VIDEO INPUTS When youaccess this screen youseethe blinkingcursorat COMPOSITE1 Toselecta videoinput option COMPOSITE1 COMPOSITE2 COMPOSITE3 or COMPOSITE4 UNASSIGNED S VIDEO1 S VIDEO2 S VIDEO3 or S VIDEO4 COMPONENT1 or COMPONENT2 follow directions at thebottom of thescreen SelecttheUNASSIGNED video inputoption if the selected device does notusea videoinput for example a CD player Press ent...

Page 38: ...return to the CONFIGURE DEVICES screen Note Seeyour video device s operating manual Youmustselect the correct format for the video device to function properly with the Home Theater Standard Configure Audio Thenextoptiononthe CONFIGURE DEVICES menu is CONFIGURE AUDIO Usethe 1 4 keys 80 to select CONFIGURE AUDIO andpressenter 83 TheCONFIGURE AUDIO INPUT screen appears KRELL HTS CONFIGUREAUDIOINPUT D...

Page 39: ...rs KRELL HTS ASSIGN ANALOGINPUT DVD OK PRESS ENTER AND USE1 TOSWITCH BETWEENANALOGINPUTS When this screenappears youseethe blinking cursor at s 1 To select another analog deviceoption S l s 2 s 3 s 4 s 5 TAPE VCR1 UNASSIGNED B l follow directions at the bottomof the screen Select the UNASSIGNED analoginput option if the selected device doesnot use an analog output for example a CDplayer Pressenter...

Page 40: ...en SelecttheUNASSIGNED digital inputoption if theselected device does notusea digital output for example ananalog VCR Press enter 83 to confirm this setting SelectOK andpress enter 83 to returnto theCONFIGURE AUDIO INPUT screen SelectOK andpress enter 83 again to returnto theCONFIGURE DEVICES screen Configure Mode Thenextoptionfor the CONFIGURE DEVICES screen is configure mode SelectCONFIGURE MODE...

Page 41: ...OK andpressenter 83 to return to the CONFIGURE DEVICES screen Note Unassigned holdsthe last selectedmode if it is valid or switches to a valid mode Configure Trigger Thefinal optiononthe CONFIGURE DEVICES screenis configuretrigger This optionallows youto customize the operationof the four remote output12VDC 12 Volt trigger connectors 53 onthe backpanel Select CONFIGURE TRIGGERandpress enter 83 The...

Page 42: ...edfor zone2 listening Use the 1 keys 80 to select the desiredtrigger mode andpressenter 83 to select Youreturn to the CONFIGURE 12V TRIGGER screen whichnowreflects the change you just entered Note If youpressthe prevbutton 79 onthe remote beforeyouswitchdevices the triggers that are onremain on evenif theyare specifiedas off onthe newlyselecteddevice Thisis for simulcast operation Adjust Trigger D...

Page 43: ...rim youcaneasily switchbetween theseinputs or modes without experiencing excessivechanges in volume levels KRELL HTS MAIN MENU CONFIGURE SPEAKERS LISTENING ROOM SETUP CALIBRATE VOLUME CONFIGUREDEVICES CONFIGURELEVEL ADJUSTMENT OPERATION TheHome TheaterStandard usestwotypes of trims mastervolumetrims andtaste trims Mastervolume trims mode device andanaloginput change the volumes of all speakersat o...

Page 44: ...Select Mode Trim Mode trim increases or decreases the volume automatically when youchange decoding modes DOLBYDIGITAL DTS DOLBYPROLOGIC STEREO MUSIC1 MUSIC2 to match listening levels between modes SelectMODE TRIM andpressenter 83 TheSELECTMODE screenappears KRELL HTS SELECT MODE STEREO OK PRESS ENTER AND USE 1 1 TOSWITCH BETWEEN MODES 40 Krell Home TheaterStandard ...

Page 45: ...e 1 keys 80 to select appropriate trimadjustment range is from 15 dBto 15dB Press enter 83 to theselection SelectOK andpress enter 83 to returnto the SELECT MODE screen When all trimshave been adjusted asdesired select OK onthe SELECTMODE screen andpressenter 83 Youreturnto the LEVEL ADJUSTMENT screen Select Device Trim Thedevice trim is a master volume trimthat is activated when aninputdevice is ...

Page 46: ... 15dR Press enter 83 to theselection SelectOKandpress enter 83 You returnto the SELECT DEVICE screen SelectOK and press enter 83 You returnto the LEVEL ADJUSTMENTS screen Select Analog Input Trim IMPORTANT Ananalog device must beselectedfor this optionto function TheANALOG INPUT TRIM screen is used to measure the level of ananalog inputsource to the Home TheaterStandard When the ANALOG INPUT TRIM ...

Page 47: ...on protection Anti clip measures the signal level andprevents theinputsignal fromdistorting clipping theanalog to digital converters Setanti clip to OFF if youwantto disengage distortion protection Thisis particularly useful if youneedto maintainmaximum signal to noisethresholdswhen recordingfroma source If youselect a non analog sourceto configure youseethe following screen KRELLHTS ANALOGINPUT W...

Page 48: ...e the Home TheaterStandard andprogram userbuttonsetupandDTS autoswitch KRELL HTS MAIN MENU CONFIGURE SPEAKERS LISTENING ROOM SETUP CALIBRATE VOLUME CONFIGURE DEVICES CONFIGURELEVEL ADJUSTMENT OPERATION Usethe1 4 keys 80 to selectOPERATION andpressenter 83 TheOPERATION appears KRELL HTS OPERATION 1 I BACKGROUND COLOR OSD CONFIGURE FPD DISPLAY CONFIGURE SERIAL CONTROLCONFIGURE CONFIGURE MUSIC PROGRA...

Page 49: ... 83 to return to the operationmenu Note Withcomponent video black is the available background color Configure On Screen Oisplay Theon screen display feature allows youto choose the position andmessage display time for on screen displays andmessages Toconfigurethe on screen display select OSD CONFIGURE andpress enter 83 TheCONFIGURE OSD screenappears KRELL HTS CONFIGURE OSD ONSCREEN TIME 3 SEC 4 LI...

Page 50: ...ars KRELLHTS FPD DISPLAY CONFIGURE H BRIGHTNESS 3 OK Press enter 83 thenuse1 4 keys 80 to select BRIGHTNESS Therange is 0 off brightest thefactory default Pressenter 83 to set the selection SelectOK andpress enter 83 to return to the operation menu Configure serial control This screenallows youto choosebetween PHASTLink andRS 232 serial control sources Select SERIAL CONTROL CONFIGURE andpress ente...

Page 51: ...SELECT A MUSICTYPE TheON STAGE optionis the example used here Each selected optionactivatesa differentvirtual acoustic environment Select an option ONSTAGE FRONTROW GENERAL ADMISSION ORCHESTRA MEZZANINE FULL RANGE ANDSUB MONO ENHANCED STEREO or PARTY bypressing enter 83 then usethe keys 80 to scrollthrough theoptions Press enter 83 to settheselection SelectOK andpress enter 83 Youreturnto theMUSIC...

Page 52: ...peaker Speaker s Afterthedesired options areselected selectOK andthenenter 83 in theMUSIC MODE SETUP SCREEN to returnto theoperation menu Program Remote Program Remote allowsyouto program a learningremote controlto operatethe Home TheaterStandard Select PROGRAM REMOTE andpressenter 83 ThePROGRAM REMOTE screenappears KRELLHTS PROGRAMREMOTE USEFRONT PANEL TO SELECT A COMMAND SAVE SENDS COMMAND ANDRE...

Page 53: ...ogrammable remotein program mode see learning remoteuser manual Placethe infrared sensorof the programmable remote so that it facesthe infrared emitter 17 onthe Home TheaterStandard front panel 5 Pressandhold the savebutton 29 on the Home TheaterStandard front paneluntil the programmable remotehas learnedthe code Seeyour remote suser manual for informationontimeneeded 6 Repeatsteps 2 through5 for ...

Page 54: ...ton 24 on the front panel KRELL HTS USER DYN RANGE TOGGLE NONE OK 1 Usethe 1 keys 80 onthe remotecontrol to select MORE on the OPERATION menu screen andpressenter 83 2 TheCONFIGURE MORE screenappears Pressthe 1 keys 80 to select USER BUTTON SETUP Select OK andpressenter 83 TheUSER BUTTON SETUP screenappears 3 Highlight DYN RANGE TOGGLE to enablethe userbutton to adjust the dynamic rangeof the HTS ...

Page 55: ...track back forward or scanbuttonsfor a compact disc digital videodisc or laser discmcan cause potentially damaging bursts of noise Thismenu allowsyouto select whether the DTS autoswitchis turnedonor off Krell recommends that youleavethe DTS autoswitchsetting on the default setting KRELL HTS DTS AUTOSWITCH ON OK Tochange DTS autoswitch setting 1 Usethe 1 4 keys 80 onthe remotecontrol to select MORE...

Page 56: ...econds Thefront paneldisplays RECALL SETUP while the settings are beingretrieved fromthe Home TheaterStandard snonvolatile memory Anysettings that havebeen saved will beavailablethroughrecalling system setup RESTORING FACTORY DEFAULT SYSTEM CONFIGURATION SETTINGS Toreplace all system settingswiththe factorydefault settings follow thesesteps 1 Pressthe front panelpower button 1 to put yoursystem in...

Page 57: ...again Note Krell recommends that the backpanelpowerswitchremainup on at all times TAPE INPUT AND OUTPUT TheHome TheaterStandard hasa discrete tape input andoutput Thetape outputis usedto sendaninput signal fromS 1 S 2 S 3 S 4 B l or aninput signal fromVCR1 to a recordingdeviceor processor Youcanusethe tapefeature in three ways 1 Usethe tapeinput to playback pre recorded tapes 2 Usethe tapeinput to...

Page 58: ...e device in anotherpart of the house With the Home Theater Standardin operational or stand by mode you can activate the mainzoneonly Or while the Home TheaterStandardis still in stand by mode you can set up zone2 listening so that whenyou switch to operational mode only zone2 plays Youcan play a device using the mainzonewhile using zone2 to record Thered LEDilluminates whenthe input is engaged and...

Page 59: ...device LEDilluminates press the input deviceselection key again Thefront paneldisplay reads TAPE OUT CHANGED TOZONE 2 Start playing the device that you wish to record Recordingbegins whenyou start playing the device 3 To monitor the output being recorded switch backto the mainzone then press the input device selection key for the device being recorded Thematerial being recorded play throughthe mai...

Page 60: ...dturn on the CDplayer follow these steps 1 Pressthe TVbutton 9 or key 63 to selectthe device Beginplaying the device 2 Pressthe prev key 79 3 Pressthe CDbutton 10 or key 64 Beginplaying the device 56 Krell Home TheaterStandard ...

Page 61: ...If youpurchased yourKrell product outsidetheU S A and wish to have it serviced at thefactory all freightandassoci ated chargesto the factory are your responsibility Krell will payreturnfreightto theU S A based freightfor warder of yourchoice Freightandothercharges to shipthe unit fromthefreight forwarder to youarealsoyourrespon sibility Krell is notresponsible for anydamage incurred in transit Kre...

Page 62: ...s of or damage to this product during ship mentto the Krell factory andprepayall shipping charges Please see the Warrantypagein this manual concern ing liability for shipping damage and shipping charges This product mayalso be handdelivered if arrangementswith the Service Department have been madein advance Proof of pur chasewill be required for warranty valida tion at the time of hand delivery IM...

Page 63: ...a RCA connectors 6 balancedvia XLRconnectors 6 single endedvia RCA connectors 1 multi channelvia a DB 25 connector 1 pair single endedvia RCA connectors 1 coaxial via RCA connectors 1 EIAJoptical via TosLink connectors 2 S videovia DINconnectors 2 compositevia RCA connectors 1 component via RCA connectors 1 pair single endedvia RCA connectors 1 infrared 1 RS 232 1 PHAST Link in andout optional 1 R...

Page 64: ... Industries Inc 45 Connair Road Orange CT06477 3650 USA TEL 203 799 9954 FAX203 891 2 028 E MAIL krell krellonline com WEBSITE http www krellonline com Home Theater Standard Surround Preamp Processor v 01 2 ...

Reviews: