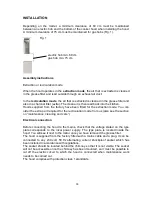
background image

IKD3850.0E

IKD4850.0E
IKD4850.0GE

BEDIENUNGS- UND 
MONTAGEANWEISUNG

GB INSTRUCTIONS FOR ASSEMBLY AND USE

GR

ΟΓΗΓΙΔ΢ ΥΔΙΡΙ΢ΜΟΤ ΚΑΙ ΢ΤΝΑΡΜΟΛΟΓΗ΢Η΢

Summary of Contents for IKD3850.0E

Page 1: ...IKD3850 0E IKD4850 0E IKD4850 0GE BEDIENUNGS UND MONTAGEANWEISUNG GB INSTRUCTIONS FOR ASSEMBLY AND USE GR ΟΓΗΓΙΔ ΥΔΙΡΙ ΜΟΤ ΚΑΙ ΤΝΑΡΜΟΛΟΓΗ Η ...

Page 2: ...ctions and tips Dimensioned drawings Assembly instructions Operation Switching your appliance on off Power controls Automatic delayed stop Switching the lamp on off Dimmer function Filter saturation display Remote control Maintenance Cleaning and Care Housing Grease filter Charcoal filter 28 30 30 30 30 31 31 32 33 34 35 20 21 22 24 24 25 26 20 ...

Page 3: ...er and if available fax number 9 When can customer service call 10 An exact appliance designation model no and fabric no refer to the nameplate and or the receipt Model designation E number F N 11 Date of purchase 12 An exact description of the problem or the kind of service you require Please also have your receipt available This will help us to avoid wasting time as well as cutting down on expen...

Page 4: ...pen fireplace e g tile stoves coal ovens fireplaces etc must always be provided with a sufficient supply of fresh air This is best ensured with a wall box for inlet air and exhaust air or with a flip switch for the window Contact your local chimney sweep for information before making your plans He will have to give his approval for the hood and the inlet air and exhaust air pipes before you put yo...

Page 5: ... that has been deposited in the filter Constant supervision is essential when deep frying or cooking with oil or fat under the hood because of the risk of fire No other work may be carried out with an open flame A fire may result and damage the metal grease filter or other parts of the hood This does not include the proper use of a gas cooker Safety instructions for maintenance cleaning and care P...

Page 6: ...ou can order the extra part required for the recirculation mode from us also see the section on maintenance cleaning and care Electrical connection Before connecting the hood to the mains check that the voltage stated on the type plate corresponds to the local power supply The type plate is located inside the hood You will see it next to the motor once you have removed the grease filter The hood i...

Page 7: ...pes Exhaust air boxes and pipes with a diameter of 100 or 120 mm are not suitable Do not use a plastic flex exhaust air tube since this may make the operating noise unpleasantly loud When drilling holes for dowels make sure that lines running in the walls electricity gas and water are not damaged This cooker hood has been designed for mounting on a ceiling Please follow the drawings and instructio...

Page 8: ...IKD3850 0E dimensioned drawing IKD4850 0E IKD4850 0GE dimensioned drawing 26 ...

Page 9: ...Assembly diagramme IKD 3850 0E IKD 4850 0E IKD4850 0GE Ceiling Ceiling mounting bracket Mounting ring Mounting angle Motor box Stainless steel chimneys Cooker hood body 27 ...

Page 10: ...arance of 75 cm for gas hobs Fig 2 Now mount the four mounting angles in Fig 3 onto the holes that have been provided on the edges of the motor block Fig 3 1 of the cooker hood then suspend these mounting angles on the ceiling bracket and fasten them there with four screws Fig 3 Fig 3 1 Now take the telescopic chimney Fig 3 2 and pull it over the motor block that has already been mounted Fasten th...

Page 11: ... metal hooks on the body of the hood to hang up the hood before you finally mount it Please note Exctraction mode Telescopic part of the chimney with recirculation air openings facing down Recirculation mode Telescopic part of the chimney with recirculation air openings facing up Fig 4 29 ...

Page 12: ...ched on the power is controlled by pressing the symbols to increase the power and to reduce the power Pressing the symbol several times will increase or reduce the power setting from 1 4 Automatic delayed stop This cooker hood is equipped with an automatic delayed stop function which automatically switches the hood motor off after 15 minutes The automatic delayed stop function should always be act...

Page 13: ...n the factory Touching the and keys will set the brightness level of your choice Press the lamp symbol once again to save this setting Fig A Deleting the filter change display C When the letter C is shown in the LED display the charcoal filter will need to be replaced see also the section on maintenance cleaning and care Hold the on off key for approx 5 seconds to reset the display The function is...

Page 14: ...ctions of the cooker hood from a distance of several metres To do so point the remote control towards the cooker hood and press the function of your choice on the remote control Fig 5 Timer Dimmer Lamp Switch on the automatic delayed stop function Set the dimmer function and switch the lamp on and off On off switch Increase reduce power setting or the dimmer setting 32 ...

Page 15: ... or cleaning work The cooker hood may not be cleaned with a steam cleaner Housing Only clean the surfaces and control elements with a sponge cloth detergent and water as they are very sensitive to scratches and cuts When you have removed the metal grease filter clean the accessible metal surfaces in the interior of the cooker hood When doing so make sure that you only use a little liquid when work...

Page 16: ... 1 Press the bar rail handle down until the top part of the grease filter has been properly inserted into the filter frame and then let the frame go Fig 7 Fig 7 1 Some of the models have a metal grease filter that is covered with a removable stainless steel grid The metal grease filter will have to removed before you put it into the dishwasher To remove the stainless steel grid press the bar rail ...

Page 17: ... Please note Make sure that the grid is not damaged when you clean the metal grease filter The metal surface may become discoloured as a result of frequent cleaning or the use of aggressive detergents This discolouration does not have any effect on the functioning of the filter and gives no reason for complaint Replace the clean dry metal grease filter in reverse order according to Fig 7 ff Charco...

Page 18: ...placement should generally be observed in order to ensure that no greasy vapours are deposited on kitchen walls and units If the metal filter is not regularly cleaned when the hood is operated in the circulation mode the charcoal filter will also become clogged more quickly impairing the operation of the hood 36 ...

Page 19: ...tfach 10 01 32 D 45801 Gelsenkirchen Küppersbuschstr 16 D 45883 Gelsenkirchen Telefon 02 09 4 01 0 Telefax 02 09 4 01 3 03 www kueppersbusch de Küppersbusch Ges m b H Eitnergasse 13 1230 Wien Telefon 01 8 66 80 0 Telefax 01 8 66 80 72 ...

Page 20: ......

Reviews: