background image


Musician’s Guide


(For PC3LE6, PC3LE7, and PC3LE8)


©2010 All rights reserved. Kurzweil ® is a product line of Young Chang Co., Ltd. Young Chang®, Kurzweil ®, V. A. S. T. ®, PC3LE®, PC3®,
X-Pro, KDFX®, Pitcher®, and LaserVerb®, KSP8 ™, K2661™, K2600™, K2500™, and K2000™ are trademarks of Young Chang Co., Ltd. All
other products and brand names are trademarks or registered trademarks of their respective companies. Product features and specifications
are subject to change without notice. 

You may legally print up to two (2) copies of this document for personal use. Commercial use of any copies of this document
is prohibited. Young Chang Co. retains ownership of all intellectual property represented by this document.


910520-003 – March 2010

Summary of Contents for PC3LE6

Page 1: ...YoungChangCo Ltd All other products and brand names are trademarks or registered trademarks of their respective companies Product features and speci cations aresubjecttochangewithout notice You may le...

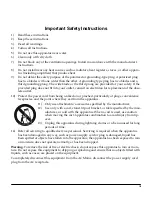
Page 2: ...ed service personnel when A The power supply cord or the plug has been damaged B Objects have fallen or liquid has been spilled into the product C The product has been exposed to rain D The product d...

Page 3: ...tacles and the point where they exit from the apparatus 11 Only use attachments accessories speci ed by the manufacturer 12 Use only with a cart stand tripod bracket or table speci ed by the man ufact...

Page 4: ...304 Derry Avenue C Agoura Hills California 91301 USA telephone 800 994 4984 fax 818 597 0411 Email Info AmericanMusicAndSound com Kurzweil Co LTD iPark Building 102 Floor 9 Jeongja Dong 9 Bundang Gu S...

Page 5: ...Connecting Audio Cables 2 2 Pedals 2 3 USB Storage Port 2 4 USB Computer Port 2 4 PC3LE Programs 2 6 Selecting Programs 2 6 Easy Audition 2 6 Setups 2 8 Quick Access 2 8 The Other Modes 2 9 Software...

Page 6: ...tton 6 4 Tap Tempo Button 6 4 V A S T and KB3 Programs 6 5 Real time Controls in KB3 Mode 6 6 The Program Editor 6 9 The PARAMETERS Page 6 9 The BASIC Page 6 11 The PADS Page 6 12 The EFFECTS FX Page...

Page 7: ...7 60 The FX Page 7 62 The AUXFX1 and AUXFX2 Pages 7 63 The Setup Editor Utility Soft Buttons 7 64 Recording A Setup To Song Mode 7 66 The Control Setup 7 68 Chapter 8 Quick Access Mode Soft Buttons In...

Page 8: ...t 9 22 Delete 9 22 Chapter 10 Song Mode and the Song Editor Getting Started with the Sequencer 10 1 Song Mode The MAIN Page 10 1 Song Mode The BIG Page 10 10 Song Mode The FX Pages 10 11 Song Mode The...

Page 9: ...ased On Played Keyboard Velocity 13 30 Assigning a Footswitch to Switch From One Setup To Another 13 33 Creating A New Setup 13 38 Basics Of Using Riffs 13 41 Adding A Riff Sync Riffs 13 41 Transposin...

Page 10: ...vi...

Page 11: ...with riffs or control other functions Assignable knobs use the shift button to access 3 different functions for each knob to control up to 15 parameters Convenient knob presets each preset has its ow...

Page 12: ...so provided many of these setups use note triggers to play factory recorded riffs and arpeggiations that provide instant grooves and backing parts An on board sequencer Song mode with front panel tran...

Page 13: ...array of lters and DSP tools can produce stunningly realistic analog emulations as well as never before heard synthetic sound scapes How to Use This Manual This manual describes how to connect and pow...

Page 14: ...lume by default Ask your Kurzweil dealer about the following optional pedals FS 1 Standard box shaped switch pedal KFP 1 Single piano style switch pedal KFP 2M Double piano style switch pedal unit CC...

Page 15: ...rubber feet and attach them now near each corner all on the same level 3 Connect the power cable 4 Make sure your sound system is at a safe volume level Also make sure that the PC3LE s MASTER VOLUME...

Page 16: ...uce the risk of a shock Connecting Audio Cables Analog After you ve turned down the level on your sound system connect the PC3LE s analog audio outputs to your sound system using a pair of stereo or m...

Page 17: ...ving Storage mode will restore USB MIDI functionality USB MIDI and 5 pin MIDI can be used at the same time the MIDI signals will be combined into a single 16 channel MIDI stream Pedals Plug your switc...

Page 18: ...LE for backing up archiving sharing your work and updating your software Any size USB mass storage device will work though thumb drives are recommended for their portability durability and low price T...

Page 19: ...op or other folder You must copy data from the PC3LE virtual drive to your computer s drive or else the data will be lost When you leave Storage Mode there will be a prompt telling you that the PC3LE...

Page 20: ...imary function The PC3LE has various settings for responding to MIDI Program Change commands from external sources These are explained in Chapter 9 so we won t go into them here You should be able to...

Page 21: ...uttons simultaneously to return transposition to zero The Panic button or a double press of Shift and Enter at the bottom of the alphanumeric keypad sends an All Notes Off message and an All Controlle...

Page 22: ...of factory preset or user programmed banks Each bank contains ten memory slots or entries where you can store any combination of programs or setups While you re in Quick Access mode you can select an...

Page 23: ...er objects via USB Software Upgrades It s easy to upgrade the PC3LE s operating system and objects programs setup etc using the boot loader to install upgrades into ash ROM When upgrades are available...

Page 24: ...2 10 Startup Software Upgrades...

Page 25: ...Editor Master mode De ne performance and control characteristics for the entire PC3LE and how your PC3LE sends and receives MIDI information Song mode Use the PC3LE s sequencer to record and play back...

Page 26: ...Each of the ve Assignable Controls can control three separate functions independently giving you access to knob control of 15 parameters Use the Shift button to the left of these knob controls to tog...

Page 27: ...tches to toggle between accessing switches 1 5 or 6 10 Pressing this Shift button will light one of the LEDs of the two rows of labels below the Assignable Switches This lets you know which set of swi...

Page 28: ...te program in that category by using the Alpha wheel buttons or up down cursor buttons Alternatively you can nd the program by pressing the category Shift button and using the numbered category button...

Page 29: ...lthough some programs use the pitch wheel to lower pitch by as much as an octave The Pitch Wheel has a spring so that it will snap back to place i e back to the original pitch when you release it The...

Page 30: ...and its editor s the various pages are selected with the navigation buttons There are many pages but there are a few features common to each page This is the entry level page for Program mode The Top...

Page 31: ...the soft button is labeled in lower case or mixed case letters Save for example the soft button performs some kind of function The Cursor Buttons To the right of the display are four buttons arranged...

Page 32: ...ocated to the left of the display activates each of the PC3LE s editors Pressing the Edit button tells the PC3LE that you want to change some aspect of the object marked by the cursor For example when...

Page 33: ...the plus or minus button corresponds to one click to the right or left with the Alpha Wheel These buttons will repeat if pressed and held Pressing the plus and minus buttons simultaneously will move...

Page 34: ...al value by pressing Cancel Pressing Clear is the same as pressing 0 without pressing Enter When entering names you can use the Left Right cursor buttons or the soft buttons to move the cursor to the...

Page 35: ...ght cursor buttons Brings up Tap Tempo page Song mode Up Down cursor buttons Toggle between Play and Stop Chan Zone Select all tracks on any TRACK page in Song Editor Left Right cursor buttons Brings...

Page 36: ...ll appear as the value for the LoKey parameter Repeat the process for the HiKey parameter Search You can find programs or setups by searching for a string of characters from the Program or Setup mode...

Page 37: ...ding track and recording mode are determined by the current settings in Song mode likewise for the playback mode when you re playing a song When the sequencer status is STOPPED neither the Record butt...

Page 38: ...3 14 User Interface Basics Quick Song Recording and Playback...

Page 39: ...urrent operating mode Pressing one of the mode buttons selects the corresponding mode This is the mode s entry level At the entry level the LED of the selected mode is lit Only one mode can be selecte...

Page 40: ...others These are Program Setup and Quick Access modes We ll describe each of the six modes brie y in this section Program Mode The PC3LE starts up in Program mode where you can select play and edit p...

Page 41: ...tton Different banks are selected with the Chan Zone buttons There s a selection of factory preset banks and you can use the Quick Access Editor to create your own banks and store them in the PC3LE s...

Page 42: ...4 4 The Operating Modes Using the Modes...

Page 43: ...ually write your editing changes to memory until you save the object you re working on It then allows you to choose between writing over the original object or storing the newly edited version in a ne...

Page 44: ...replacing the original object Double press the and buttons beneath the Alpha Wheel to select the next available user location Objects of different types can have the same ID but objects of the same t...

Page 45: ...rently selected character Press the or soft buttons to move the cursor without changing characters Press an alphanumeric button one or more times to enter a character above the cursor The characters t...

Page 46: ...press the buttons simultaneously to toggle between the ID that the PC3LE suggested and the original ID Or press the Cancel soft button to cancel the operation If you decide not to cancel or change the...

Page 47: ...he cursor one space to the right each time you strike a key just like a typewriter or computer keyboard This is the most convenient setting l L Delete move characters left one space Move cursor left o...

Page 48: ...E will delete the object and all its dependent objects when you execute the Delete function Continuing with the example from above if you were deleting the setup you created and you chose to delete de...

Page 49: ...continuous controller values to external equipment Each factory program has some of these controllers assigned to program parameters for example lter frequency attack time distortion drive etc Press...

Page 50: ...their ID s can be found at kurzweil com When not in General MIDI mode default programs used for GM mode can be accessed starting at ID 4096 see General MIDI on page 9 9 for details The PC3LE has vari...

Page 51: ...mount of transposition Xpose Pressing both Xpose buttons simultaneously returns the transposition to zero The Xpose buttons transpose the PC3LE as well as any MIDI devices connected to the PC3LE s MID...

Page 52: ...Setup mode but in Program mode the Arpeggiator 2 page has no SyncTo SyncType or Num Beats parameters as it does in Setup mode Split Layer Button Press the Split Layer button to create a split or layer...

Page 53: ...n detailed and more realistic programs Each layer is also routed through sophisticated digital signal processing DSP algorithms which shape the tone and other behaviors of the sounds KB3 programs use...

Page 54: ...te to standard drawbar functions Assignable Switches In KB3 Mode When the assignable switches are enabled for KB3 control their LEDs indicate the status of the various effects for the current KB3 prog...

Page 55: ...rgans as an older organ will have more leakage as it ages and its capacitors begin to leak The Mod Wheel controls Distortion Drive Switch Pedal 1 the sustain pedal controls the Rotary FootSw parameter...

Page 56: ...umbers to its MIDI Out port when you re using the local keyboard channel see Local Keyboard Channel LocalKbdCh on page 9 19 The controller numbers below may not apply if you have edited controller ass...

Page 57: ...r is controlled by For each parameter selected the right top line of the page displays what type of parameter it is The three parameter types are Prog either one of the 5 basic parameters or a paramet...

Page 58: ...ume of your programs will stay consistent and can always be changed by the expression pedal If you want a program to have a default volume you must set a MIDI Value other than None for the Expression...

Page 59: ...re set in cents where 100 cents 1 half step For both Bend parameters positive values will cause the pitch to bend up while negative values will cause the pitch to bend down Large positive values can c...

Page 60: ...he same effects resources as the current channel saving effects resources for other tracks To turn the pads off set this parameter to None by entering 0 Note Channel 10 can only use its current progra...

Page 61: ...nal from all active programs aux sends A Note About Processor Power Allocation Each effects Chain is composed of an effect box or a series of effect boxes Each effect box uses a certain amount of the...

Page 62: ...appear in the eld to the right You can also use the Chan Zone buttons to the left of the display to change the insert number being viewed The insert s chain name will usually give you a clue about wh...

Page 63: ...or Num Beats parameters as it does in Setup mode The Program Editor Utility Soft Buttons Import Arpeggiator Settings ImpArp The ImpArp button allows you to import arpeggiator settings from other prog...

Page 64: ...6 16 Program Mode The Program Editor...

Page 65: ...to enter Setup mode you ll see a list of setups with the currently selected setup highlighted in the middle of the list Select a setup by scrolling through the list with the Alpha Wheel cursor button...

Page 66: ...split or layer zone to the currently selected setup You will be brought to the Split Layer page Press the LoSplt or UpSplt soft button to add a new zone to the lower or upper half of the keyboard or p...

Page 67: ...he new zone you are creating but no keys above it will trigger this zone If you are on the Split Layer UPPERSPLIT page the Split Key will become the lowest key that plays in that zone The Split Key an...

Page 68: ...reating Select the eld for the LowKey parameter and choose your Low Key by holding the Enter button on the alphanumeric pad and playing a key You can also use the Alpha Wheel or buttons to enter a not...

Page 69: ...allowing you to compare your edited setup with the original setup Pressing the Storage button again returns you to the Setup editor Using the Compare Editor makes no changes to the current setup The...

Page 70: ...Exit the Program Editor to return to the Setup Editor of the current setup Channel The Channel parameter de nes the MIDI transmit channel for the currently selected zone You can set it to any of the...

Page 71: ...external MIDI devices as well by setting the Destination parameter to a destination including MIDI or USB_MIDI then changing MidiBank Some instruments may have more banks than the PC3LE Bank switchin...

Page 72: ...he MIDI Speci cation is a little ambiguous when it comes to Bank Select messages as to whether they should be only Controller 0 only Controller 32 or both Controllers sent as a pair Different manufact...

Page 73: ...a Wheel or the buttons to scroll through the list Once you have selected the desired controller in the Controls eld use the cursor buttons to set the controller destination and other available paramet...

Page 74: ...oes pressure Note Aside from the Pressure settings on the Controllers page MIDI pressure values can be affected by settings you make on other pages See Pressure Map Press Map Master on page 9 5 for an...

Page 75: ...Then set the Scale parameter to 100 and set the Offset parameter to 127 This makes the selected controller send a value of 127 when all the way down and a value of 0 when all the way up To get an idea...

Page 76: ...Page on page 10 31 or to an external sequencer To see the CC number being used for a parameter you can temporarily change the DestType parameter to Ctrl to see the CC number in the Dest eld Some CC n...

Page 77: ...ou choose SW Momentary in the Type eld the control will send the value for its OnValue parameter when pressed and the value for its OffValue parameter when released If you choose SW Toggled in the Typ...

Page 78: ...nes whether an initial setting for the switch will be sent when the setup is selected and what that initial setting will be There are three choices None no setting is sent when the setup is loaded Off...

Page 79: ...to assign a Riff Lastly use the Zone eld to set the desired zone that you wish to control with the current pad You can control either the current zone or all zones See below for parameter explanation...

Page 80: ...to play a Riff the pad will light up blue when the riff is started Trig Mode Trigger Mode With Trig Mode set to Start Stop the pad will act as a toggled switch meaning it will alternate between start...

Page 81: ...USB out ports destinations 0 127 will only perform their named function if the external equipment has the capability to do so Most of these named functions correspond to the MIDI standard for continuo...

Page 82: ...notes that are currently down but not notes played subsequently 67 Soft Lowers the volume by a preset amount and may soften the timbre as well see SW Pedal 1 2 Arp switch Arp latch sw Switch 1 10 on p...

Page 83: ...129 PitchRev Pitch values above and below 64 bend the pitch down and up respectively 130 PitchUp Pitch values above 0 bend the pitch up 131 PitchDwn Pitch values above 0 bend the pitch down 132 Pressu...

Page 84: ...154 ArpLmtOp Arpeggiator Shift Limit Option each range of values selects one of seven options in order on parameters list 0 18 19 36 37 54 55 72 73 90 91 108 109 127 SeeThe ARPEGGIATOR Page on page 7...

Page 85: ...s one of the 17 ARPEGGIATOR ShiftPatt Banks SeeThe ARPEGGIATOR Page on page 7 36 173 VelPatt Selects one of the 128 patterns in the current ARPEGGIATOR VelPatt Bank SeeThe ARPEGGIATOR Page on page 7 3...

Page 86: ...Shift Pattern for the desired zone in order for Shift Key Number to have an effect To select a Shift Pattern for the current zone in a setup enter the setup editor and go to the Arpeggiator page by pr...

Page 87: ...se a key is to set Shift Key to Last Note Played mode in which the last note played in the zone will set the key For example you could set the zone being used for Shift Key Number to have a Key Range...

Page 88: ...12 steps will trigger notes in every octave over a shorter range of the controller For example in a shift pattern with 3 steps by default the controller values 0 to 2 will trigger notes starting in t...

Page 89: ...ables you to control the initial MIDI pan setting for each zone of the current setup When you select a setup in Setup mode MIDI channels for zones that have an Entry Pan value other than None will rec...

Page 90: ...ng mode that you are using Low Key LoKey High Key HiKey The LoKey and HiKey parameters de ne the note range of the currently selected zone The easiest way to change these values is to press and hold t...

Page 91: ...aults to C4 but you can change this with the Transpose parameter This works well when you want the sound from a particular key to play with every note of another zone for example playing a ride cymbal...

Page 92: ...This is useful for creating velocity based crossfades between zones See the following section on Velocity Offset for ideas about negative scaling The following illustration shows what happens when you...

Page 93: ...ity available will be 102 while any keystroke 25 or below will produce a velocity of 1 a velocity value of zero has a special meaning in MIDI and cannot be used for Note Ons You can think of Scale as...

Page 94: ...l end up as zeroes well ones actually since a MIDI note on with velocity zero is something else So to get true inverse scaling that is minus 100 you must set an offset of 127 to get the full range of...

Page 95: ...ocity differences less than with a linear curve while when you re playing hard you ll notice velocity differences more Compress produces a velocity curve that is the opposite of the expanded curve tha...

Page 96: ...set one parameter instead of two MIDI Velocity 127 0 127 Strike Velocity 64 64 Velocity Curve Linear Velocity Curve Bump Velocity Curve Crossfade as you hit the keys harder increase the velocity MIDI...

Page 97: ...nt sounds depending on how hard you strike it The values can be anywhere from 1 to 127 As with other parameters zones can overlap or be totally discrete or be identical Usually LoVel will have a small...

Page 98: ...dRangeDown ct lets you ne tune the value for Bend Range semitones 100 cents equals one semitone or one half step you can set this parameter anywhere between 0 and 100 cents BendRangeUp in both semiton...

Page 99: ...Pitch Wheel other continuous controllers such as a knob will not automatically return to the original center pitch This can make it hard to accurately return the controller to it s center position by...

Page 100: ...g you to a similar Arpeggiator screen for the current program Active The rst parameter on the Arpeggiator menu is Active which speci es whether or not the Arpeggiator is on for the current zone This p...

Page 101: ...ce UpDown Repeat is similar to UpDown except that the notes at the top and bottom play twice repeat when the Arpeggiator reverses direction Random plays the currently latched notes in completely rando...

Page 102: ...ch is decided by the order parameter on the ARPEGGIATOR page Note For patterns with negative velocity values if the velocity of the rst played note is low enough that a pattern step could result in a...

Page 103: ...f the arpeggiator will randomly choose a velocity within the given range See the table below for velocity ranges Note For Human and Chimp modes if the velocity of the rst played note is low enough tha...

Page 104: ...ipolar means that after playing up to the shift limit the Arpeggiator begins shifting notes in the opposite direction until it reaches the original pitch where it reverses again To determine the next...

Page 105: ...quencer for arpeggiator note patterns The inputted note number of each played key is shifted according to a sequenced pattern thus Shift Pattern There are 69 pre programed shift patterns including man...

Page 106: ...ith pattern direction set to Down the pattern starts at step one but then moves to the last step and continues to move backwards through the steps down towards step 1 Additionally patterns set to Down...

Page 107: ...ues playing them even after you let them go until Latch turns off Any notes that you play after Latch is already on do not get arpeggiated even if they re in the arpeggiation range Arpeg is similar an...

Page 108: ...it gets latched and continues arpeggiating after you release the chord When you play another chord the previous chord gets unlatched and the new one gets latched You can use the Panic soft button to s...

Page 109: ...se button Doing this temporarily replaces the programs in your setup s zones with the program used for each channel in the song so it s best to make a setup that uses the same programs as your song on...

Page 110: ...time that whatever it is syncing to starts This way you can trigger the arpeggiator to start ahead of time and have it start in sync at the start of the riff arpeggiator or song that you are syncing t...

Page 111: ...Arpeggiator Beats each range of values selects one of seven options in order of the parameters list 0 18 Quarter notes 19 36 8th notes etc 37 54 55 72 73 90 91 108 109 127 32nd triplets 152 ArpShift T...

Page 112: ...ge of a controller s zone 173 VelPatt Selects one of the 128 patterns in the VelPatt Bank for the ARPEGGIATOR page of a controller s zone 174 VelPBank Each range of seven values 0 6 7 13 112 127 selec...

Page 113: ...ou can set the PC3LE to sync up with the tempo from another device assuming the device is sending MIDI clock data to the PC3LE via MIDI or USB by setting Clock Source to External When Clock Source is...

Page 114: ...the ARPEGGIATOR page of each zone that you want to sync are the same Different Beats values result in irregular but potentially very interesting arpeggios Aux FX Channel The Aux FX Channel determines...

Page 115: ...e CH PRG page of the Setup Editor choose the program that you want to use for the riff on the current zone Program changes that are recorded in song mode will be ignored when using the song as a riff...

Page 116: ...59 Since there are 960 possible start points within a beat you can specify your riff to start on any common beat subdivision moments and a few uncommon ones The following Tick values correspond to the...

Page 117: ...SrcTrack for each zone To create a setup with a single riff that plays multiple instrument parts set SrcTrack to ALL Each track of the sequence will play its track through the zones which have corresp...

Page 118: ...alue change as you press a key Next move your cursor to the right to highlight the second value of the Trigger eld this will be the high end of the trigger key range Use one of the methods described a...

Page 119: ...m the keyboard Conditional Release CondRel The CondRel parameter allows you to have a riff play only while a key is pressed and held and nothing will stop or restart that riff until the key is release...

Page 120: ...eplaces the programs in your setup s zones with the program used for each channel in the song so it s best to make a setup that uses the same programs as your song on the same MIDI channels If you pla...

Page 121: ...aying to sync to the current riff will wait for the playing riff or song to restart its loop if it is looped before starting see Loop on page 7 55 for looping riffs and Loop on page 10 11 for looping...

Page 122: ...nc to to begin playing rst before releasing This is similar to DownBeatWait but it will only release the riff the rst time that whatever it is syncing to starts This way you can trigger the riff to st...

Page 123: ...at controller s zone The override remains in effect until you select a different setup Remember each of the following Controller Destinations affects only the riff for the zone which your controller i...

Page 124: ...x effect can be set to be applied either pre or post Insert Effect see Signal Flow below for details Chains The object used for Insert and Aux Effects is referred to as a Chain A Chain is a sequence o...

Page 125: ...see the Insert Effects and Aux Effects sections above If you are using both types of effects for a zone or track in Song Mode you can choose to have your signal sent to the Aux effects before or after...

Page 126: ...isable effects allocation for the MIDI channels of less important zones tracks This is done on the FX page in either Setup or Song mode which provides per channel control over effects allocation see b...

Page 127: ...This parameter switches on or off the Aux override Set Override to Yes to select an override Aux Chain on this page Set Override to No to allow Aux FX chain of the program for the current zone or trac...

Page 128: ...or details on pre and post Insert Aux Effects The Setup Editor Utility Soft Buttons In addition to the Setup Editor s pages there are basic library and editing soft buttons Their functions are describ...

Page 129: ...as zone mute buttons To do this in the Setup editor rst use the KB3CTL soft button as explained above Next go to the Controllers page by pressing the CTRLS soft button On the Controllers page select...

Page 130: ...song in Song mode just as you would with any other song see Song Mode and the Song Editor on page 10 1 Each program from each zone in your setup is automatically assigned to a track change the RecTrk...

Page 131: ...zones and do not change the controller destination assignments for each new zone Often this is the desired behavior such as when using zones to create layers For example if zone one sends pitch bend...

Page 132: ...no longer be controlled by the PC3LE s physical controllers These programs could be xed by re assigning the Control Source for each parameter so that they are controlled by the new CC numbers set for...

Page 133: ...ranges transposition and velocity options though these are best left at their defaults For program mode it is best to set transposition settings with Xpose or Octav soft buttons on the Program Mode m...

Page 134: ...7 70 Setup Mode The Control Setup...

Page 135: ...numeric pad then press Enter The bank is selected and you return to the Quick Access mode page Each bank contains ten memory slots or entries where you can store programs or setups in any combination...

Page 136: ...Master mode MIDI Transmit page The QA Editor Use the QA Editor to customize existing QA banks Enter the QA editor from QA mode by pressing the Edit button The top line gives you the usual mode remind...

Page 137: ...he setup list Just as with programs the cursor highlights the setup s ID and name Use the Alpha Wheel or buttons to scroll through the setups You can also use the alphanumeric pad followed by the Ente...

Page 138: ...8 4 Quick Access Mode The QA Editor...

Page 139: ...inal factory settings When you exit Master Mode the PC3LE saves a Master Table The Master Table remembers the settings of the Master pages as well as the state of the PC3LE such as which programs are...

Page 140: ...t of PC3LE program notes and not notes sent via MIDI Transpose Like the Tune parameter above Transpose affects every PC3LE program but not those notes sent to the MIDI Out port You can adjust the MIDI...

Page 141: ...velocity before and after reaching the Master Velocity Map The default map Linear allows MIDI velocities to pass unchanged Light 1 3 make it increasingly easier to produce high MIDI velocity values f...

Page 142: ...lues for all MIDI sources and destinations used in the PC3LE see the circled box above for its location in the MIDI signal ow Different maps used for the Pads Velocity Map generate different MIDI velo...

Page 143: ...ferent curve to received MIDI pressure aftertouch values and remaps them to new values before letting them pass The default map provides the widest range of pressure aftertouch expression but you may...

Page 144: ...each of the semitones in a single octave used for all octaves by setting pitch offsets for each note in cents Scroll through the list of Intonation maps and listen for the differences between semiton...

Page 145: ...tervals The original tuning of Classical European music 3 Just Flat 7th Similar to classic Just but with the Dominant 7th atted an additional 15 cents 4 Harmonic The perfect 4th Tritone and Dominant 7...

Page 146: ...al Output Setting this parameter to Variable makes the Digital Output respond to changes made on the volume slider Setting this parameter to Fixed makes the Digital Output output a signal with a xed v...

Page 147: ...remapping takes place in Program mode When the Master Page Drum Remap is set to GM the PC3LE remaps Drum programs to the GM drum map General MIDI This parameter enables or disables General MIDI GM mo...

Page 148: ...ce that uses GM program 1 would now use the new harpsichord program that you selected Using a PC3LE program that does not resemble the instrument named in the current GM program would technically make...

Page 149: ...on and determines if the PC3LE s sound engine will receive MIDI data Select the desired destination or any combination of destinations depending on your needs For example a value of Local disables the...

Page 150: ...h track determines this in a song The value for this parameter matches the current MIDI channel displayed on the top line of the Program mode page If you change the current MIDI channel while in Progr...

Page 151: ...s MIDI velocities to pass unchanged Maps Light 1 3 make it increasingly easier to produce high MIDI velocity values for the same key strike velocity with Light 3 being the easiest so these maps may wo...

Page 152: ...IDI data sent from Song mode or to the PC3LE s sound engine The default map provides the widest range of pressure aftertouch expression but you may want to choose a different map if the default does n...

Page 153: ...re details Note The ProgChang parameter applies to all modes except Song mode and Setup mode or when a setup is loaded from Quick Access mode Setups disregard the ProgChang setting and instead use the...

Page 154: ...of Poly the PC3LE responds only to events that are sent on the same channel as the PC3LE s current MIDI channel the one displayed on the top line of the Program mode page In Poly mode the currently s...

Page 155: ...make it increasingly easier to produce high MIDI velocity values for the same key strike velocity with Light 3 being the easiest so these maps may work better for users who play with a lighter touch H...

Page 156: ...fect on MIDI data sent from the PC3LE s keyboard The default map provides the widest range of pressure aftertouch expression but you may want to choose a different map if the default does not suit you...

Page 157: ...can direct SysEx messages to the appropriate PC3LE with the SysExID byte that s included with every SysEx message A value of 127 speci es Omni Receive That is at this value a PC3LE responds to a SysEx...

Page 158: ...o play and control all of the setup s zones Set LocalKbd to match the channel your external MIDI source is using if for example your MIDI source transmits on Channel 1 set LocalKbd to 1 All MIDI infor...

Page 159: ...front panel selecting programs is as simple as entering the program s object ID on the alphanumeric pad and pressing Enter Even program numbers above the usual MIDI limit of 127 can be selected this w...

Page 160: ...Master Mode Reset Press the Reset soft button if you want to return your PC3LE s memory to the state it was in when you bought it CAUTION Resetting the PC3LE system causes ALL parameters to be restore...

Page 161: ...sounds with a sequencer Rather you are recording commands that cause sounds to be played Nonetheless we will sometimes explain sequencer features by drawing analogies to familiar tape recording techni...

Page 162: ...n you record your rst track will be the song s initial tempo During playback the current tempo is shown in this eld During recording tempos dialed in here get recorded in the Tempo Track The initial t...

Page 163: ...d An initial program is the program that will be used for a track when it is played from the start of bar 1 or any other point if there are no program changes and Control Chase is turned on see Contro...

Page 164: ...see Song Editor The EVENT Page on page 10 31 Setting Initial Values For All Tracks An important last step before saving a nished song is to store initial values of Program Volume and Pan for all track...

Page 165: ...k of a track Initial Pan settings are not automatically written during recording because they make it harder to try out different Pan settings for a track For example an initial Pan setting will reset...

Page 166: ...an are set to NONE then the track for that channel uses the Pan setting of that channel in Program mode or Quick Access mode If there is no zone that uses certain channels used by your song then those...

Page 167: ...lay the same program the one on the higher numbered track since that s the most recent Program Change command received on that channel Soft Buttons on the MAIN Page This section contains descriptions...

Page 168: ...rk set to None If this is not done you will simultaneously record to the external sequencer and the selected RecTrk if in Song Mode or activate the Quick Song Recording function from other modes This...

Page 169: ...tain part of the song without listening to the whole thing The Playing eld displays whether to NEW or OLD data is playing Stop halts the playback of either the Old or the New version of the song you a...

Page 170: ...changes upon loading a new song if the MAIN page settings were changed while recording or with recording armed or if any of the BIG page settings were changed For more detailed instructions see Saving...

Page 171: ...vents i e in the middle of the current song the sequencer will ignore but not delete events after this point Loop With the Loop parameter set to Loop the sequencer will loop the segment of the song be...

Page 172: ...hanges viewable in the corresponding track s EVENT page Upon playback these automated mixer parameters will display their changing values in real time on the MIXER page Below is an example MIXER page...

Page 173: ...g recording With Metronome set to Always the metronome plays during playback and recording CountOff This parameter determines the number of measures the PC3LE will count off before recording With Star...

Page 174: ...each measure Soft Note This parameter determines the MIDI number of the note played by the metronome for the upbeats the 2 3 and 4 of each measure Soft Vel This parameter determines the velocity of t...

Page 175: ...playback With Notes set to On only the notes within the speci ed note range with velocities within speci ed velocity range are recorded played LoKey LoKey determines the lowest key that is recorded p...

Page 176: ...Controllers is set to On LoVal LoVal determines the lowest value for the speci ed controller that is recorded played back when Controllers is set to On Hi The Hi to the right of LoVal determines the h...

Page 177: ...from the beginning of the song up to the current time are computed and the most recent non note MIDI event is sent out before starting playback This ensures that the volume panning program changes an...

Page 178: ...loaded at a given time in the system These include the current song the compare song buffer and up to 16 riffs The STATS page shown below is the state of the PC3LE event pool with 0 New Song selected...

Page 179: ...ck 1 16 or all tracks All of the values for the parameters found in any of the Song editor pages are saved in the song object Song Editor The COMMON Page Press the Edit button on the front panel of th...

Page 180: ...r tracks 1 8 or 9 16 Use the Chan Zone buttons to the left of the display to select one of the tracks 1 8 viewed in the top right corner of the page in order to access tracks 1 8 or select one of the...

Page 181: ...or you can scroll through modify add or delete any or all of the tracks MIDI events The EVENT page is described on page 10 31 Rec Play and Stop function as described in The Rec Play and Stop Soft Butt...

Page 182: ...t saving and then redo each of the changes you made That s why it s usually best to save after each successful edit Common Parameters for Edit Song Track Functions Locate This parameter is available f...

Page 183: ...ed controller s recorded data Value ranges are not de nable when Ctl is set to All Available Values are 0 127 Soft Buttons on the TRACK Page FromTo is a quick way to de ne the region of time you inten...

Page 184: ...ack use the Events parameter in the Region Criteria box to select a speci c MIDI event type you would like the edit function to affect Some event types provide you more criteria selection parameters I...

Page 185: ...n track Bounce Use the Bounce function to move the selected events from the current track to another track either merging with or overwriting existing data on the destination track The Bounce function...

Page 186: ...n you perform this function rather they are offset by the length of the blank time being added to a Bar and Beat later in the song Amount Bars Beats Ticks The length of the blank time being added is d...

Page 187: ...id 1 1 to 1 480 This setting determines the size of the Quantize grid expressed as a fraction of a Bar with a 4 4 meter Set Grid to 1 1 for whole note grid 1 16 for sixteenth notes All of the standard...

Page 188: ...dary location Amount Bars Beats Ticks The Ticks parameter speci es the number of bars beats and ticks that the MIDI events from within the selected region are moved forward for positive values or back...

Page 189: ...d track is All tracks then the destination track will be All tracks as well No matter what channel the current track source track in the source song is set to when you use the grab function the events...

Page 190: ...om the original or scaled values Values for velocities can not be less than 1 or greater than 127 Values for controllers can not be less than 0 or greater than 127 As an example to set all Velocities...

Page 191: ...Control Source List 0 to 127 The New parameter is set to the Controller code you wish to have use the existing values once used by the Old Controller to produce a different effect Song Editor The EVE...

Page 192: ...on page 10 1 for details on initial settings for program volume and pan Each of these parameters can be set to NONE by entering 0 on the alphanumeric pad and then pressing the minus button to nd NONE...

Page 193: ...age returns to the COMMON page Tempo Track To access the tempo track use the channel up down buttons to navigate to track 1 then press channel down The tempo track functions the same as the other trac...

Page 194: ...10 34 Song Mode and the Song Editor Song Editor The EVENT Page...

Page 195: ...into the appropriate type of USB port on the rear of the PC3LE Using USB Devices below for details When you select USB PC connection any USB MIDI connection will be temporarily disconnected and will...

Page 196: ...on your computer When you enter Storage mode and select USB PC Connection a virtual drive named PC3LE will appear on your computer s desktop Load les from your computer to your PC3LE by putting les on...

Page 197: ...l appear as Path SOUNDS The backslash character is a directory separator as in the following Path Path BACKUP COVERBAND SONGS This represents the directory SONGS which is a subdirectory of the COVERBA...

Page 198: ...e File Name New Directory Rename Dialog When you create a new le in Storage mode create a new directory or rename a le or directory the PC3LE prompts you to enter the object s name This File Name dial...

Page 199: ...e PC3LE to recognize it as a Kurzweil le when it examines the directory Note that although PLE les are collections of objects you can load individual objects if you want to See Loading Individual Obje...

Page 200: ...soft buttons Below are descriptions of their functions Parent Moves you up one level in the directory hierarchy If the display is already at the root directory this button has no effect Open Open sel...

Page 201: ...mp to next object type OK Tell PC3LE to proceed to load the selected objects Cancel Exits the Store Advanced page and returns you to the Store page Select All Deselect All Selecting or deselecting all...

Page 202: ...es from the current device Rename Change the lename of a le Copy Single or multiple le copy between devices Open Opens the highlighted directory Parent Moves you up one level in the directory hierarch...

Page 203: ...ack a song a k a a MIDI sequence in Song mode the PC3LE triggers each of the notes that you have recorded sort of like a player piano MIDI is very useful for recording songs with electronic instrument...

Page 204: ...nd the value of an 8th note divide 960 by 2 since there are two 8th notes in a quarter note Divide 960 by 4 for 16th notes by 6 for 16th note triplets by 8 for 32nd notes and so on You can also use re...

Page 205: ...e tempo after recording 1 On the Song mode MAIN page use the cursor buttons to navigate to the Tempo eld and enter a tempo Entering the tempo with the alphanumeric pad is the easiest method if you kno...

Page 206: ...po For this example we will leave our previous Tempo setting of 100 0 4 Once you are happy with the tempo press the BIG soft button to return to the Song Big Time page Set the Metron parameter back to...

Page 207: ...name the song My Song under ID 1025 See below for an explanation of this page Soft Button Functions On the Save Changes Page The PlyNew soft button allows you to play the song with your latest record...

Page 208: ...ions chapter Saving and Naming section If you decide not to save or rename on the Song Save Changes page pressing the No soft button returns you to the Song mode page in which you were last recording...

Page 209: ...Zone buttons to the left of the display to Set the RecTrk parameter to an unused track number for example track 2 2 Set the instrument sound for the current track Use the cursor buttons to navigate t...

Page 210: ...On the Song mode MAIN page use the Chan Zone buttons to the left of the display to Set the RecTrk parameter to the track that you want to x For example let s x track 1 see below 2 Set the Mode paramet...

Page 211: ...ng in order to re record the desired section Leave enough time usually a bar or two so that you will have time to prepare before the section you are replacing plays For this example we will set our st...

Page 212: ...itial volume for each track Let s use the song we created in the parts above as an example Let s adjust the volume of track 1 and store the value as an initial volume setting 1 On the Song mode MAIN p...

Page 213: ...value for each setting to be recalled at the song s beginning 6 Follow the above procedure in steps 4 and 5 to store current values as initial values after changing any volume pan or program paramete...

Page 214: ...view and save your changes just as in Step 4 of Part 3 see above Part 6 c Erasing Volume Automation If you ve saved a song with volume automation and you wish to change or remove it afterwords follow...

Page 215: ...me automation from You can view the selected track number in the upper right corner of the screen 5 Set the Events parameter to Controllers see below 6 Set the Controller parameter to Volume You can d...

Page 216: ...on to delete the selected volume automation A screen will appear reading Erase Operation Completed Press the OK soft button to return to the EditSong TRACK page see below 9 Once back on the EditSong T...

Page 217: ...with a drum program selected for a track you could record a drum part by playing one drum sound each time through a 2 bar loop until the entire 2 bar drum beat sounds complete Next you could turn off...

Page 218: ...ntered Use the same method if you would like to change the program back to the original after the new section The Event List Song mode is a powerful composition tool because just about anything that y...

Page 219: ...ngle Knob to Crossfade Between The Volume Of Different Zones 13 25 Switch Between Zones Based On Played Keyboard Velocity 13 30 Assigning a Footswitch to Switch From One Setup To Another 13 33 Creatin...

Page 220: ...nd key ranges In each tutorial read the text for each step and look at the example display screen shots as a guide for following each step Important parameters that are mentioned in each step will be...

Page 221: ...choice of soft buttons Press Rename to rename the setup before saving press No to return to the Setup mode main page without saving press Yes to choose an ID and save the setup press Cancel to return...

Page 222: ...art 1 Load The Example Setup 1 Press the Exit button until you reach the ProgramMode page Next press the Setup mode button located with the mode buttons to the left of the display This will bring you...

Page 223: ...or see below 2 On the CH PROG page use the Chan Zone buttons to the left of the display to select Zone 1 see above You can view the number of the selected Zone in the top right corner of screen In the...

Page 224: ...this Zone end an octave higher by changing the LoKey eld from E3 to E4 To do this select the LoKey eld hold the Enter button on the alphanumeric pad and play E4 the E two whole steps above middle C on...

Page 225: ...bring you to the CH PROG page of the setup editor 4 Use the Chan Zone buttons to the left of the display to select Zone 1 You can view the number of the selected Zone in the top right corner of screen...

Page 226: ...o the left of the display This will bring you to the Setup mode main page 2 Use the buttons or Alpha Wheel to select the setup 38 Jazz Bass Piano or use the alphanumeric pad to enter 38 and press Ente...

Page 227: ...elow Now playing the upper half of the keyboard will produce piano and strings To nish press the Exit button to the right of the display to exit the Setup Editor and save your changes to this setup un...

Page 228: ...adjust the volume of a layered Zone with a Knob or expression pedal see page 13 13 or mute and unmute a layered Zone with a assignable switch or footswitch See SW Pedal 1 2 Arp switch Arp latch sw Sw...

Page 229: ...press the Exit button until you reach the ProgramMode page then press the Setup mode button located with the mode buttons to the left of the display This will bring you to the Setup mode main page Nex...

Page 230: ...r to 127 see below Now the Zone will play the piano program from only the right speaker For the EntryPan parameter a value of 64 plays the program at equal volume from left and right speakers A value...

Page 231: ...e Setup mode button located with the mode buttons to the left of the display This will bring you to the Setup mode main page Next press 38 and then Enter on the alphanumeric pad to select the setup 38...

Page 232: ...f not select the Controller eld with the cursor buttons Make sure the LED to the left of Timbre Knob is lit if it is not press the Shift button to the left of the Knobs until that LED is lit Next hold...

Page 233: ...ge for Zone 1 Knob 1 should be left at their default values see above 8 Next lets repeat the steps above for Zone 2 using Knob 2 On the Controllers page use the Chan Zone buttons to the left of the di...

Page 234: ...r buttons to select a destination in the Dest eld Knob 2 labeled Mod on the front panel should now control the volume of the piano which is on the upper half of the keyboard if not review the previous...

Page 235: ...ues only range from 0 127 volumes that are changed by an offset get truncated to 0 or 127 if the addition of the offset to your current volume results in a value below 0 or above 127 Using an offset g...

Page 236: ...oller eld with the cursor buttons Make sure the LED to the left of the Timbre Knob is lit if it is not press the Shift button to the left of the Knobs until that LED is lit Next hold the Enter button...

Page 237: ...page use the Chan Zone buttons to the left of the display to select Zone 3 see below You can view the number of the selected Zone in the top right corner of screen 9 On the Controllers page for Zone...

Page 238: ...s steps Zone 3 will always be 14 MIDI volume steps below Zone 2 because of the Offset parameter 13 To nish press the Exit button to the right of the display to exit the Setup Editor and save your chan...

Page 239: ...page then press the Setup mode button located with the mode buttons to the left of the display This will bring you to the Setup mode main page Next press 8 and then Enter on the alphanumeric pad to s...

Page 240: ...a Wheel or buttons 6 With Knob 1 selected in the Controller eld use the cursor buttons to select the DestType eld and then use the Alpha Wheel or buttons to select Ctrl see below 7 With Ctrl selected...

Page 241: ...Knobs until that LED is lit Next hold the Enter button on the alphanumeric pad and move the Knob labeled Timbre This will select Knob 1 for the Controller eld You can also set the desired controller...

Page 242: ...e value set for Zone 3 For example if Knob 1 is sending a value of 127 Zone 2 will be at MIDI volume 127 while Zone 3 will be at MIDI volume 114 The value 114 is a result of the value sent by Knob 1 1...

Page 243: ...iano and one of the pads or the piano and a blend of both pads 1 If you are not already in Setup mode press the Exit button until you reach the ProgramMode page then press the Setup mode button locate...

Page 244: ...e Controller eld with the cursor buttons Make sure the LED to the left of the Timbre Knob is lit if it is not press the Shift button to the left of the Knobs until that LED is lit Next hold the Enter...

Page 245: ...ay up than it would be with the standard Linear curve This allows for the pad sound to be closer to its full volume when Knob 1 is half way up which will give us an equal blend of both pad sounds when...

Page 246: ...e the Alpha Wheel or buttons to select Ctrl see below 12 With Ctrl selected in the DestType eld use the cursor buttons to select the Dest eld In the Dest eld press 7 and then the Enter button on the a...

Page 247: ...step 8 above This is because we used the 100 Scale value for Zone 3 which makes the Expand curve boost middle values like the Compress curve usually does instead of decreasing middle values as Expand...

Page 248: ...ranges in this way allows you to emphasize the dynamics of your playing by having more sounds come in as you play louder and having sounds drop out when you play more quietly 1 If you are not already...

Page 249: ...et the same velocity range for Zone 3 Use the Chan Zone buttons to the left of the display to select Zone 3 see below You can view the number of the selected Zone in the top right corner of screen 7 O...

Page 250: ...rial and additionally change the velocity range of the piano on Zone 1 so that it is not heard for velocities above 80 This way you only hear one sound at a time piano for low velocities and pads for...

Page 251: ...etups the PC3LE attempts to keep effects active for held notes of your previous setup If there are not enough effects units available the previously used effects will be shut off in favor of the new s...

Page 252: ...trollers page Zone 1 will be selected If not use the Chan Zone buttons to the left of the display to select Zone 1 You can view the number of the selected Zone in the top right corner of screen see be...

Page 253: ...ssign your switch pedal to SetupInc make sure you don t step on it until you ve exited the Setup Editor If you step on the pedal while you are in the Setup Editor all of the settings of your setup wil...

Page 254: ...his will replace the original factory Setup 28 World with our edited version This is essential for this tutorial because when we are done stepping on the switch pedal will bring us up one Setup to the...

Page 255: ...mance you would save a copy of all the Setups that you use for each song into the space above ID 1024 these are reserved as user ID s Save your Setups in the order which you would like to use them in...

Page 256: ...of the display This will bring you to the Setup mode main page see below 2 Use the buttons or Alpha Wheel to select the setup 128 Default Setup or use the alphanumeric pad to enter 128 and press Enter...

Page 257: ...ated and you will be brought to the CH PROG page for the new Zone You can view the number of the selected Zone in the top right corner of screen 6 On the CH PROG page for the new Zone select the Progr...

Page 258: ...etup mode main page You will be presented with the message This setup has been edited Press Rename to save and name your setup press No to return to the Setup mode main page without saving or press Ca...

Page 259: ...st way to add a riff to a setup is to create a new zone which will be dedicated to playing a riff For this tutorial we will look at a setup that contains a drum riff and add a horn riff that will play...

Page 260: ...e left of the display 5 We will use the new zone zone 5 to play a horn riff On the CH PROG page for zone 5 choose program 59 BigBand AMradio for the zone s program see below To do this enter 59 into t...

Page 261: ...zones not just the horn program on zone 5 First lets make the riff trigger only zone 5 and later we will make the riff trigger only from a pad Use the cursor buttons to select the SrcTrack eld then u...

Page 262: ...hanumeric pad Next use the cursor buttons to select G9 in the right most Release eld and change it to C 1 by pressing 0 and then pressing the Enter button on the alphanumeric pad see below You can als...

Page 263: ...ill notice that the horn riff on pad 2 does not play at the same tempo as the drum riff on pad 1 The drum riff is playing at the tempo of the setup while the horn riff is playing at the tempo of its o...

Page 264: ...s to select the eld below SyncZone SyncType Use the buttons or the Alpha Wheel to select DownBeatWait for the SyncType eld see below Now if you press pad 2 the PC3LE will wait until you press pad 1 to...

Page 265: ...rollers page for zone 5 select SW Pedal 1 for the Controller eld and select None for the OnControl and OffControl elds There are many possible ways to use riffs in a setup For example instead of trigg...

Page 266: ...button located with the mode buttons to the left of the display This will bring you to the Setup mode main page 2 Use the buttons or Alpha Wheel to select the setup 16 Old School Jam or use the alpha...

Page 267: ...tton at the bottom of the display to nd the RIFF1 soft button then press the RIFF1 soft button This brings you to the RIFF1 page for zone 2 Here we can see that a riff is turned on for zone two Zone 2...

Page 268: ...is bass part was originally played starting on a G in the song 95 Old School Jam the Root Note parameter has been set to G1 When you play a G within the trigger range this riff will play in the correc...

Page 269: ...riff when the drum riff is playing If you press pad 1 again to stop the drum riff you will be able to trigger the bass riff out of sync once again You may also want to assign a pad to stop the bass ri...

Page 270: ...de buttons to the left of the display This will bring you to the Song mode MAIN page see below 2 On the Song mode MAIN page use the cursor to select the CurSng eld if not already selected In the CurSn...

Page 271: ...ay riffs triggered from pads 1 4 while zone 5 contains a piano program playable from the keyboard The riffs on pads 2 4 are all set to sync to the down beat of the riff on pad 1 see the previous riff...

Page 272: ...into riffs in setup mode One thing that makes this example simple is that each track of the song 428 H Fact Sng uses its corresponding MIDI channel number If you were to go back to the song in Song m...

Page 273: ...ng play Press pad 1 again to stop the riff before continuing How does riff 1 play the entire song Since each track of the song is assigned to MIDI channels 1 4 in Song mode each track is still played...

Page 274: ...tons to select the SyncType eld and use the Alpha Wheel to set this eld to None see below This turns off the riff sync settings that had been saved with this setup Now pad 1 and 2 will each play a dif...

Page 275: ...ft of the display and pressing and unlighting any lit pads Next press and light pad 1 to start riff 1 then press and unlight pad 1 to release riff 1 Since riff 1 has its RelSynTyp set to StartWait and...

Page 276: ...tor for the riff s zone make sure the Notemap parameter is set to Linear some factory setups that trigger riffs from the pads have Notemap set to Off The riff wont stop playing when released In the Se...

Page 277: ...el 14 2 Picking Favorite Programs For Each Category 14 2 Easy Audition Play A Demo Song For Each Program 14 3 Save The Current Knob And Switch Settings From The Program Mode Main Page 14 3 Advanced Ti...

Page 278: ...currently selected program Before following the steps above you could set a program on each channel so that each channel will have a speci c program upon startup This could be useful if you are trigge...

Page 279: ...t you made to the previous program will be lost without warning Saving A Newly Edited Program If you are saving changes to a program that you have not previously edited the save dialog will choose the...

Page 280: ...eat the process for the HiKey parameter Search Function Find A Program Or Setup By Name You can nd programs or setups by searching for a string of characters from the Program or Setup mode main pages...

Page 281: ...ord the recording track and recording mode are determined by the current settings in Song mode likewise for the playback mode when you re playing a song When the sequencer status is STOPPED neither th...

Page 282: ...with the alphanumeric pad and pressing the Enter button Some insert effects chains may require you to turn up a parameter in order to hear the effect Most effect parameters are automatically assigned...

Page 283: ...ed parameter selected use the cursor buttons to select the right column in the row of the desired parameter The right column is the control source column where you choose a controller to assign to the...

Page 284: ...p right corner of the display For details on assigning pads to a zone see Pads on page 7 15 3 With the desired zone selected press the KEYVEL soft button at the bottom of the display This will bring y...

Page 285: ...parameter must be set to On on the ARPEGGIATOR page for that zone Next press the CTRLS soft buttons to move to the Controllers page for the same zone and choose the desired pad in the Controller eld...

Page 286: ...r Use As A Riff Record A Setup To Song Mode Riffs are full songs or individual tracks of a song created in the PC3LE sequencer that you can trigger in setup mode Every zone in a setup can have it s ow...

Page 287: ...ed Note Number 0 127 True Voice 0 127 0 127 Velocity Note ON O O Note OFF O O After Touch Keys X O Channels O O Pitch Bender O O Control Change O 0 31 32 63 LSB 64 127 O 0 31 32 63 LSB 64 127 Controll...

Page 288: ...kg PC3LE8 Height 5 12 7 cm Depth 14 5 36 83 cm Length 56 48 143 41 cm Weight 54 15 lb 24 56 kg Power PC3LE6 PC3LE7 PC3LE8 Internal AC power supply Automatic selection 90 250V AC operation 50 60 Hz Fu...

Page 289: ...e le system The Bootloader program itself is not found on the le system Instead it resides in a ROM chip that cannot be erased and therefore is permanently installed in your PC3LE Using the Bootloader...

Page 290: ...uter and place it in the USB storage port on the rear panel of the PC3LE A USB connector will only t into the port if oriented properly so don t force it into the port as this may damage your PC3LE or...

Page 291: ...want to restore the instrument to its default state This is especially helpful if you re having problems getting sound programs or setups to work properly or think there may be some kind of underlyin...

Page 292: ...al le system This will delete everything that was stored internally on the PC3LE and leave a clean empty le system ready for use After the format is complete you will need to install an OS and objects...

Page 293: ...Song Mode TRACK Page 10 30 Changing intonation key 9 7 Channel Program CH PROG Page 7 6 Setup Mode 7 68 Characters 5 3 COMMON Page Song Mode 10 19 Connecting MIDI 2 3 continuous pedals 1 4 Contrast 2...

Page 294: ...struments 13 8 LCD 3 6 Line cord 2 2 Loading les 5 6 Loading Individual Objects 11 6 Loops 12 15 M Master les 11 6 Master mode 4 3 Master mode page 9 1 Master Transpose 9 2 Memory objects 5 4 metronom...

Page 295: ...ow Song mode 10 21 Remap Song Mode TRACK Page 10 31 Rename 12 6 Renaming objects 5 3 Reset hard 9 22 Riff Troubleshooting 13 58 Riffs Setup mode 7 50 ROM objects 5 4 ROM objects saving 5 2 S S PDIF 2...

Page 296: ...ades 2 9 Soloing a zone 7 5 Song Editor 10 19 TRACK Page 10 21 Song Mode 10 1 12 1 Demo Songs 12 15 Loops 12 15 Program Changes 12 15 Song Structure 12 15 The Event List 12 16 Song mode 4 3 Songs Reco...

Reviews: