
Page 3
Page 2
Find your full manual and product information here:
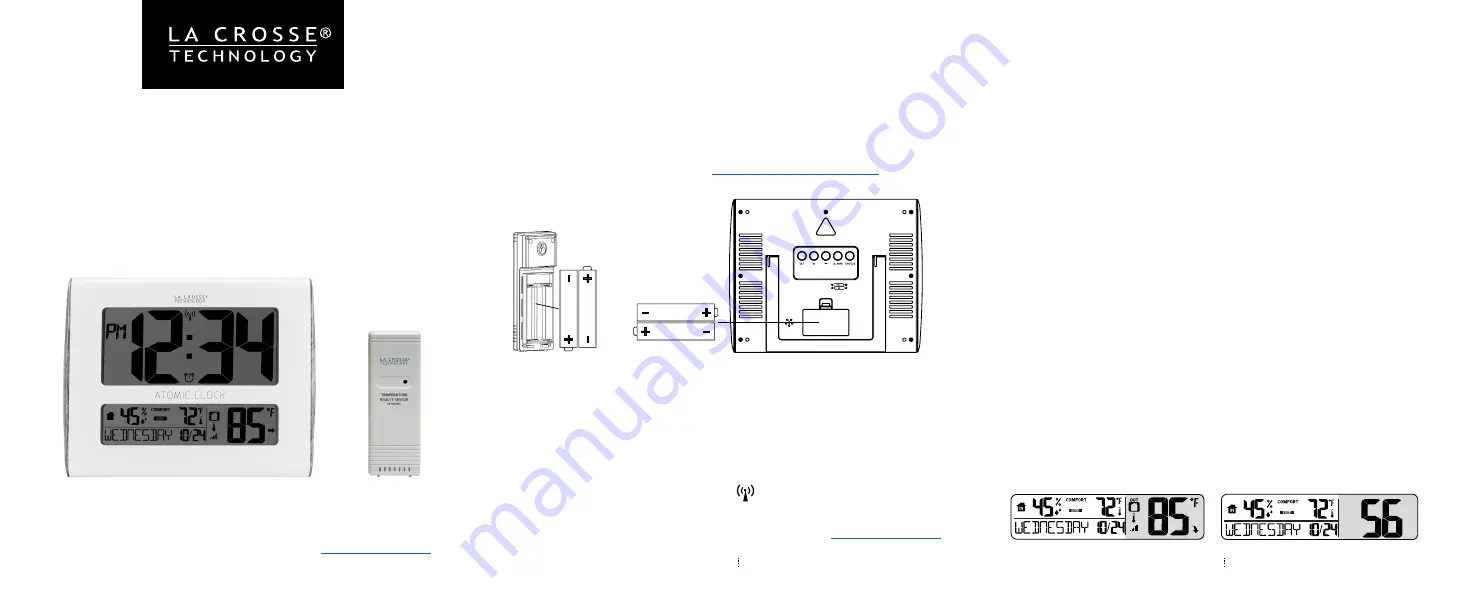
1. Insert 2-AA batteries into your Outdoor Sensor.
2. Insert 2-AA batteries into your Atomic Clock.
3. Once the Outdoor Sensor is reading to your Atomic Clock, place
it outside in a shaded location to protect from the sun’s heat.
POWER UP
AA
AA
AA
AA
Outdoor Sensor
TX191
SETTINGS
ATOMIC DIGITAL CLOCK
WITH INDOOR/OUTDOOR TEMPERATURE
& INDOOR HUMIDITY
QUICK START GUIDE
MODEL: 513-1919
DC: 050519
Atomic Clock
513-1919
1. Hold the SET button to enter the Settings Menu.
2. Use the + or -
button to adjust and SET to confirm.
3. Press the SNOOZE button anytime to exit the Settings Menu.
Settings Menu order:
• Beep ON/OFF
• Atomic ON/OFF
• DST ON/OFF (Daylight Saving Indicator)
• Time Zone
• 12/24 hour time format
• Hour
• Minutes
• Year
• Month
• Date
• Fahrenheit/Celsius
Weekday:
Weekday sets automatically
when Year, Month and Date are set.
WWVB ATOMIC TIME SIGNAL
• The clock will automatically search for the Atomic Time Signal
at UTC 7:00, 8:00, 9:00, 10:00, and 11:00.
• Press the SET button to manually search for the WWVB Atomic
Time Signal.
• The Atomic Time Reception Icon will flash when searching for
the signal and be solid after the Atomic Time Signal is received.
• For information about WWVB Atomic Time visit:
AST
EST
CST
MST
PST
AKT
HAT
Atlantic
Eastern
Central
Mountain
Pacific
Alaskan
Hawaiian
Time Zone
CUSTOM DISPLAY: TEMPERATURE OR SECONDS
• Choose to display Outdoor Temperature or Seconds in the lower
right corner of your Atomic Clock.
• Press the + (PLUS) button to select Outdoor Temperature or
Seconds Display.


