background image

Model: WS6867

Summary of Contents for WS6867

Page 1: ...Model WS6867 ...

Page 2: ... 6 Temperature Humidity HI LO 8 Weather Alerts 9 Set Weather Alerts 10 Weather Forecast Icons 11 Seasonal Trees 11 Sensor Search 12 Mounting Instructions 13 Replace Wind Cups 14 Replace Directional Vane 15 Factory Restart 15 WIFI Icon 16 Specifications 17 Care and Maintenance 17 Liability Disclaims 18 Page 1 WS6867 ...

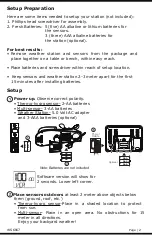
Page 3: ...station 2 3 meter apart for the first 15 minutes after installing batteries Setup Power up Observe correct polarity Thermo hygro sensor 2 AA batteries Multi sensor 3 AA batteries Weather Station 5 0 Volt AC adapter and 3 AAA batteries optional Software version will show for 2 seconds Lower left corner Optional Place sensors outdoors at least 2 meter above objects below them ground roof etc Thermo ...

Page 4: ... Page 3 WS6867 ...

Page 5: ...WS6867 ...

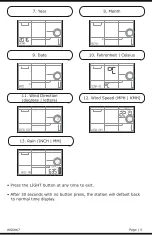
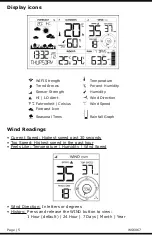
Page 6: ...idity Wind Speed Wind Direction In letters or degrees History Press and release the WIND button to view 1 Hour default 24 Hour 7 Days Month Year Page 5 WS6867 WIFI Strength Temperature Trend Arrows Percent Humidity Sensor Strength Humidity HI LO Alert Wind Direction Fahrenheit Celsius Wind Speed Forecast Icon Seasonal Trees Rainfall Graph ...

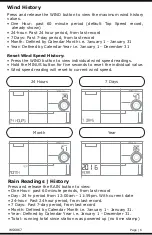
Page 7: ...idual wind speed readings Hold the MINUS button for five seconds to reset the individual value Wind speed reading will reset to current wind speed Rain Readings History Press and release the RAIN button to view One Hour past 60 minute periods from last record Day 24 hr period from 12 00am 11 59pm With current date 24 hour Past 24 hour period from last record 7 Days Past 7 day period from last reco...

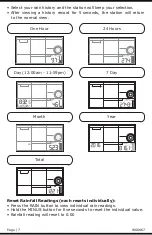
Page 8: ...ation will return to the normal view Month Year Reset Rainfall Readings each resets individually Press the RAIN button to view individual rain readings Hold the MINUS button for five seconds to reset the individual value Rainfall reading will reset to 0 00 Page 7 WS6867 One Hour 24 Hours Day 12 00am 11 59pm 7 Day Total ...

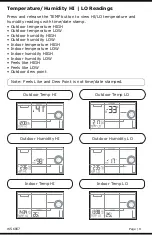
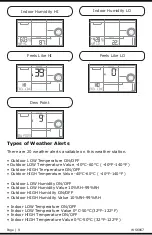
Page 9: ...oor temperature LOW Outdoor humidity HIGH Outdoor humidity LOW Indoor temperature HIGH Indoor temperature LOW Indoor humidity HIGH Indoor humidity LOW Feels like HIGH Feels like LOW Outdoor dew point Note Feels Like and Dew Point is not time date stamped WS6867 Page 8 Outdoor Temp HI Outdoor Temp LO Outdoor Humidity HI Outdoor Humidity LO Indoor Temp HI Indoor Temp LO ...

Page 10: ...rature Value 40 C 60 C 40 F 140 F Outdoor LOW Humidity ON OFF Outdoor LOW Humidity Value 10 RH 99 RH Outdoor HIGH Humidity ON OFF Outdoor HIGH Humidity Value 10 RH 99 RH Indoor LOW Temperature ON OFF Indoor LOW Temperature Value 0 C 50 C 32 F 122 F Indoor HIGH Temperature ON OFF Indoor HIGH Temperature Value 0 C 50 C 32 F 122 F Page 9 WS6867 Indoor Humidity HI Indoor Humidity LO Feels Like HI Feel...

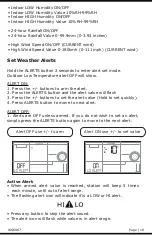
Page 11: ...arm the alert 2 Press the ALERTS button and the alert value will flash 3 Press the buttons to set the alert value Hold to set quickly 4 Press ALERTS button to move to next alert ALERT OFF 1 Alerts are OFF unless armed If you do not wish to set an alert simply press the ALERTS button again to move to the next alert Active Alert When armed alert value is reached station will beep 5 times each minute...

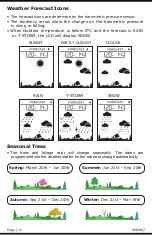
Page 12: ...ture is below 0 C and the forecast is RAIN or T STORM the LCD will display SNOW SUNNY RAIN PARTLY CLOUDY T STORM CLOUDS SNOW Seasonal Trees The trees and foliage color will change seasonally The dates are programmed into the weather station for the scene to change automatically Page 11 WS6867 Spring March 20th Jun 20th Summer Jun 21st Sep 20th Autumn Sep 21st Dec 20th Winter Dec 21st Mar 19th ...

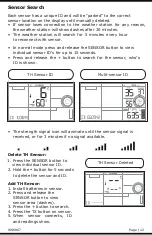
Page 13: ...for up to 15 seconds Press and release the button to search for the sensor who s ID is shown The strength signal icon will animate until the sensor signal is received or for 3 minutes if no signal available Delete TH Sensor 1 Press the SENSOR button to view individual sensor ID 2 Hold the button for 5 seconds to delete the sensor and ID Add TH Sensor 1 Install batteries in sensor 2 Press and relea...

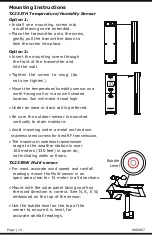
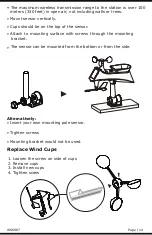
Page 14: ...k rail is preferred Be sure the outdoor sensor is mounted vertically to drain moisture Avoid mounting under a metal roof and use stainless steel screws for best RF transmission The maximum wireless transmission range to the weather station is over 100 meters 330 feet in open air not including walls or floors TX233RW Multi sensor For most accurate wind speed and rainfall readings mount the Multi se...

Page 15: ... the top of the sensor Attach to mounting surface with screws through the mounting bracket The sensor can be mounted from the bottom or from the side Alternatively Insert your own mounting pole sensor Tighten screws Mounting bracket would not be used Replace Wind Cups 1 Loosen the screw on side of cups 2 Remove cups 3 Install new cups 4 Tighten screw WS6867 Page 14 ...

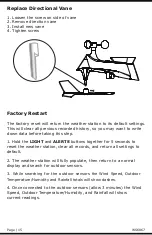
Page 16: ...ld the LIGHT and ALERTS buttons together for 5 seconds to reset the weather station clear all records and return all settings to default 2 The weather station will fully populate then return to a normal display and search for outdoor sensors 3 While searching for the outdoor sensors the Wind Speed Outdoor Temperature Humidity and Rainfall totals will show dashes 4 Once connected to the outdoor sen...

Page 17: ...uter Note Hold the PLUS and MINUS buttons together for 3 seconds to reconnect if WIFI signal is lost STEP 2 Register your weather station Download the Weather Connect app and register your weather station Weather Connect Note The Weather Connect App is only for connecting your weather station to Weather Underground STEP 3 Get Connected Download the Weather Underground app and connect your new weat...

Page 18: ...0 C 40 F to 140 F Humidity Range 10 to 99 RH Update interval About every 58 seconds Transmission Range 100 m 330 ft RF 868MHz open air Wind Speed Range 0 180 kMh 0 111 mph Multi sensor Wind Direction 0 359 degrees Rainfall 0 9999 mm 0 393 7 inches Update interval About every 30 seconds Transmission Range 100 m 330 ft RF 868MHz open air Power Weather Station 5 0 Volt 500mA adapter included Primary ...

Page 19: ...enefit of the user This product must however not be thrown in general rubbish collection points The manufacturer and supplier cannot accept any responsibility for any incorrect readings and any consequences that occur should an inaccurate reading take place This product is designed for use in the home only as indication of the temperature This product is not to be used for medical purposes or for ...

Reviews: