background image

Lahoux

 Horus

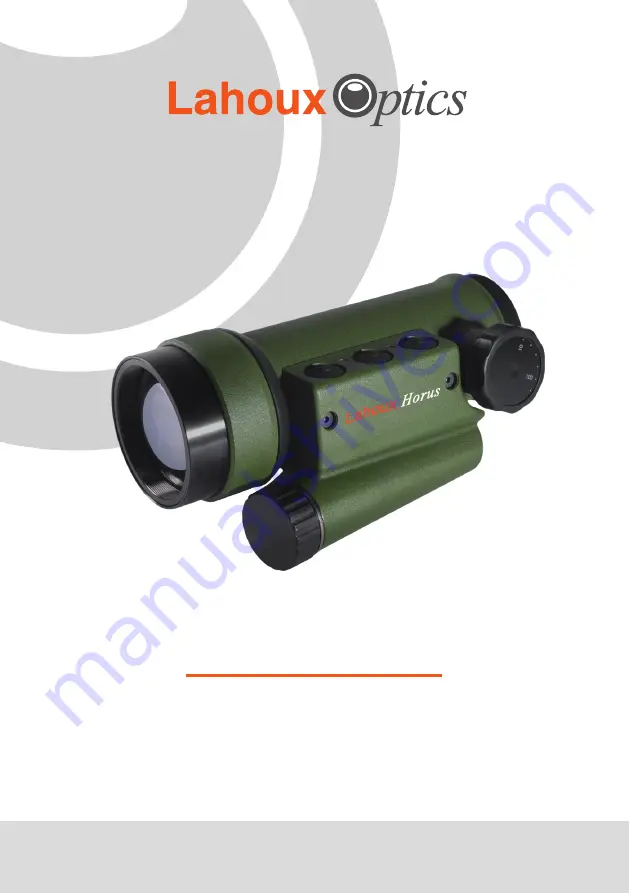
Multifunctional Thermal Imaging Camera

User manual

Summary of Contents for Horus

Page 1: ...Lahoux Horus Multifunctional Thermal Imaging Camera User manual...

Page 2: ......

Page 3: ...Mounting the Lahoux HORUS with an AD 545 X adapter 10 3 3 Adjusting the AD 545 X adapter 11 4 Menu 12 4 1 Lahoux HORUS button operation within the menu 12 4 2 Menu structure tree 12 4 3 Basic menu str...

Page 4: ...es the user to read and strictly abide by the requirements of the following operating specifications before using the Lahoux HORUS The use and maintenance of the Lahoux HORUS should be subject to the...

Page 5: ...bly expiration of the warranty When the Lahoux HORUS is not in use for a longer period or during transportation please remove the battery Place the Lahoux HORUS in the supplied pouch or original box P...

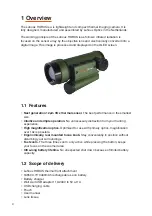
Page 6: ...Intuitive and simple operation No unnecessary distraction from your hunting experience High magnification optics Optimized for use with primary optics magnification over 10x is possible Ergonomically...

Page 7: ...ew the battery cap on the battery compartment thread until firm The Lahoux HORUS uses only one type of battery A protected 18650 3 7V Li ion battery as supplied with the Lahoux HORUS You can use anoth...

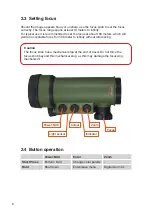
Page 8: ...which will yield an acceptable focus from 30 meter to infinity without refocussing Caution The focus knob has a mechanical stop at the end of travel Do not force the focus knob beyond this mechanical...

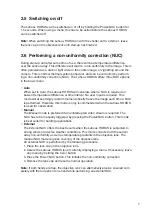
Page 9: ...s mode will at seemingly random moments briefly freeze the image each time a NUC is performed Therefore this mode is only recommended when the Lahoux HORUS is used for observation Manual The Manual mo...

Page 10: ...ources Black hot Inversed black white palette for a more natural appearance of scene This gives an enhanced image during very cold or freezing weather circumstances and a clearly visible outline of an...

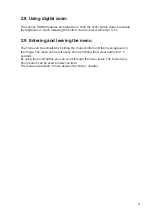
Page 11: ...2 9 Entering and leaving the menu The menu can be activated by holding the Colour button until the menu appears in the image The menu can be left at any time by holding the Colour button for 1 5 secon...

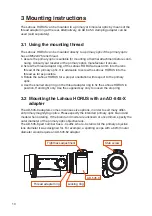
Page 12: ...s possible 3 Rotate the Lahoux HORUS for a proper orientation with respect to the primary optic 4 Use the knurled stop ring on the thread adapter ring to fix the Lahoux HORUS in position Hand tight on...

Page 13: ...thread adapter ring hand tight only to fix the AD 545 X in position Note Use the supplied key only to loosen the stop ring as thread is easily fixed and difficult to unscrew 5 Place the Lahoux HORUS o...

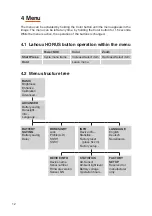
Page 14: ...Increase Select item Decrease Select item Hold Leave menu 4 2 Menu structure tree BASIC Brightness Enhance Calibration Advanced ADVANCED Battery saving Boresight Info Language BATTERY SAVING Battery s...

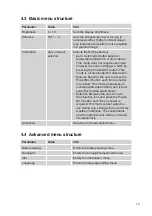
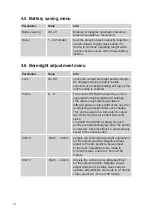
Page 15: ...tion Manual Requires the user to press the Power NUC button each time a shutter is required This mode guarantees an uninterrupted video stream and is best suited for hunting applications External Requ...

Page 16: ...nt settings This allows easy switching between different primary optics without the need for re adjusting boresight after each change This can be used on a binocular to adjust two Horus devices for pe...

Page 17: ...ero due to testing procedures performed during assembly and quality assurance Factory reset Press 5 times the Zoom button not the Colour button Resets all user set values to factory default It is stro...

Page 18: ...g the Lahoux Horus If desired the Lahoux HORUS housing can be wiped clean with a damp cloth and optionally a mild detergent Do not rub the cloth forcefully against the housing as this may damage the c...

Page 19: ...ress the Color button to cycle through the available color palettes Contrast is enabled or set too high Disable the Contrast function in the basic menu or decrease its value The image looks grainy or...

Page 20: ...The Lahoux HORUS has not been mounted correctly Correct mounting The primary optic does not support the Lahoux HORUS weight This primary optic is not suitable for mounting a front attachment The imag...

Page 21: ...al size is calculated by taking the square root of the multiplication of the object width and height 7 2 Technical specifications Optical specifications Sensor 320 x 256 12 m Sensitivity NETD 0 06 C 0...

Page 22: ...20 7 3 Mechanical dimensions...

Page 23: ...question or service Alternatively you can contact the service centre of Lahoux Optics for techni cal and service related questions services lahouxoptics nl To return products please first request an...

Page 24: ...Lahoux Horus EN V2 01 21 12 2020 Lahoux Optics B V Stephensonstraat 47 2014 KC Haarlem The Netherlands www lahouxoptics com info lahouxoptics nl...

Reviews: