
Cloud Print Edition Quick Start Guide
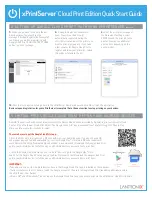
1.
If you intend to connect a USB printer to the xPrintServer™, please be sure to test the printer from the Windows or Mac computer that it is
directly attached to before proceeding.
2.
xPrintServer Cloud Print Edition is made to work with Google’s Cloud Print service. In order to use Google Cloud Print, you must first have a
Google account. If you don’t already have one, go to:
https://accounts.google.com/SignUp
.
3.
xPrintServer will auto-discover all network (wired and wireless) printers located on the same subnet. Printers on a different subnet must be
manually configured. Refer to the User’s Guide for instructions.
4.
The xPrintServer requires Internet access during set-up and for printing functionality (via a router with Wi-Fi®).
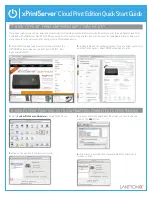
Auto Set-Up Process:
The xPrintServer will automatically set-up your printers (USB & network) as soon it is
connected, as shown above. The glowing “X” will blink quickly for about 30 seconds, then it will pulse slowly to
show it’s ready for printing. *
Connecting a USB printer to the xPrintServer is not required for the xPrintServer to
work or to set-up network printers.
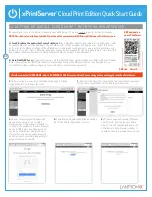
1 BEFORE YOU BEGIN
2 HARDWARE INSTALLATION
3 QUICK CONNECT
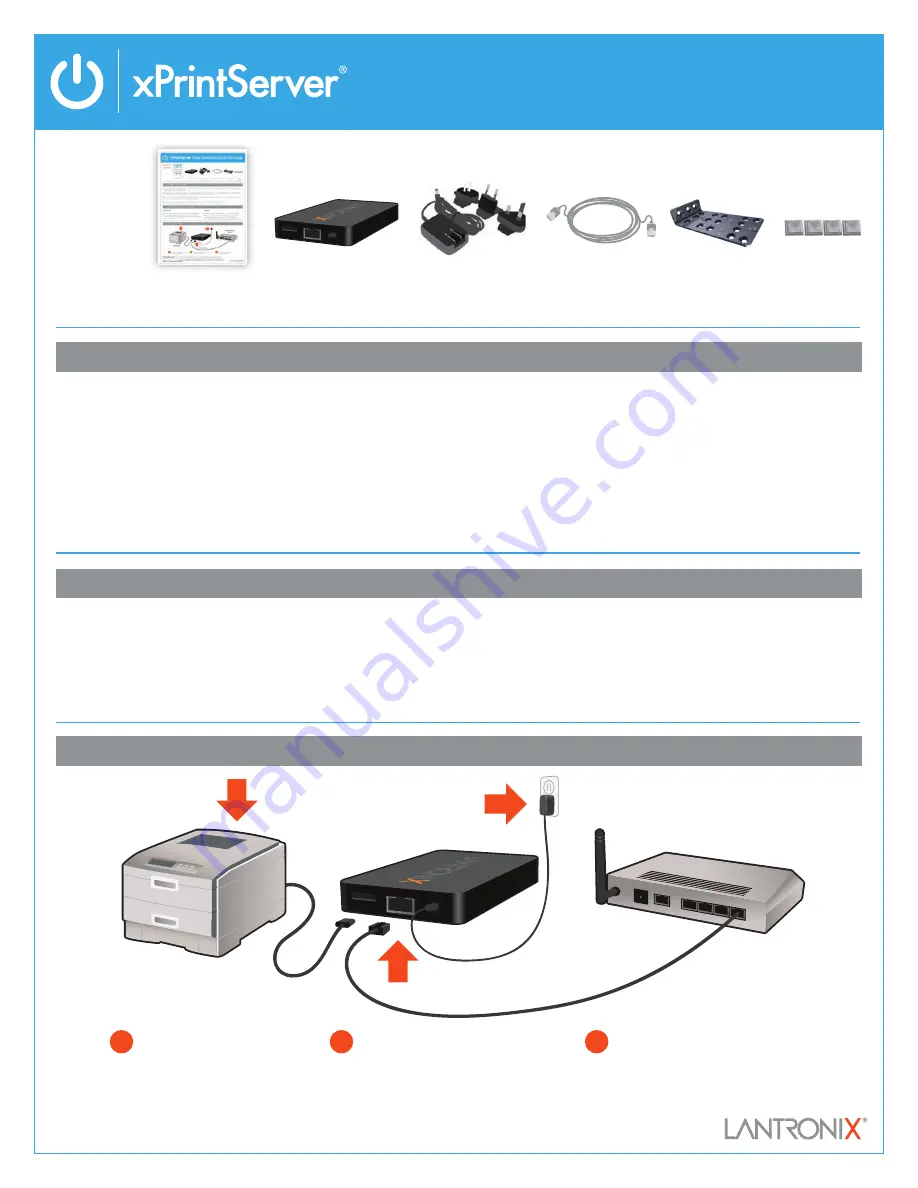
WHAT’S
INSIDE
Power supply with
regional adapters
3’ Ethernet Cable
Mounting Bracket
& 2 Screws
xPrintServer
Quick Start Guide
Rubber
Feet (4)
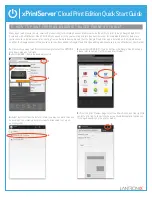
RACK MOUNT
1.
A versatile mounting bracket and screws are supplied to assist in
easily installing and mounting xPrintServer into a server rack in
various orientations (e.g., horizontal or vertical). Refer to the User’s
Guide for mounting instructions.
DESKTOP
1.
Place the xPrintServer upside down on a smooth, flat surface.
2.
Peel off the rubber feet from the adhesive strip and place them
adhesive-side down onto each corner of the xPrintServer.
3.
Turn the xPrintServer over so that it is resting on the rubber feet.
1
USB Printer
Network Cable
Wireless Router/
Switch
2
3
1
Connect USB printer cable to USB port
of xPrintServer (if any).
2
Connect network cable from wireless
router/switch to xPrintServer.
3
Power on the xPrintServer with
supplied power adapter.
*


