background image

Hardware Maintenance Manual

ThinkPad Tablet

Summary of Contents for ThinkPad 1838

Page 1: ...Hardware Maintenance Manual ThinkPad Tablet ...

Page 2: ...tion under Notices on page 59 First Edition August 2011 Copyright Lenovo 2011 LIMITED AND RESTRICTED RIGHTS NOTICE If data or software is delivered pursuant a General Services Administration GSA contract use reproduction or disclosure is subject to restrictions set forth in Contract No GS 35F 05925 ...

Page 3: ... 28 Disabling the screen lock function 29 Power management 29 Screen blank mode 29 Wireless network disconnect policy 30 Chapter 5 Hot key combinations on the ThinkPad Tablet Keyboard Folio Case 31 Chapter 6 FRU replacement notices 33 Screw notices 33 Retaining serial numbers MTM UUID and Asset ID 34 Chapter 7 Removing and replacing a FRU 35 Before servicing the ThinkPad Tablet 35 1010 ThinkPad Ta...

Page 4: ...ii Hardware Maintenance Manual ...

Page 5: ... is intended only for trained service technicians who are familiar with ThinkPad products Use this manual along with the advanced diagnostic tests to troubleshoot problems effectively Before servicing a ThinkPad product be sure to read all the information under Chapter 1 Safety information on page 1 and Chapter 2 Important service information on page 19 Copyright Lenovo 2011 iii ...

Page 6: ...iv Hardware Maintenance Manual ...

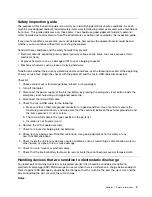
Page 7: ... equipment unsafe Before you start the machine make sure that other service technicians and the customer s personnel are not in a hazardous position Place removed covers and other parts in a safe place away from all personnel while you are servicing the machine Keep your toolcase away from walk areas so that other people will not trip over it Do not wear loose clothing that can be trapped in the m...

Page 8: ...an occur only when there is a complete circuit By observing the above rule you may prevent a current from passing through your body When using testers set the controls correctly and use the approved probe leads and accessories for that tester Stand on suitable rubber mats obtained locally if necessary to insulate you from grounds such as metal floor strips and machine frames Observe the special sa...

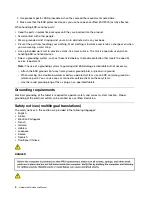
Page 9: ...ery by pressing the emergency reset button inside the emergency reset hole using a straightened paper clip 4 Disconnect the micro USB cable 5 Check the micro USB cable for the following a Make sure that a third wire ground connector is in good condition Use a meter to measure the third wire ground continuity and make sure that the continuity between the external ground pin and the frame ground is ...

Page 10: ...rovide protection that meets the specific service requirement Note The use of a grounding system to guard against ESD damage is desirable but not necessary Attach the ESD ground clip to any frame ground ground braid or green wire ground When working on a double insulated or battery operated system use an ESD common ground or reference point You can use coax or connector outside shells on these sys...

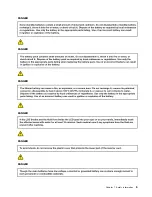
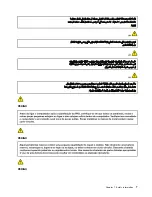
Page 11: ...DANGER DANGER DANGER DANGER DANGER DANGER Chapter 1 Safety information 5 ...

Page 12: ...DANGER 6 Hardware Maintenance Manual ...

Page 13: ...PERIGO PERIGO PERIGO Chapter 1 Safety information 7 ...

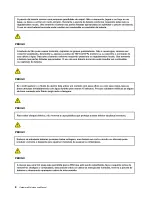
Page 14: ...PERIGO PERIGO PERIGO PERIGO PERIGO 8 Hardware Maintenance Manual ...

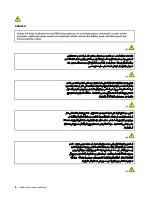
Page 15: ...DANGER DANGER DANGER DANGER DANGER Chapter 1 Safety information 9 ...

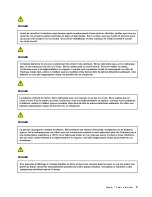
Page 16: ...DANGER DANGER DANGER VORSICHT VORSICHT 10 Hardware Maintenance Manual ...

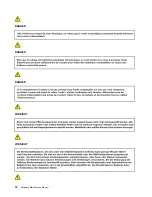
Page 17: ...VORSICHT VORSICHT VORSICHT VORSICHT VORSICHT VORSICHT Chapter 1 Safety information 11 ...

Page 18: ...12 Hardware Maintenance Manual ...

Page 19: ...Chapter 1 Safety information 13 ...

Page 20: ...14 Hardware Maintenance Manual ...

Page 21: ...Chapter 1 Safety information 15 ...

Page 22: ...16 Hardware Maintenance Manual ...

Page 23: ...Chapter 1 Safety information 17 ...

Page 24: ...18 Hardware Maintenance Manual ...

Page 25: ... FRUs If you are instructed to replace a FRU but the replacement does not correct the problem reinstall the original FRU before you continue Some tablets have both a processor board and a system board If you are instructed to replace either the processor board or the system board and replacing one of them does not correct the problem reinstall that board and then replace the other one If an adapte...

Page 26: ...custom models and are not found in the HMM General Announce Variant GAV This is a standard model fixed configuration GAVs are announced and offered to all customers The MTM portion of the machine label is a 4 digit MT and 3 digit model where model a fixed part number not CTO Example 1829 F1U Also PEW eSupport and the HMM will list these products under the same fixed model number FRU identification...

Page 27: ...it The key commodities will be displayed For the remaining FRUs the complete list of FRUs at the MT model level eSupport can be used to view the complete list of FRUs for a machine type and model To view the complete list of FRUs do the following 1 Click Product Parts Detail and then follow the instructions on the screen to reach the Product and Parts Details page 2 Click the Parts Detail tab to v...

Page 28: ...22 Hardware Maintenance Manual ...

Page 29: ...only when a problem recurs If you suspect that a FRU is defective clear the error log and run the test again If the error does not recur do not replace the FRU Be careful not to replace a non defective FRU What to do first When you do return a FRU you must include the following information in the parts exchange form or parts return form that you attach to it 1 Name and phone number of service tech...

Page 30: ... Then install the internal battery 7 Check whether the internal battery supplies power when you turn on the tablet If you suspect a power problem see the appropriate one of the following power supply checkouts Checking the internal battery on page 24 Checking the internal battery condition on page 24 Checking the ThinkPad Tablet AC Charger on page 25 Checking the internal battery status on page 25...

Page 31: ... 4 If the voltage is acceptable replace the system board Checking the internal battery status To check the battery status of the tablet do either of the following Approximate information about the battery status Get the approximate status of the battery at any time by checking the battery status icon on the system bar in the lower right corner of the screen The shorter the blue bar is the less the...

Page 32: ...26 Hardware Maintenance Manual ...

Page 33: ... data reset 4 Touch the Reset tablet icon and the tablet will be reset to the factory condition Locking the screen To protect your tablet data against unauthorized access lock the screen and set an unlock mode for unlocking the screen The screen unlock mode can be a personal or corporate password a PIN or a pattern After a screen unlock mode is set and the screen is locked the next time you turn o...

Page 34: ...ord or the PIN or draw the unlock pattern to unlock the screen Notes For the Corporate Logon mode after 10 incorrect attempts to unlock your tablet your tablet will reset itself to the factory default state This process erases all user created data from the tablet including Google or other e mail account settings system and application data and settings and downloaded applications For other unlock...

Page 35: ... to lock the screen refer to Locking the screen on page 27 Configure the Timeout policy to turn off the screen automatically when the tablet is not in use To configure the Timeout policy do the following 1 Open the Android Settings screen To open the Android Settings screen do either of the following From the main Home screen touch the Android Settings icon on Lenovo Launch Zone The Android Settin...

Page 36: ...Lenovo Launch Zone The Android Settings screen is displayed Touch the application icon from the action bar and then touch Settings The Android Settings screen is displayed 2 Touch Wireless network Wi Fi settings 3 Touch the Menu icon and then touch Advanced 4 Touch Wireless Enhanced Settings The following options are displayed Touch to enable the function or to further configure the setting Turn o...

Page 37: ...ablet Keyboard Folio Case Hot key Description Go back to the previous screen Speaker mute Speaker volume down Speaker volume up Microphone mute Open the main Home screen View notifications from Lenovo Open the Android Settings screen Lock the screen Zoom in Zoom out Go to the previous track or scene Play or pause Go to the next track or scene Open the menu for the current application Launch Google...

Page 38: ...32 Hardware Maintenance Manual ...

Page 39: ...and 2 you may be charged for the replacement CRU if Lenovo does not receive the defective part within thirty 30 days of your receipt of the replacement CRU See your Lenovo Limited Warranty documentation for full details This chapter presents notices related to removing and replacing parts Read this chapter carefully before replacing any FRU Screw notices Loose screws can cause a reliability proble...

Page 40: ...e that all of the screws are tightened firmly Ensure torque screwdrivers are calibrated correctly following country specifications Retaining serial numbers MTM UUID and Asset ID Instructions for retaining serial numbers MTM UUID or asset ID can be found at the following Web site http support lenovo com Note To access the instructions use and download the required Android Package APK file you must ...

Page 41: ...FRUs that have to be removed before replacing the failing FRU Any such FRUs are listed at the top of each FRU replacement page Remove them in the order in which they are listed 4 Follow the correct sequence in the steps for removing a FRU as given in the drawings by the numbers in square callouts 5 When turning a screw to replace a FRU turn it in the direction as given by the arrow in the drawing ...

Page 42: ...emergency reset hole using a straightened paper clip After you finish the servicing make sure that you insert the card back into the slot firmly 1010 ThinkPad Tablet Pen Removal steps of ThinkPad Tablet Pen 1020 Front facing camera rear facing camera assembly and internal battery For access remove this FRU 36 Hardware Maintenance Manual ...

Page 43: ...ing camera rear facing camera assembly and internal battery disconnect the power supply of the internal battery by pressing the emergency reset button inside the emergency reset hole using a straightened paper clip Detach the Back and Home buttons on the LCD module assembly with your thumbs as shown in the following illustration 3 3 Step Screw quantity Color Torque 3 M2 8 mm flat head nylon coated...

Page 44: ...etach the hooks between the LCD module assembly and the base cover 5b 5a 4 9 8 6 7 When installing Make sure that the connector is attached firmly to the system board Step Screw quantity Color Torque 9 M2 4 mm flat head nylon coated 1 Silver 0 181 Nm 1 85 kgfcm 38 Hardware Maintenance Manual ...

Page 45: ... firmly to the system board Step Screw quantity Color Torque 12 M2 4 mm flat head nylon coated 1 Silver 0 181 Nm 1 85 kgfcm 14 14 14 Step Screw quantity Color Torque 14 M2 4 mm flat head nylon coated 3 Silver 0 181 Nm 1 85 kgfcm Chapter 7 Removing and replacing a FRU 39 ...

Page 46: ...tor 16 is attached firmly to the system board 1030 Speaker assembly For access remove these FRUs in order 1010 ThinkPad Tablet Pen on page 36 1020 Front facing camera rear facing camera assembly and internal battery on page 36 40 Hardware Maintenance Manual ...

Page 47: ...reless WAN For access remove these FRUs in order 1010 ThinkPad Tablet Pen on page 36 1020 Front facing camera rear facing camera assembly and internal battery on page 36 Removal steps of PCI Express Mini Card for wireless WAN In step 1 unplug the jacks by using the removal tool antenna RF connector P N 08K7159 or pick the connectors with your fingers and gently unplug them in the direction of the ...

Page 48: ...talling When you install the card plug the red cable into the jack labeled MAIN on the card and the blue cable into the jack labeled AUX 1050 PCI Express Mini Card for wireless LAN and Bluetooth combo card For access remove these FRUs in order 1010 ThinkPad Tablet Pen on page 36 42 Hardware Maintenance Manual ...

Page 49: ...ep 1 unplug the jacks by using the removal tool antenna RF connector P N 08K7159 or pick the connectors with your fingers and gently unplug them in the direction of the arrows Note Some models might have a third white antenna cable 1 1 2 Step Screw quantity Color Torque 2 M2 3 mm flat head nylon coated 1 Black 0 181 Nm 1 85 kgfcm Chapter 7 Removing and replacing a FRU 43 ...

Page 50: ...he black cable AUX into the jack marked TR2 on the card 1060 LCD module assembly For access remove these FRUs in order 1010 ThinkPad Tablet Pen on page 36 1020 Front facing camera rear facing camera assembly and internal battery on page 36 Removal steps of LCD module assembly 1 6 7 4 5 3 2 When installing Make sure that the connectors are attached firmly Note When you replace the LCD module assemb...

Page 51: ...internal battery on page 36 1050 PCI Express Mini Card for wireless LAN and Bluetooth combo card on page 42 Removal steps of microphone assembly Detach the wireless WAN antenna assembly in the direction as shown by the arrow 2 1 2 When installing Make sure that the connector 1 is attached firmly to the system board Chapter 7 Removing and replacing a FRU 45 ...

Page 52: ...aker assembly on page 40 1040 PCI Express Mini Card for wireless WAN on page 41 1050 PCI Express Mini Card for wireless LAN and Bluetooth combo card on page 42 Removal steps of system board and base cover In step 1 unplug the jack by using the removal tool antenna RF connector P N 08K7159 or pick the connector with your fingers and gently unplug it in the direction of the arrow 1 46 Hardware Maint...

Page 53: ...the new base cover 1 Israel Homo Wireless LAN Bluetooth label 9 GEO label for others 2 Non Encryption label 12 Brazil Anatel 3G label 3 Israel Homo 3G labellabel 13 Brazil Anatel Wireless LAN Bluetooth label 4 Indonesia Kit label 14 SIRIM 3G label 5 China Wireless WAN label 15 SIRIM Wireless LAN Bluetooth label 6 China Wireless WAN label for models with Huawei EM660 card 16 Indonesia Postel Wirele...

Page 54: ...5 15 16 17 14 12 11 13 4 2 10 6 8 9 7 1 3 Removal steps of LCD cable When installing Make sure that the LCD cable is attached firmly to the system board 48 Hardware Maintenance Manual ...

Page 55: ... Tablet Pen slot 3 Rear facing camera 14 ThinkPad Tablet Pen string holes 4 Headphone or microphone connector 15 Volume control button 5 Mini HDMI connector 16 Ambient light sensor 6 Micro USB connector 17 Front facing camera 7 ThinkPad Tablet Dock connector 18 Multi touch display 8 SIM card slot 19 Home button 9 Emergency reset hole 20 Back button 10 3 in 1 media card reader 21 Browser button 11 ...

Page 56: ...50 Hardware Maintenance Manual ...

Page 57: ... service CRUs is your responsibility you may request that Lenovo installs an Optional service CRU according to the warranty service for your product Where you are installing the CRU Lenovo will ship the CRU to you CRU information and replacement instructions are shipped with your product and are available from Lenovo at any time upon request You may find a list of CRUs in the publications that shi...

Page 58: ...Overall 1 14 13 12 11 10 9 8 7 2 3 4 5 6 52 Hardware Maintenance Manual ...

Page 59: ...CTO 60Y3267 N 2 Integrated Mobile Broadband F5521gw Indigo only SKU 1838 CTO 2Bx 2Cx 2Dx 2Ex 2Fx 2Gx 2Mx 2Nx 2Px 3Hx 3Jx 3Kx 3Lx 3Mx 3Nx 3Px 3Qx 3Rx 3Sx 3Tx 3Ux 3Vx 3Wx 3Xx 3Yx 3Zx 42x 43x 44x 45x 46x 47x 48x 49x 4Ax 4Bx 4Cx 4Dx 4Ex 1839 CTO 2Hx 2Kx 2Mx 2Nx 2Px 2Qx 2Rx 36x 37x 38x 39x 3Ax 3Bx 3Cx 3Dx 3Ex 3Fx 3Gx 60Y3289 N 2 Integrated China Telecom Mobile Broadband Huawei EM660 1838 CTO 1839 CTO 6...

Page 60: ...embly 32 GB eMMC 1 GB memory with WWAN antenna Non DRM worldwide 1838 CTO 1839 CTO 04W3410 N 4 System board assembly 64 GB eMMC 1 GB memory with WWAN antenna Non DRM China 1838 CTO 1839 CTO 04W3408 N 4 System board assembly 64 GB eMMC 1 GB memory with WWAN antenna DRM U K 1838 CTO 1839 CTO 04W3402 N 4 System board assembly 64 GB eMMC 1 GB memory with WWAN antenna DRM U S 1838 CTO 27x 28x 2Dx 2Fx 2...

Page 61: ...l Li ion 24 Wh 42T4963 42T4965 N 12 Rear facing camera 04W2156 N 13 Front facing camera 04W2155 N 14 ThinkPad Tablet Pen OP 1838 CTO 23x 24x 25x 26x 27x 28x 29x 2Ax 2Bx 2Cx 2Dx 2Ex 2Fx 2Gx 2Hx 2Jx 2Kx 2Sx 2Tx 2Ux 2Vx 2Wx 2Xx 2Yx 2Zx 32x 33x 34x 35x 36x 37x 38x 39x 3Ax 3Bx 3Cx 3Dx 3Ex 3Fx 3Gx 3Hx 3Jx 3Kx 3Lx 3Mx 3Nx 3Px 3Qx 3Rx 3Sx 3Tx 3Ux 3Vx 3Wx 3Xx 3Yx 3Zx 42x 43x 44x 45x 46x 47x 48x 49x 4Ax 4Bx...

Page 62: ...04W2168 Russian 04W2169 Swedish Finnish 04W2170 Spanish 04W2162 Swiss 04W2171 Thai 04W2177 Traditional Chinese 04W2176 Turkish 04W2172 U K English 04W2173 U S English 04W2157 U S English International with a Euro symbol 04W2174 Miscellaneous parts Table 4 Parts list Miscellaneous parts FRU P N CRU ID Screw kit M2 2 mm flat head 1 M2 2 5 mm flat head 21 M2 3 mm flat head 8 M2 4 mm flat head 4 M2 6 ...

Page 63: ... in prongs for Argentine 45N0170 Snap in prongs for Brazil 45N0172 Snap in prongs for Korea 45N0174 Snap in prongs for India 45N0176 Snap in prongs for South Africa 45N0178 ThinkPad Tablet Dock ac power adapter OP For the following models an ac power adapter can be ordered separately from Lenovo for a specific country or region 1838 CTO 28x 29x 2Ax 2Hx 2Jx 2Kx 2Wx 2Yx 2Zx 32x 35x 37x 38x 3Ax 3Bx 3...

Page 64: ...x 3Cx 3Fx 3Gx 3Lx 3Nx 3Px 3Qx 3Ux 3Wx 3Xx 3Yx 44x 46x 47x 48x 49x 1839 CTO 28x 2Cx 2Dx 2Gx 2Hx 2Jx 2Kx 2Ux 2Xx 32x 35x 38x 3Bx 3Ex 3Gx Table 10 Parts list 2 pin ThinkPad Tablet Dock power cord cable OP Country or region FRU no CRU ID Argentina models CTO xxY 42T5020 42T5105 Brazil models CTO xxP 42T5180 42T5183 Canada U S models CTO xxF xxL xxS xxU 42T5008 42T5093 Japan models CTO xxE xxJ 42T5014 ...

Page 65: ...s services or features discussed in this document in all countries Consult your local Lenovo representative for information on the products and services currently available in your area Any reference to a Lenovo product program or service is not intended to state or imply that only that Lenovo product program or service may be used Any functionally equivalent product program or service that does n...

Page 66: ...presented as an illustration The result obtained in other operating environments may vary Lenovo may use or distribute any of the information you supply in any way it believes appropriate without incurring any obligation to you Any references in this publication to non Lenovo Web sites are provided for convenience only and do not in any manner serve as an endorsement of those Web sites The materia...

Page 67: ......

Page 68: ...Part Number 0A96158 1P P N 0A96158 0A96158 ...

Reviews: