background image

R

P/NO : 3828VA0360J(373-026H) 

RL-JA20

OWNER’S MANUAL

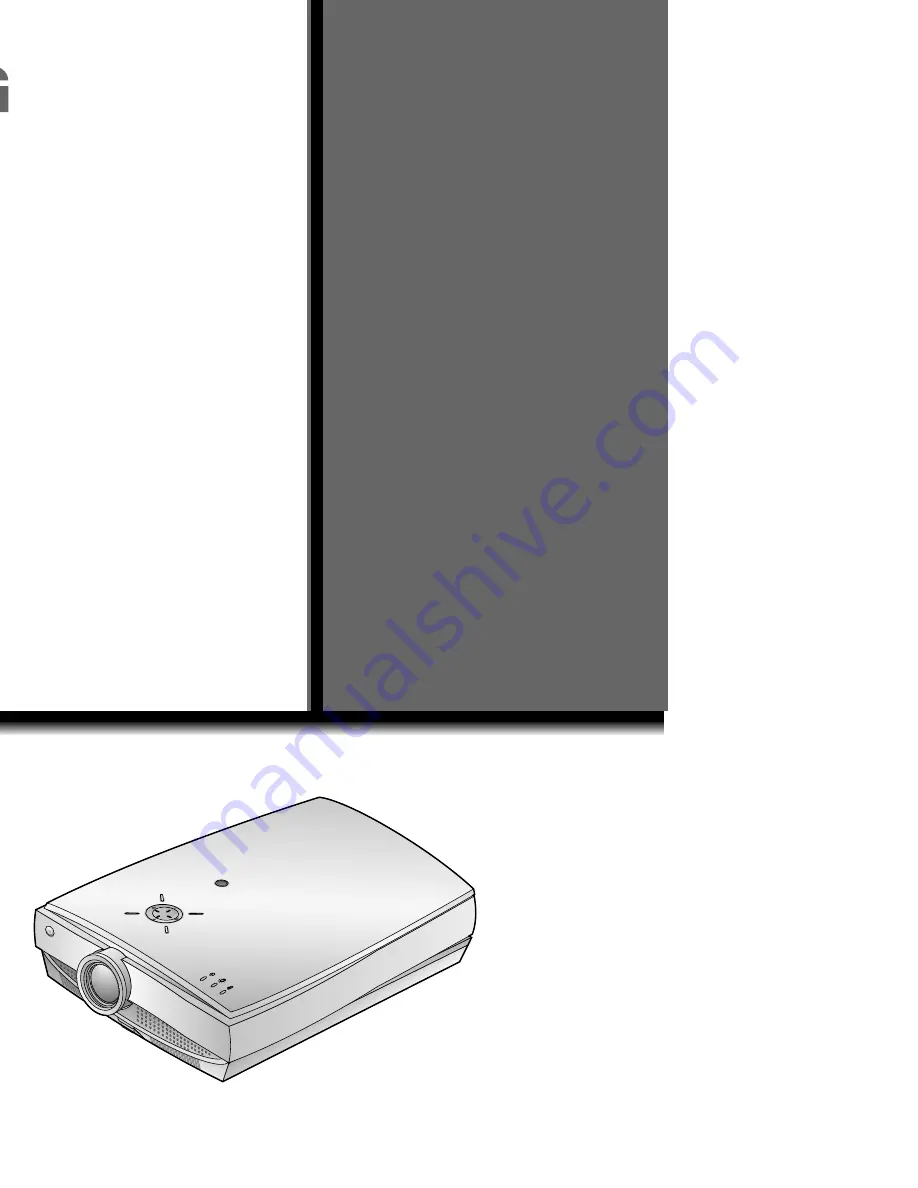
LG  LCD  PROJECTOR

LG  LCD  PROJECTOR

Please read this manual carefully before operating
your set. 
Retain it for future reference.
Record model number and serial number of the set. 
See the label attached on the bottom of the set and
quote this information to your dealer when you
require service.

Model number

:

Serial number

:

Your LG

®

brand LCD Projector will be repaired or replaced as set forth below, if it proves to be defective in mate-

rial or workmanshipunder normal use, during the warranty period ("Warranty Period") listed below, effective from

the date ("Date of Purchase") of original consumer purchase of the product. This warranty is good only to the orig-

inal purchaser of the product and effective only when used in the United States, excluding U.S. Territories.

LG

®

Brand LCD Projector

U.S. Limited Warranty

THIS WARRANTY IS IN LIEU OF ANY OTHER WARRANTY, EXPRESS OR IMPLIED, INCLUDING WITHOUT LIM-

ITATION, ANY WARRANTY OF MERCHANTABILITY OR FITNESS FOR A PARTICULAR PURPOSE. TO THE

EXTENT ANY IMPLIED WARRANTY IS REQUIRED BY LAW, IT IS LIMITED IN DURATION TO THE EXPRESS

WARRANTY PERIOD ABOVE. NEITHER THE MANUFACTURER NOR ITS U.S. DISTRIBUTOR SHALL BE LIABLE

FOR ANY INCIDENTAL, CONSEQUENTIAL, INDIRECT, SPECIAL, OR PUNITIVE DAMAGES OF ANY NATURE,

INCLUDING WITHOUT LIMITATION, LOST PROFITS, LOST OR CORRUPTED PROGRAMMING OR DATA, OR

ANY OTHER DAMAGE WHETHER BASED IN CONTRACT, TORT, OR OTHERWISE. 

Some states do not allow the

exclusion or limitation of incidental or consequential damages or limitations on how long an implied warranty lasts, so

the above exclusion or limitation may not apply to you. This warranty gives you specific legal rights and you may also

have other rights that vary from state to state.

WARRANTY PERIOD:
LABOR: Two Years

from the Date of Purchase. Your

unit will

be repaired or replaced with a new, substitute model or

factory

reconditioned unit, at the manufacturer’s option. If

repaired,

parts used in the repair may be new or remanufactured.

Parts, excluding Projector Lamp: Two Years 

from

the Date of Purchase.

Projector Lamp: 90 Days

from the Date of Purchase.

Replacement Units and Repair Parts are warranted for

the remaining portion of the original unit’s warranty

period.

EFFECTIVE DATE OF WARRANTY: 

Your warranty peri-

od begins on the date of sale to the original consumer /

end user. KEEP THE DEALER’S DATED BILL OF SALE OR

PROOF OF DELIVERY as evidence of the purchase date.

You will be required to submit a legible copy of your bill

of sale or proof of delivery when requesting warranty

service.

SERVICE:

The customer will be required to ship the unit

to the Factory Service Center to make the necessary

repairs. LG is not responsible for the de -installation or

re-installation of the unit from its mounted position.

Please call: 1-800-243-0000 to locate your nearest

LG® Brand Authorized Service Center.

For further Instructions, see “For Service” below

THIS LIMITED WARRANTY DOES NOT APPLY TO:

The cost of repair or replacement under these excluded circumstances shall be borne by the consumer.

damage caused in shipping or transit

service required as a result of improper installation,
including incorrect or insufficient AC supply (please
consult the owner’s manual for power supply 
requirements).

installation or repair of antenna systems, cable
converters, cable company supplied equipment, or
other components in a video system

set-up or adjustment on consumer controls, or
damage caused by improper adjustments

damage caused by other system components

any unit that has been modified or incorporated 
into any other product

replacement of batteries on the remote control.

replacement of the Projector Lamp except within 
the first 90 days

damage (including cosmetic damage), failure, loss 
or personal injury due to misuse, abuse, negli
gence, improper maintenance or storage, or to acts
of nature or other causes beyond our control. 
(Causes beyond our control include but are not 
limited to lightning strike, power surges, power out
ages and water damage.)

repair or replacement of warranted parts by other 
than an LG

®

Brand authorized service centers.

units purchased or serviced outside of the U.S.A.

product where the original factory serial numbers
have been removed, defaced or changed in any 
way.

product sold and labeled as "as is, where is" or simi
lardisclaimer.

software errors that do not disable functionality,
operating software protocols adopted after the date
of manufacture or for use outside of the United 
States.

Summary of Contents for RL-JA20

Page 1: ...R RL JA20 OWNER S MANUAL LG LCD PROJECTOR LG LCD PROJECTOR al carefully before operating ence and serial number of the set on the bottom of the set and to your dealer when you ...

Page 2: ... does cause harmful interference to radio or television reception which can be determined by turning the equipment off and on the user is encouraged to try to correct the interference by one or more of the following measures Reorient or relocate the receiving antenna Increase the separation between the equipment and receiver Connect the equipment into an outlet on a circuit different from that to ...

Page 3: ...ansmitter option 32 Connecting to a wireless receiver option 33 Connecting to a Video Source 34 Connecting to a DVD 35 Connecting to a D TV Set Top Box 36 BASIC FUNCTIONS Function checking 37 Using Still function 38 SPECIAL FUNCTIONS Selecting language 39 Checking lamp time 40 Manual Color Temperature Control 41 Using Blank function 42 Using Flip Horizontal Vertical function 44 Twin Picture functi...

Page 4: ...or damage to the projector Indoor Installation WARNING Indoor Installation NOTES R R R Do not place the Projector in direct sunlight or near heat sources such as radiators fires and stove etc This may cause a fire hazard Disconnect from the mains and remove all connections before moving Do not place the projector close to sources of steam or oil such as a humidifier This may create a fire hazard o...

Page 5: ...l temperature may cause a fire hazard K K K Do not block the vents air intake exhaust of the projector or restrict air flow in any way This would cause the internal temperature to increase and could cause a fire hazard R Do not place the projector directly on a carpet rug or place where ventilation is restricted This would cause its internal temperature to increase and might create a fire hazard A...

Page 6: ...k R Earth wire should be connected If the earth wire is not connected there is possible a danger of electric shock caused by the current leak age If grounding methods are not possible a separate cir cuit breaker should be employed and installed by a qualified electrician Do not connect ground to telephone wires lightning rods or gas pipe The mains plug should be inserted fully into the power outle...

Page 7: ...an electric shock hazard Prevent dust collecting on the power plug pins or outlet This may cause a fire hazard R Place the projector where people will not trip or tread on the power lead R Do not turn the projector On Off with plug ging in or unplugging the power plug to the wall outlet Do not use the power plug for switch It may cause mechanical failure or could give an electric shock R Ensure th...

Page 8: ...er is spilt into the projector unplug it from the mains supply outlet immediately and consult your Service Agent This may cause an electric shock hazard R Dispose of used batteries carefully and safely In the case of a battery being swallowed by a child please consult a doctor immediately R In the event that an image does not appear on the screen please switch it off and unplug it from the mains s...

Page 9: ...he windows and ventilate It can cause a fire or a burn by a spark R Do not drop the projector or allow impact shock This may cause mechanical failure or personal injury R Do not place heavy objects on top of pro jector This may cause mechanical failure or personal injury R Don t look directly onto the lens when the projector is in use Eye damage may occur R Take care not to cause impact to the len...

Page 10: ... it from the wall outlet and contact your dealer or service centre This may cause a fire or an electric shock hazard R Do not touch the lens of the projector It is delicate and easily damaged R Do not use any sharp tools on the projec tor as this will damage the casing Using NOTES Cleaning WARNING R Use an air spray or soft cloth that is moist with a neutral detergent and water for removing dust o...

Page 11: ...lectric Shock as well as invalidating the warranty R If a receiver VCR Digital Set Top Box is connected to the projector in the event of lightning or thunder storm unplug the pro jector and aerial from the wall outlet This will prevent damage to the projector and possible electric shock Only use the specified type of battery This could cause damage to the remote control Do not mix new batteries wi...

Page 12: ...nent DVD DTV DC 12V OUT Power button Rear remote control sensor Control panel The LCD projector is manufactured using high precision technology You may however see on the Projector screen tiny black points and or bright points red blue or green This can be a normal result of the manufacturing process and does not always indicate a malfunction Focus ring Zoom ring Foot adjusting button S Video Vide...

Page 13: ...INTRODUCTION K A RGB1 RS 232C Audio A RGB2 D RGB Rear Connecting Part Rear Connecting Part RS 232C A RGB1 A RGB2 D RGB Audio Kensington Security System Connector Refer to page 21 Rear remote control sensor ...

Page 14: ...enus MENU Button Selects or closes menus INPUT SELECT Button Switches to A RGB1 A RGB2 D RGB Video S Video Component mode VOLUME Button Adjusts volume level and functions of menus OK A Button Checks present mode and saves the change of functions PATTERN Button When pressing the PATTERN button the test screen for focus adjustment is displayed ...

Page 15: ...to p 42 SUB INPUT Button Refer to p 46 TWIN PICTURE Button Refer to p 46 MUTE Button Switches the sound on or off UP DOWN buttons APC Button Refer to p 53 ARC Button Refer to p 51 SWAP Button Refer to p 47 ZOOM Button Refer to p 50 AUTO TRACKING Button Refer to p 54 OKA Button VOL F G Button Inserting the batteries Open the battery compartment cover on the back of the remote control and insert the...

Page 16: ...ching the end of its life and needs Red to be replaced with a new lamp over 1500 hours The OSD Replace the Lamp is displayed 10 seconds from the first power on Lamp Indicator Red flashing The projector has trouble in the lamp or around it at power on Retry Power On again later If lamp indicator is red flashing again contact the service center Green flashing The lamp cover or absorption pipe cover ...

Page 17: ...emote Control Power Cord Audio Video Cable Audio Cable Operating guide Computer Cable SCART to RCAjack option Lamp Portable Bag S Video Cable Projection Screen DVI Cable 1 5V 1 5V Batteries 2 size AAA DVI to VGA Cable CH1 CH2 CH3 CH S W CH4 CH1 CH2 CH3 CH S W CH4 A V wireless transmitter receiver C H 1 C H 2 C H 3 C H S W C H 4 C H 1 C H 2 C H 3 C H S W C H 4 See A V wireless transmitter receiver ...

Page 18: ...ation where adequate temperature and humidity is available refer p 67 Do not place the projector on a carpet rug or other similar surface It may prevent a adequate ventilation of the projector bot tom This product should be mounted to a wall or ceiling only Don t place the projector in the following conditions It may cause malfunction or product damage R R Never push projector or spill liquid of a...

Page 19: ...logy You may however see tiny black points and or bright points red blue or green that continuously appear on the LCD projector Screen This is a normal result of the man ufacturing process and does not indicate a malfunction To display DTV programmes it is necessary to connect a DTV receiver Set top Box and connect it to the projector If there is no input signal the Menu will not be displayed on s...

Page 20: ...r to a wall power socket and other connected sources projection distance based on the picture format The longest shortest distance show status when adjusted by the zoom function Center line of lens Screen height X Projection distance D Projection off set ratio 114 16 9 picture format mm 40 60 80 90 100 110 120 150 200 498 747 996 1121 1245 1370 1494 1868 2491 1715 2572 3430 3859 4287 4716 5145 643...

Page 21: ...stem cable as below For the detailed installation and use of the Kensington Security System refer to the user s guide attached to the Kensington Security System set And for further information contact http www kensington com the internet homepage of the Kensington company that deals with expensive electronic equipments such as notebook PCs or LCD projectors Kensington Security System is an optiona...

Page 22: ...r the operation indicator light up Green Select the source mode with the INPUT SELECT button Leave the projector plugged in for at least 2 minutes after switching off the projector as this will allow the lamp cooling to continue which will help to preserve the lamp life 3 Adjust volume level If you press VOLUME G button sound and volume level number are increased If you press VOLUME F button sound...

Page 23: ...r remote control again to cut off the power 2 If the operation indicator LED is orange and blinking do not disconnect the mains supply until the operation indicator LED is lit up constantly orange If the operation indicator LED is orange and blinking the power button on the top cover or on the remote control will not operate 3 Power Off Please Press Key Again ...

Page 24: ... focus of the image rotate the focus ring which is the outer ring on the lens To adjust the size of the image rotate the zoom ring which is the inner ring on the lens To raise or lower the image on the screen extend or retract the foot at the bottom of the projector by pushing foot adjuster button as below 1 Stand behind the projector and lift the foot adjuster levers while you support the front o...

Page 25: ...LLATION AND COMPOSITION Press the INPUT SELECT button 1 Each press of the VOLUME F G button changes the display as below 2 A RGB1 A RGB2 D RGB Video S Video Component Selecting source mode F A RGB1 G select OK ...

Page 26: ...e set may not support HD signal perfectly Refer to page 63 for the supported pc graphic card displays of the projector How to connect a Connect computer cable to A RGB1 of the projector b If the PC has DVI output connect DVI cable to A RGB2 D RGB of the projector c Connect the audio cable of PC LINE OUT sound port to Audio of the projector If the PC has two audio out ports of SPEAKER OUT and LINE ...

Page 27: ... computer and the external monitor the picture of the external monitor may not appear properly In such cases set the output mode of your computer to output the signal only to the external monitor For details refer to the operating instructions supplied with your computer If the PC has DVI output use DVI cable b Connect the audio cable of PC LINE OUT sound port to Audio of the projector K A RGB1 RS...

Page 28: ...ce with the resolution you want to use and connect the adaptor to the Macintosh Refer to page 29 30 c Connect the computer cable to the Macintosh desktop adaptor d Connect the audio cable of PC LINE OUT sound port to Audio of the projector You must use the Macintosh desktop adaptor to connect the projector to a Macintosh PC K A RGB1 RS 232C Audio A RGB2 D RGB 1 2 3 4 5 6 7 8 9 ON b c d a ...

Page 29: ...use Usually set 1 6 to OFF status and 7 9 to ON status of the adjusting numbers And select the adjusting letter which is correct to the Macintosh and the monitor Refer to page 30 b Notes for Connecting to the Macintosh PowerBook If you get problems when connecting it to the projector set the adjusting number 9 to OFF status and restart the Macintosh PowerBook ...

Page 30: ...84 24 5 60 N N N N N N N N N N N N N N N N N N output resolution horizontal frequency KHz vertical frequency Hz adjusting letter 13 x14 RGB 640x480 35 66 J J J J J J J J J J J J J J J J J J 15 Portrait 640x870 68 8 75 O O O O O O O O O O O O O O VGA 640x480 31 60 G G M G G G G G G G G G G G G G SVGA 800x600 35 56 G G G G G G G G G G SVGA 800x600 56or72 G G G 16 Color 832x624 50 75 F F F F F F F F ...

Page 31: ...ter of the Macintosh desktop adaptor in accordance with the resolution you want to use and connect the adaptor to the Macintosh Refer to page 29 30 c Connect the computer cable to the Macintosh desktop adaptor d Connect the audio cable of PC LINE OUT sound port to Audio of the projector K A RGB1 RS 232C Audio A RGB2 D RGB 1 2 3 4 5 6 7 8 9 ON a b c d ...

Page 32: ...S VIDEO R AUDIO L VIDEO OUT IN AV INPUT AV OUTPUT 12V DC INPUT CH1 CH2 CH3 CH S W CH4 CH1 CH2 CH3 CH S W CH4 AV INPUT a b c d How to connect a Turn on the transmitter power and set the desired channel with channel button and direct the wireless AV transmitter toward the wireless receiver b Connect the output jacks of the VCR to the AV OUTPUT jacks of the wireless AV transmitter c Connect the adapt...

Page 33: ... AC IN IN P U T S E LE C T PA T T E R N P O W E R M E N U V O L V O L O K a b c How to connect a Turn the power button of the receiver on and adjust the channel number to match the channel number of the transmitter with the channel button Direct the wireless AV receiver toward the wireless transmitter b Connect the AV input ports of the projector to the AV INPUT port of the receiver c Connect the ...

Page 34: ...deo input jack of the projector to the S Video output jack of an A V source with an S Video cable Connect the Audio input jacks of the projector to the output jacks of the A V source with an Audio cable You can get better picture quality when connecting S Video source to the projector You can connect a VTR a camcorder a LDP or any other compatible video image source to the projector R IN P U T S E...

Page 35: ...LE C T PA TT E R N P O W E R M E N U AC IN Y PB PR Video S Video Audio DC 12V OUT Component DVD DTV V O L V O L O K a b How to connect a Connect the Component DVD DTV ports Y PB PR of the projector to the Video output ports Y PB PR of the DVD b Connect the Audio port of the projector to the Audio output port L of the DVD c Use a DVD with Component 480i 576i 480p mode DVD rear ...

Page 36: ...nect a Component source a Connect the Component DVD DTV ports Y PB PR of the projector to the Video output ports Y PB PR of the D TV Set Top Box b Connect the Audio port of the projector to the Audio output port L of the D TV Set Top Box c Use a DTV receiver with DTV 480p 720p 1080i mode To receive D TV programmes it is necessary to purchase a D TV receiver Set Top Box and connect it to the projec...

Page 37: ... RGB mode Refer to page 52 Color R Color G Color B Use only for the A RGB1 and the A RGB2 modes Color R Color G Color B items are used to adjust the R G B color levels when the RGB analog input signal has improper R G B signal levels 2 If there is no input signal present the Menu will not be displayed on the screen This operating guide explains operation of A RGB1 mode mainly 37 BASIC FUNCTIONS Co...

Page 38: ...ng Still function Press the STILL button You can freeze the input image 1 To exit Pause press any button The STILL function would release automatically after about 10 minutes 2 Moving Image Still Image 38 ...

Page 39: ...ss the VOLUME F G button to select the language you want to use On Screen Display OSD is marked in the selected language from this point To exit the menu display press the MENU button 2 3 39 SPECIAL FUNCTIONS Language ARC Flip Horizontal Flip Vertical English 16 9 Menu exit move OK Language ARC Flip Horizontal Flip Vertical English 16 9 Menu prev move select ...

Page 40: ...ojector will display Replace the Lamp on screen The OSD Replace the Lamp is displayed for 10 seconds from the first power on The lamp warning LED illuminates red continuously in the case of excessive lamp time 40 Press the MENU button and then use D E button to select the menu 1 V Keystone 0 H Keystone 0 Zoom Blank Image Set ID Lamp Time Blue 0 Hr 1 Menu exit move OK ...

Page 41: ...OK A button and then use D E button to select a color Use the VOLUME F G button to make appropriate adjustments The adjustment range of Color Temp R Color Temp G and Color Temp B is 50 50 To exit the menu display press the MENU button 2 3 Twin Picture Color Temp R 0 Color Temp G 0 Color Temp B 0 Off Menu exit move OK Twin Picture Color Temp R 0 Color Temp G 0 Color Temp B 0 Off Menu prev move adju...

Page 42: ...dience during presentations meetings or briefings Press the BLANK button The screen turns off to a background color and sound also turns off You can choose the background color Refer to page 43 1 Press any button to cancel the blank function On exiting the blank status sound is also restored 2 ...

Page 43: ...t Blank Image item 2 V Keystone 0 H Keystone 0 Zoom Blank Image Set ID Lamp Time Blue 0 Hr 1 Menu exit move OK V Keystone 0 H Keystone 0 Zoom Blank Image Set ID Lamp Time Blue 0 Hr 1 Press the VOLUME F G button to select the color you want to use Background color will be changed to the selected Blank function color from this point To exit menu display press the MENU button 3 Menu prev move select ...

Page 44: ...use D E button to select the menu 1 Press the OK A button and then use D E button to select Flip Horizontal item Press the OK A button to see reversed image Each time you press the button the image will be reversed To exit the menu display press the MENU button 2 3 Language ARC Flip Horizontal Flip Vertical English 16 9 Menu exit move OK Language ARC Flip Horizontal Press OK to Flip Flip Vertical ...

Page 45: ... MENU button and then use D E button to select the menu 1 Press the OK A button and then use D E button to select Flip Horizontal item Press the OK A button to see reversed image Each time you press the button the image will be reversed To exit the menu display press the MENU button 2 3 Language ARC Flip Horizontal Flip Vertical English 16 9 Menu exit move OK Language ARC Flip Horizontal Flip Vert...

Page 46: ...ing the MENU button Twin Picture function How to use twin picture Twin Picture1 Twin Picture 1 Twin Picture 2 Twin Picture 2 Twin Picture Off PICTURE TWIN Twin Picture Off Input select of the sub picture SUB INPUT Press the SUB INPUT button to select the input source of sub picture F A RGB1 G select OK ...

Page 47: ...ou can cancel this function directly by selecting Off in menu The STILL function is cancelled when changing the input signal Main Still is cancelled when changing the input signal with INPUT SELECT button and Sub Still is cancelled when changing the input signal with SUB INPUT button That is Main Sub Still work separately The STILL function would release automatically after about 10 minutes Main S...

Page 48: ...hen use D E button to select the menu 1 Press the OK A button and then use D E button to select Horizontal or Vertical item Press the VOLUME F G button to adjust the screen condition as you want Horizontal Vertical are adjusted from 50 to 50 To exit the menu display press the MENU button 2 3 Auto Tracking Clock 25 Phase 25 Horizontal 0 Vertical 0 Menu exit move OK Auto Tracking Clock 25 Phase 25 H...

Page 49: ... blazing fire of the screen Press the D E button to select V Keystone or H Keystone item 2 49 POSITION ING Press the VOLUME F G button to adjust the screen condition as you want Keystone are adjusted from 50 to 50 Adjustment range of H V Keystone may not work until 50 50 because they are interlocked Based on the input resolution or twin picture mode the adjustment range of Keystone may be differen...

Page 50: ...he zoom function 4 Press the ZOOM or ZOOM button to adjust the zoom level 2 This function doesn t work in Video S Video Component mode You can use this function by using the MENU button In the zoom mode you can adjust horizontal vertical position with the VOLUME F G D E button during displaying zoom OSD R 50 This function works only in RGB mode 0 20 ZOOM ZOOM 15 20 20 20 ZOOM ZOOM ZOOM ZOOM ...

Page 51: ...F Zoom1 G 22 Magnification 22 Magnification Zoom2 ARC F Zoom2 G Zoom3 ARC F Zoom3 G Zoom4 ARC F Zoom4 G Zoom1 Select to stretch the normal image vertically about 17 Part of the top and bottom of the image will not be visible and black bars may appear at top and bottom of screen for some input sources Zoom2 Select to stretch the normal picture both vertically and horizontally about 17 to provide an...

Page 52: ...ponent 480p 720p 1080i To restore the original image condition after changing it press OK A button after selecting Reset item In the broadcasting system NTSC the picture item Tint is displayed and can be adjusted To exit the menu display press the MENU button 4 Press the OK A button 2 RGB mode Video S Video Component mode RGB mode Video S Video Component mode 52 APC Contrast 50 Brightness 50 Color...

Page 53: ...elow 2 User Clear Soft Use APC to set the projector for the best picture appearance This function will not work in RGB mode APC Auto Picture Control APC Auto Picture Control You can also use this function by using the MENU button Video S Video Component mode R APC F User G 53 VIDEO ...

Page 54: ...ted Press the AUTO TRACKING button 1 Adjust Clock or Phase in menu after operation of Auto Tracking if you want to get bet ter picture quality in accordance with diverse Analog RGB A RGB1 A RGB2 input modes In certain circumstances you can t get the best picture quality only with auto correction Refer to page 55 2 You can also use this function by using the MENU button Only in Analog RGB mode For ...

Page 55: ... only Clock Phase Function Clock Phase Function Press the MENU button and then use D E button to select the menu 1 Press the OK A button and then use D E button to select Clock or Phase item Press the VOLUME F G button to adjust the screen condition To exit the menu display press the MENU button 2 3 Auto Tracking Clock 25 Phase 25 Horizontal 0 Vertical 0 Menu exit move OK Auto Tracking Clock 25 Ph...

Page 56: ...ory CISPR22 EN55022 standards 56 Press the MENU button and then use D E button to select the menu 1 Press the OK A button and then use D E button to select Set ID item 2 V Keystone 0 H Keystone 0 Zoom Blank Image Set ID Lamp Time Blue 0 Hr 1 Menu exit move OK V Keystone 0 H Keystone 0 Zoom Blank Image Set ID Lamp Time Blue 0 Hr 1 Press the VOLUME F G button to adjust Set ID to select the desired p...

Page 57: ... RS 232C Audio A RGB2 D RGB 3 2 5 4 6 7 8 Male RXD TXD GND DTR DSR RTS CTS TXD RXD GND DTR DSR RTS CTS Female 1 9 Pin No Connection Fig 1 RS 232 Interface Cable 2 3 5 4 6 7 8 Use the RS232C cable to control the projector externally Refer to Fig 1 Communication Parameter Setup Baud Rate 19200 bps UART Data Length 8 bit Parity none Stop bit 1 bit Flow Control none Communication code ASCII code ...

Page 58: ...ata is data write mode it returns the data of the PC computer Command2 1 Command2 2 Set ID OK Data X Command2 1 Command2 2 Set ID NG Data X 2 Error Acknowledge The Projector transmits ACK acknowledgement based on this format when receiving abnormal data from non viable functions or communication errors Data 01 illegal code This command is not supported 02 not support function This function doesn t...

Page 59: ... the screen format Transmission Data 00 Wide Screen 16 9 01 Normal Screen 4 3 02 Zoom 1 03 Zoom 2 04 Zoom 3 05 Zoom 4 Data 00 Wide Screen 16 9 01 Normal Screen 4 3 02 Zoom 1 03 Zoom 2 04 Zoom 3 05 Zoom 4 k 0 2 Set ID Data Cr 0 2 Set ID OK Data X Ack Using the PC input you select either 16 9 or 4 3 screen aspect ratio Screen size function doesn t work with HD signal Zoom1 Zoom4 mode works only with...

Page 60: ... marks data value with Hexadecimal That is marks with two place Hexadecimal while writing and read data is also marked with Hexadecimal value Data Min 00 Max 64 k 3 2 Set ID Data Cr 3 2 Set ID OK Data X Ack 9 Tint Command2 1 3 Command2 2 3 To adjust the screen tint Transmission Data Red 00 Green 64 Refer to Real data mapping2 Always marks data value with Hexadecimal That is marks with two place He...

Page 61: ...a is also marked with Hexadecimal value Data Min 00 Max 64 k 3 8 Set ID Data Cr 3 8 Set ID OK Data X Ack 14 Color Temp R Command2 1 3 Command2 2 9 Adjust the color temperature R of LCD part Transmission Data Min 00 Max 64 Refer to Real data mapping 1 Always marks data value with Hexadecimal That is marks with two place Hexadecimal while writing and read data is also marked with Hexadecimal value D...

Page 62: ...ID Data Cr 5 0 Set ID OK Data X Ack 20 OSD Lock mode Command2 1 9 Command2 2 0 This function operates Local Keypad and Remote control Lock so that only Power button on Local Keypad works with OSD Lock On Transmission Data 00 OSD Lock Mode Off 01 OSD Lock Mode On Data 00 OSD Lock Mode Off 01 OSD Lock Mode On k 9 0 Set ID Data Cr 9 0 Set ID OK Data X Ack 18 Volume Mute Command2 1 5 Command2 2 4 To c...

Page 63: ...tion ex The optimum vertical frequency may be displayed up to 75Hz or under in the resolution of 640X480 or 800X600 Sources Format V ertical Freq Hz Horizontal Freq kHz VGAEGA 640X350 70 090Hz 31 468kHz 640X350 85 080Hz 37 861kHz PC98 VGA text 640X400 70 090Hz 31 468kHz 640X400 85 080Hz 37 861kHz 720X400 70 082Hz 31 469kHz 720X400 85 039Hz 37 927kHz VGA 640X480 59 940Hz 31 469kHz 640X480 66 667Hz ...

Page 64: ... remove stubborn dirt or stains moisten a soft cloth with water and a neutral detergent and then wipe the casing Do not use alcohol benzene thinners or other chemical detergents as these can cause the casing to be warped Cleaning the Cleaning the Air Filter Air Filter The air filter which is located at the bottom of the projector should be cleaned after every 100 hours use If it is not cleaned per...

Page 65: ...65 Memo ...

Page 66: ...08m 40 200 inches 12m 3W 16 9 horizontal vertical 1 1 3 NTSC PAL SECAM NTSC4 43 PAL M PAL N AC 100 240V 50 60Hz 294 1mm including front foot 359 7mm 115 5mm including lens 4 2kg Operating Condition temperature In operation 32 95 F 0 C 35 C In storage and transit 4 140 F 20 C 60 C humidity In operation 0 80 relative humidity by dry hygrometer Not in operation 0 90 relative humidity by dry hygromete...

Page 67: ...o reach you promptly should we discover a safety or reliability problem that could affect you FOR SERVICE For warranty service information please contact the LG Brand Customer Support telephone number listed below When calling for service please have your product model number serial number and the date of purchase or the date of original installation available If a replacement unit is required und...

Page 68: ......

Reviews: