background image

SVM142-A

September, 2002

Safety Depends on You

Lincoln arc welding and cutting
equipment is designed and built
with safety in mind.  However,
your overall safety can be
increased by proper installation
. . . and thoughtful operation on
your part.  

DO NOT INSTALL,

OPERATE OR REPAIR THIS
EQUIPMENT WITHOUT READ-
ING THIS MANUAL AND THE
SAFETY PRECAUTIONS CON-
TAINED THROUGHOUT.

And,

most importantly, think before
you act and be careful.

SERVICE MANUAL

For use with machine code number 

10501 thru 10510

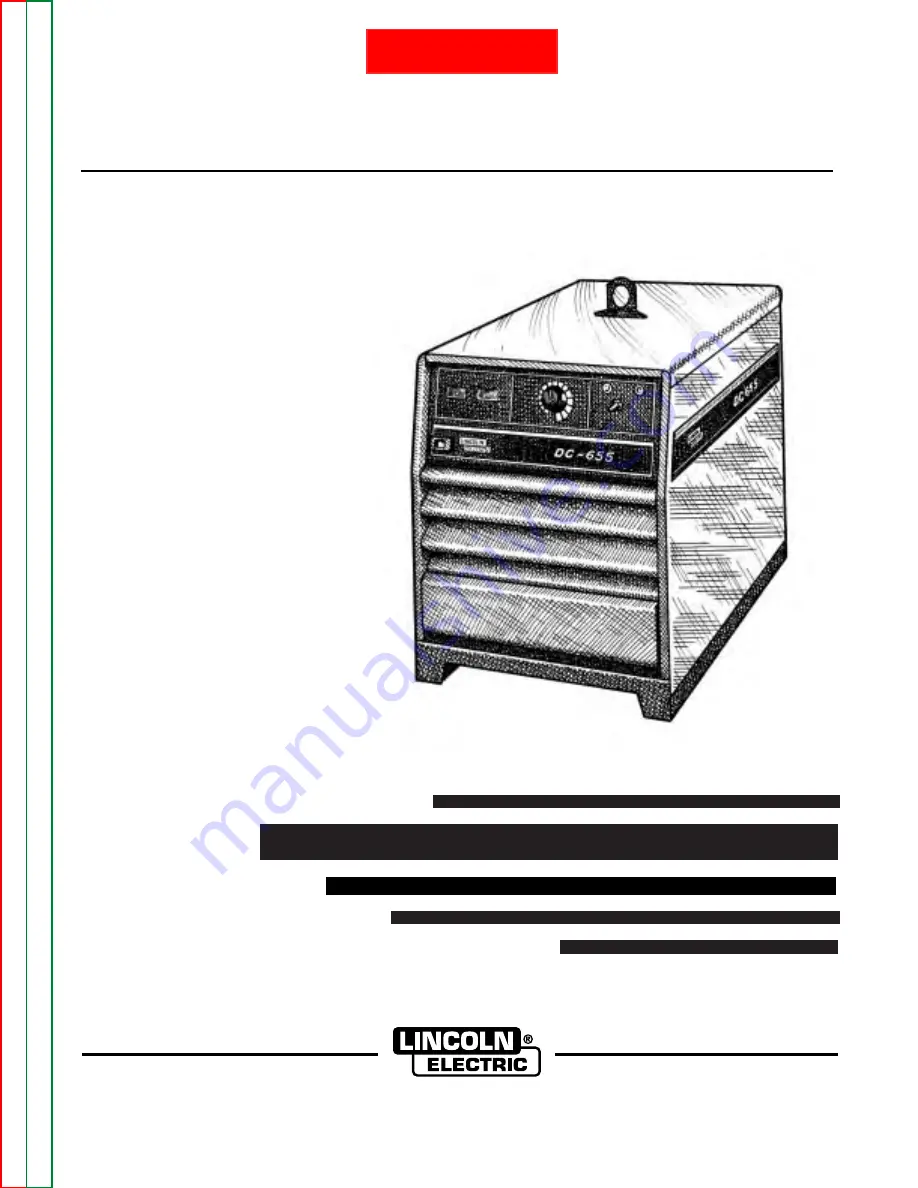
IDEALARC 

DC-655

Retur

n to Master TOC

Retur

n to Master TOC

Retur

n to Master TOC

Retur

n to Master TOC

V

iew Safety Info

V

iew Safety Info

V

iew Safety Info

V

iew Safety Info

RETURN TO MAIN INDEX

• Sales and Service through Subsidiaries and Distributors Worldwide •

Cleveland, Ohio 44117-1199  U.S.A.   TEL: 216.481.8100   FAX: 216.486.1751   WEB SITE: www.lincolnelectric.com

• World's Leader in Welding and Cutting Products •

Copyright © 2002 Lincoln Global Inc.

Summary of Contents for IDEALARC DC-655

Page 1: ...OUT And most importantly think before you act and be careful SERVICE MANUAL For use with machine code number 10501 thru 10510 IDEALARC DC 655 Return to Master TOC Return to Master TOC Return to Master TOC Return to Master TOC View Safety Info View Safety Info View Safety Info View Safety Info RETURN TO MAIN INDEX Sales and Service through Subsidiaries and Distributors Worldwide Cleveland Ohio 4411...

Page 2: ...LE SERIOUS INJURY OR DEATH KEEP CHILDREN AWAY PACEMAKER WEARERS SHOULD CONSULT WITH THEIR DOCTOR BEFORE OPERATING Read and understand the following safety highlights For additional safety information it is strongly recommended that you pur chase a copy of Safety in Welding Cutting ANSI Standard Z49 1 from the American Welding Society P O Box 351040 Miami Florida 33135 or CSA Standard W117 2 1974 A...

Page 3: ...Ground the work or metal to be welded to a good electrical earth ground 3 f Maintain the electrode holder work clamp welding cable and welding machine in good safe operating condition Replace damaged insulation 3 g Never dip the electrode in water for cooling 3 h Never simultaneously touch electrically hot parts of electrode holders connected to two welders because voltage between the two can be t...

Page 4: ...g area If this is not possible cover them to prevent the welding sparks from starting a fire Remember that welding sparks and hot materials from welding can easily go through small cracks and openings to adjacent areas Avoid welding near hydraulic lines Have a fire extinguisher readily available 6 b Where compressed gases are to be used at the job site special precautions should be used to prevent...

Page 5: ... soudage à l aide d écrans appropriés et non inflamma bles 4 Des gouttes de laiter en fusion sont émises de l arc de soudage Se protéger avec es vêtements de protection libres de l huile tels que les gants en cuir chemise épaisse pan talons sans revers et chaussures montantes 5 Toujours porter des lunettes de sécurité dans la zone de soudage Utiliser des lunettes avec écrans lateraux dans les zone...

Page 6: ...Settings B 4 Case Back Connections B 6 Auxiliary Power B 6 Machine Protection B 6 Welding Performance B 8 Accessories Section C Maintenance Section D Safety Precautions D 2 General Maintenance D 2 General Component Locations D 3 Theory of Operation Section E Troubleshooting and Repair Section F How to Use Troubleshooting Guide F 2 PC Board Troubleshooting Procedures F 3 Troubleshooting Guide F 4 T...

Page 7: ...r on Rating Plate A 3 Safety Precautions A 4 Select Suitable Location A 4 Stacking A 4 Tilting A 4 Electrical Input Connections A 4 Fuse and Wire Sizes A 4 Ground Connection A 4 Input Power Supply Connections A 5 Reconnect Procedure A 5 Output Connections A 6 Electrode and Work Cables A 6 Auxiliary Power and Control Connections A 7 Auxiliary Power Table A 7 115VAC Duplex Receptacle A 7 230V Recept...

Page 8: ...60 380 500 50 60 440 50 60 200 400 50 60 415 50 60 Code Number 10501 10502 10503 10504 10505 10506 10507 10508 10509 10510 100 Duty Cycle 122 61 122 61 49 135 67 5 61 49 122 70 74 56 64 140 70 68 60 Duty Cycle 150 75 150 75 60 166 83 75 60 150 86 90 69 78 172 86 83 Input Current at Rated Output RATED OUTPUT INPUT VOLTAGE FREQUENCY 208 230 416 460 575 200 230 380 400 415 440 500 SUPER LAG OR BREAKE...

Page 9: ...PPEAR ON RATING PLATE LOCATED ON CASE BACK Constant Voltage Output Characteristics R NEMA EW 1 100 Designates welder complies with International Electrotechnical Commission requirements 974 1 European Models IEC 974 1 Designates welder complies with low voltage directive and with EMC directive European models CE Designates welder can be used in environments with increased hazard of electric shock ...

Page 10: ...e and frequency as specified on the welder nameplate Use input wire sizes that meet local electrical codes or see the Technical Specifications page in this manual Input power supply entry is through the hole in the Case Back Assembly See Figure A 1 for the location of the machine s input cable entry opening Input Contactor CR1 and reconnect panel FUSE AND WIRE SIZES Protect the input circuit with ...

Page 11: ...TO THE INPUT SIDE OF CR1 CONTACTOR AS SHOWN L1 LINES 4 CONNECT TERMINAL MARKED TO GROUND PER LOCAL AND NATIONAL ELECTRIC 2 DISCONNECT AND INSULATE THE H3 LEAD TERMINAL WITH TAPE TO PROVIDE AT LEAST 600 VOLT INSULATION CODES INSTALL AND TIGHTEN ALL OF THE HEX NUTS POSITIONING THE LUGS TO MAINTAIN MAXIMUM CLEARANCE TO THE LINKS D UF INPUT 3 CONNECT L1 L2 L3 INPUT SUPPLY LINES AND H1 H2 CONTROL TRANS...

Page 12: ... connected to 21 on the terminal strip Note This is how the DC 655 is shipped from the factory 5 Replace the terminal strip access cover panel For Negative Polarity 1 Connect the electrode cable to the appropriate high inductance terminal marked or to the low inductance terminal marked if using NR203Ni 1 electrode 2 Connect the work cable to the positive terminal marked 3 Remove the terminal strip...

Page 13: ... Plug L E C Part S12020 32 Refer to the Figure A 4 for the available circuits in the 14 pin receptacle 42 VAC is available at receptacle pins I and K A 10 amp circuit breaker protects this circuit 115 VAC is available at receptacle pins A and J Domestic Canadian and Export Models This circuit is protected by a circuit breaker see Auxiliary Power Table Note that the 42 VAC and 115 VAC circuits are ...

Page 14: ...of the control cable to 21 when welding positive polarity or to 21 when weld ing negative polarity TERMINAL STRIP 1 T S 1 TERMINAL STRIP 2 T S 2 INSTALLATION A 8 A 8 IDEALARC DC 655 Return to Section TOC Return to Section TOC Return to Section TOC Return to Section TOC Return to Master TOC Return to Master TOC Return to Master TOC Return to Master TOC Lead No Function 75 Output Control 76 Output C...

Page 15: ...nd Settings B 4 Case Back Connections B 6 220 VAC Auxiliary Receptacle B 6 220 VAC 2 Amp Circuit Breaker B 6 Auxiliary Power B 6 Machine Protection B 6 Thermal Fan Control B 6 Fan Motor Fuse B 6 Machine Shutdown B 6 Thermal Shutdown B 7 Over Current Protection Shutdown B 7 Remote Control Leads Fault Protection Shutdown B 7 Shorted Rectifier Fault Protection B 7 Idle Shutdown Timer B 7 Welding Perf...

Page 16: ...ll Do not touch electrically live parts or electrodes with your skin or wet cloth ing Insulate yourself from the work and ground Always wear dry insulating gloves FUMES AND GASES can be dangerous Keep your head out of fumes Use ventilation or exhaust to remove fumes from breathing zone CUTTING SPARKS can cause fire or explosion Keep flammable material away Do not cut containers that have held comb...

Page 17: ...ge CV mode and current CC mode control for easy operation Panel switches behind a latched front panel for remote or local output control output on or remote selection and CC CV Sub arc or CV MIG mode selection Panel knob settable CC arc force control with built in adjustable Hot Start High efficiency output and selectable sleep mode idle mode timer which shuts down input power if not used for extr...

Page 18: ...inal strip When this switch is in the ON position the machine s output terminals will be electrically energized all the time 5 LOCAL REMOTE CONTROL SWITCH When this switch is set to the LOCAL position con trol of the output voltage is via the output control on the DC 655 s control panel When this switch is set to the remote position control is through a remote source such as a wire feeder via the ...

Page 19: ... mode It prevents stubbing of the electrode by providing the extra weld current that linearly increases as the welding voltage decreases below a level determined by the setting of the constant current control The Arc Force control knob located behind the latched cover adjusts arc force from Min no cur rent increase to Max higher short circuit current The mid position 5 is recommended for most CC w...

Page 20: ...e feeders is available through the wire feeder recepta cle A 10 amp circuit breaker protects the 42 volt cir cuit from overloads DC 655 machines can also supply 115 volt AC auxil iary power through the wire feeder receptacle A 20 amp circuit breaker on the Domestic model and a 15 amp on the Canadian and Export models protects the 115 volt circuit from overloads 115 VAC is not avail able in the MS ...

Page 21: ... input shut down is reset by turning the DC 655 input power off then on If the fault is not corrected however the shutdown will re occur when turning on the input power 1 Note on earlier machines LED4 will turn on and output will be disabled if this fault occurs SHORTED RECTIFIER FAULT PROTECTION If a short occurs across one of the silicon controlled rectifiers of the DC 655 a potentially hazardou...

Page 22: ... The Arc Force control knob located behind the latched cover adjust Arc Force from Min no current increase to Max about 9A V increase As a general guideline for CC welding set Arc Force to Mid position and increase typically to no more than 7 as necessary to prevent stubbing or pop outs while welding This higher arc force is recommended especially for low end 6010 stick welding CC MODE HOT START H...

Page 23: ... C 3 NA 3 or LT 7 Terminal Strip C 3 NA 5 or NA 5R Terminal Strip C 4 Semiautomatic Wire Feeders C 6 LN 7 14 Pin MS Receptacle C 6 LN 7 Terminal Strip C 7 LN 8 or LN 9 Terminal Strip C 8 LN 8 or LN 9 14 Pin MS Receptacle C 9 DH 10 14 Pin MS Receptacle C 9 Section C 1 Section C 1 IDEALARC DC 655 Return to Master TOC Return to Master TOC Return to Master TOC Return to Master TOC ...

Page 24: ...ote output control is available This is the same remote control that is used on other Lincoln power sources K775 The K775 consists of a control box with 28 ft 8 5m of four conductor cable This connects to terminals 75 76 and 77 on the terminal strip and the case grounding screw so marked with the symbol on the machine These terminals are locat ed behind the cover panel on the lower connection pane...

Page 25: ...to the OFF 0 position 2 Disconnect main AC input power to the Idealarc DC 655 3 Connect the wire feeder control cable leads to the Idealarc DC 655 terminal strip as shown in Figure C 1 4 Connect the wire feeder control cable ground lead to the frame terminal marked NOTE The Idealarc DC 655 must be properly grounded FIGURE C 1 NA 3 OR LT 7 WIRE FEEDER CONNECTION TO THE IDEALARC DC 655 5 Extend wire...

Page 26: ...n 2 Disconnect main AC input power to the Idealarc DC 655 3 Connect the wire feeder control cable leads to the Idealarc DC 655 terminal strip as shown in Figure C 2 FIGURE C 2 NA 5 5R WIRE FEEDER CONNECTION TO THE IDEALARC DC 655 4 Connect the wire feeder control cable ground lead to the frame terminal marked NOTE The Idealarc DC 655 must be properly grounded 5 Extend wire feeder control cable lea...

Page 27: ...nal d If connecting lead 21 to the terminal strip connect it to the 21 terminal to match work polarity If work polarity changes back to negative lead 21 must be connected to the 21 terminal NOTE For proper NA 5 operation the electrode cables must be secured under the clamp bar on the left side of the NA 5 Control Box 7 Set the DC 655 OUTPUT CONTROL switch to the Remote position and the OUTPUT TERM...

Page 28: ...e LN 7 See Figure C 3 5 Set the MODE switch to a CV constant voltage position at the welder 6 Adjust wire feed speed at the LN 7 and set the welding voltage with the output CONTROL NOTE If optional remote control is used place the OUTPUT CONTROL and the OUTPUT TERMI NALS switch in the Remote position ACCESSORIES C 6 C 6 IDEALARC DC 655 Return to Section TOC Return to Section TOC Return to Section ...

Page 29: ...nections to the work piece are secure then wire feeder control cable lead 21 can be connected directly to the DC 655 terminal strip b An S 16586 X remote voltage sensing work lead is available for this purpose c Keep the 21 lead electrically separate from the work cable circuit and connection d Tape the 21 lead to work cable for ease of use NOTE The connection diagram shown in Figure C 3 shows the...

Page 30: ...oltage Control board See LN 9 Operator s Manual NOTE The connection diagram shown in Figure C 4 shows the electrode connected for positive polarity To change polarity a Set the Idealarc DC 655 POWER toggle switch to the OFF 0 position b Move the electrode cable to the negative output terminal High inductance or low inductance as needed c Move the work cable to the positive output terminal d Connec...

Page 31: ...i tion 2 Disconnect main AC input power to the Idealarc DC 655 3 Connect the electrode cable from the DH 10 to the terminal of the welder Connect the work cable to the terminal of the welder High induc tance or low inductance as needed Reverse this hookup for negative polarity NOTE Welding cable must be sized for the current and duty cycle of the application 4 Connect the DH 10 input cable between...

Page 32: ...NOTES IDEALARC DC 655 Return to Section TOC Return to Section TOC Return to Section TOC Return to Section TOC Return to Master TOC Return to Master TOC Return to Master TOC Return to Master TOC ...

Page 33: ...n to Master TOC Return to Master TOC Return to Master TOC Section D 1 Section D 1 IDEALARC DC 655 TABLE OF CONTENTS MAINTENANCE Maintenance Section D Safety Precautions D 2 General Maintenance D 2 General Component Locations D 3 ...

Page 34: ...ict the cooling air causing the welder to run hot with pre mature tripping of thermal protection Blow ou the welder with low pressure air at regular intervals to eliminate excessive dirt and dust build up on inter nal parts 3 Periodically check the welding cables Inspect for any slits or punctures Also make sure that all connections are tight MAINTENANCE D 2 D 2 IDEALARC DC 655 Return to Section T...

Page 35: ... D 3 D 3 IDEALARC DC 655 DC 655 D C 655 2 15 14 10 8 3 3 4 11 7 1 13 12 9 5 6 FIGURE D 1 GENERAL COMPONENT LOCATIONS 1 CASE FRONT 2 OUTPUT TERMINALS 3 CASE SIDES 4 CASE TOP 5 RECONNECT PANEL LOCATION 6 INPUT CONTACTOR LOCATION 7 CONTROL TRANSFORMER LOCATION 8 CASE BACK 9 FAN ASSEMBLY 10 CONTROL PANEL 11 PC BOARDS LOCATION 12 CHOKE 13 MAIN TRANSFORMER 14 BASE 15 SCR RECTIFIER BRIDGE ...

Page 36: ...NOTES IDEALARC DC 655 Return to Section TOC Return to Section TOC Return to Section TOC Return to Section TOC Return to Master TOC Return to Master TOC Return to Master TOC Return to Master TOC ...

Page 37: ...horted Output Rectifier Fault Protection E 4 SCR Operation E 5 TABLE OF CONTENTS THEORY OF OPERATION SECTION CONTROL TRANSFORMER R E C O N N E C T CONTACTOR FAULT PROTECTION 115VAC MAIN TRANSFORMER CONTROL BOARD SHUNT OUTPUT CONTROL MODE SWITCH POSITIVE TERMINAL NEGATIVE TERMINAL LATCHING RESISTOR F E E D B A C K F E E D B A C K SCR BRIDGE 42VAC 115VAC 42VAC T E R M I N A L S T R I P TO OPTIONAL M...

Page 38: ... eight isolat ed secondary windings There are three 32 VAC wind ings which provide power and timing to the firing board The 115 VAC winding powers the fan motor and provides the user with up to 20 amps of 115 VAC auxiliary power at the receptacle or 14 pin MS type connector The 42 VAC winding provides up to 10 amps at the 14 pin MS type connector Three other isolated coils are used to power the op...

Page 39: ...event of a fault condition the control board activates the fault relay CR2 See Protective Devices and Shut Down Circuits A tapped output choke is connected between the neu tral connection of the main transformer secondaries and the two negative output terminals This large inductor stores energy which provides current filtering for the welding output of the DC 655 Two negative output terminals are ...

Page 40: ... the feeder gun trigger or switching the DC 655 output terminal switch to the OFF position PEAK CURRENT PROTECTION If the peak current exceeds 2500 amps the welding output will be disabled and the control board LED 4 shutdown light will turn on The peak current shut down circuit can be reset by turning the DC 655 input switch off REMOTE CONTROL FAULT PROTECTION The remote control leads from the 14...

Page 41: ... An SCR is fired by a short burst of current into the gate This gate pulse must be more positive than the cathode voltage Since there is a standard PN junc tion between gate and cathode the voltage between these terminals must be slightly greater than 0 6V Once the SCR has fired it is not necessary to contin ue the flow of gate current As long as current contin ues to flow from anode to cathode th...

Page 42: ...NOTES IDEALARC DC 655 Return to Section TOC Return to Section TOC Return to Section TOC Return to Section TOC Return to Master TOC Return to Master TOC Return to Master TOC Return to Master TOC ...

Page 43: ...al Fan Snubber Board LED Chart F 41 Control Board LED Chart F 42 Oscilloscope Waveforms Normal Open Circuit Voltage Waveform Constant Current Mode F 43 Normal Open Circuit Voltage Waveform Constant Voltage MIG Maximum Output F 44 Normal Open Circuit Voltage Waveform Constant Voltage MIG Minimum Output F 45 Typical Output Voltage Waveform Constant Voltage MIG F 46 Typical SCR Gate Voltage Waveform ...

Page 44: ...AREAS OF MISADJUSTMENT S lists the obvious external possibilities that may contribute to the machine symptom Perform these tests checks in the order listed In general these tests can be con ducted without removing the case wrap around cover Step 3 PERFORM COMPONENT TESTS The last column labeled Recommended Course of Action lists the most likely components that may have failed in your machine It al...

Page 45: ...equipment Do not touch electrically hot parts Remove the PC board from the static shielding bag and place it directly into the equipment Don t set the PC board on or near paper plastic or cloth which could have a static charge If the PC board can t be installed immediately put it back in the static shield ing bag If the PC board uses protective shorting jumpers don t remove them until installation...

Page 46: ...e power switch S1 is in the ON position 2 Check for blown or missing fuses in the input lines 3 Check the three phase input line voltage at the machine The input voltage must match the rating plate and reconnect panel 1 Check the power switch S1 and associated leads and con nections See the Wiring Diagram 2 Perform the Control Trans former Test The input contactor operates but no welding output Th...

Page 47: ...The input voltage must match the rating plate and reconnect panel configuration 1 Check for loose or faulty wiring between the input power switch SW1 the fault protec tion relay CR2 and the input contactor See the Wiring Diagram 2 The fault protection relay CR2 may have defective contacts Check or replace 3 The control board may be defective See the Control Board LED Chart 4 The input contactor ma...

Page 48: ...2 If a remote control cable is used make certain the cable and connections are good 1 The output control potentiome ter output control switch SW3 or associated wiring may be defective See the Wiring Diagram 2 Perform the Firing Board Test 3 Perform the SCR Output Bridge Test 4 The control board may be faulty See the Control Board LED Chart The machine does not have maxi mum output 1 Check the thre...

Page 49: ...MISADJUSTMENT S RECOMMENDED COURSE OF ACTION OUTPUT PROBLEMS The 115 VAC receptacle is not working The machine s welding output is normal 1 The circuit breaker may be tripped Reset if necessary 2 Make sure the 115 VAC plug and load is in good working condition 1 The circuit breaker may be defective Check associated wiring See the Wiring Diagram 2 Check for 115 VAC at terminals 31 and 32 on the ter...

Page 50: ...put control potentiometer does not function when the output control switch SW3 is in the Local position The DC 655 operates normally when controlled remotely 1 The output control switch SW3 may be defective 1 The output control potentiome ter or associated wiring may be faulty See the Wiring Diagram The remote output control unit does not function properly when the output control switch SW3 is in ...

Page 51: ...oes not run 1 Check for obstructions that could prevent the fan from turn ing 1 The fan motor could be faulty Check or replace 2 The Thermal Fan Snubber PC Board may be defective See the Thermal Fan Snubber PC Board LED Chart The fan runs continuously 1 Note The fan is thermal con trolled Under normal condi tions it does not continuously run 1 The Thermal Fan Thermistor may be faulty See the Wirin...

Page 52: ...POSSIBLE AREAS OF MISADJUSTMENT S RECOMMENDED COURSE OF ACTION FUNCTION PROBLEMS The optional digital meter is not working properly and or the dis play is erratic 1 Make certain plugs P12 and P13 are securely plugged into the digital meter PC board Also make sure plug P3 is securely plugged into the con trol board 1 Check feedback leads 222 210 201 and 202 for loose or faulty connections See the W...

Page 53: ...tage must match the rating plate and reconnect panel 2 Check the welding cables for loose or faulty connections 3 Make sure the proper welding procedures are being used Wire feed speed arc voltage and wire size 4 Make sure the negative welding cable is connected to the cor rect negative output terminal Low or High inductance 1 Check the weld mode switch SW2 and associated leads for proper operatio...

Page 54: ...ings are correct for the welding process 3 Check the welding cables for loose or faulty connections Also make sure cables are sized correctly for the welding cur rent 4 See CV Mode Current Limiting 1 Check the weld mode switch SW2 and associated leads for proper operation or loose or faulty connections See the Wiring Diagram 2 Perform the Firing Board Test 3 Perform the SCR Bridge Test 4 Perform t...

Page 55: ...trical shock please observe all safety notes and precautions detailed throughout this manual If for any reason you do not understand the test procedures or are unable to perform the test repairs safely contact the Lincoln Electric Service Department for electrical trou bleshooting assistance before you proceed Call 216 383 2531 or 1 800 833 9353 WELD TEST DESCRIPTION This test will help determine ...

Page 56: ...ted the wiring and circuitry to the firing board is good Perform the Firing Board Test and see the Control Board LED Chart See the Simplified Trigger Diagram NOTE LED 10 should not be lit if the trigger circuit is not activated 2 If LED 10 does not light when the trigger cir cuit is activated proceed with the following voltage and continuity checks 3 Check the 10 Amp circuit breaker It is the one ...

Page 57: ...ugs 8 Check continuity zero ohms from pin D lead 4 at the 14 pin receptacle to the out put terminal switch and also to plug J5 pin 9 at the firing board See the Simplified Trigger Diagram and Figures F 1 and F 2 If a resistance of any value is indicated check the associated wires and plugs TROUBLESHOOTING REPAIR F 15 F 15 IDEALARC DC 655 Return to Section TOC Return to Section TOC Return to Sectio...

Page 58: ...tion TOC Return to Section TOC Return to Section TOC Return to Master TOC Return to Master TOC Return to Master TOC Return to Master TOC 2 4 C D P16 2 4 TERMINAL STRIP 42A 13 P15 5 9 41 11 10 2 4 TO 41 AT MAIN TRANSFORMER TO 42 AT MAIN TRANSFORMER 273 N C SECONDARY THERMOSTAT 41 N C CHOKE LEAD THERMOSTAT 4 41 9J5 1J5 11J5 10J5 309 310 TO CONTROL BOARD OUTPUT TERMINAL SWITCH 14 PIN RECEPTACLE 10AMP...

Page 59: ...d to avoid electrical shock please observe all safety notes and precautions detailed throughout this manual If for any reason you do not understand the test procedures or are unable to perform the test repairs safely contact the Lincoln Electric Service Department for electrical trou bleshooting assistance before you proceed Call 216 383 2531 or 1 800 833 9353 WELD TEST DESCRIPTION This test will ...

Page 60: ... LED4 LED5 LED6 LED10 J5 J6 J7 J4 TEST PROCEDURE 1 Disconnect the AC input power to the DC 655 machine 2 Locate the firing board on the left side of the control box 3 Perform a visual inspection on the firing board to see if there are any loose or faulty connections or physical damage 4 Connect the correct AC input power to the DC 655 ELECTRIC SHOCK can kill Do not touch electrically hot parts 5 T...

Page 61: ...AC power is being supplied to the firing board from leads 205 and 206 connected to the phase angle winding in the Main Transformer LED 8 is not lit or is dimmer than The proper AC power may not be the other LEDs reaching the firing board Check for loose or faulty connections Perform the Main Transformer Test LED 9 is ON 32 VAC power is being supplied to the firing board from leads 207 and 208 conn...

Page 62: ...ter R1 As the pot is turned clockwise LEDs 1 through 6 should get brighter As the pot is turned counter clockwise the LEDs should get dimmer If the LEDs glow and change in brightness equally as the pot is turned and the prob lem continues the SCR bridge may be faulty Perform the SCR Output Bridge Test If one or two lights stay bright or dim and the others change this could indicate an open or shor...

Page 63: ...mum If the voltage varies and LEDs 1 through 6 do NOT vary in brightness the firing board may be faulty If the voltage does NOT vary the control board control potentiometer or associated leads may be faulty See the Wiring Diagram 13 Test for approximately 5 5 VDC between leads 231 and 215 on the firing board See Figure F 4 Put the Mode Switch SW2 in the constant current CC position Rotate the Outp...

Page 64: ...ry warranty For your safety and to avoid elec trical shock please observe all safety notes and precautions detailed throughout this manu al If for any reason you do not understand the test procedures or are unable to perform the test repairs safely contact the Lincoln Electric Service Department for electrical trou bleshooting assistance before you proceed Call 216 383 2531 or 1 800 833 9353 WELD ...

Page 65: ...the DC 655 See the connection diagram located on the inside of the input box assembly 4 Connect the correct AC three phase input power to the DC 655 machine ELECTRIC SHOCK can kill Do not touch electrically hot parts 5 Turn the power switch SW1 to the ON position 6 Make sure the input contactor CR1 ener gizes 7 Test with an AC voltmeter for the proper main AC input voltages applied to the line sid...

Page 66: ... TO COMMON BUS VOLTAGE CHECK 9 Test with an AC voltmeter for approximately 55 VAC from each of the six main trans former secondary leads to the common bus connected to the output choke See Figure F 7 NOTE The secondary voltages will vary if the input line voltages vary If any one or more of the voltage checks are incorrect check for loose or faulty connections See the Wiring Diagram If the leads a...

Page 67: ...iring Diagram 11 If 115 VAC is NOT present and the wiring and circuit breaker are good the main transformer may be defective 12 Test for 42 VAC between leads 41 and 2 on the terminal strip The terminal strip can be accessed by removing the small panel at the lower portion of the case front See Figure F 8 If the correct voltage is not pre sent make sure the 10 amp circuit breaker is not tripped or ...

Page 68: ...tal meter board If a digital meter board is not in place plug J13 will not be used but will be present in the harness Check the fol lowing voltages at the appropriate leads and pin locations 10 VAC Plug J13 pin 1 lead 331 to pin 2 lead 332 10 VAC Plug J13 pin 4 lead 333 to pin 5 lead 334 42 VAC Plug J13 pin 3 lead 335 to pin 6 lead 336 18 If the correct primary voltages are applied to the main tra...

Page 69: ...our factory warranty For your safety and to avoid elec trical shock please observe all safety notes and precautions detailed throughout this manu al If for any reason you do not understand the test procedures or are unable to perform the test repairs safely contact the Lincoln Electric Service Department for electrical trou bleshooting assistance before you proceed Call 216 383 2531 or 1 800 833 9...

Page 70: ... TEST continued FIGURE F 10 CONTROL TRANSFORMER TEST PROCEDURE 1 Disconnect the main AC input voltage to the DC 655 2 Remove the case top and sides 3 Locate the control transformer T2 on the left side of the input box facing the back of the machine See Figure F 10 4 Locate the control transformer primary leads H1 H2 H3 etc See the Wiring Diagram NOTE Unused leads should be insulated and taped Insp...

Page 71: ...DC 655 does not have to be ON to perform this test If the main AC input supply voltage varies the control trans former secondary voltage will vary by the same percentage 7 If approximately 115 VAC is present at leads X1 to X2 the control transformer is function ing properly 8 If approximately 115 VAC is NOT present at leads X1 to X2 make certain the correct input voltage is being applied to the pr...

Page 72: ... factory warranty For your safety and to avoid elec trical shock please observe all safety notes and precautions detailed throughout this manu al If for any reason you do not understand the test procedures or are unable to perform the test repairs safely contact the Lincoln Electric Service Department for electrical trou bleshooting assistance before you proceed Call 216 383 2531 or 1 800 833 9353...

Page 73: ...can kill Do not touch electrically hot parts 5 Apply the correct three phase input power to the DC 655 and turn the power switch SW1 to the ON position 6 Carefully check for 42 VAC at the secondary leads 281 to 282 If 42 VAC is present the control board transformer T3 is good If 42 VAC is missing or low proceed to the next step 7 Carefully check for 115 VAC at the primary leads 255 and 256 If the ...

Page 74: ...e your factory warranty For your safety and to avoid elec trical shock please observe all safety notes and precautions detailed throughout this manu al If for any reason you do not understand the test procedures or are unable to perform the test repairs safely contact the Lincoln Electric Service Department for electrical trou bleshooting assistance before you proceed Call 216 383 2531 or 1 800 83...

Page 75: ... Connect an AC voltmeter to the leads ELECTRIC SHOCK can kill Do not touch electrically hot parts 5 Apply the correct three phase input power to the DC 655 and turn the power switch SW1 to the ON position 6 Check for 120 VAC at the contactor coil leads 7 If the 120 VAC is NOT present with the input power switch SW1 on check the switch and associated circuitry See the Wiring Diagram Also see the Co...

Page 76: ... across the contacts Zero ohms or very low resistance is normal See Figure F 13 If the resistance is high the input contactor is faulty Replace the input contactor 5 When the contactor is NOT activated the resistance should be infinite or very high across the contacts If the resistance is low the input contactor is faulty Replace the input contactor TROUBLESHOOTING REPAIR F 34 F 34 IDEALARC DC 655...

Page 77: ...lidate your factory warranty For your safety and to avoid elec trical shock please observe all safety notes and precautions detailed throughout this manu al If for any reason you do not understand the test procedures or are unable to perform the test repairs safely contact the Lincoln Electric Service Department for electrical trou bleshooting assistance before you proceed Call 216 383 2531 or 1 8...

Page 78: ...D8 LED9 LED1 LED2 LED3 LED4 LED5 LED6 LED10 J5 J6 J7 J4 TEST PROCEDURE 1 Disconnect the main AC input power to the DC 655 machine 2 Locate and disconnect plug J9 from the thermal fan snubber board and plug J5 from the firing board See Figure F 14 3 Remove the red insulating paint from the heat sink test points See Figure F 15 DO NOT DISASSEMBLE THE HEAT SINKS 4 Test for high or infinite resistance...

Page 79: ...isolate the defective SCR s See the Wiring Diagram 8 Replace plug J9 into the thermal fan snub ber board and plug J5 into the firing board NOTE To further check the SCRs functions use an SCR tester and proceed to the Active SCR Test TROUBLESHOOTING REPAIR F 37 F 37 IDEALARC DC 655 Return to Section TOC Return to Section TOC Return to Section TOC Return to Section TOC Return to Master TOC Return to...

Page 80: ...and will invalidate your factory warranty For your safety and to avoid elec trical shock please observe all safety notes and precautions detailed throughout this manu al If for any reason you do not understand the test procedures or are unable to perform the test repairs safely contact the Lincoln Electric Service Department for electrical trou bleshooting assistance before you proceed Call 216 38...

Page 81: ...AND FIRING BOARD PLUG LOCATIONS THERMAL FAN SNUBBER LED5 LED1 LED2 LED3 LED4 LED6 PLUG J9 L10124 FIRING BOARD G2699 LED7 LED8 LED9 LED1 LED2 LED3 LED4 LED5 LED6 LED10 J5 J6 J7 J4 PLUG J20 TEST PROCEDURE 1 Disconnect the main AC input power to the machine 2 Locate and disconnect plug J9 from the thermal fan snubber board and plug J5 from the firing board See Figure F 16 3 Remove the red insulating ...

Page 82: ...low battery can affect the results of the test Repeat the battery test procedure in Step 4 if needed 10 Open switch SW 1 11 Reconnect the Tester leads See Figure F 17 a Connect Tester lead A to the cathode b Connect Tester lead C to the anode c Disconnect Test lead G from the gate 12 Close switch SW 1 13 Read the meter for zero voltage a If the voltage is zero the SCR is func tioning b If the volt...

Page 83: ...dicates welding current is greater than 200 amps 3 Indicates fan should be running due to heating of main SCRs 4 Indicates an open thermal fan thermistor or an open con nection between the thermistor and the thermal fan snub ber board See the Wiring Diagram leads 319 and 316 5 Indicates a thermostat choke or secondary has opened The thermal protection light should also be illuminated 6 Indicates t...

Page 84: ...on Section 4 Indicates an over current shutdown See Over Current Protection Shutdown in the Operation Section 5 Indicates output current is present 6 Indicates that the machine is in the CC mode LED 6 should be on whenever LED 1 is lit 7 Indicates that the 16 VDC power supply is functioning This circuitry is located on the control board 8 Indicates the control signal is being generated to control ...

Page 85: ...rm generated from a properly operating machine Note that each vertical division represents 50 volts and that each horizontal divi sion represents 2 milliseconds in time Note Scope probes connected at machine output terminals probe to positive terminal probe to neg ative high inductance terminal SCOPE SETTINGS Volts Div 50V Div Horizontal Sweep 2 ms Div Coupling DC Trigger Internal NORMAL OPEN CIRC...

Page 86: ...d from a properly operating machine Note that each vertical division represents 50 volts and that each horizontal divi sion represents 2 milliseconds in time Note Scope probes connected at machine output terminals probe to positive terminal probe to neg ative high inductance terminal SCOPE SETTINGS Volts Div 50V Div Horizontal Sweep 2 ms Div Coupling DC Trigger Internal NORMAL OPEN CIRCUIT VOLTAGE...

Page 87: ...d from a properly operating machine Note that each vertical division represents 20 volts and that each horizontal divi sion represents 2 milliseconds in time Note Scope probes connected at machine output terminals probe to positive terminal probe to neg ative high inductance terminal SCOPE SETTINGS Volts Div 20V Div Horizontal Sweep 2 ms Div Coupling DC Trigger Internal NORMAL OPEN CIRCUIT VOLTAGE...

Page 88: ...e that each vertical division repre sents 20 volts and that each horizontal division represents 2 milliseconds in time The machine was loaded with a resistance grid bank The grid bank meters read 650 amps at 44 VDC Note Scope probes connected at machine out put terminals probe to positive terminal probe to negative high inductance terminal SCOPE SETTINGS Volts Div 20V Div Horizontal Sweep 2 ms Div...

Page 89: ... The machine was in an open circuit con dition no load and operating properly Note that each vertical division represents 2 volts and that each horizontal division represents 5 milli seconds in time Note Scope probes connected at SCR gate and cathode probe to gate probe to cathode SCOPE SETTINGS Volts Div 2V Div Horizontal Sweep 5 ms Div Coupling DC Trigger Internal TYPICAL SCR GATE VOLTAGE WAVEFO...

Page 90: ... waveform One SCR gate is disconnected to simulate an open or non functioning output SCR Each vertical division represents 20 volts and each horizontal division represents 2 milliseconds in time Note Scope probes connected at machine out put terminals probe to positive terminal probe to negative high inductance terminal SCOPE SETTINGS Volts Div 20V Div Horizontal Sweep 2 ms Div Coupling DC Trigger...

Page 91: ...ill invalidate your factory warranty For your safety and to avoid elec trical shock please observe all safety notes and precautions detailed throughout this manu al If for any reason you do not understand the test procedures or are unable to perform the test repairs safely contact the Lincoln Electric Service Department for electrical trou bleshooting assistance before you proceed Call 216 383 253...

Page 92: ...T PROCEDURE 1 Disconnect main input supply power to the machine 2 Locate and get access to the input contac tor CR1 in the input box See Figure F 18 3 Disconnect the main input supply power leads L1 L2 and L3 to the input contactor Remove the control transformer primary leads H1 H2 or H3 dependent on input volt age from the L1 and L3 terminals on the input side of the contactor 4 Disconnect the ou...

Page 93: ...hnician or machine operator and will invalidate your factory warranty For your safety and to avoid elec trical shock please observe all safety notes and precautions detailed throughout this manu al If for any reason you do not understand the test procedures or are unable to perform the test repairs safely contact the Lincoln Electric Service Department for electrical trou bleshooting assistance be...

Page 94: ...ove the case top and sides 3 Locate and remove plugs J9 and J20 from the Thermal Fan Snubber Board See Figure F 19 4 Disconnect lead 222 from the negative high inductance output terminal This lead runs from plug J9 to the negative high inductance output terminal Cut any necessary cable ties See the Wiring Diagram SCR RECTIFIER BRIDGE REMOVAL AND REPLACEMENT PROCEDURE continued THERMAL FAN SNUBBER ...

Page 95: ...ck ets Be sure to remove the insulators and take note of placement for reassembly 8 While supporting the heat sink assembly remove the left side horizontal mounting bracket from the left side leg assembly See Figure F 20 9 Carefully slide the rectifier heat sink assem bly from the machine Clear all leads REASSEMBLY 1 Upon reassembly apply a thin coating of Dow Corning 340 Heat Sink Compound to all...

Page 96: ...nd will invalidate your factory warranty For your safety and to avoid elec trical shock please observe all safety notes and precautions detailed throughout this manu al If for any reason you do not understand the test procedures or are unable to perform the test repairs safely contact the Lincoln Electric Service Department for electrical trou bleshooting assistance before you proceed Call 216 383...

Page 97: ...EDURE continued PROCEDURE 1 Remove the input power to the DC 655 machine 2 Remove the case top and sides OUTPUT CHOKE REMOVAL 3 Label and remove leads 273 and 41A from the choke thermostat 4 Using the 9 16 wrench remove the flexible transformer secondary lead and the 222A lead from the top lead of the output choke See Figure F 21 5 Using the 9 16 wrench remove the low inductance output lead from t...

Page 98: ...d nuts holding the iron coil assembly to the frame assembly 15 Cut or remove any necessary cable ties 16 Using the hoist carefully remove the iron coil assembly from the DC 655 machine Clear all leads REASSEMBLY 1 Using the rope sling carefully position the iron coil assembly onto the DC 655 Mount it to the frame assembly with four bolts washers and nuts 2 Attach the transformer primary leads to t...

Page 99: ...60 11 0 1 0 230 3 60 10 0 1 0 380 3 60 6 0 1 0 416 3 60 5 5 1 0 460 3 60 5 0 1 0 550 3 60 4 2 1 0 575 3 60 4 0 1 0 200 3 50 21 0 1 3 220 3 50 19 1 1 3 230 3 50 18 3 1 3 380 3 50 11 0 1 3 400 3 50 10 5 1 3 415 3 50 10 1 1 3 440 3 50 9 6 1 3 500 3 50 8 4 1 3 550 3 50 7 7 1 3 MAXIMUM OPEN CIRCUIT VOLTAGES Mode Input Hertz Open Circuit Volts CC Stick 60 66 70 CV MIG 60 44 47 Auxiliary Output 31 32 60 ...

Page 100: ...____________________________________________ ___________________________________________________________________________ ___________________________________________________________________________ ___________________________________________________________________________ ___________________________________________________________________________ ___________________________________________________...

Page 101: ...ams Section Section G Wiring Diagram 60 Hz Domestic G3348 1 G 2 Control Board Schmatic G3384 G 3 Firing Board Schmatic G2792 G 4 Thermal Fan Snubber P C Board Schematic L10123 G 5 Control Board Layout G3385 1 G 6 Firing Board Layout G2699 2 G 7 Thermal Fan Snubber Board Layout L10124 1 G 8 TABLE OF CONTENTS ELECTRICAL DIAGRAMS SECTION ...

Page 102: ...IFIER FLAT HEAT SINK N G STANDARD 14 PIN RECEPTACLE PLUGS INTO J16 ON STANDARD MACHINES AND IS REPLACED BY DUAL FEEDER OPTION IF USED METERS PC BD OR J14 IN LINE CONNECTOR FOR ANALOG METERS N J AS SHIPPED ONLY SWITCH 4 IS ON UP SEE INSTRUCTION MANUAL J3 210 8 201 202 9 2 3 10 4 5 6 1 J13 J12 2 2 4 5 11 6 7 12 331 8 13 14 210 201 202 336 11 5 6 7 8 9 4 77 31 76 75 21 J19 1 2 21 41 11 12 13 14 PLUG ...

Page 103: ...D DIGITAL METER PCB TO TIMER INPUT TIMER 317 THERMAL FAN SNUBBER PCB TO POWER SUPPLY FIRING SLOPE BUFFER INTERCEPT BUFFER ARC FORCE Vco REFERENCE CC CONTROL TIMER CHIP PCB TO FIRING PROTECTION AMPLIFIER CURRENT TO OPTIONAL TO OPTIONAL DIGITAL METER PCB 201 201 DIGITAL METER PCB 202 202 COM REF TO OPTIONAL CC VFB BUFFER A C PROTECTION SHORTED SCR A G3384 NOTE Lincoln Electric assumes no responsibil...

Page 104: ... liablilities resulting from board level troubleshooting PC Board repairs will invalidate your factory warranty Individual Printed Circuit Board Components are not avail able from Lincoln Electric This information is provided for reference only Lincoln Electric discourages board level troubleshooting and repair since it may compromise the quality of the design and may result in danger to the Machi...

Page 105: ...nsibility for liablilities resulting from board level troubleshooting PC Board repairs will invalidate your factory warranty Individual Printed Circuit Board Components are not avail able from Lincoln Electric This information is provided for reference only Lincoln Electric discourages board level troubleshooting and repair since it may compromise the quality of the design and may result in danger...

Page 106: ...TE Lincoln Electric assumes no responsibility for liablilities resulting from board level troubleshooting PC Board repairs will invalidate your factory warranty Individual Printed Circuit Board Components are not available from Lincoln Electric This information is provided for reference only Lincoln Electric discourages board level troubleshooting and repair since it may compromise the quality of ...

Page 107: ...ncoln Electric assumes no responsibility for liablilities resulting from board level troubleshooting PC Board repairs will invalidate your factory warranty Individual Printed Circuit Board Components are not available from Lincoln Electric This information is provided for reference only Lincoln Electric discourages board level troubleshooting and repair since it may compromise the quality of the d...

Page 108: ... LED1 LED2 LED3 LED4 LED5 6 T13657 2 RED LED LED6 OCI1 1 S15000 10 OPTO ISOLATOR OCI2 1 S15000 12 OPTOCOUPLER TRIAC DRIVER Q1 1 T12704 68 2N4401 R1 R2 R3 R4 R5 R6 6 T14648 22 50 5W R7 1 T14648 2 25 5W R8 1 T14648 9 5W 2500 OHM RESISTOR R9 R10 R16 R19 R21 R43 R46 9 S19400 1002 10K 1 4W R48 R52 R11 R37 2 S19400 4752 47 5K 1 4W R12 R14 R33 R44 R49 R53 6 S19400 1003 100K 1 4W R13 1 S19400 1821 1 82K 1...

Page 109: ...NOTES DC 655 Return to Section TOC Return to Section TOC Return to Section TOC Return to Section TOC Return to Master TOC Return to Master TOC Return to Master TOC Return to Master TOC ...

Reviews: