
Copyright © 2014 Linear LLC
1
2GIG-PANIC3-433
PANIC BUTTON REMOTE
INSTALLATION INSTRUCTIONS
The
Panic
Button
Remote
(2GIG
‐
PANIC3
‐
433)
is
a
compact,
battery
‐
powered,
wireless
panic
button
that
transmits
an
Emergency
signal
from
any
location
within
radio
frequency
(RF)
range
of
the
control
panel.
The
signal
can
be
transmitted
to
the
control
panel,
whether
the
security
system
is
armed
or
disarmed.
Users
can
mount
the
panic
button
in
a
convenient
location
in
the
wall
or
use
one
of
these
wearable
options:
lanyard,
wristband,
belt
clip,
and
car
‐
visor
clip.
It
is
completely
water
‐
resistant
and
also
offers
a
five
(5)
‐
second
button
lockout.
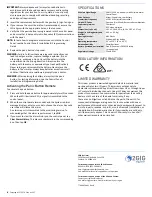
Figure 1
Panic Button Remote
Box Contents
Verify
that
the
package
includes
the
following:
•
1—Panic
Button
Remote
•
1—Battery
•
1—Lanyard
•
1—Car
‐
Visor
Clip
•
1—Belt
Clip
•
1—Wrist
Band
•
1—Sensor
holder
for
clips
(belts
and
visor)
with
option
to
wall
mount
using
two
(2)
screws
(not
included)
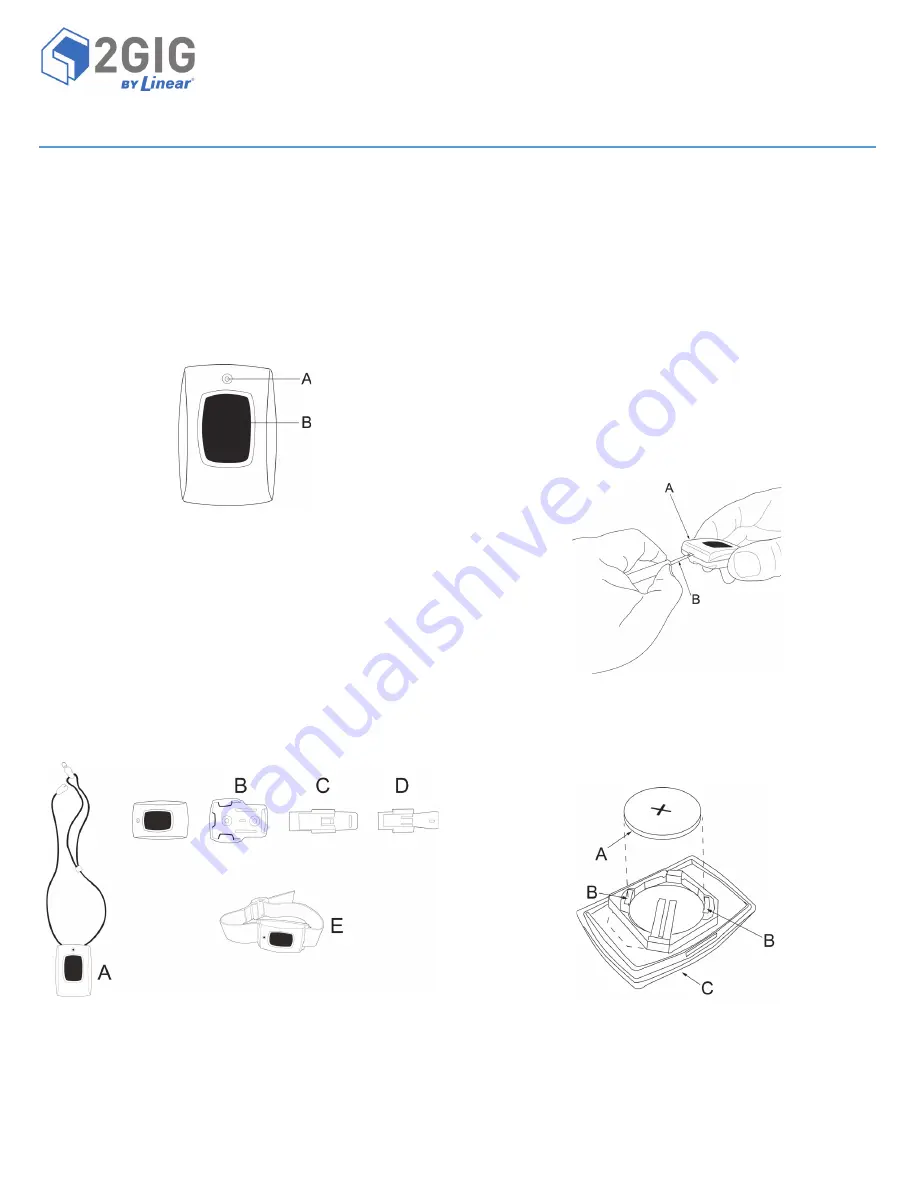
Figure 2
Panic Button Remote—Wearable Options
Inserting and Replacing the Batteries
WARNING:
To
be
useful
in
duress
situations,
it
is
imperative
that
you
maintain
the
battery
in
the
panic
button.
To
ensure
proper
functioning,
it
is
recommended
that
end
users
and/
or
qualified
installation
personnel
check
the
battery
for
the
panic
button
regularly,
at
least
one
or
more
times
per
year.
Under
typical
conditions,
the
battery
life
is
approximately
two
(2)
years.
When
the
battery
is
low,
the
control
panel’s
Home
screen
will
display
a
trouble
notification.
To
help
to
ensure
that
the
panic
button
is
available
during
a
duress
event,
always
replace
the
battery
when
the
low
battery
notification
first
appears.
WARNING:
Always
use
the
recommended
replacement
batteries
and
ensure
that
it
is
new,
in
good
condition,
and
fully
‐
charged
(see
1
Insert
a
small,
flathead
screwdriver
into
the
opening
on
the
panic
button.
Then
remove
the
top
cover.
Figure 3
Panic Button Remote
—
Removing the Top Cover
2
Gently
insert
the
flathead
screwdriver
between
the
battery
and
one
of
the
metal
clips
in
the
battery
compartment.
Then
remove
the
old
battery.
Figure 4
Panic Button Remote—Battery Compartment
A
LED
Indicator
B
Panic
Button
A
Lanyard
B
Sensor
holder
C
Belt
Clip
D
Visor
Clip
E
Wristband
A
Top
Cover
B
Flat
Head
Screwdriver
A
Battery
B
Metal
Clips
C
Battery
Compartment


