background image

Built-in Electric Oven

Instruction / Installation Manual
LBMULX11

LBMULX11_IB_final110520.indd   1

20/05/2011   4:46 PM

Summary of Contents for LBMULX11

Page 1: ...Built in Electric Oven Instruction Installation Manual LBMULX11 LBMULX11_IB_final110520 indd 1 20 05 2011 4 46 PM ...

Page 2: ...LBMULX11_IB_final110520 indd 2 20 05 2011 4 46 PM ...

Page 3: ...oking 10 Programming Cooking Time 10 Programming Delay Cooking with Cooking Time 10 Operation in Case of Emergency 10 Cleaning and Maintenance 11 Oven 11 Replacement of the Oven Lamp 11 Door Removal 12 Removal of the Internal Glass Panel 12 Specification 13 Installation 13 Use a Competent Person or Qualified Electrician 13 Electrical Connection 15 Fitting Guidelines 15 Connection Diagram 15 Wiring...

Page 4: ... purchase of your new Logik Built in Electric Oven We recommend that you spend some time to read this manual in order to fully understand how to install and operate it correctly This oven must be installed by a competent person if in doubt contact a qualified electrician Please allow the installer to view the installation section of this manual Read all the safety warnings carefully before use and...

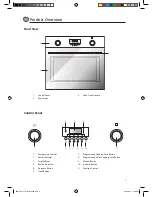
Page 5: ...rol 2 Power Indicator 3 Display Panel 4 Button Indicators 5 Decrease Button 6 Clock Button 7 Programming Cooking Time Button 8 Programming Delay Cooking Time Button 9 Manual Button 10 Increase Button 11 Function Control C RUN 3 1 2 C RUN 1 5 2 3 4 8 6 9 7 10 11 LBMULX11_IB_final110520 indd 5 20 05 2011 4 46 PM ...

Page 6: ...the temperature regulator Temperature Control as well C Temperature Control During use the oven becomes hot Care should be taken to avoid touching the heating elements inside the oven Oven On and Off In order to switch on the oven you need to 1 Set to the required temperature by turning the Temperature Control clockwise 2 Set the Function Control to the required position by turning it clockwise 3 ...

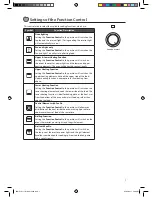
Page 7: ...ood Upper heating function is appropriate for final baking from above Lower Heating Function Setting the Function Control to this position will switch on the lower heating element and cook the lower side of the food The lower heating function is ideal for baking pizza as the heat rises from the bottom of the oven and warms food up rather than cooking the foods Central Element with Fan On Setting t...

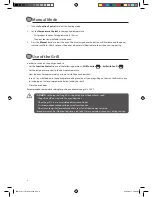
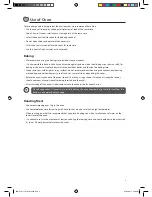
Page 8: ...cook The grill should be used with the oven door shut When the grill is in use accessible parts can become hot It is recommended to keep children away from the oven Always turn the grill off immediately after use as fat left behind may catch fire Bread may catch fire if the toasting time is too long Close supervision is necessary during toasting Manual Mode 1 Turn the Function Control to select th...

Page 9: ...g the conventional heating method top and bottom heaters use of such tins can result in undercooking the cakes Before the cake is taken out of the oven check if it is ready using a skewer if the cake is ready the skewer should come out dry and clean after being inserted into the cake After switching off the oven it is advisable to leave the cake inside for about 5 mins When baking cakes it is nece...

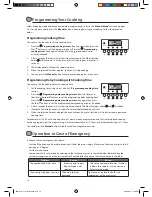
Page 10: ...set the programming delay cooking minutes if needed 3 After 5 seconds the oven will set the time automatically The blue indicators above and will both illuminate The display panel will show the time left before cooking will start 4 When the selected time has elapsed the oven will sound once to start and will stop after the programmed cooking time For example it is 10 00 am A cooking time of 1 hour...

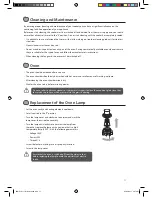
Page 11: ...and maintenance of your cooker you can have a significant influence on the continuing fault free operation of your appliance Before you start cleaning the cooker must be switched off and isolated from the mains supply and you should ensure that all controls are set to the 0 position Do not start cleaning until the cooker has completely cooled It is advisable to use a solution of hot water with a l...

Page 12: ...Follow the steps below to remove the door 1 Open the door completely 2 The swivel retainers of the right hand and left hand hinges are hooked onto the metal bar above them Lift the retainers as shown 3 Slightly close the door and lift The notch on the bottom of the hinge will disengage 4 Now pull the door forward off the oven Releasing both hinge sections from the slots Removal of the Internal Gla...

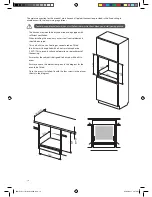
Page 13: ...east 3mm must be supplied in the fixed wiring This appliance must be properly earthed Do not lift the appliance by the door handles Prepare the cupboard opening to match your appliance measurements See diagrams Slide appliance into the cupboard ensuring that the mains cable where fitted does not kink To prevent tipping secure your oven into the cupboard by fastening with the 4 screws supplied We c...

Page 14: ...e cabinet is designed to be used with built in ovens Ensure you have the dimensions given in the diagram for the oven to be fitted Once the oven is installed fix with the four screws in the places shown in the diagram 590 600 6 5 0 560 Min38 600 6 5 0 560 0 Min6 0 The mains connection for this product must have an all pole disconnection provided in the fixed wiring in accordance with the local wir...

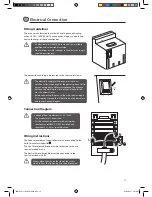
Page 15: ...qualified and authorised electrician No alterations or wilful changes in the electricity supply should be carried out The electricity supply for the oven must have an isolation switch which enables the power to be cut off in case an emergency and for maintenance The distance between the working contacts of the isolation switch must be at least 3 mm Before connecting the oven to the mains power sup...

Page 16: ...nnel should carry out servicing Certificate of Compliance to be retained This appliance must be earthed To maintain safe operation it is recommended that the product be inspected every five years by an a qualified technician General Warnings If the mains power cable is damaged it must be replaced by the manufacturer its service agent or similarly qualified persons in order to avoid a hazard This p...

Page 17: ...come hot during use Young children should be kept away Do not use harsh abrasive cleaners or sharp metal scrapers to clean the oven door glass since they can scratch the surface which may result in shattering of the glass Grill Do not cover the grill insert with foil as fat left there may catch fire Always keep the tray clean as any fat there may catch fire Do not leave the grill on unattended To ...

Page 18: ...ife separately from your household waste There are separate collection systems for recycling in the EU For more information please contact the local authority or your retailer where you purchased the product DSG Retail Ltd Maylands Avenue Hemel Hempstead Herts HP2 7TG England P N LBMULX11 001 Visit Partmaster co uk today for the easiest way to buy electrical spares and accessories With over 1 mill...

Page 19: ...LBMULX11_IB_final110520 indd 19 20 05 2011 4 47 PM ...

Page 20: ...LBMULX11_IB_final110520 indd 20 20 05 2011 4 47 PM ...

Reviews: