background image

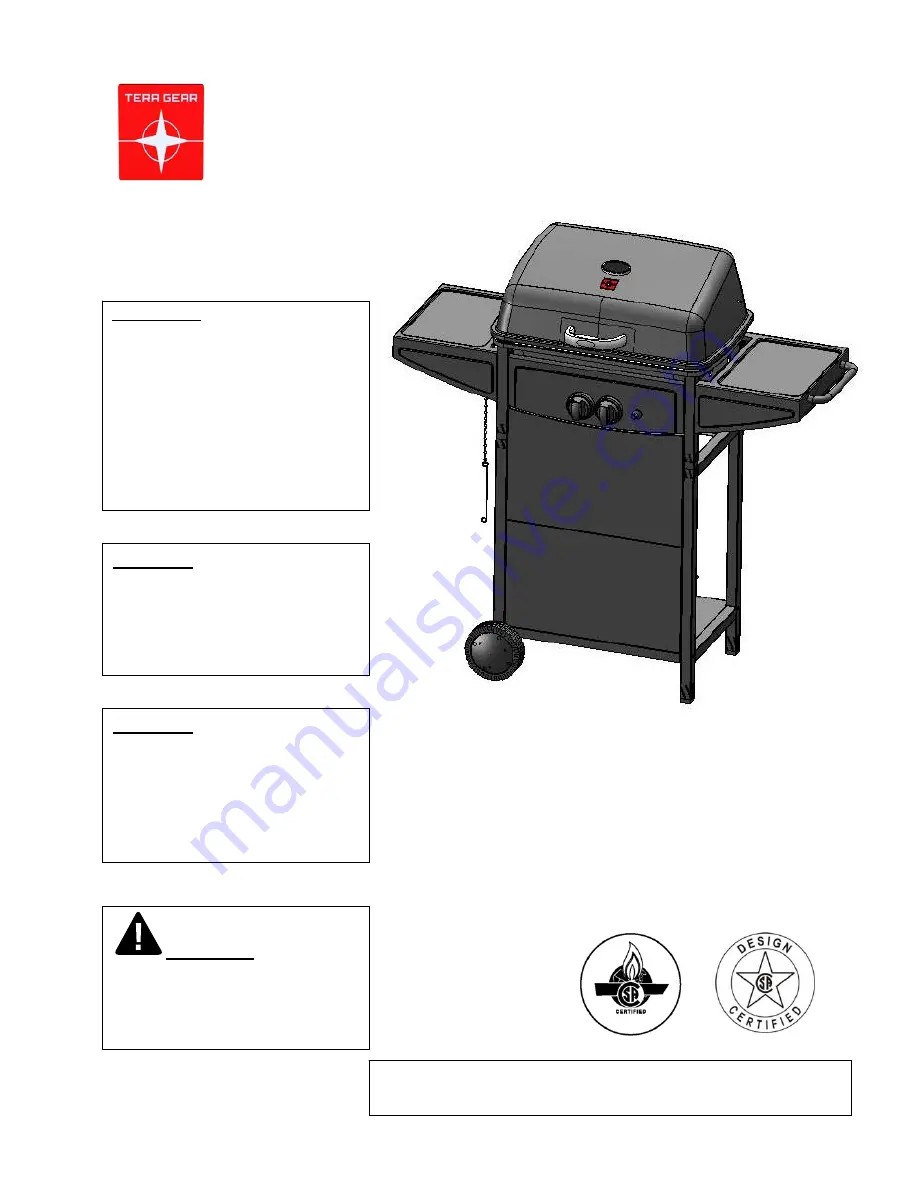
GPC2700JD-Grey 
Owner’s Manual 

0


DANGER:


Failure to follow these 
instructions could result in 
fire or explosion that could 
cause property damage, 
personal injury or death.


WARNING:


FOR YOUR SAFETY:   


For Outdoor Use Only 

(outside any enclosure)


DANGER:


DO NOT use gas grill for 
indoor cooking or heating. 
TOXIC fumes can accumulate 
and cause asphyxiation. DO 
NOT use in or on boats or 
recreational vehicles.


SAVE THESE INSTRUCTIONS FOR FUTURE REFERENCE.   
IF YOU ARE ASSEMBLING THIS UNIT FOR SOMEONE ELSE, 
GIVE THIS MANUAL TO HIM OR HER TO SAVE FOR FUTURE 
REFERENCE. 

FOR CUSTOMER SERVICE, PLEASE CALL 1-877-630-5396 

(TOLL-FREE), 10:00 A.M. – 19:00 P.M. (EST), 

MONDAY-FRIDAY. 

WARNING: 
Improper installation, 
adjustment, alteration, service 
or maintenance can cause 
injury or property damage. 
Read the installation, 
operation and maintenance 
instructions thoroughly 
before installing or servicing 
this equipment. 


Service Center: 1-877-630-5396

TG 1201 2502 
NG 510957 

The Deck Grill 

Summary of Contents for GPC2700JD-Grey

Page 1: ...or recreational vehicles SAVE THESE INSTRUCTIONS FOR FUTURE REFERENCE IF YOU ARE ASSEMBLING THIS UNIT FOR SOMEONE ELSE GIVE THIS MANUAL TO HIM OR HER TO SAVE FOR FUTURE REFERENCE FOR CUSTOMER SERVICE PLEASE CALL 1 877 630 5396 TOLL FREE 10 00 A M 19 00 P M EST MONDAY FRIDAY WARNING Improper installation adjustment alteration service or maintenance can cause injury or property damage Read the insta...

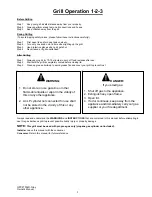
Page 2: ... Step 3 Clean up grease build up to avoid grease fire and cover your grill to prevent rust Always read and understand the WARNINGS and INSTRUCTIONS that are contained in this manual before attempting to use this gas barbecue grill to prevent possible bodily injury or property damage NOTE This grill must be used with propane gas only propane gas cylinder not included Installer Leave this manual wit...

Page 3: ... Contents 5 Hardware Contents 6 Assembly Instructions 7 Operating Your Grill 12 Connecting Disconnecting The Gas Cylinder 13 Checking for Leaks 13 Lighting Your Grill 14 Excess Flow Safety Valve Reset Procedure 15 Care and Maintenance 16 Troubleshooting 17 Warranty Program 18 ...

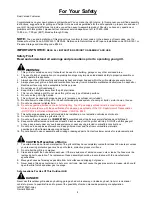
Page 4: ... camper trailer motor home or house 11 Do not use charcoal or lighter fluid 12 Do not use gasoline kerosene or alcohol for lighting The LP gas supply cylinder must be constructed and marked in accordance with the specifications for propane gas cylinders of the U S Department of Transportation DOT CFR 49 or National Standard of Canada CAN CSA B339 13 This outdoor gas appliance is not intended to be...

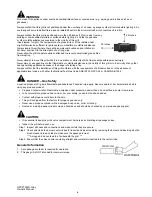
Page 5: ...ire Always confirm that the installation of this grill conforms with the requirements of all local codes or in the absence of applicable local codes with either the National Fuel Gas Code ANSI Z223 NFPA 54 or CAN CGA B149 2 DANGER Gas Safety Liquefied propane LP gas is flammable and hazardous if handled improperly Become aware of its characteristics before using any propane product Propane Charact...

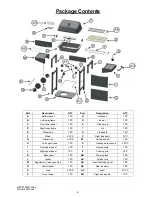
Page 6: ... 1 PC F Wheel 2 PCS V Right side shelf 1PC G Wheel cap 2 PCS W Left side shelf 1 PC H Left upper frame 1 PC X Heating plate support 2 PCS I Front upper panel 1 PC Y Heating plate 1 PC J Right upper panel 1PC Z Cooking grid 1PC K Back panel 1 PC AB Warning rack 1 PC L Igniter 1 PC AC Cylinder clip 1 PC M Regulator Valve assembly 1 PC AD Heat insulation panel 1 PC N Control panel 1 PC AE Heat insula...

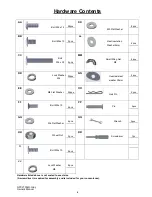
Page 7: ...s JJ 8pcs Hardware listed above is not scaled to exact size A screwdriver is required for assembly and is included for your convenience Bolt M6 x 15 M5 Flat Washer Bolt M6 x 10 Heat Insulation Washer 5mm Bolt M6 x 50 Lock Washer M6 Small Wing Nut M5 Heat resistant washer 30mm M6 Flat Washer Hair Pin Bolt M5 x10 Pin M6 Flat Washer Wrench Wheel Nut Bolt M5 x 10 Lock Washer M5 Screwdriver ...

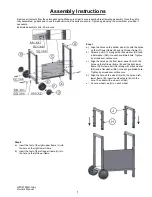
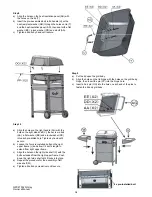
Page 8: ...a lock washer DD and a flat washer GG into each pre drilled hole Tighten by screwdriver until secure c Align the holes on the front lower panel C with the holes on the left lower frame B and the right lower frame D Screw a bolt AA along with a lock washer DD and a flat washer EE into each pre drilled hole Tighten by screwdriver until secure d Align the hole on the wheel F with the hole on left low...

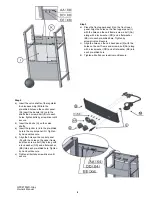
Page 9: ...er frame and then screw a bolt AA along with a lock washer DD and a flat washer EE into each pre drilled hole Tighten by hand until secure c Tighten all bolts by screwdriver until secure Step 3 a Place the front upper panel I on the front lower panel Align the holes on the front upper panel I with the holes on the cart frame screw a bolt AA along with a lock washer DD and a flat washer EE into eac...

Page 10: ...er JJ and a wing nut MM Tighten by hand until secure b Align the holes on grill body with the holes on the upper frame then screw a bolt AA along with a lock washer DD and a flat washer EE into each pre drilled holes Tighten by hand until secure c Tighten all bolts by screwdriver until secure Step 7 a Put the burner R inside the grill body Make certain the valve nozzle is inserted into the burner ...

Page 11: ...e hole c Insert a hair pin OO into the hole on each end of the pins to fasten the lid and grill body Step 10 a Align the holes on the right handle AG with the hole on the right side shelf V then screw a bolt AA a flat washer EE and a lock washer DD into each pre drilled hole Tighten by hand until secure b Loosen the four pre installed bolts on the right upper frame J and allow 1 4 bolt s length to...

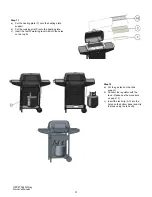
Page 12: ... grid Z onto the heating plate c Insert the feet of warming rack AB into the holes on the top lid Step 12 a Put the gas tank on the tank support b Connect the regulator with the tank Please see the procedure on page 13 c Insert the tank clip AC into the holes on the bottom panel and clip the tank using the tank clip ...

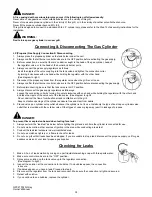
Page 13: ...ped with a cylinder connection device compatible with the connection for outdoor cooking appliances The cylinder must include a collar to protect the cylinder valve Do not drop or handle the cylinder roughly If the appliance is not in use disconnect the cylinder Storage of the appliance indoors is permissible ONLY if the cylinder is disconnected and removed from the appliance Store cylinder outdoo...

Page 14: ...tors as followings Loosen the connection collar by turning it counter clockwise with one hand while holding the regulator with the other hand and take the nipple of the valve out of the tank valve See diagram to right Do not obstruct the flow of combustion air and ventilation air to the grill Keep ventilation openings of the cylinder enclosure free and clear from debris 9 Place dust cap on cylinde...

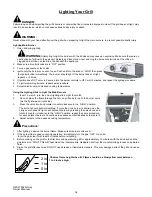
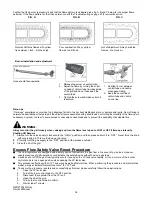
Page 15: ...ooking temperature Using the Lighting Stick to Light the Main Burners 1 Insert a match into the end of lighting stick Light the match 2 Once lit place the flame through the hole on grill body to reach the burner ports As the fig shown on right side 3 Press the valve knob and rotate it counter clockwise to the HIGH position The burner should light immediately If more than one burner is desired use ...

Page 16: ...with a safety device that restricts the gas flow in the event of a gas leek However unsafe practices of grill operation could activate the safety device without having a gas leak A sudden shut off of the gas flow typically occurs if you open the LP tank valve rapidly or if one or more of the burner control knobs is in an open position when opening the LP tank valve This procedure effective with al...

Page 17: ...clean any grill part in a self cleaning oven The extreme heat will damage the finish Cleaning Burning off the grill after every use approx 15 minutes will keep excessive food residue from building up Cleaning the grill before and after cooking is recommended Recommended cleaning materials Mild dishwashing liquid detergent Hot water Nylon cleaning pad Wire brush Paper clip Putty knife scraper Compr...

Page 18: ... Replace electrode Reconnect wire or replace electrode wire assembly Burner will not light using a match No gas flow Coupling nut and regulator not fully connected Obstruction of gas flow Disengagement of burner to valve Spider webs or insect nest in venturi Burner ports clogged or blocked Irregular flame pattern flame does not run the full length of burner Burner ports are clogged or blocked Clea...

Page 19: ...if the warranty has expired customers will also be subject to parts fees Some provinces do not allow the limitation or exclusion of incidental or consequential damages so the above limitations or exclusions may not apply to you This warranty gives you specific legal rights and you may also have other rights that vary from province to province If you have any questions related to the product or war...

Reviews: