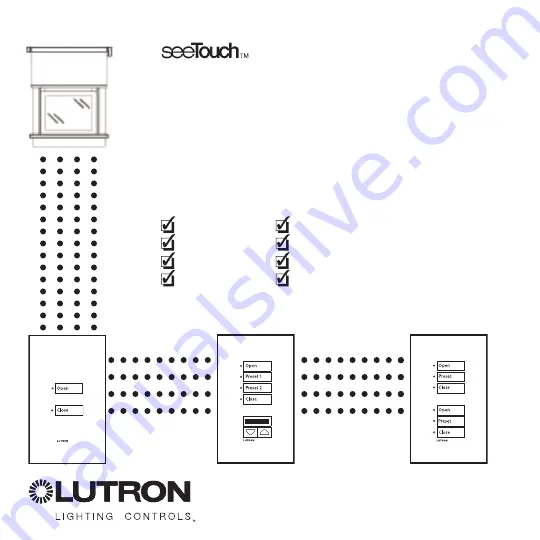
background image

SVQ-2W
SVQ-2WRL
SVQ-2WD
SVQ-4WRL-IR

SVQ-3W
SVQ-3WRL
SVQ-3WD
SVQ-5WRL

Sivoia QED

seeTouch

Keypads

for use with 

Lutron Sivoia QED

Motorized Window Treatment System

Summary of Contents for seeTouch SVQ-2W

Page 1: ...SVQ 2W SVQ 2WRL SVQ 2WD SVQ 4WRL IR SVQ 3W SVQ 3WRL SVQ 3WD SVQ 5WRL Sivoia QED seeTouch Keypads for use with Lutron Sivoia QED Motorized Window Treatment System ...

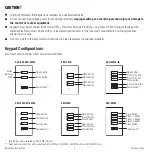
Page 2: ...2 button Close button Infrared Receiver Raise Lower Raise Lower Installation Instructions Occupant Copy CAUTION Lutron recommends that Keypads be installed by a qualified electrician Do not connect high voltage power to low voltage terminals Improper wiring can result in personal injury or damage to the control or to other equipment Keypads must be connected to the Sivoia QED Electronic Drive Unit...

Page 3: ...ant Copy AC GRD AC 75 75 75 75 75 75 AC GRD AC AC GRD AC 75 75 AC GRD AC 75 75 75 75 AC GRD AC AC GRD AC Sivoia QED Link Wiring Using Power Panels Sivoia QED Link Wiring Using Individual Transformers For larger systems distribute Keypads evenly on the link maximum one Keypad between EDUs as seen below For systems with up to four Keypads and 122m 400 feet of wire there is no requirement for even di...

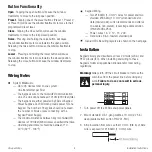
Page 4: ...ng the close button will cause the window treatments to stop Wiring Notes System Maximums Up to 96 devices total on one system One transformer per EDU The Keypads wire to the Sivoia QED Communication Link The Link can not exceed 1 219m 4000 feet total The Keypads are either powered by EDUs or Keypad Power Supplies Each EDU can provide power for one Keypad The number of Keypads should not exceed th...

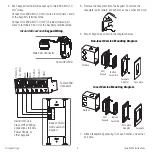
Page 5: ... terminals 3 and 4 of the Keypad s terminal block 4 3 2 1 Common 12 VDC MUX MUX 24 VAC 24 VAC EGND Female EDU Connector Sivoia QED EDU 5 Remove the faceplate from the Keypad To remove the faceplate pull outward at each corner one corner at a time Non insert Version Mounting Diagram 6 Mount Keypad as shown in the diagram below Insert Version Mounting Diagram 7 Attach faceplate by pressing in at eac...

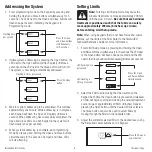
Page 6: ...e Raise and Lower buttons on the Keypad Press the Open and Raise buttons simultaneously LED flashing once per second LED flashing 8 times per second Installation Instructions Occupant Copy Addressing the System 1 Enter programming mode on the Keypad by pressing and holding the Open and Close buttons simultaneously for 5 seconds The LEDs next to the Open and Close buttons will flash once per second...

Page 7: ... EDUs that are assigned to the Keypad in Assignment Mode will move to their Close limit EDUs that are not assigned to the Keypad will move to their Open limit Press the Close button 3 Press any button on an EDU to toggle between assignment or unassignment with the Keypad OR Use the Open button to step through each EDU in the system Each time the Open button is pressed a window treatment will begin...

Page 8: ...5 Lutron Electronics Co Inc Press the Preset button for 5 seconds Flash and then turn on Note The current position is stored as a preset only on the EDUs that are assigned to that preset button The preset is only accessable from that particular Keypad Troubleshooting For information on troubleshooting please refer to the Sivoia QED Technical Reference Guide Storing Presets Sivoia QED EDUs have the...

Reviews: