Magellan eXplorist 510, User Manual
The Magellan eXplorist 510 is a versatile GPS device designed for outdoor exploration. Unlock its full potential with our comprehensive User Manual, available for free download at 88.208.23.73:8080. Gain a deeper understanding of its numerous features and maximize your adventure experience with ease.
Share
Download


Reviews:
No comments
Related manuals for eXplorist 510

SportPilot
Brand: Raymarine Pages: 3

Raytheon NAV 398
Brand: Raymarine Pages: 5

Raychart 320
Brand: Raymarine Pages: 139

NAV 298
Brand: Raymarine Pages: 7

SeaTalk HS
Brand: Raymarine Pages: 19

A Series A50
Brand: Raymarine Pages: 8

G-Series system
Brand: Raymarine Pages: 180

G-Series system
Brand: Raymarine Pages: 14

GPSMAP 96 - Hiking
Brand: Garmin Pages: 150

nuvi 1200
Brand: Garmin Pages: 8

Bike 270 Pro
Brand: Memory-map Pages: 66

Trackstick
Brand: Sageplan Pages: 4

eTrex 10
Brand: Garmin Pages: 168

TwoNav Sportiva
Brand: CompeGPS Pages: 2
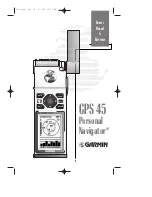
GPS 45
Brand: Garmin Pages: 70

Star III
Brand: SiRF Pages: 22

Compasseo 800
Brand: Packard Bell Pages: 10

BlackBox air
Brand: PATCHWORK Pages: 4


