

Reviews:
No comments
Related manuals for Triton Triton 300

Flex Mini
Brand: Bad Elf Pages: 19

ABX-3
Brand: CSI Wireless Pages: 113

MT 2001 GPS
Brand: GPT Pages: 7
LMU-3050
Brand: CalAmp Pages: 38
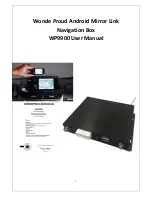
WP9900
Brand: Wonde Proud Pages: 35

GL300M Series
Brand: Queclink Pages: 12
Iridium Tracker
Brand: GPS.AT Pages: 9

LTS-100DS
Brand: Roadragon Pages: 12

GlassOuse V1.2
Brand: ENNOPRO Pages: 5

USB GPS Dongle ND-100
Brand: Globalsat Pages: 5
BOX tracker
Brand: BOX Telematics Pages: 37

Expert GPS CLOCK 0508
Brand: Gude Pages: 33

Prego
Brand: Javad Pages: 152

SX550
Brand: SkyCaddie Pages: 32

GPS SPEED CAMERA WARNING DEVICE RCD-1000
Brand: RoyalTek Pages: 18

G4
Brand: NavTour Pages: 122

450-00059B
Brand: Laird Pages: 19

Home V102
Brand: Alcatel Pages: 21


