background image

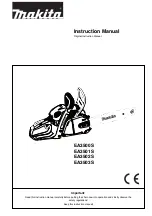
EA7300P

EA7900P

Operator’s and Safety Manual

for Gasoline Chain Saws


(page 2 - 38)

Manuel d’emploi et de sécurité

de tronçonneuses thermiques


(page 39 - 75)

WARNING!

Read and understand this Manual. Always follow safety precautions in the Operator’s and Safety Manual. Improper use can cause serious injury!  Preserve this Manual carefully!

WARNING!

FUELS WITH MORE THAN 10% ETHANOL ARE NOT APPROVED FOR USE IN MAKITA 2-STROKE ENGINES!

Use of alternative fuels, such as E-20 

(20% ethanol)

, E-85 

(85% ethanol)

 or any fuels not meeting MAKITA requirements are not approved for use in MAKITA 2-stroke gasoline engines!

USE OF ALTERNATIVE FUELS CAN CAUSE THE FOLLOWING PROBLEMS:

Poor engine performance, loss of power, overheating, fuel vapor lock, improper clutch engagement, premature deterioration of fuel lines, premature deterioration of gaskets,  

premature deterioration of carburetors.

USING ALTERNATIVE FUELS AND/OR 2-STROKE OILS NOT ACCORDING TO JASO FC OR ISO-L-EGD IN MAKITA 2-STROKE ENGINES WILL VOID YOUR ENGINE WARRANTY!

ATTENTION!

Suivez toujours les conseils de sécurité du présent manuel d’emploi et de sécurité. Une utilisation incorrecte de la tronçonneuse peut entraîner des blessures graves!  

Lisez et comprenez ce manuel.  Conservez avec soin ce manuel!

ATTENTION!

LES CARBURANTS CONTENANT PLUS DE 10 % D’ÉTHANOL NE SONT PAS AUTORISÉS POUR L’UTILISATION DANS LES MOTEURS 2 TEMPS!

Les carburants alternatifs, tels que E-20 

(20 % d‘éthanol)

, E-85 

(85 % d’éthanol)

 ou tout autre carburant n’étant pas conformes aux exigences MAKITA ne sont pas autorisés  

pour l’utilisation dans les moteurs essence à 2 temps MAKITA!

L’UTILISATION DE CARBURANTS ALTERNATIFS PEUT CAUSER LES PROBLÈMES SUIVANTS:

Faible performance moteur, Perte de puissance, Surchauffe, Bouchons de vapeur dans la conduite d’essence, Embrayage incorrect, Détérioration prématurée des conduites 

d’essence, Détérioration prématurée des joints d’étanchéité, Détérioration prématurée des carburateurs.

L’UTILISATION DE CARBURANTS ALTERNATIFS ET/OU D’HUILES 2 TEMPS NON-CONFORMES À LA NORME JASO FC OU ISO-L-EGD DANS LES MOTEURS À 2 TEMPS  

MAKITA ANNULERA VOTRE GARANTIE MOTEUR!

Summary of Contents for EA7300P

Page 1: ...AKITA 2 STROKE ENGINES WILL VOID YOUR ENGINE WARRANTY ATTENTION Suivez toujours les conseils de sécurité du présent manuel d emploi et de sécurité Une utilisation incorrecte de la tronçonneuse peut entraîner des blessures graves Lisez et comprenez ce manuel Conservez avec soin ce manuel ATTENTION LES CARBURANTS CONTENANT PLUS DE 10 D ÉTHANOL NE SONT PASAUTORISÉS POUR L UTILISATION DANS LES MOTEURS...

Page 2: ... reasonable amount of time not to exceed 30 days If you have a question regarding your warranty coverage you should contact the MAKITA Warranty Service Department at 1 800 4 MAKITA 462 5482 DEFECTS WARRANTY REQUIREMENTS The warranty period begins on the date the small off road engine is delivered to an ultimate purchaser or first placed into service The warranty period is two years GENERAL EMISSIO...

Page 3: ... that such abuse neglect or improper maintenance was the direct cause of the need for repair or re placement of the part That notwithstanding any adjustment of a component that has a factory installed and properly operating adjustment limiting device is still eligible for warranty coverage The following emission warranty parts lists are covered 1 Fuel Tank 2 Fuel Line 3 Fuel Cap 4 Fuel Cap Seal WA...

Page 4: ... outlined in this operator s manual Kickback may cause severe or fatal injury and is one of many potential dangers in operating a chain saw Kickback and other safety related precautions are described in detail within this operator s manual Additional operator s manuals are available from www makitausa com and 1 800 4 MAKITA 462 5482 and MAKITA CANADA INC 1950 Forbes Street Whitby Ontario L1N 7B7 C...

Page 5: ...ing symbols on the chain saw and in the Operator s and Safety Manual Further symbols see page 7 Read Operator s and Safety Manual and follow the warning and safety precautions Particular care and caution Forbidden Wear protective helmet eye and ear protection Wear protective gloves No smoking No open fire Stop engine Push the starting valve Engine manual start On Off I O switch Caution kickback Ch...

Page 6: ...ins are desi gned to reduce the risk of kickback injury Ask your MAKITA dealer about these devices Safety precautions for chain saw operators While operating the chain saw please observe the follo wing rules a Contact of the guide bar nose with any object should be avoided b Tip contact may cause the guide bar to move suddenly upward and backward which may cause serious or fatal injury c Always op...

Page 7: ...d regulate temperature produces numbness and burning sensations and may cause nerve and circulation damage and tissue necrosis All MAKITA saws are therefore provided with an an tivibration system which is essential for those using chain saws on a regular or sustained basis Antivi bration systems do not guarantee that you will not sustain Whitefinger disesase however they reduce thisdangerconsidera...

Page 8: ... behind you fig 4 By vehicle When transporting in a vehicle keep chain and bar covered with the chain guard Properly secure your saw to prevent turnover fuel spillage and damage to the saw Make sure the saw in not exposed to heat or sparks 4 Proper clothing Clothing must be sturdy and snug fitting but allow com plete freedom of movement Avoid loose fitting jackets scarfs neckties jewelry flaredorc...

Page 9: ...ou or all other obstructions and objects including the ground because when the engine starts in semi throttle position engine speed will be fast enough for the clutch to engage the sprocket and turn the chain which may cause a kickback Never attempt to start the saw when the guide bar is in a cut or kerf When you pull the starter grip don t wrap the starter rope around your hands Do not allow the ...

Page 10: ...ions Always hold the saw firmly with both hands when the en gine is running Place your left hand on the tubular handle andyourrighthandongripandthrottlelever Left handers should follow these instructions too 8 7 WARNING Donotoperateyourchainsawinsemi throttleposition Cutting in this position does not permit the operator proper control of the saw or chain speed WARNING Never come too close to a rot...

Page 11: ...ng of the causes of these reactive forces may help you avoid loss of control The most common reactive forces are kickback pushback pull in In order to keep control of your saw always maintain a firm foothold Never work on a ladder in a tree or on any other insecure support Never use the saw above shoulder height fig 9 9 10 Thisreactioncanoccurinafractionofasecondandunder some circumstances cause t...

Page 12: ...orce increase with the rate of impact The contact angle between the nose of the bar and the foreign object fig 11 Kickback is most pronounced in the upper quadrant of the bar nose MAKITA chain types are designed to reduce kickback forces The depth gauges Improper lowering of the depth gauges also increases the risk of a kickback Saw chain cutter sharpness WARNING A dull improperly sharpened chain ...

Page 13: ... Pull inmayalsobepreventedbyusingplasticwedges to open the kerf or cut Cutting techniques Felling Felling is cutting down a tree Beforefellingatree considercarefullyallconditionswhich may affect the direction of fall including The intended direction of the fall The neutral lean of the tree Any unusually heavy limb structure Surrounding trees and obstacles The wind direction and speed WARNING Alway...

Page 14: ...nd equipment a safe distance away from the tree but not on the escape path 17 18 19 Then determine the placement of the felling notch fig 21 The felling notch when properly placed determines the direction in which the tree will fall It is made perpen dicular to the line of fall and should be as close to the ground as possible Cut the felling notch to a depth of about one fifth to one fourth of the...

Page 15: ...rthanthelength of the guide bar requires use of either the sectioning or plunge cut method These methods are extremely dangerous because they involve the use of the nose of the guide bar and can result in kickback Only properly trained professionals should attempt these techniques For the sectioning method fig 24 make the first cut with the guide bar fanning in toward the hinge Then using the bump...

Page 16: ...ig 30 Always cut from the top of the limb Do not underbuck freely hanging limbs A pinch may result or the limb may fall causing loss of control If a pinch occurs stop the engine and remove the saw by lifting the limb WARNING Be extremely cautious when cutting limbs under tension The limbs could spring back toward the operator and cause loss of control of the saw or injury to the operator 29 30 Buc...

Page 17: ...ckets or chains Keep the chain sharp You can spot a dull chain when easy to cut wood becomes hard to cut and burn marks appear on the wood Keep the chain at proper tension Tighten all nuts bolts and screws except the carburetor adjustment screws after each use Keep spark plug and wire connection tight and clean Store saws in a high or locked place away from chil dren 35 WARNING 5 Logs under strain...

Page 18: ...arter grip 15 Adjusting screws S L H for carburetor 16 I STOP switch 17 Choke lever 18 Throttle lever 19 Throttle stopper 20 Hand guard 21 Fuel tank cap 22 Fan housing with starting assembly 23 Oil tank cap 24 Guide bar 25 Chain 26 Adjusting screw for oil pump bottom side Indicate when ordering spare parts Identification plate Serial no Year of manufacture EA7900P 445 060 655 038 100 650 Typ 038 5...

Page 19: ... at the bystander s position 50 ft 15 m distance according to ANSI B 175 1 db A 78 7 78 7 Carburetor diaphragm carburetor Type ZAMA Ignition system Type electronic Spark plug Type NGK BPMR 7A Electrode gap inch mm 020 0 5 or spark plug Type BOSCH WSR 6F Fuel consumption at max load per ISO 7293 kg h 1 9 2 0 Specific consumption at max load per ISO 7293 g kWh 460 460 Fuel tank capacity floz 25 36 C...

Page 20: ...ith the chain saw for the following work Put the chain saw on a stable surface and carry out the following steps for mounting the guide bar and saw chain Release the chain brake by pulling the hand guard 1 in direc tion of arrow Unscrew retaining nuts 2 Pull off the sprocket guard 3 C D PUTTING INTO OPERATION CAUTION Before doing any work on the guide bar or chain always switch off the engine and ...

Page 21: ...guide bar and turn the chain adjusting screw 13 to the right clockwise until the chain rests against the bottom side of the guide bar While still holding up the tip of the guide bar tighten the retaining nuts 2 with the universal wrench NOTE Before tightening the chain loosen the two nuts 2 slightly Line up the holes in the sprocket guard 3 with the bolts 11 Turn the chain tensioning screw H 13 un...

Page 22: ...g the chain brake braking If the kickback is strong enough the sudden acceleration of the guide bar combined with the inertia of the hand guard 1 will automatically actuate the chain brake To engage the chain brake manually simply push the hand guard 1 forward towards the tip of the saw with your left hand arrow 1 Releasing the chain brake Pull the hand guard 1 towards you arrow 2 until you feel i...

Page 23: ...es are ensured MAKITAsynthetic two stroke engine oil 50 1 is available in the following sizes to suit your individual requirements 2 6 floz order number T 00745 6 4 floz order number T 00739 In case MAKITAsynthetic two stroke engine oil is not available it is recommended to use a mixture ratio of 50 1 with other synthetic two stroke engine oils as otherwise optimum opera tion of the engine cannot ...

Page 24: ...caused by using waste oil or unappropriate chain oil the product guarantee will be null and void Your salesman will inform you about the use of chain oil AVOID SKIN AND EYE CONTACT Mineral oil products degrease your skin If your skin comes in contact with these substances repeatedly and for an extended periodoftime itwilldesiccate Variousskindeseasesmayresult In addition allergic reactions are kno...

Page 25: ...e saw on a suitable surface C To ensure troublefree operation of the oil pump the oil guide groove at the crank case 2 and the oil inlet bore in the guide bar 3 must be cleaned regularly Note After the saw has been turned off it is normal for residual chain oil to drip from the oil feed system the guide bar and the chain for a time This does not constitute a defect Place the saw on a suitable surf...

Page 26: ...in does not stop immediately when you test the chain brake do NOT use the chain saw Take the chain saw to a MAKITA service center 7 C B Cold starting Pull the choke 1 out until it audibly clicks This simultaneously actuates the half throttle lock Move the I STOP ignition switch 3 as shown by the arrow Slowly pull out the starter cable until you notice resistance the piston is positioned before the...

Page 27: ... 10 D Adjusting the carburetor CAUTION Carburetor adjustment may only be done by a specialist MAKITA service center Only adjusting screw S can be manipulated by the user If the saw chain moves in idle i e without the throttle being pressed it is imperative to correct the idle speed Do not adjust the idle speed until after complete assembly and testing of the saw Idle speed adjustment must only be ...

Page 28: ...from the spare parts list All cutters must be of the same length dimension a Cutters with different lengths result in rough running of the chain and can cause cracks in the chain The minimum cutter length 0 11 3 mm Do not resharpen the chain when the minimum cutter length has been reached at this point the chain must be replaced see the Extract from the spare parts list and Replacing the saw chain...

Page 29: ...her cutters of the chain New saw teeth must be filed to the exact same shape as the used teeth including on their running surfaces Always guide the file horizontally 10 to the guide bar E The file holder makes file guidance easier It is marked for the correct sharpening angle of 25 keep the marks parallel with the chain when filing see illustration and limits the cut depth to the correct 4 5 of th...

Page 30: ...he guide plate 5 and brake mechanism cover 7 Use a brush to clean the interior especially the brake mecha nism 11 Make sure to leave no residue in the oil guide groove 10 NOTE The brake mechanism cover 7 holds the lever 8 in place Before putting the cover back on check the lever for proper positioning First put on the brake mechanism cover 7 and then the guide plate 5 For replacing the guide bar c...

Page 31: ...nsult the Extract from the spare parts list Assemble the new sprocket cup disc and circlip For replacing the guide bar chain and sprocket see PUTTING INTO OPERATION A H NOTE New chains stretch so check the chain tension frequently see Checking the chain tension D C Replacing the fuel filter The felt filter 17 of the fuel filter can become clogged It is recommended to replace the fuel filter once e...

Page 32: ...re is a noticeable loss of power If cleaning the filter does not bring an improvement in performance it is time to replace it Cleaning the nylon filter the nylon filter in the filter hood and pre filter Use a soft brush or blow out dirt from the inside with compressed air If the filter is very dirty it can be washed in lukewarm water with regular dishwashing detergent Clean frequently several time...

Page 33: ...nition spark Stick the combination tool 7 between the hood and cylinder exactly as shown IMPORTANT Do not stick the tool in the spark plug hole It should touch only the cylinder otherwise the engine will be damaged With the spark plug cap firmly attached to the unscrewed spark plug 8 use insulated pliers to hold the plug against the tool away from the spark plug hole Switch the I STOP ignition swi...

Page 34: ...slightly until the return spring engages Screw in and tighten screw 5 and washer 6 Guide the cable into the space 4 on the drum and use the cable to turn the drum two turns clockwise Hold the cable drum with your left hand and with your right hand untwist the cable pull it tight and hold it Carefully release the cable drum The spring will wind the cable around the drum Repeat three or four times T...

Page 35: ... compressed air A bottle brush can come in handy for cleaning out the cylinder ribs With the cyinder fin cleaner clean out the area between the cylinder fins and between the cylinder and the mounting plate Do not use force Be careful not to damage the short circuit wire and the ignition wire Mounting the fan housing Put the fan housing 13 on Press the screws 14 into their holes Lift the engine hoo...

Page 36: ...e have repaired by a qualified service center immediately Saw chain Sharpen regulary replace in good time 28 29 Chain brake Have inspected regularly at an authorized service center Guide bar Turn over to ensure even wear of bearing surfaces Replace in good time 22 31 Starter cable Check for damage Replace if damaged 34 Before each start Saw chain Inspect for damage and sharpness 28 29 Check chain ...

Page 37: ...priate repairs Use of unsuitable spare parts or parts which are not original MAKITA parts insofar as they have caused the damage Use of unsuitable or old oil Damage related to conditions arising from lease or rent contracts Damages caused by disregarding loose outer bolted connections Cleaning servicing and adjustment work is not covered by the guarantee All repairs covered by the guarantee must b...

Page 38: ... for 15 952 020 650 1 Chain protection for 18 20 952 020 660 1 Chain protection for 24 952 030 680 1 Chain protection for 28 4 038 213 641 1 Sprocket guard cpl 5 923 208 004 2 Hexagonal nut M8 6 941 719 131 1 Universal wrench SW 19 13 7 940 827 000 1 Offset screwdriver 8 944 340 001 1 Carburetor screwdriver 9 963 601 122 1 Fuel filter 10 010 114 050 1 Fuel Oil tank cap cpl 11 963 228 030 1 O Ring ...

Page 39: ... station technique MAKITA dès l apparition d un problème Les réparations sous garantie seront effectuées dans un délai raisonnable ne dépassant pas 30 jours Pour toute question concernant votre couverture garantie adressez vous au service garantie MAKITA en appelant le 1 800 4 MAKITA 462 5482 CONDITIONS DE GARANTIE La période de garantie commence le jour de la remise du petit moteur hors route à l...

Page 40: ...remplacement de la pièce Nonobstant cela tout ajustement d une pièce équipée d un dispositif de limitation installé en usine et en bon état de fonctionnement demeure éligible à la garantie Les listes suivantes de pièces sous garantie du système antipollution sous couvertes par la garantie 1 réservoir à carburant 2 conduite de carburant 3 bouchon de carburant 4 joint du bouchon de carburant LISTE D...

Page 41: ...t mode d emploi Le retour de chaîne peut entraîner des blessures graves ou mortelles et constitue l un des nombreux dangers potentiels liés à l utilisa tion d une tronçonneuse Ce mode d emploi décrit de faç on détaillée le retour de chaîne et les autres mesures de sécurité D autres exemplaires de ce mode d emploi peuvent être commandés auprès de www makitausa com et 1 800 4 MAKITA 462 5482 et MAKI...

Page 42: ...é Symboles additionnels voir page 44 Lire manuel d emploi et suivre les consignes de sécurité et d avertissement Danger et attention particuliers Interdit Porter le casque les lunettes et acoustiques de protection Porter des gants de protection Interdiction de fumer Pas de feu ouvert Arrêter le moteur Appuyer sur la soupape de décompression Démarrer le moteur Interrupteur de marche arrêt I O Atten...

Page 43: ... les guides et les chaînes indiqués par le constructeur ou des pièces équivalentes Mesures de sécurité supplémentaires Tous les utilisateurs de tronçonneuses doivent respecter les mesures de sécurité supplémentaires ci dessous 1 Netravaillezpasavecunetronçonneuselorsquevous êtes fatigué 2 Utilisez des chaussures de sécurité des vêtements ajustés des gants de sécurité ainsi que des lunettes un casq...

Page 44: ...e se manifeste par une réduction de la sensibilité et de la régulation de la température au niveau des mains par des engourdissements et des brûlures Elle peut également entraîner des lésions nerveuses et circulatoires et une nécrose des tissus Toutes les tronçonneuses MAKITA sont donc munies d un système antivibration qui est très important pour les personnes utilisant des tronçonneuses de façon ...

Page 45: ...çonneuse avec le moteur en marche Une accélération intempestive du moteur peut mettre la chaîne en marche Evitez de toucher le pot d échappement risque de brûlure Transport à la main lorsque vous portez votre tronçonneuse à la main le moteur doit être arrêté et la tronçonneuse doit être en position correcte La protection de la chaîne doit être mise et le guide doit être orienté vers l arrière Lors...

Page 46: ... que le moteur tourne Démarrage Nedémarrezpaslatronçonneuseenlalaissantdescendre au bout du cordon Cette méthode est très dangereuse car vous pouvez perdre le contrôle de la tronçonneuse fig 6 Posez la tronçonneuse sur un sol ferme ou sur une autre surfacedureàunendroitdégagé Assurez vousquevous avezunepositionstableausoletunbonéquilibre Passez le pied droit dans la poignée arrière et prenez ferme...

Page 47: ... ne doit pas tourner Pour le réglage du ralenti reportez vous au chapitre correspondant de ce mode d emploi N utilisez pas de tronçonneuse dont le ralenti n est pas correctement réglé Réglez le ralenti vous même de la façon indiquée dans le chapitre correspondant de ce mode d emploi Demandez à votre revendeur MAKITA d examiner votre tronçonneuse et de procéder aux réglages corrects ou aux réparati...

Page 48: ...sur tout autre support instable N utilisez jamais la tronçonneuse plus haut qu à hauteur d épaules fig 9 9 10 11 12 Positionnez la chaîne de sorte que votre corps soit éloigné du dispositif de coupe lorsque le moteur tourne fig 10 N appuyezpassurlatronçonneuselorsquevousarrivezà la fin d une coupe Sous l effet de la pression le guide et la chaîne peuvent sauter hors de la coupe ou de l entaille ne...

Page 49: ...portionnelle à l impact L angle de contact entre la pointe du guide et le corps étranger fig 11 Le choc de recul est plus marqué dans le quadrant supérieur de la pointe du guide Les modèles de chaîne MAKITAsont conçus pour réduire les forces de choc de recul Les limiteurs de profondeurs L abaissement incorrect des limiteurs de profondeur augmente également le risque de choc de recul Affûtage des p...

Page 50: ...sse lorsqu elle entre en contact avec le bois Le recul Le recul se produit lorsque la chaîne se trouvant sur la partie supérieure du guide est arrêtée subitement lorsqu elle est coincée prise ou rencontre un corps étranger dans le bois La réaction de la chaîne pousse la tronçonneuse directement vers l utilisateur lui faisant perdre le contrôle de la tronçonneuse Le recul se produit souvent lorsque...

Page 51: ...li et dégagez la de tous les obstacles Cette voie doit être opposée à la direction prévue de la chute de l arbre et avoir un angle de 45 fig 19 Il faut aussi choisir une seconde voie Placez tous les outilsetl ensembledumatérielensécuritéàunedistance suffisante de l arbre mais pas sur la voie de repli 45 45 zone d abattage 2 1 2 17 18 19 0 5 2 4cm encoche d abattage tenant sens de chute 20 21 22 23...

Page 52: ...t abattus qui ont un soutien médiocre Si l arbre reste en suspens ou si pour une raison ou une autre il ne tombe pas complètement posez la tronçonneuse de côté et tirez l arbre à l aide d un treuil à câble d un palan ou d un tracteur Si vous essayez de l abattre complètement en le coupant à la tronçonneuse vous risquez de vous blesser Méthode de sectionnement ATTENTION Pour abattre un arbre dont l...

Page 53: ...anche pourrait tomber vous faisant perdre le contrôle de la tronçonneuse Si le guide est coincé arrêtez le moteur et retirez la tronçonneuse en soulevant la branche ATTENTION Soyezextrêmementprudentlorsquevouscoupezdes branches qui forcent Les branches peuvent sauter vers l utilisateur et entraîner une perte de contrôle de la tronçonneuse ou blesser l utilisateur 29 30 31 32 ATTENTION A ce point i...

Page 54: ...e d emploi ATTENTION Avant de commencer toute opération d entretien de réparation ou de nettoyage de la tronçonneuse il faut toujours arrêter le moteur et s assurer que la chaîne est arrêtée Laisser refroidir la tronçonneuse avant les travaux d entretien risque de brûlure Les temps de refroidissement nécessaires sont plus longs pour les tronçonneuses équipées d un catalyseur Ne procédez pas à des ...

Page 55: ...r 16 Commutateur I Stop 17 Choke étrangleur 18 Levier de gaz 19 Touche de verrouillage de sécurtité 20 Protège main 21 Bouchon de fermeture du réservoir carburant 22 Carter ventilateur avec dispositif de lancement 23 Bouchon de fermeture du réservoir huile 24 Guide de la chaîne de la scie 25 Chaîne de sciage 26 Vis de réglage p pompe à huile face inférieure 12 Bouton du chauffage de poignée option...

Page 56: ... pour une personne voisine à une distance de 50ft 15 m selon ANSI B 175 1 db A 78 7 78 7 Carburateur à membrane Type ZAMA Dispositif d allumage Type électronique Bougie d allumage Type NGK BPMR 7A Ecartement électrodes inch mm 020 0 5 ou bougie d allumage Type BOSCH WSR 6F Consommation carburant puissance max selon ISO 7293 kg h 1 9 2 0 Consommation spéc puissance max selon ISO 7293 g kWh 460 460 ...

Page 57: ... suivants Placer la tronçonneuse sur un support stable et exécuter les opérations suivantes pour le montage de la chaîne de sciage et du guide de la chaîne Desserrer le frein de chaîne Pour cela tirer le protège main 1 dans le sens de la flèche Dévisser les écrous de fixation 2 Retirer la protection de la roue à chaîne 3 C D MISE EN ROUTE Attention Pour tous travaux effectués sur le guide de la ch...

Page 58: ...r la vis de tension de la chaîne 13 vers la droite dans le sens des aiguilles d une montre jusqu à ce que la chaîne s applique sur la face inférieure du rail voir cercle Continuer à relever la pointe du guide et serrer les écrous de fixation 2 à bloc avec la clé combinée NOTE Pour retendre la chaîne de sciage desserrer légèrement les deux écrous de fixation 2 Aligner les trous de réception de la p...

Page 59: ...ein de chaîne bloquer En cas de contrecoup suffisamment fort le frein de chaîne se déclenche automatiquement dû à l accélération rapide de la chaîne de sciage et à l inertie de masse du protège main 1 Lors d un enclenchement manuel le protège main 1 est poussé par la main gauche en direction de la pointe du guide de la chaîne flèche 1 Libérer le frein à main Tirer le protège main 1 en direction de...

Page 60: ...s Le contact avec les yeux de l huile conduit à des irri tations en cas de contact rincer immédiatement l oeil avec de l eau claire Si l irritation continue consulter immédiatement un médecin Carburants ATTENTION L appareil est utilisé avec des produits de pétrole essence et huile Votre attention est requise lorsque vous manipulez l essence Ilestinterditdefumerettoutfeuimmédiatn estpasautorisé ris...

Page 61: ...nde usure de la pompe à huile et du dispositif de sciage Les dommages résultant de l utilisation d huiles usagées ou d huiles de chaîne non appropriées ne sont pas couverts par la garantie Votre vendeur spécialisé vous informe sur la manipulation et l utilisation d huile de chaîne de sciage EVITEZ LE CONTACT AVEC LA PEAU ET LES YEUX Les produits pétroliers ainsi que les huiles dégraissent la peau ...

Page 62: ...C Pour que la pompe à huile fonctionne toujours parfaitement la rainure de guidage d huile sur le carter du vilebrequin 2 ainsi que les orifices d entrée d huile dans le guide de la chaîne 3 doivent régulièrement être nettoyés Remarque Après la mise hors service de la tronçonneuse il est normal que de petites quantités d huile de chaîne restant encore dans le système de conduite d huile et sur le ...

Page 63: ...l ne faut en aucun cas commencer à travailler Prière de consulter un atelier spécialisé MAKITA 7 C B Démarrage à froid Tirer le starter 1 jusqu à ressentir qu il s enclenche ce qui actionne simultanément l arrêt d admission réduite Pousser le bouton I STOP 3 de l allumage dans le sens de la flèche Tirer le cordon de lancement lentement jusqu à sentir une résistance le piston se trouve au point mor...

Page 64: ...10 D Réglage du carburateur ATTENTION Le carburateur ne peut être réglé que par un atelier agréé MAKITA Seules les rectifications au niveau de la vis de réglage S peuvent être effectuées par l utilisateur de l appareil Au cas où l outil de coupe tourne au ralenti l accélérateur n est pas actionné le réglage du ralenti doit être impérativement rectifié Le ralenti ne doit être réglé qu après l assem...

Page 65: ...ent une marche irrégulièreetrudedelachaîne augmententl usureetaboutissent à des ruptures de chaîne L angle d arasement de la dent de rabotage 60 résulte de la profondeur de pénétration de la lime ronde Si la lime prescrite est guidée correctement l angle d arasement correct s obtient par lui même C Critères d affûtage ATTENTION N utiliser que des chaînes et guide permis pour cette tronçonneuse voi...

Page 66: ...a mesure type pour toutes les autres dents de rabotage de la chaîne de sciage Les nouvelles dents de rabotage doivent être exactement adaptées aux formes des dents usées ainsi qu aux surfaces de roulement Conduire la lime horizontalement 10 par rapport au guide E Un porte lime facilite le guidage de la lame il porte des repères pour l angle d affûtage correct de 25 orienter les repères parallèleme...

Page 67: ...e couvercle du dispositif de freinage 7 Nettoyer tout l intérieur notamment la zone du dispositif de freinage 11 au moyen d un pinceau Veiller à ne pas laisser de restes dans la rainure d ouverture 10 ATTENTION Le levier 8 fixent par le couvercle du dispositif de freinage 7 Avant de monter le couvercle vérifier la bonne fixation du levier et de la cheville Monter d abord le couvercle du dispositif...

Page 68: ... Monter la nouvelle roue de chaîne les rondelles de butée et le circlip Montage du guide de chaîne de la chaîne de sciage et de la protection de la roue à chaîne voir chapitre MISE EN ROUTE A H NOTE Contrôler fréquemment la tension de la chaîne car les nouvelles chaînes de sciage ont en général tendance à s allonger voir Contrôle de la tension de la chaîne D C Remplacement de la crépine d aspirati...

Page 69: ... en voile que si une perte de puissance sensible survient pendant la coupe Remplacer le filtre si aucune amélioration n est sensible après le nettoyage Nettoyage du filtre en nylon crible en nylon dans le capot du filtre et du préfiltre Nettoyer au moyen d un pinceau d une brosse souple ou de l intérieur avec de l air comprimé avec précaution Laver le filtre en nylon fortement encrassé dans une ea...

Page 70: ... NGK BPMR 7A ou BOSCH WSR 6F Vérification de l étincelle d allumage Introduire la clé combinée 7 entre le capot et le cylindre comme montré sur la figure ATTENTION Ne pas introduire la clé dans le trou de la bougie établir uniquement le contact avec le cylindre pour éviter d endommager le moteur Pousser la bougie d allumage dévissée 8 contre la clé à partir du trou de la bougie avec la cosse de bo...

Page 71: ...e Y insérer la vis 5 avec la rondelle 6 et bien visser Introduire le cordon dans l échancrure 4 du tambour d enroulement et tourner deux fois le tambour avec le cordon dans le sens des aiguilles Tenir le tambour d enroulement de la main gauche et démêler le cordon de la main droite bien le tirer et le tenir Relâcher le tambour avec précaution Ce faisant le cordon s enroule sur le tambour dû à la t...

Page 72: ... la serrer à la main Poser la cosse et retirer la soupape de démarrage Enlever le capot du ventilateur et retirer le déflecteur de ven tilateur ATTENTION En cas d utilisation d air comprimé pour le net toyage utiliser impérativement des lunettes de protection pour éviter toute blessure au niveau des yeux Toute la zone dégarnie 17 peut être nettoyée avec une brosse et de l air comprimé Pour nettoye...

Page 73: ...ment remplacer à temps 65 66 Frein à chaîne Faire vérifier régulièrement par l atelier spécialisé Guide de chaîne Tourner afin que les surfaces de roulement sollicitées s usent de manière régulière 59 68 Cordon de lancement Vérifier s il n est pas détérioré Le remplacer en cas de détérioration 71 Avant toute mise Chaîne de sciage Vérifier le tranchant et si elle n est pas détériorée 65 66 en route...

Page 74: ...sation de pièces de rechange non appropriées resp de pièces non d origine MAKITA dans la mesure où elles sont sources de détériorations Utilisation de produits de fonctionnement inadaptés ou superposés Détériorations provenant de conditions d utilisation du magasin de location Endommagements causés par fixation dévissée et non resserrée à temps Les travaux de nettoyage d entretien et de réglage ne...

Page 75: ...haîne 18 20 952 020 660 1 Protection chaîne 24 952 030 680 1 Protection chaîne 28 4 038 213 641 1 Protection cpl roue à chaîne 5 923 208 004 2 Ecrou hexag M8 6 941 719 131 1 Clé combinée Ouverture 19 13 7 940 827 000 1 Tournevis coudé 8 944 340 001 1 Tournevis pour carburateur 9 963 601 122 1 Crépine d aspiration 10 010 114 050 1 Essence Capuchon cpl réservoir huile 11 963 228 030 1 O Ring 28x3 mm...

Page 76: ... Division 1950 Forbes Street Whitby Ontario Canada L1N 7B7 The engine exhaust from this product contains chemicals known to the State of California to cause cancer birth defects or other reproductive harm Les gaz d échappement émis par ce produit contiennent des produits chimiques connus par l Etat de Californie pour provoquer le cancer des défauts de naissance ou autres dommages de reproduction ...

Reviews: