background image

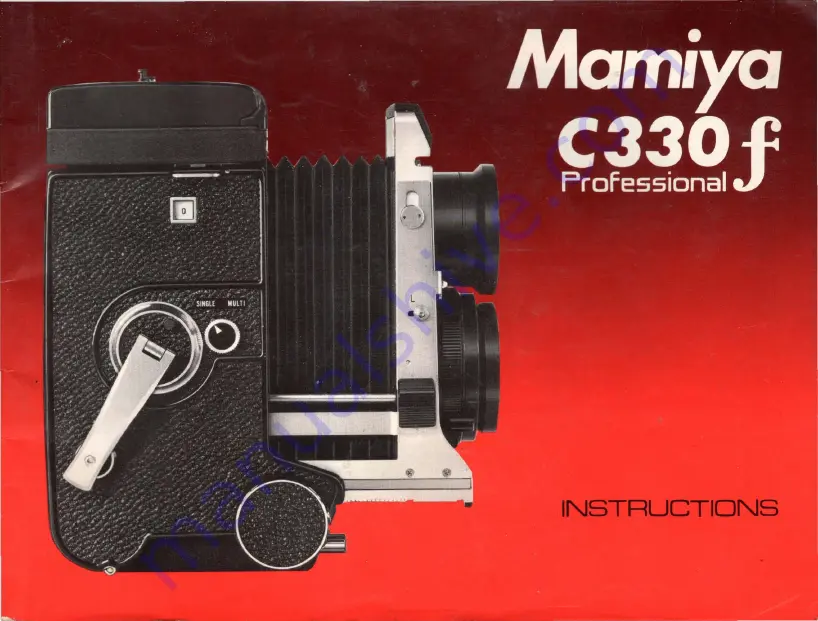
Summary of Contents for C330f Professional

Page 1: ......

Page 2: ...ra truly makes possible The MAMIYA C330 accepts all interchangeable lenses of the current Mamiya C series as well as all of the accessories except the single exposure attachment In addition various new accessories have been designed for this model With the wide selection of all these inter changeable lenses and accessories you can further widen your scope of photography by making the most of the u...

Page 3: ...g film insert both film spools correctly See page 9 for details When closing the back cover firmly press both sides of the back cover catch button See page 7 for details In coinciding the focal length of the lens to be used set the parallax cor recting dial The amount of parallax correction and the exposure factor are readable on the focusing screen in the finder See page 74 for details 2 ...

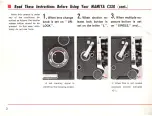
Page 4: ... release button cannot be de pressed In this case abso lutely do not use force 1 When lens change knob is set on UN LOCK A red warning signal is visible on the focusing screen 2 When shutter reo 3 When multiple ex lease lock button is posure button is set set on the letter L on SINGLE and 1 When film is not loaded exposure counter indicates 0 ...

Page 5: ... after 12 or 24 pressed exposures When taking ordinary pic tures with roll film set the multiple exposure selector triangular mark toward the word SINGLE For multiple exposures when the shutter is freely released without loading film or when the single exposure attachment is used set the triangular mark toward the word MULTI 4 ...

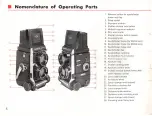
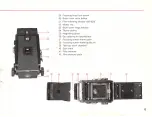
Page 6: ...me for 80mm lens 11 Sportsfinder mask stud 12 Sportsfinder flap 13 Synchroflash terminal 14 Synchroflash M X selector 15 Shutter speed ring 16 Aperture ring 17 Shutter cocking lever 18 Aperture control knob 19 Shutter release button lower with cable release socket 20 Lens catch bracket 21 Accessory shoe 22 Spool change knob upper 23 Parallax correcting dial 24 Lens change knob 25 Distance scale wi...

Page 7: ...indow 120 220 32 Memo cli p 33 Back cover hinge release 2 W 34 Tripod socket 35 Magnifying glass 36 Eye opening for sportsfinder 37 Focusing screen frame catch 38 Focusing screen frame guide pin 39 Take up spool chamber 40 Start mark 41 Film chamber 42 Film pressure plate 32 6 ...

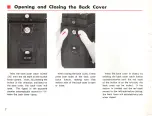
Page 8: ...o 0 when the back cover opens When closing the back cover firmly press both sides of the back cover catch button making sure that neither side of the back cover is open or loose When the back cover is closed by twisting the back cover catch button counterclockwise until the red mark of the button is on the left side the back cover can be locked If the button is twisted and the red mark moved to th...

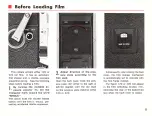
Page 9: ... is wound pre venting accidental double exposures 2 Adju st direction of the pres sure plate according to the film used Open the back cover twist the pres sure plate 42 either to the right or left 90 degrees until the red mark on the pressure plate matches either 120 or 220 Subsequently when closing the back cover the film stopper mechanism is automatically set to coincide with the film frame numb...

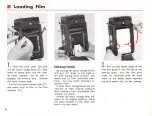
Page 10: ...ter pulling them outward the knobs stay at their protruded posi tions Turn the knobs backward to reinsert them If both spool change knobs are not returned to their original positions after loading a film unbalanced film winding will result Should the spool change knob not return to its original position move the spool slightly to the front and rear or up and down 2 Pull out the leader paper of the...

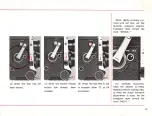
Page 11: ...the film wind crank 6 clockwise until it stops Figur e 1 appears on the exposure counter 3 at the position where the crank stops diagonally upward and the shutter is automatically set Now the camera is prepared for the first exposure The crank cannot be turned in reverse Turn the crank each time one picture is exposed Regardless of the number of pictures taken the crank always stops at a diagonall...

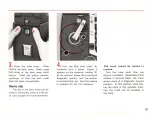
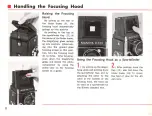
Page 12: ...tion turn the focusing knob 8 to focus After focusing push down the magnifying glass and decide the photo composition by using the entire view on the focusing screen as a guide Using the Focusing Hood as a Sportsfinder 1 By pulling up the magni fying glass anct pushing down the sportsfinder flap and by attaching the latter to the catch at the bottom of the focusing hood the hood can be used as a s...

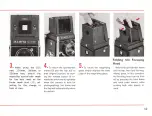
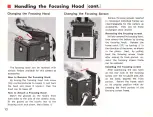
Page 13: ...e button 1 to wards the arrow mark right side when the camera is held for photographing the frame and the flap will automatically return to position 5 To return the magnifying gfass sim ply depress the base plate of the magnifying glass Folding the Focusing Hood Return the sportsfinder frame and the flap then fold the mag nifying glass In this condition the focu sing hood can be fold ed by pressin...

Page 14: ...sing screens inserted in convenient individual frames are interchangeable for this camera as accessories They can be freely exchanged when desired Removing the focusing screen Initially remove the focusing hood then extend the bellows by turning the focusing knob Release the frame catch 37 by turning it in the direction of the arrow as shown in the photo Next by pulling back the focusing screen fr...

Page 15: ... tripod use the Paramender parallax corrrecting device to ensure that the camera photographs the same image viewed on the focusing screen through simple operations Compensating exposure As distance between the lens and film increases image brightness on the film is reduced even though aperture size remains the same Consequently it is necessary to increase the exposure The figures on the focusing s...

Page 16: ...lass 1 5 diopter mounted on the focusing hood as standard equipment available are 2 1 0 2 and 3 diopters totaling six types Changing the Magnifying Glass 1 Raise the focusing hood then c jepress the sportsfinder flap 12 and frame 10 2 Fold the rais ed magnifying glass then lay the camera down with the lens facing upward 3 Hold the base plate of the magnifying glass from inside and under the focusi...

Page 17: ... in feet or meters A distan ce scale marked 105 is used for ordinary 105 mm lens There are two types scaled in feet or meter Distance graduations of lenses other than the 105mm lens are all the same Replacing the Distance Scale To remove the distance scale at first fully extend the bellows by turning the focusing knob then remove the scale end cover by sliding it to the front Next pullout the dist...

Page 18: ...g lever 28 for ward and appropriately clamp it wher eby the focusing mechanism is secured Deviation in focusing can be prevented in this manner when continu ously taking pictures taking snapshots with wide angle lenses close up photographs an d using telephoto lenses How to Remove Film When all film frames have been exposed the film winding stop mech anism is automatically released Remove the film...

Page 19: ...For operations without loaded film such as shutter testing 3 When photographing with the single ex posure at achment When photography is suspended by a missing chance to release the shutter in spite of deeply depressing the shutter button half way it rarely happens that the shutter button cannot be depressed on the next attempt In this case by setting the mark on MULTI pictures can be taken withou...

Page 20: ...an be depressed many times even though the shutter is not cocked the same as the 80mm f 3 7 lens When the shutter is not cocked the shutter blades do not open When using this type of lens shut ter if the shutter button is depressed without cocking the shutter no pic ture will be recorded on the film Concerning the unopened shutter blades even though the shutter is cocked manually the shutter butto...

Page 21: ...he synchroflash M X selector on X to synchronize flash at all shutter speeds This synchroflash M X selector can be changed even after cocking the shutter When photographing without flash keep the selector on X Cont act M X FLASH SYNCHRONIZATION TABLE Shutter Speed Bulb 1 1 1 1 1 1 1 B 1 2 4 8 15 30 60 125 M class 0 0 0 0 0 0 0 0 0 Electronic Flash 0 0 0 0 0 0 0 0 0 F class 0 0 0 0 0 0 0 0 x M clas...

Page 22: ...t 20 press the head toward the camera b dy pu h it down t o release the lens catch and remove the lens To attach another lens to the camera body carefully position the lens so that the lens shutter cocking lever 17 connects with the cocking lever on the camera body This operation is correctly performed by previously cocking the lens shutter with the fingers first inserting the lens from the cockin...

Page 23: ...ding the cocking lever on the 180mm lens an auxiliary lever for connection is provided on the side of the lens barrel Since this lever is constantly pushed upward by a spring when mounting the lens hold the auxiliary lever downward with a finger tip to prevent obstruct ing installation 3 When the lens change Knob 24 is in the UNLOCK position the portion to which the picture taking lens lower lens ...

Page 24: ...cover press the hinge release with the hinge of the cover while inserting the hinged shaft of the back cover in the body receiver sliding the back cover in the reverse direction from detach ing it Tripod Socket In addition to a tripod a grip holder pistol grip paramender and so forth can be attached to the tri pod socket 34 on the camera base Those persons who own a tri pod with a 3 8 in tripod sc...

Page 25: ...05mm fl3 5 0 and 135mm fl4 5 lenses 5 Lens hood for super 1S0mm 1S0mm and 250mm lenses Lens hoods marked with an asterisk have a side plate which can be inclined Attach the lens hood to the lens with this p ate up ard Whel l light reflected from the lens hood to the viewing lens becomes annoying while focusing due to a certain light condition incline the side plate to eliminate the annoying reflec...

Page 26: ...urface except cen ter micropirsm portion with Fresnel lens except center circular portion and exposure factor scale Matted entire surface except cen ter circular portion with expo sure factor scale Matted entire surface with Fres nel lens except center circular portion with sectional scale and exposure factor scale Application For general photography Suitable for any lens For general photography Q...

Page 27: ...ng screen appears exactly as the sub ject is seen Really an indispensable accessory for eye level photo journal photos or candid shots Magnification of this finder is approximately 2 5 times the image on the ground glass focusing screen particularly bright and clear Eye Correction Lens This lens designed to correct visibility is installed inside the eyepiece ring of the Porrofinder CdS Porrofinder...

Page 28: ...he finder lens such com pensation is unnecessary Grip Holder for Mamiya C The grip holder is a very con venient accessory for hand holding the camera while taking pictures or for carrying the camera Its acces sory shoe is attached on the top of the grip for Mamiya C330 RB The camera shutter can be released by triggering the shutter button of this grip This grip can also be used for the Mamiya RB M...

Page 29: ...ked with the camera By replacing the change able base plate an optional flash gun bracket may be attached When a subgrip is mounted instead of the flashgun bracket further stabilized eye level photography becomes possible Focusing Knob Adapter An adapter for attaching to the focusing knob to facilitate precise focusing From left to right Flashgun bracket Type M for Mamiya flashgun Type H for Heila...

Page 30: ...stall a holder containing a dry plate or cut film on the exclusive back cover to complete preparation This single exposure attachment is used exclusively with the C330 29 Paramender Model 2 This is a parallax correcting instrument used between the camera base and a tripod Keep the part attached to the camera base downward while focusing then raise the camera position by turning the handle until it...

Page 31: ...oupled with the tripod adapter type p enabling the camera to be rapidly attached to the tripod Flashgun Adapter The flashgun adapter design ed for the Mamiya flashgun is provided with an accessory shoe for accommodating other brands of clip on type flash units Flashgun High y efficient large Be type flashgun usable with both a screw ba se bulb and a bayonet type base bulb supplies suf ficient ligh...

Page 32: ...terchangeable lenses and accessories as well as standard equipment By changing the inserts the Custom Case conveniently accommodates the Mamiya C Mamiya RB or Mamiya Press and related equipment The interchangeable inserts made of sponge rub ber provide effective shock absorption and sufficient protection of the equipment The case measures 18 x 13 x 6 47 x 35 x 17 cm and weighs 8 Ibs 2 oz 3 7 kg ...

Page 33: ...1132 in 5 group 27 1cm 6 7 X 6 7cm 80mm f 2 8 5 element 50 40 I f 32 46 48 I 1ft 1 151J6 in 3 25 64 X 3 25 64 in 3 group 35 4cm 8 6 X 8 6cm 105mm f 3 5D 5 element 41 20 f 32 I 46 48 11 0 7 1 4 X 7 1 4 in 3 group 58 4cm 18 4 X 18 4cm 4 element 1 2ft 11 1 2 in 9 15 16 X 9 1 5 16 in 135mm f 4 5 3 group 33 f 45 I 46 48 90 2cm 25 2 X 25 2cm Super 5 element 24 30 I f 4 I 49 50 4ft 2 314 in 10 53 64 X 10...

Page 34: ... Angle of View Changes by Interchanging Lenses All these pictures were taken from the same position at on identical distance from the sub ject 105mm 33 55mm 135mm 65mm 80mm 180mm 250mm ...

Page 35: ... r Jf 9 Distance in meter Aperture 00 5 3 2 1 5 1 1 0 8 0 6 0 5 0 4 0 3 0 25 4 5 8 87 3 24 2 28 1 66 1 31 1 00 0 75 0 57 0 48 0 391 0 296 0 249 00 11 11 4 42 2 52 1 76 1 23 0 86 0 63 0 52 0 410 0 304 0 251 5 6 7 07 2 98 2 15 1 59 1 27 0 98 0 74 0 57 0 48 0 389 0 296 0 248 00 16 28 5 04 2 70 1 85 1 26 0 88 0 64 0 52 0 412 0 305 0 252 8 5 02 2 56 1 93 1 47 1 19 0 93 0 71 0 56 0 47 0 384 0 294 0 248 ...

Page 36: ...r 5 5 1 2 8 2 2 I 9 I 4 I Aperture Distance in meter 00 5 3 2 1 2 1 0 8 0 65 0 6 0 5 0 4 0 3 3 5 15 31 3 81 2 54 1 79 1 12 0 95 0 77 0 63 0 585 0 490 0 395 0 298 00 7 32 3 68 2 27 1 29 1 06 0 83 0 67 0 616 0 510 0 405 0 302 4 13 40 3 68 2 48 1 76 1 12 0 94 0 77 0 63 0 582 0 489 0 394 0 298 00 7 84 3 80 2 31 1 30 1 06 0 84 0 67 0 619 0 512 0 406 0 302 5 6 9 59 3 33 2 32 1 68 1 09 0 92 0 75 0 62 0 5...

Page 37: ... 5 4 3 7M l 7 32 9 2X 7 2X 5 10 5 4 2X 3 sX 2 11M 2 5 l 4 00 00 00 00 24 271 9 7 6 3X 4 l 7 Aperture Di stance in meter co 10 5 3 2 1 5 1 2 1 0 45 2 8 31 27 7 62 4 34 2 76 1 89 1 44 U6 0 98 0 447 co 14 57 5 90 3 29 2 12 1 56 1 24 1 02 0 453 4 21 91 6 92 4 11 2 66 1 85 1 42 1 15 0 97 0 446 co 18 13 6 40 3 44 2 18 1 59 1 26 1 04 0 454 5 6 15 67 6 16 3 84 2 55 1 80 1 39 1 13 0 95 0 444 co 26 92 7 21 ...

Page 38: ... 4 11Y 3 11y 3 7Y 3 4 2 7Y 00 00 5180 3y 27 9W 12 2y 6 11Y 5 1IY 4 Y 3 5 Aperture Di stance in meter Xl 10 5 3 2 1 5 1 3 1 2 1 0 65 3 5 40 06 8 05 4 48 2 81 I 92 1 46 1 27 1 17 0 98 0 645 Xl 13 21 5 67 3 22 2 09 1 55 1 33 1 23 1 02 0 655 4 35 07 7 84 4 41 2 79 I 91 1 45 1 26 1 17 0 98 0 644 Xl 13 85 4 78 3 25 2 10 1 55 1 34 1 23 1 02 0 656 5 6 25 08 7 21 4 21 2 71 I 87 1 43 1 25 1 16 0 97 0 642 Xl...

Page 39: ...r 3 IOU 3 3X 16 2 1 10 9 1 8 I 6 SY 5 IU 4 7 1 3 5 3 U 2 8 f 45 00 00 132 8 23 1 11 2 8 8Y 4 10 1 4 3Y 3 HC Distance in meter Aperture co 10 5 3 2 1 75 1 2 1 0 0 95 4 5 48 55 8 34 4 56 2 85 1 93 1 70 1 18 0 99 0 94 00 12 49 5 53 3 17 2 07 1 80 1 22 1 01 0 96 5 6 39 03 8 02 4 47 2 81 1 92 1 69 1 17 0 98 0 94 00 13 30 5 68 3 22 2 09 1 81 1 23 1 02 0 96 8 27 35 7 39 4 27 2 74 1 89 1 67 1 16 0 98 0 93...

Page 40: ...6 53 4 76 3 85 2 92 2 45 11 18 7 54 5 26 4 16 3 09 2 56 8 84 6 42 4 71 3 81 2 90 2 43 11 51 7 69 5 33 4 20 3 11 2 57 8 43 6 21 4 59 3 74 2 86 2 40 12 30 8 03 5 49 4 30 3 16 2 60 7 96 5 95 4 46 3 65 2 81 2 37 13 34 8 50 5 70 4 42 3 22 2 65 7 29 5 58 4 25 3 51 2 73 2 32 16 00 9 42 6 09 4 65 3 33 2 72 6 62 5 18 4 02 3 36 2 64 2 25 20 67 10 84 6 63 4 95 3 48 2 81 5 74 4 64 3 69 3 14 2 50 2 16 40 37 14...

Page 41: ... 8 6lf 7 l f 6 4 f 00 00 00 00 94 4 34 11 21 5 15 6 12 l 9 Ilf 7 9 Aperture Di stance in meter 00 50 30 20 15 10 7 5 4 3 2 5 6 3 125 6 35 97 24 37 17 37 13 49 9 33 6 68 4 84 3 91 2 95 2 47 00 82 30 39 08 23 59 16 90 10 78 7 36 5 17 4 10 3 05 2 53 8 99 02 33 44 23 20 16 78 13 14 9 16 6 60 4 80 3 88 2 94 2 46 00 99 75 42 57 24 80 17 50 11 01 7 46 5 21 4 13 3 06 2 54 11 70 12 29 43 21 22 15 73 12 50 ...

Page 42: ...lenses 4B I Chrome type for 105mm lens for 135mm lens 1 6135mm F4 5 Q135mm F4 5 Super for 1BOmm F4 5 1BOmm F4 5 for 1BOmm lens 250mm eo Q c11 __ 1BOmm F4 5 for Mamiya C 250mm F6 3 for 250mm lens 41 Diopter lens 2 to 3 diopter Focusing hood I model 2 f i7f1 Focusing screen I No 1 Matte I Camera body Focusing knob adapter Tripod adapter r I typeP I Type Ili Quick shoe _ _1 _ _ _ Pistol grip for C330...

Page 43: ...ther case f9 s dca r I rI Film sheath type J C __ O o Snhe a e es e of 43 4 x 61 2 In film tJ for 2 1 2 x 31 2 In 65 x 9cm cut film c Single Cut film plate exposure back holder model 2 i i i I Clashgun bracket Subgrip I I Type Type 1 Flashgun I H M I I Adapter ____ l I I JV Multi angle Grip holder for C330 and RS grip for C330 and RB Grip holder Paramender Model 2 Flashg un Pro del uxe II I Parame...

Page 44: ......

Reviews: