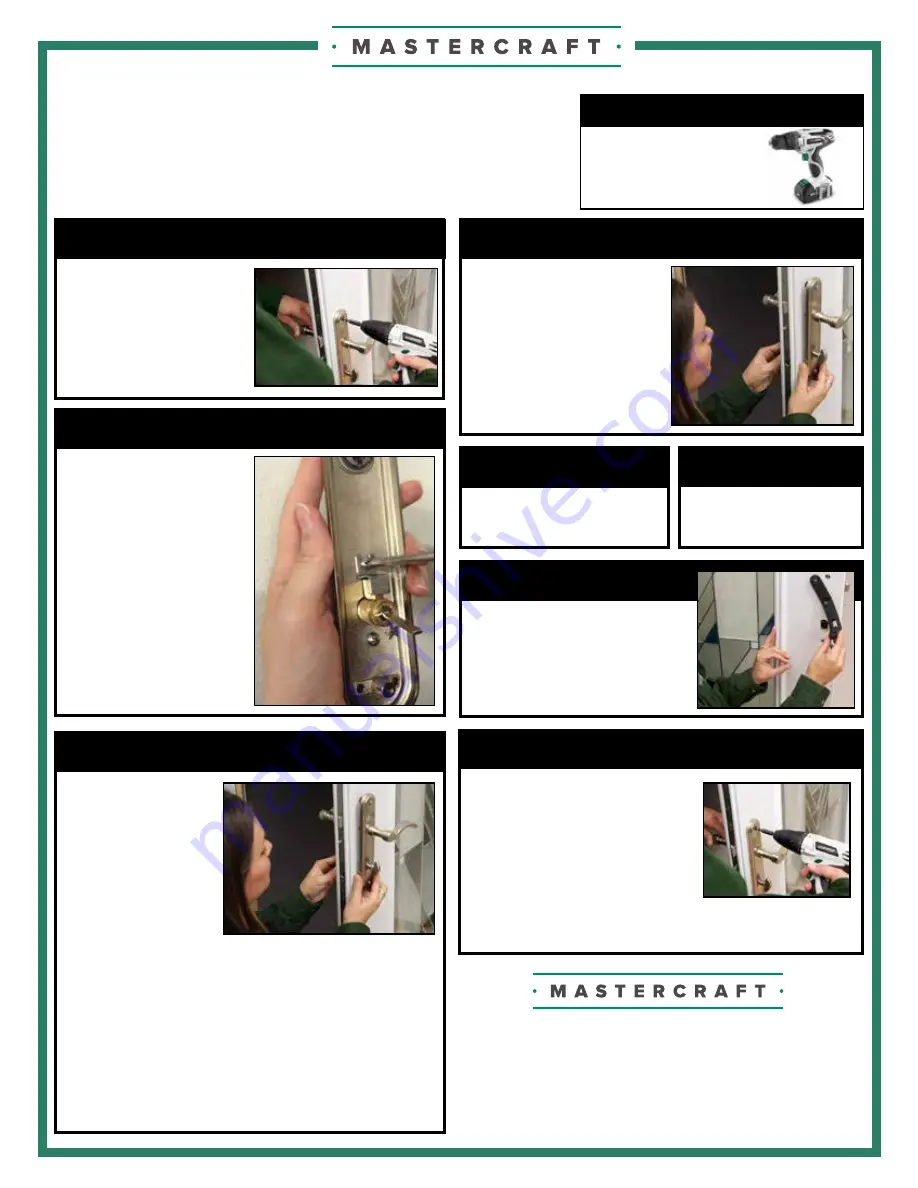
Begin replacement of the
key cylinder by removing
the Lock Set installation
screws on the interior
side of the door handle.
Remove the exterior face
of the lock set.
Remove the screw from the
Z-clip that is covering the
door cylinder on the exterior
plate.
Rotate the thumbturn
on the interior handle
assembly to the vertical
position so that it is
aligned with the key
cylinder tail.
(Note: The
key cylinder tail in
the horizontal position
should align with the horizontal slot in the thumbnail shaft.)
Place the door handle in a horizontal position and slide the
two halves of the lock together.
Remove the Key Cylinder and
replace it with the new cylinder.
Re-install the Z-Clip over
the key cylinder.
If the foam gasket has fallen
down. Place it back onto the
lock set.
3-Point Lock System
KEY CYLINDER REPLACEMENT
REQUIRED TOOLS
1
)
Remove Screws
2
)
Remove Exterior Face
3
)
Remove Z-Clip
7
)
Align Assembly
4
)
Remove Cylinder
5
)
Re-install Z-Clip
6
)
Check Gasket
Silicone Caulk
Phillips Bit
Screw Gun
8
)
Re-install Screws
Re-install the two lock set
installation screws from step one
and check the operation of the
lock set. If the door does not lock,
remove the exterior handle assembly
and rotate the key cylinder tail 180
degrees and then reinstall the handle assembly.
Questions or Concerns: For guest assistance contact
MASTERCRAFT
®
by sending an email to:
MastercraftDoorHelp@MidwestManufacturing.com
For more information, including troubleshooting help
and videos, please visit:
www.MastercraftDoors.com


