background image

Summary of Contents for CONTROL 500 SERIES

Page 1: ...ace Oven Cooking 8 15 Upper Oven Control Manual Clean Lower Oven Control Self Clean Baking Cook Hold Delay Bake Keep Warm Broiling Lower Oven Only Oven Racks Sef Clean Oven Lower Oven Only Cleaning Procedures Maintenance 20 Oven Doors and Windows Oven Lights Troubleshooting 21 22 Warranty Service Back Page Form No A 01 08 Part No 8113P719 60 2006 Maytag Appliances Sales Co Litho U S A ...

Page 2: ...d in this guide General Instructions To ensure proper and safe operation Appliance must be properly installed and grounded by a qualified technician Do not attempt to adjust repair service or replace any part of your appliance unless it is specifically recommended in this guide All other servicing should be referred to a qualified servicer Always disconnect power to appliance before servicing ALL ...

Page 3: ... cans are EXPLOSIVE when exposed to heat and may be highly flammable De net use or store near appliance Cooktop NEVER leave surface units unattended especially when using high heat An unattended boilover could cause smoking and a greasy spillover can cause a fire This appliance is equipped with different size surface elements Select pans with flat bottoms large enough to cover element Fitting pan ...

Page 4: ...acing the cooktop oven vent surfaces near the vent opening oven doors areas around the doors and oven windows Deep Fat Fryers Use extreme caution when moving the grease pan or disposing of hot grease Allow grease to cool before attempting to move pan Ovens Use care when opening doors Let hot air or steam escape before removing or replacing food For proper oven operation and performance do not bloc...

Page 5: ... 1986 Proposition 65 requires the Governor of California to publish a list of substances known to the State of California to cause cancer or reproductive harm and requires businesses to warn customers of potential exposures to such substances Users of this appliance are hereby warned that when the oven is engaged in the self clean cycle there may be some low level exposure to some of the listed su...

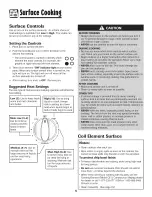
Page 6: ...melt chocolate I and butter I OFF ivied Low 3 4 Use to continue cooking covered foods or steam foods High 10 Use to bring liquid to a boil Always reduce setting to a lower heat when liquids begin to boil or foods begin to cook I Hi_h 10 Medium 5 7 Use to maintain slow boil for large amounts of liquids and for most frying operations ivied High 8 9 Use to brown meat heat oil for deep fat frying or s...

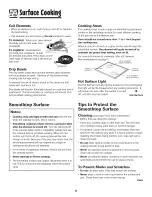
Page 7: ...ontrol is turned off until the area has cooled Hot Surface Smoothtop Surface Notes Cooktop may emit light smoke and odor the first few times the cooktop is used This is normal Smoothtop cooktops retain heat for a period of time after the element is turned off Turn the elements off a few minutes before food is completely cooked and use the retained heat to complete cooking When the hot surface ligh...

Page 8: ...ations Using the right cookware can prevent many problems such as food taking longer to cook or achieving inconsistent results Proper pans will reduce cooking times use less energy and cook food more evenly Fiat Pan Tests See if your pans are flat The Ruler Test 1 Place a ruler across the bottom of the pan 2 Hold it up to the light 3 Little or no light should be visible under the ruler The Bubble ...

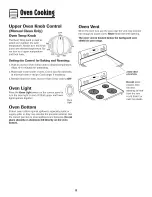
Page 9: ...n Temp knob to OFF Oven Light Press the Oven Light switch on the control panel to turn the oven light on and off Both upper and lower lights operate together Oven Light Oven Bottom Protect oven bottom against spillovers especially acidic or sugary spills as they may discolor the porcelain enamel Use the correct pan size to avoid spillovers and boilovers Do not place utensils or aluminum foil direc...

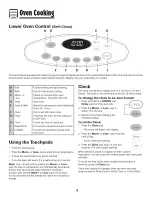
Page 10: ...conds after pressing the More or Less pad the time or temperature will automatically be entered if more than 30 seconds elapse between touching a function pad and the More or Less pad the function will be canceled and the display will return to the previous display Clock The clock can be set to display time in a 12 hour or 24 hour format The clock is set at the factory for the 12 hour format To ch...

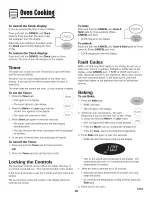
Page 11: ... when locked if the oven is currently in use the controls and door cannot be locked The current time of day will remain in the display when the controls are locked To lock Press and hold the CANCEL and Cook Hold pads for three seconds Press CANCEL pad first LOCK flashes in the display To unlock Press and hold the CANCEL and Cook Hold pads for three seconds Press CANCEL pad first LOCK disappears fr...

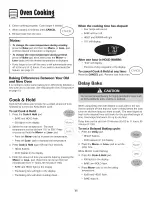
Page 12: ... Hold 1 Pressthe Cook Hold pad BAKE and HOLD flash 999 lights in the display More 2 Select the oven temperature The oven temperature can be set from 170 to 559 Press or press and hold the More or Less pad Less Pressthe More pad to increase the temperature Pressthe Less pad to decrease the temperature 3 Press Cook Hold again OR wait four seconds HOLD flashes 99 99 flashes in the display 4 Enter the...

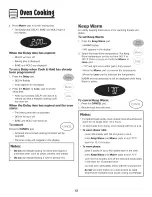
Page 13: ... plates To set Keep Warm 1 Press the Keep Warm pad WARM flashes 2 000 appears in the display Select the Keep Warm temperature The Keep Warm temperature can be set from 145 F to 190 F Press or press and hold the More or Less pad 170 will light when either pad is first pressed Pressthe More pad to increase the temperature Pressthe Less pad to decrease the temperature WARM and the temperature will be...

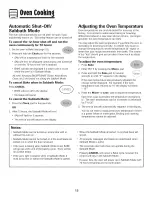
Page 14: ... The results of the test should give you an idea of how much to adjust the temperature To adjust the oven temperature 1 Press Bake 2 3 Enter 550 F by pressing the More pad Press and hold the Bake pad for several seconds or until 0 appears in the display If the oven temperature was previously adjusted the change will be displayed For example if the oven temperature was reduced by 15 the display wil...

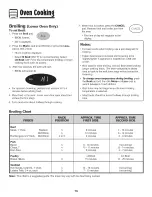
Page 15: ...g to be slightly lighter if appliance is installed on a 208 volt circuit HI is used for most broiling Use LO Broil when broiling longer cooking foods The lower temperature allows food to cook to the well done stage without excessive browning To change oven temperature during broiling press the Broil pad and then the More or Less pad to switch between LO and HI Broil Broil times may be longer when ...

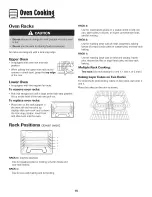
Page 16: ... RACK 3 Use for most baked goods on a cookie sheet or jelly roll pan layer cakes fruit pies or frozen convenience foods and for broiling RACK 2 Use for roasting small cuts of meat casseroles baking loaves of bread bundt cakes or custard pies and two rack baking RACK 1 Use for roasting large cuts of meat and poultry frozen pies dessert souffles or angel food cake and two rack baking Multiple Rack C...

Page 17: ...he clean cycle 5 Wipe up excess grease or spillovers from the oven bottom This prevents excessive smoking flare ups or flaming during the clean cycle To set Self Clean Note Oven temperature must be below 400 F to program a clean cycle 1 Close the oven door 2 Press the Clean pad CLEAN flashes in the display If the door is not closed within 25 seconds the self cleaning operation will be canceled and...

Page 18: ...ayed Smoke and Smells You may see some smoke and smell an odor the first few times the oven is cleaned This is normal and will lessen in time Smoke may also occur if the oven is heavily soiled or if a broiler pan was left in the oven Sounds As the oven heats you may hear sounds of metal parts expanding and contracting This is normal and will not damage the oven After Self Cleaning About one hour a...

Page 19: ...een correctly replaced Never use oven cleaners chlorine bleach ammonia or glass cleaners with ammonia Note Call an authorized servicer if the glass ceramic top should crack break or if metal or aluminum foil should melt on the cooktop Allow the cooktop to cool before cleaning General Clean cooktop after each use orwhen needed with a damp paper towel and Cooktop Cleaning Creme Part No 20000001 Then...

Page 20: ...tch the surface When using commercial oven cleaners follow the manufacturer s instructions Wipe up acidic spills tomato or milk based foods as soon as possible with soap and water If the spill is not wiped up it may discolor the porcelain To make cleaning easier remove the oven door if desired See Maintenance section on page 200 e e e Clean with soapy water Remove stubborn soil with cleansing powd...

Page 21: ...abrasive cleaning agents such as steel wool scouring pads or powdered cleansers as they may scratch the glass 2 Do not hit the glass with pots pans furniture toys or other objects 3 Do not close the oven door until the oven racks are in place Scratching hitting jarring or stressing the glass may weaken its structure causing an increased risk of breakage at a later date To replace oven light bulb 1...

Page 22: ... Make sure the oven vent has not been blocked See page 8 for location Check to make sure range is level Temperatures often vary between a new oven and an old one As ovens age the oven temperature often drifts and may become hotter or cooler See page 13 for instructions on adjusting the oven temperature Note It is not recommended to adjust the temperature if only one or two recipes are in question ...

Page 23: ...rmal for a new range and will disappear after a few uses initiating a clean cycle will burn off the odors more quickly Turning on a ventilation fan will help remove the smoke and or odor Excessive food soils on the oven bottom Use a self clean cycle BAKE or LOCK may flash rapidly in the display to alert you if there is an error or a problem If BAKE or LOCK appear in the display press CANCEL pad If...

Page 24: ...me of your major appliance for repairs This major appliance is designed to be repaired in the home and only in home service is covered by this warranty 8 Repairs to parts or systems resulting from unauthorized modifications made to the appliance 9 Expenses for travel and transportation for product service if your major appliance is located in a remote area where service by an authorized Maytag ser...

Reviews: