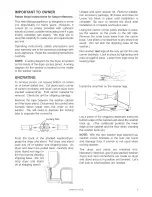
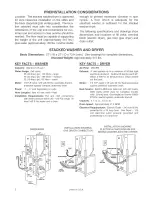
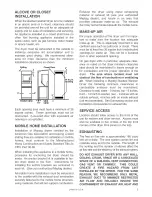
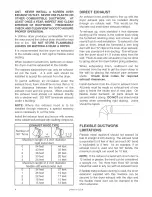
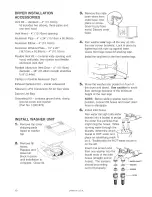
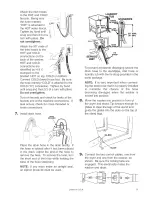
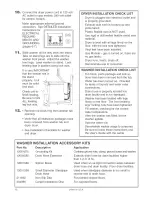
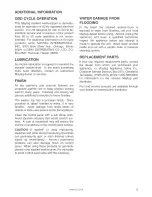
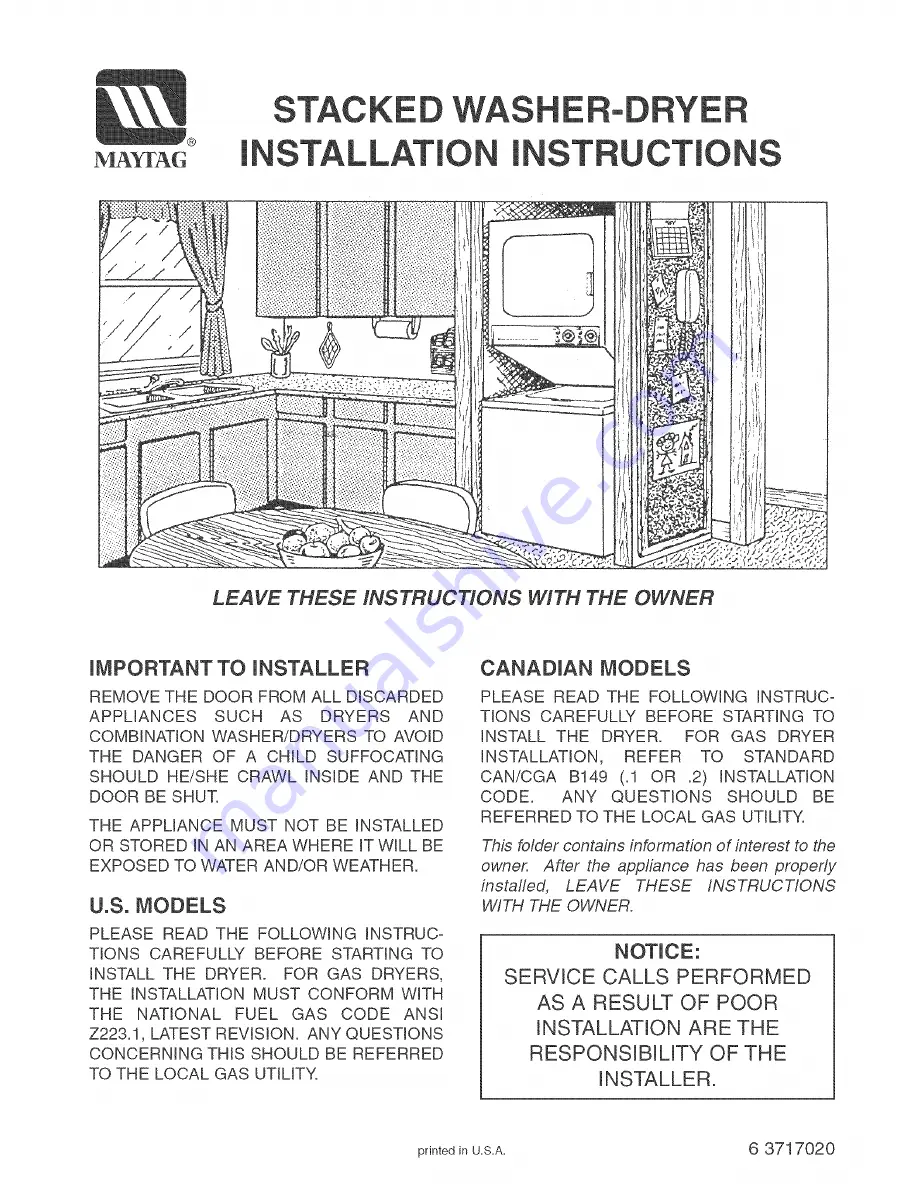
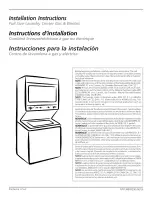
background image

Summary of Contents for LSE7806ACE

Page 1: ...NSTALLATION MUST CONFORM WITH THE NATIONAL FUEL GAS CODE ANSI Z223 1 LATEST REVISION ANY QUESTIONS CONCERNING THIS SHOULD BE REFERRED TO THE LOCAL GAS UTILITY CANADIAN MODELS PLEASE READ THE FOLLOWING INSTRUC TIONS CAREFULLY BEFORE STARTING TO INSTALL THE DRYER FOR GAS DRYER INSTALLATION REFER TO STANDARD CAN CGA B149 1 OR 2 INSTALLATION CODE ANY QUESTIONS SHOULD BE REFERRED TO THE LOCAL GAS UTILI...

Page 2: ...gainst base Leave front legs loose for leveling later To remove carton cut around bottom of carton on or below dotted line Cut down each corner of carton vertically and peel carton away from stacked washer dryer Fold carton material for removal Check the unit for shipping damage Remove the tape between the washer cabinet and the dryer stand Disconnect the control wire harness which leads from the ...

Page 3: ... medium 22 18 Imp gaL 83 liters small Motor 1 2 H R rated 120 volt 60 Hz reversible thermo protected against overload automatic reset Power 1 17 kwh depending on cycle Hose Lengths Inlet 4 0 feet drain 4 feet Installation Requirements Hot and cold connections with water pressure within 20 120 PSI range At least 140 R hot water and a drain KEY FACTS DRYER Air Fmow 180CFM Exhaust 4 duct permits up t...

Page 4: ...0 inches with an outside exhaust 4 inches with an inside exhaust not recommended See Exhausting section and Installation Accessories for exhaust kits Each opening area must have a minimum of 36 square inches These openings must not be obstructed Louvered door with equivalent air opening is acceptable MOBILE HOME iNSTALLATiON SERVICE ACCESS Location should allow access to the front of the unit for ...

Page 5: ...all the furnished 4 inch long duct with four S clips to the inner dryer exhaust then use standard 4 inch ducting This will posi tion the dryer about 4ol 2 inches away from the wall Flush to wall side exhausting may be done by going above the dryer before going sideways When exhausting down wallboard can be removed from the wall to get the dryer closer to the wall by placing the exhaust pipe betwee...

Page 6: ...S AND LOCAL CODES AND ORDINANCES GAS DRYER UNITS A 120 volt 60 Hz 15 ampere fuse electrical supply is required An individual branch or separate circuit serving only this appliance is recommended DO NOT USE AN EXTENSION CORD unless it meets all requirements as out lined for grounding polarizing 3 wire and capacity Wire size should be at least No 14 BEFORE OPERATING OR TESTING follow grounding instr...

Page 7: ... with a ground strap connected from the neutral P2 terminal block post to the frame of the dryer The use of this strap is permitted by the national electrical code The dryer electrical supply may be connected by means of a new U L listed power supply cord kit rated at 240 volts minimum 30 amperes with three No 10 copper wire conductors terminated with closed loop terminals open end spade lugs with...

Page 8: ...ires of the cord to the outer terminals of the terminal block 5 Replace the terminal block cover 208 VOLT OPERATION A stacked washer dryer model is available for 208 volt operation Canadian Models All Canadian models are shipped with the power cord attached The dryer power cord should be plugged into a 30 ampere receptacle and fused through a 30 ampere fuse or comparable circuit breaker on both si...

Page 9: ...te it so that it will not interfere with the washer once the washer is pushed back into position It is important to make sure the gas fine does not come into contact with either the washer drain hose or any part of the washer NOTE A 3 8 inch x 1 inch pipe nipple is includ ed to adapt valve connection from a 3 8 inch female to a 3 8 inch male t RS connection AdditionaJly a 1 8 inch N RT National Pi...

Page 10: ...eet GAS MODELS Connect gas line using pipe joint compound on male threads see page 9 for GAS CONNECTION ELECTRmC MODELS install electric power cord U L Approved NOTE Power cord provided with Canadian models Make appropriate external ground connection See DETAILED Installation Instructions for ELECTRICAL REQUIREMENTS AND GROUNDING pages 6 7 Make exhaust connections Exhaust connection is lined up as...

Page 11: ...te base Use pliers or screw _ f driver to pry from _F _1 _ I wood Discard crate I i _ Ill I base 4 Run washer rear legs all the way up into the rear corner brackets Lock in place by tightening lock nuts up against base Leave front legs loose for leveling later install the vinyl feet on the front washer legs m m Move the washer into position in front of the dryer and stand Use caution to avoid floo...

Page 12: ...se is twisted after it has been placed in the drain adjust the end of the hose to remove the twist To remove the twist turn the short end of the hose while holding the base of the hose stationary NOTE If you must make an airtight seal an siphon break kit must be used LAUNDRY STANDPIPE UNIT TIE STRAP m To prevent accidental dislodging secure the drain hose to the standpipe inlet hose or laundry tub...

Page 13: ...e been installed Gas Models gas is turned on there are no gas leaks Dryer runs heats shuts off Demonstrate use to consumer WASHER NSTALLAT ON CHECK L ST Tub block parts package and instruc tions have been removed from the tub Water has been turned on Checked for leaks at faucets and water valve connections Drain hose is properly located into drain facility and is not damaged Washer has been levele...

Page 14: ...void abrasive cleaners that would scratch sur face A coat of household wax will reduce the chance of scratches on the control panel surface CAUTION If spilled or used improperly bleaches and other strong laundering chemicals can permanently spot or stain finishes unless wiped up immediately Aerosol pretreated products can also damage finish on control panel When using these products on garments pl...

Reviews: